

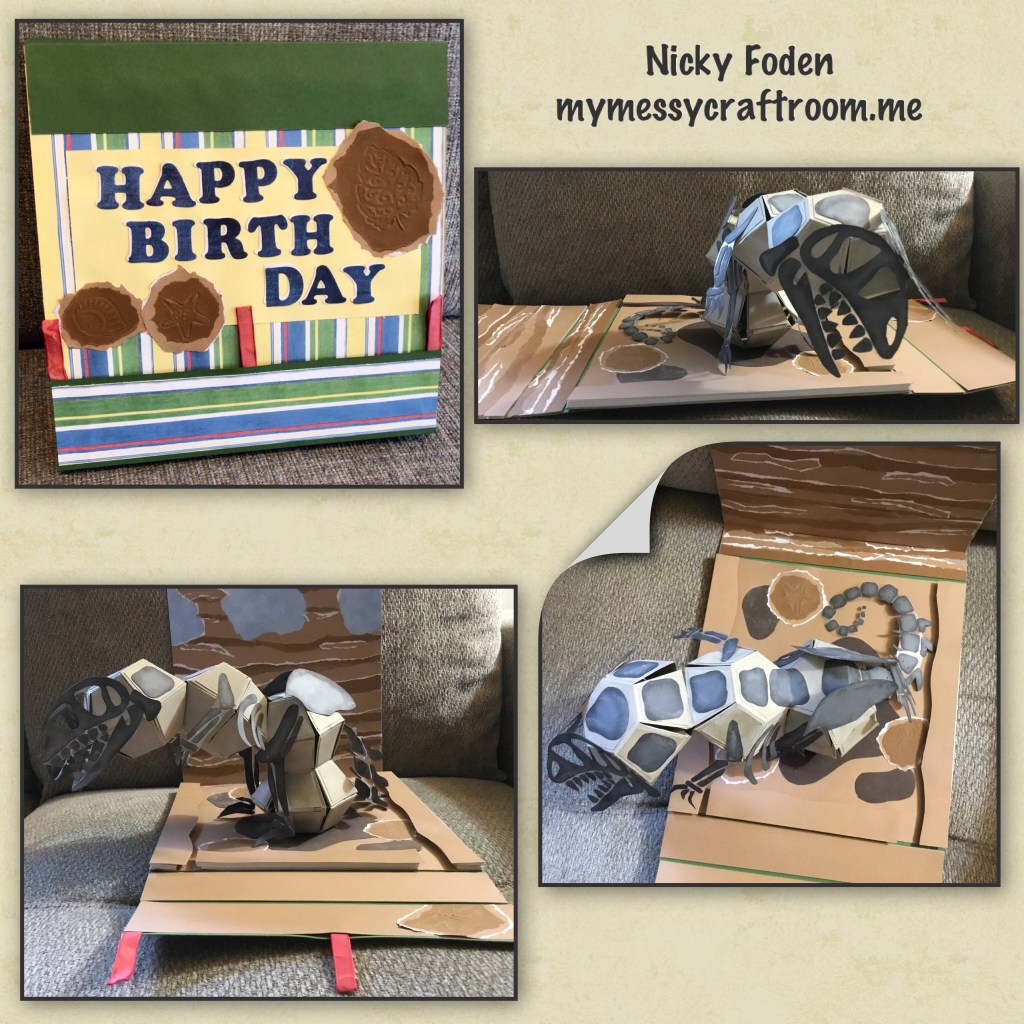
Is it still a birthday card if you have to mail it in box 🤔, this is by far the biggest birthday card I EVER made. I didn’t originally plan for it to be this big but one thing led to another and KaBang giant pop up dinosaur. My kids actually told me I was insane 🤦♀️ lol. This started off with my thinking about making a 2 ball dragon card. I had seems some pretty impressive dragons and was going to give it a go when I remembered that I had a dinosaur 🦖 skeleton stencil from YEARS ago and I thought hey why make a dragon when I can make a dinosaur and I hadn’t seen a Surprise Pop up Ball Dinosaur yet soooooo my mind was made up.

with this card all the fun is definitely in the reveal, to see this card in action please check out my FACEBOOK page, feel free to join if you would like to share your own crafty creations. You can also see a video of this card on my INSTAGRAM page.
Soooo when I say this card is big it is big, it is 10” x 10” x 1 1/2” thick 😳. To make the card base so it would support the weight of a 4 ball dinosaur I had to use the thin cardboard that comes in some packs of 12” x 12” cardstock. The paper is mostly from my stash unless otherwise stated below. This card was made by using trial and error, so if the photos seem out of order I am giving the directions in the order in which it would make sense to make it (or if I as making it again) But as I was going along and adding more balls and taking it apart and adding more pieces it would’ve been confusing. If you are going to try to make this I do recommend reading the whole blog before starting.

I used Crumb Cake card stock from Stampin Up, and Karen Burniston Surprise Ball Pop up die set to make the pop up balls

The next fall is the ball that will be on the bottom. So it needs to be really strong. I put two balls in one but if I had to do this again I would do the same thing but I would reinforce all the bends where the balls meet each other. A give picture directions below but I would do that as soon as this ball is assembled.

I traced all the pieces so if I ever made this dinosaur again I would have all the pieces in the proper size, and I could probably use my scan and cut to cut all the pieces out as opposed to cutting them all by hand. The pieces on the first picture you need 2 of each, mirror image as the are on each side. The pieces on the second picture you only need one of each as they go down the back.
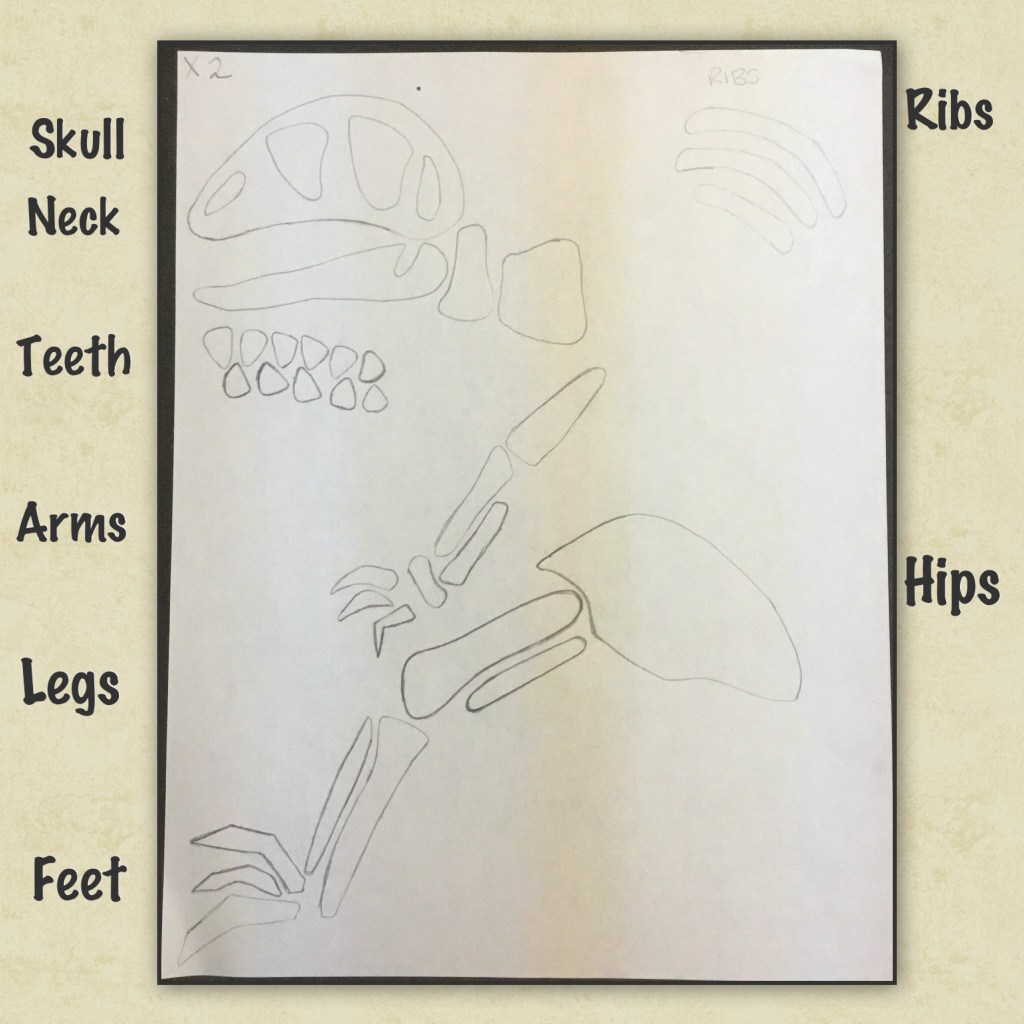

I used Stampin UPS Basic Grey cardstock to cut out all the bones. I made the bones bigger than the original stencil because his head would be way too small on the ball if I use the original size. this is where the size issue started to come in to play LOL

I knew the dinosaur would not fit on two pop up balls, I did think it would fit on three. But once I started adding some of the bones to the balls I realized his legs would not fit. Especially since I was now making the rest of the bones to be in scale with the skull bones that I made bigger originally. So I had to figure out how I was going to add a fourth ball.

I knew the bottom ball would need to have reinforcement, that’s why as soon as I created it I doubled it up, see below.

The legs were still going to be too long, when folded flat they suck straight out so I would’ve had to of been an even bigger card and I thought 10 inches would be pushing it

You may notice that when I glued the bones to the acetate I had to use liquid glue and some of it seeped out. I used my Embossing Buddy to cover the glue so it wouldn’t be sticky and stick to things that shouldn’t. I then decided to add in Embossing Buddy powder all over the dinosaur to make it look as if I meant to do this because it made the acetate look dusty. But seeing as it is a dug up dinosaur skeleton I thought Dusty would work good, I never thought i’d use an Embossing Buddy to decorate a card.


Now onto the card base, when making the card base I did add raised edges to the sides. Below I have them top and bottom but they actually are on the sides. I made them raised so legs or arms or tail wouldn’t stick out the sides if they somehow got loose.


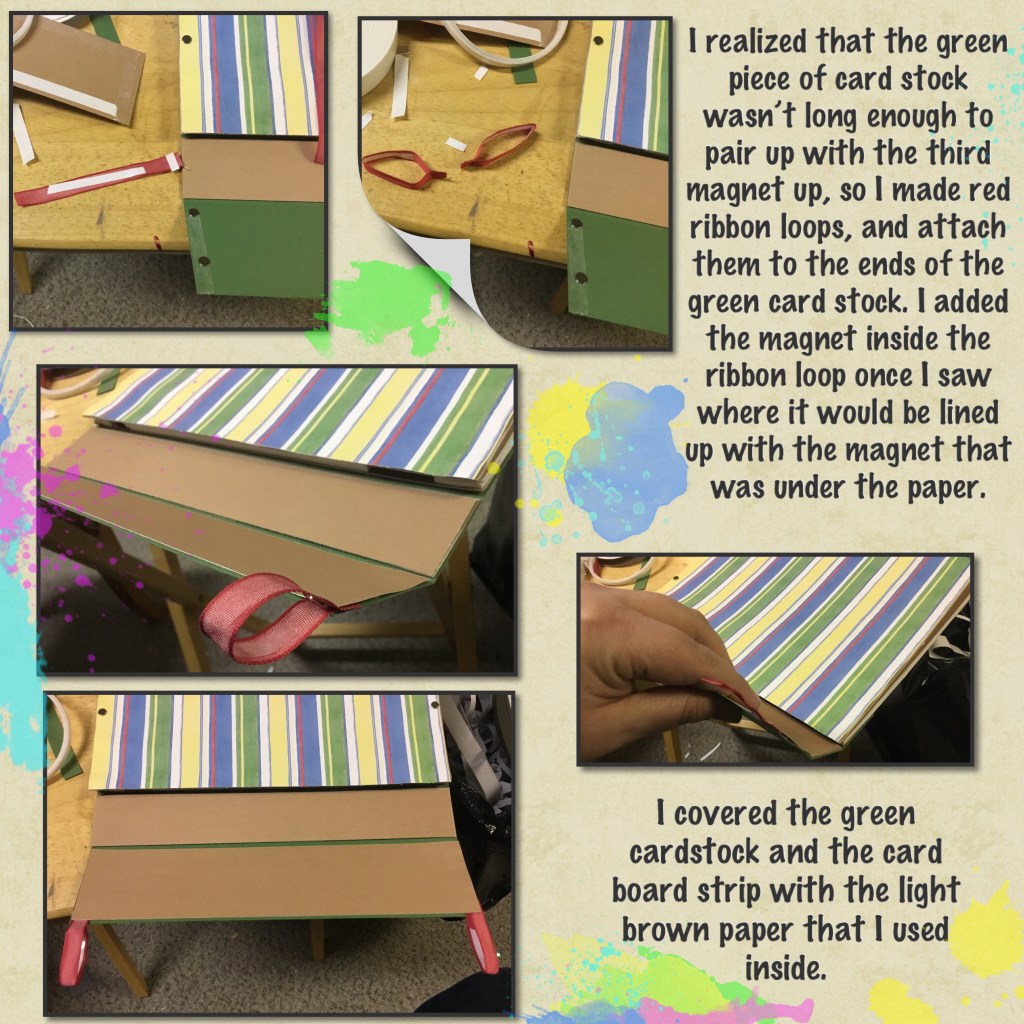
The cardboard strips below were leftover pieces that I trimmed off the card board from the card base. Also slight correction in the next panel below this one I show striped paper added to the cart front. That is the front side of the piece of cardboard with the Hoodoos and the sky. I did add that striped paper first before adding that whole card front to the card bottom.

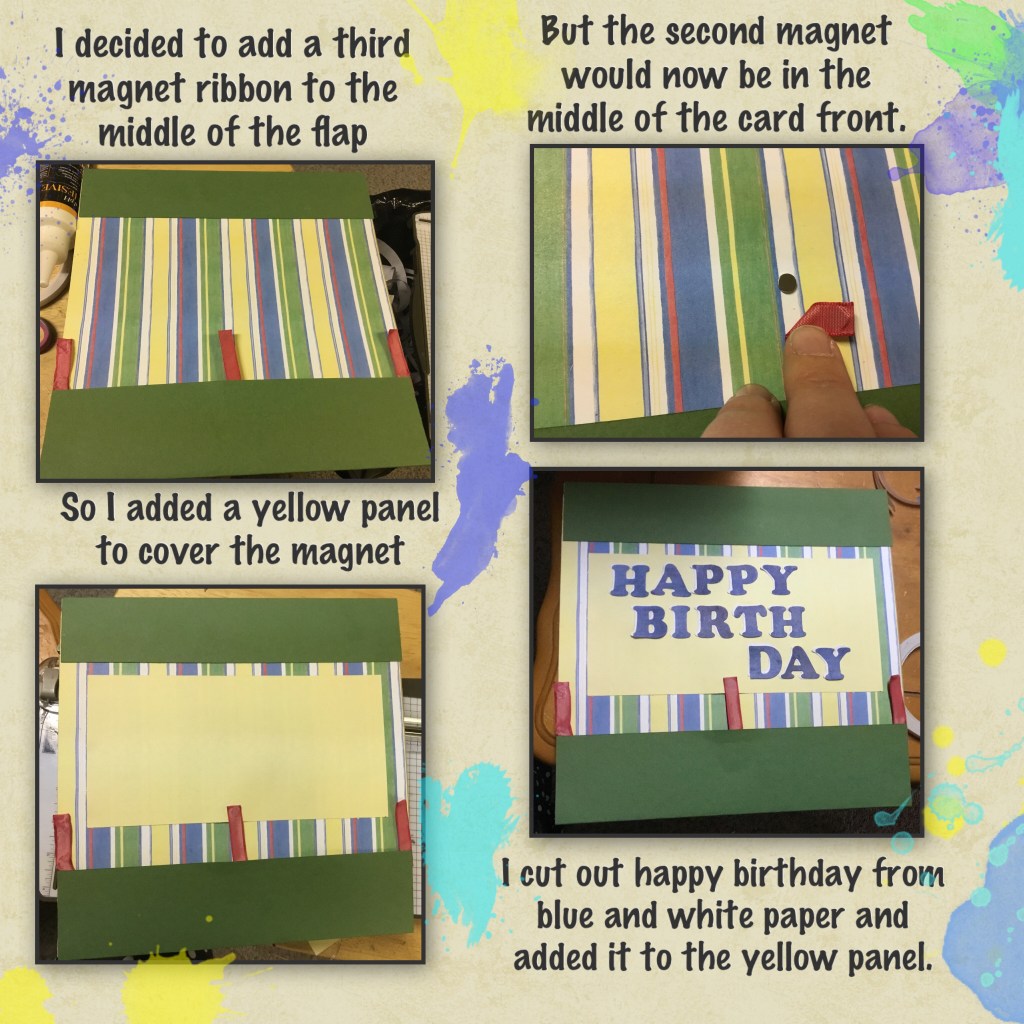
If you’re wondering why I attached the card together with a 1 1/2” strip and the closure flap is also a 1 1/2” strip that is because when all four balls are folded and stacked on top of each other they are almost 1 1/2 inches thick. I forgot to take a picture of all the balls stacked one on top of each other. I needed to use a magnet closure as well to keep the card closed.


To see some other fun Surprise Ball pop up cards please check these out.
The Gangs All Here Long horn Bull
Happy Belated Birthday We Wish You (Yoda card) Yoda
Pop Goes the Snowman cute snowman ☃️

What a great work of creativity and skill, Nicky
LikeLiked by 1 person