
So I have to admit, that I’m a bit of a pack rat. I have a hard time getting rid of anything that I might “use one day” so I decided to start using up some of my older cards that I have in box or cards that I may have started and not finished and I am calling them “Take 2 Cards” because it will be their second chance of making it out of my craft room.
The card below was part of card swap that I was part of when I was a Stampin Up Demo, over ten years ago. (Don’t judge me lol) If I remember correctly I made ten for the swap and since I was on a roll I made a few more. But since then I have been addicted to pop up cards. I decided to make the butterfly card to a pop up butter fly card.
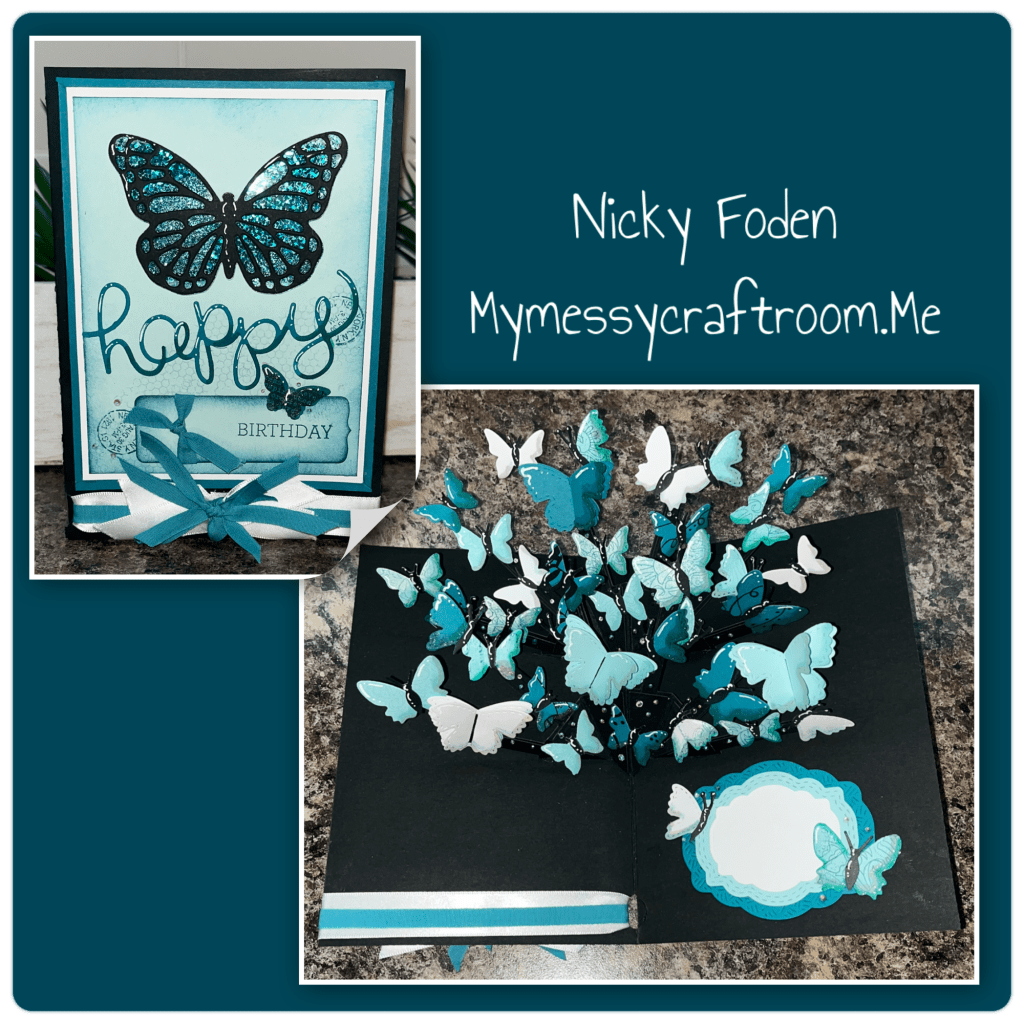
All the fun is in the reveal, to see this card in action please check out my FACEBOOK page, feel free to join if you would like to share your own crafty creations. You can also see a video of this card on my INSTAGRAM page.
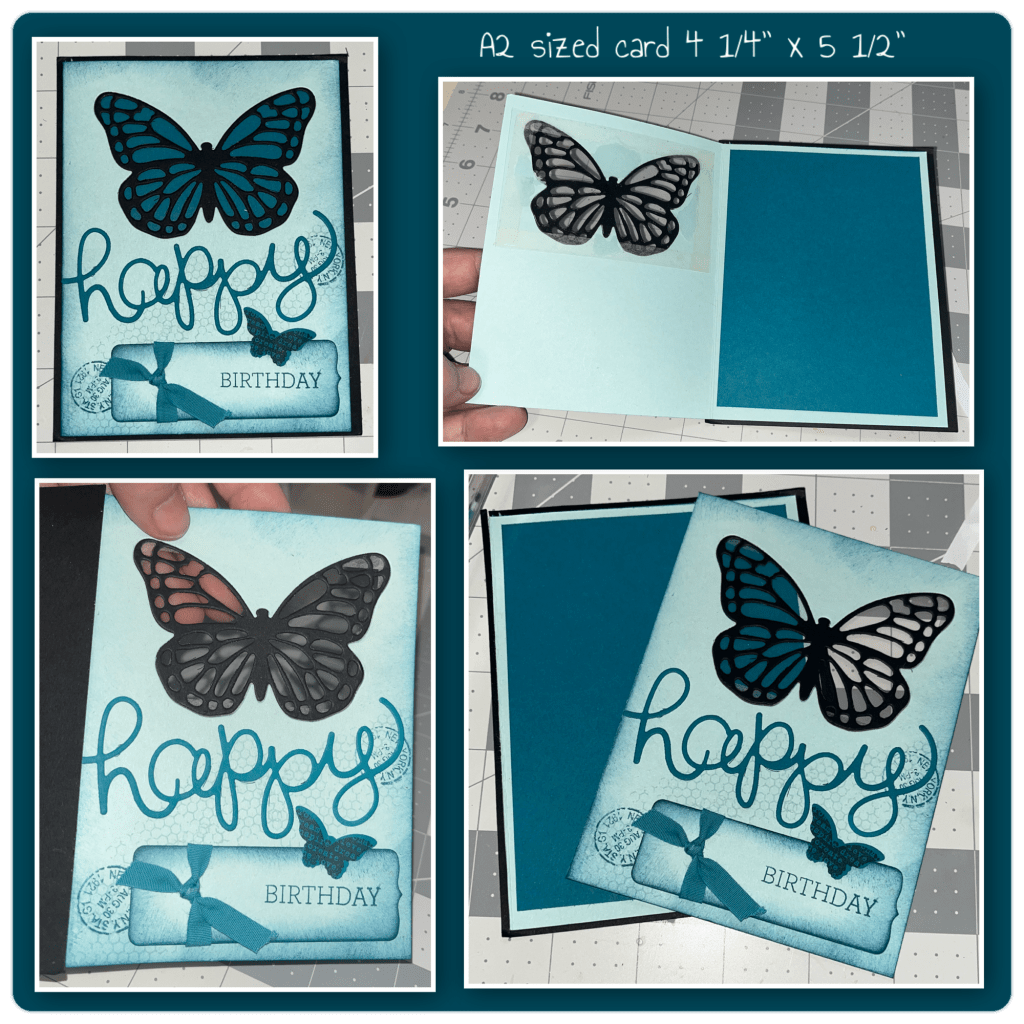
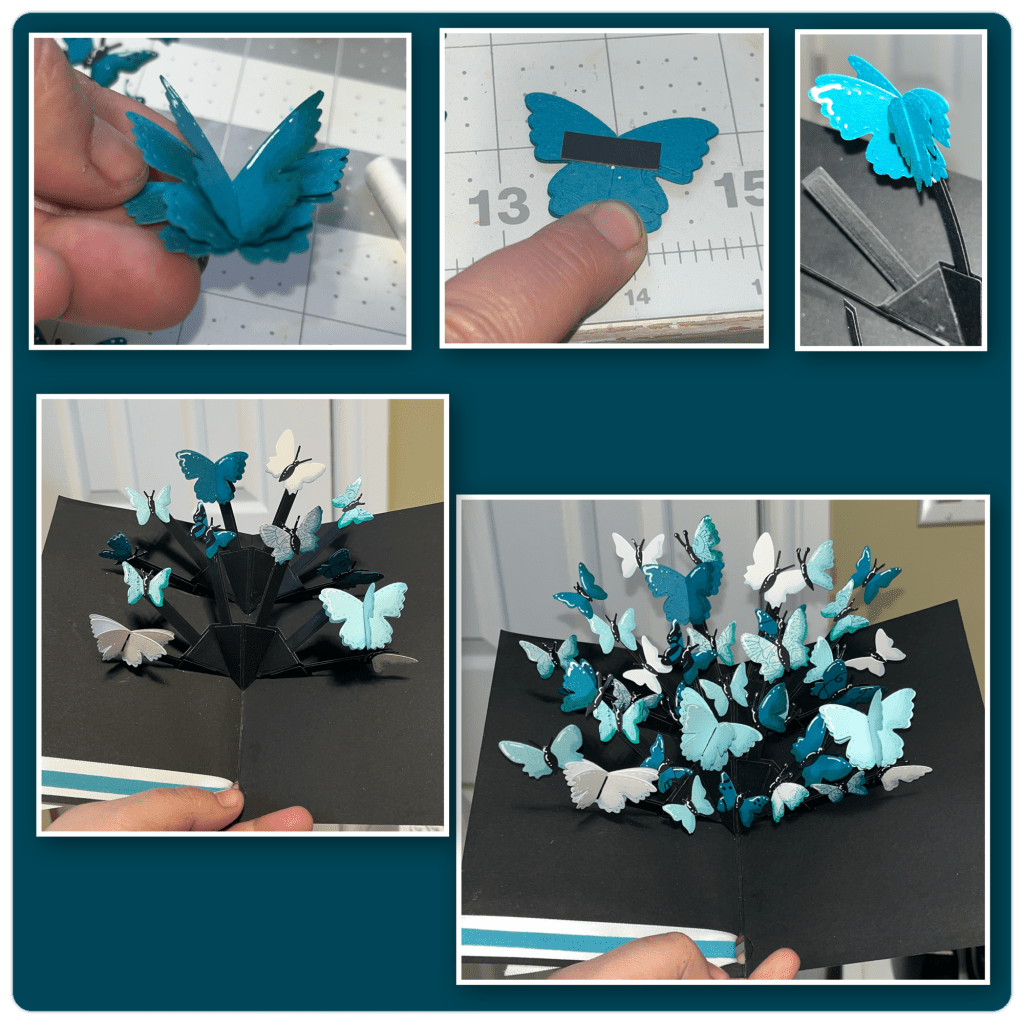
I thought I was quite clever when I made this card. The Black Butterfly is actually adhered to a piece of acetate which makes the butterfly appear to be the darker blue that is the colour on the inside panel. The finished card was 4 1/4” x 5 1/2” with the black panel being the finish size, the card part that opened was about 1/4” smaller. I cut the front flap of the card off and it will be used on the new card. All the supplies I used for the original card are retired Stampin Up! And at the time I mixed die cutting and stamps to give a collage kind of look.
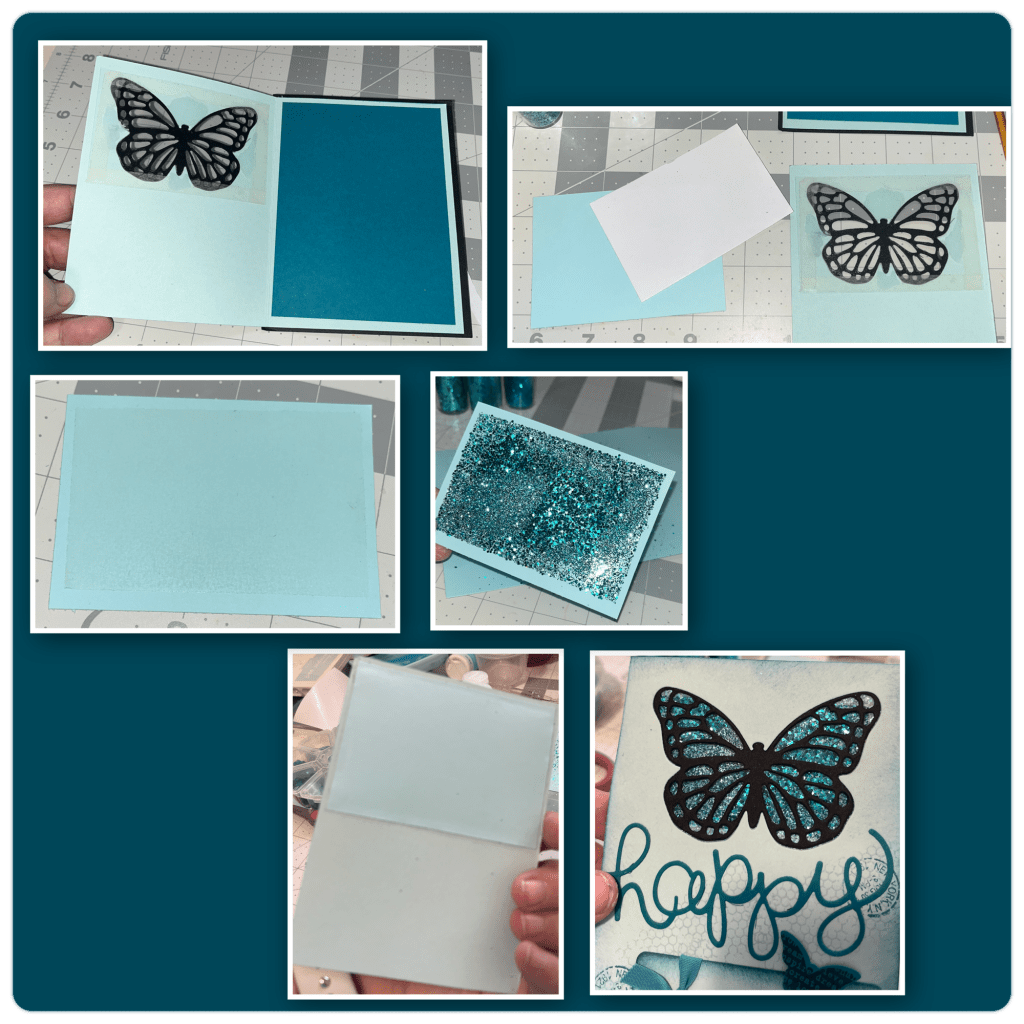
Ooops I added a duplicate photo. I knew I wanted the butterfly to still be teal so I took a piece of cardstock slightly bigger than the butterfly and added a piece of double sided adhesive. I took 2 different teal glitters, one a little chunkier than the other and stuck it to the adhesive. I added the glitter cardstock behind the butterfly. It gives the impression of a shaker box with it being a shaker
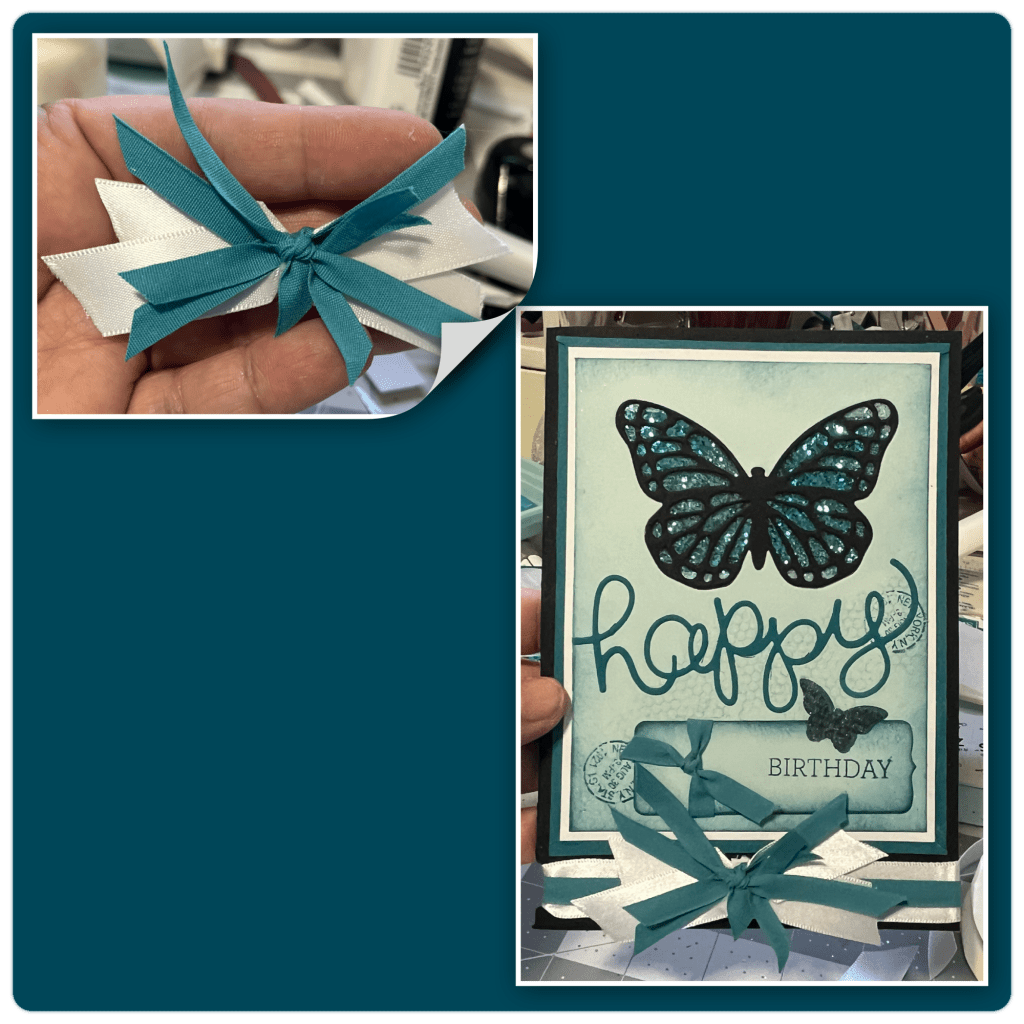
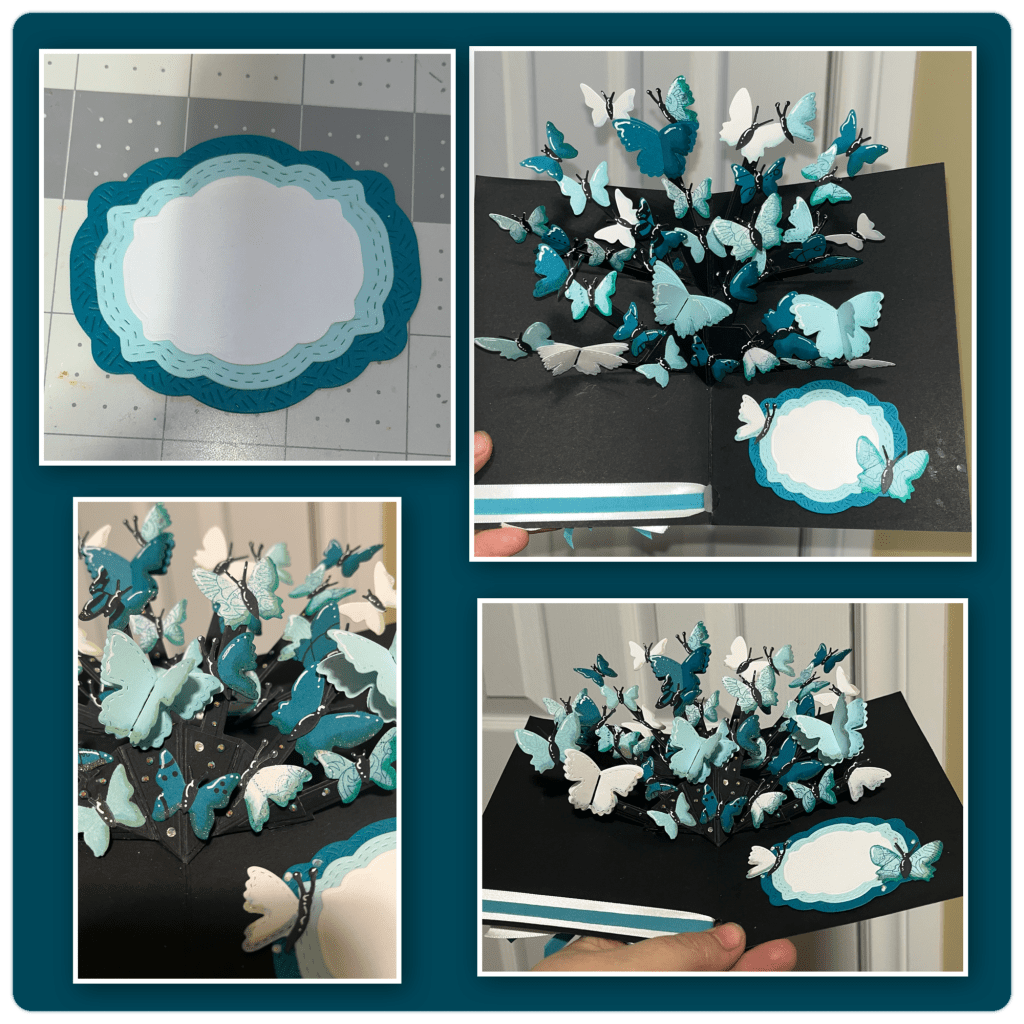
I decided to make a 5”x7” card base out of black cardstock. I noticed that I ripped the edge a bit, so instead of starting it over I used a small round hole punch and punched a notch out of it big enough for the ribbon I was going to use as a border. I mounted the card front on to a piece of white, then onto a piece of the teal/blue, each layer 1/4’ larger than the last. I wrapped the ribbon around the card front through the hole with the over lap in the front.
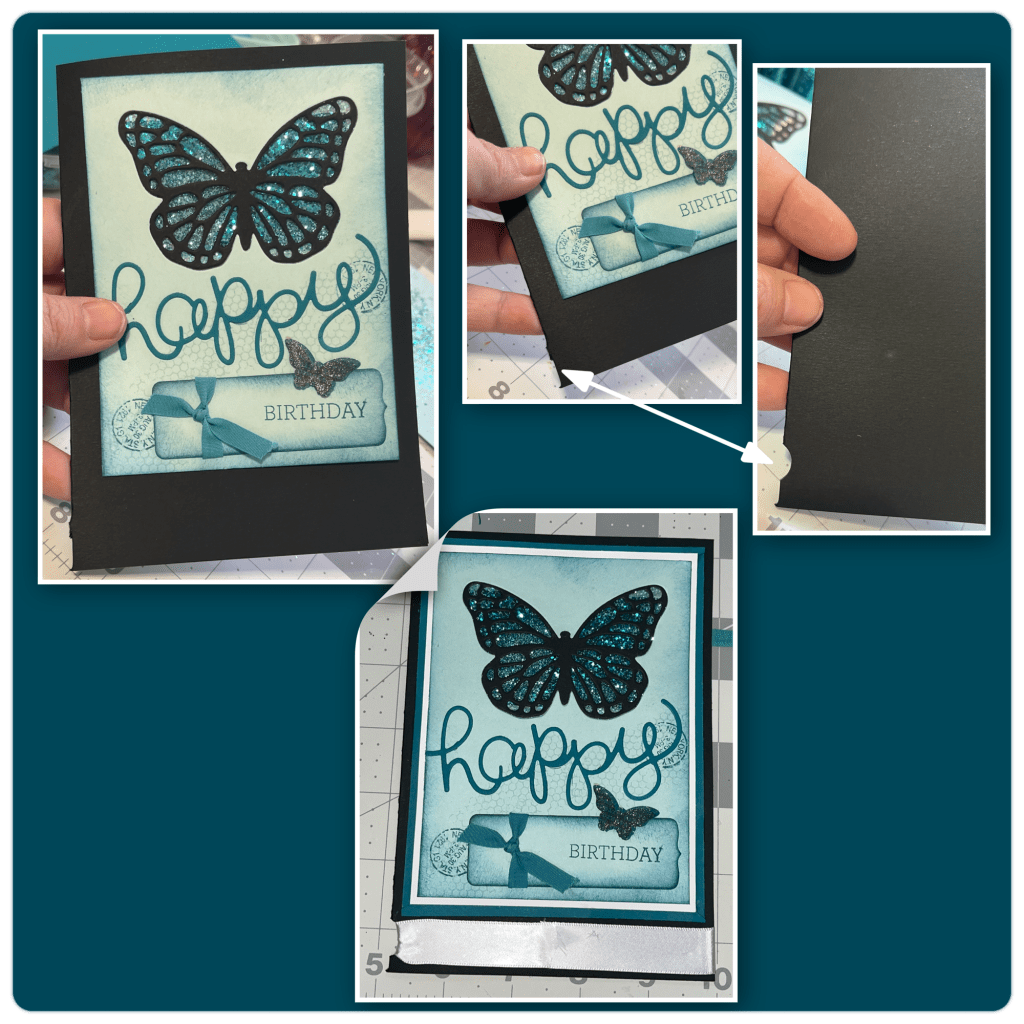
I went through my ribbon stash and found that I still had some of the same ribbon that I originally used (see I am a pack rack) I took a few pieces of white ribbon and a few pieces of blue/teal ribbon and laid them on top of each other and then wrapped another piece of the blue/teal ribbon around it to make a faux bow. I glued the bow over the overlap of the ribbon.
To even out the weight I added a panel to the back of the card about 1/4” smaller than the card base.
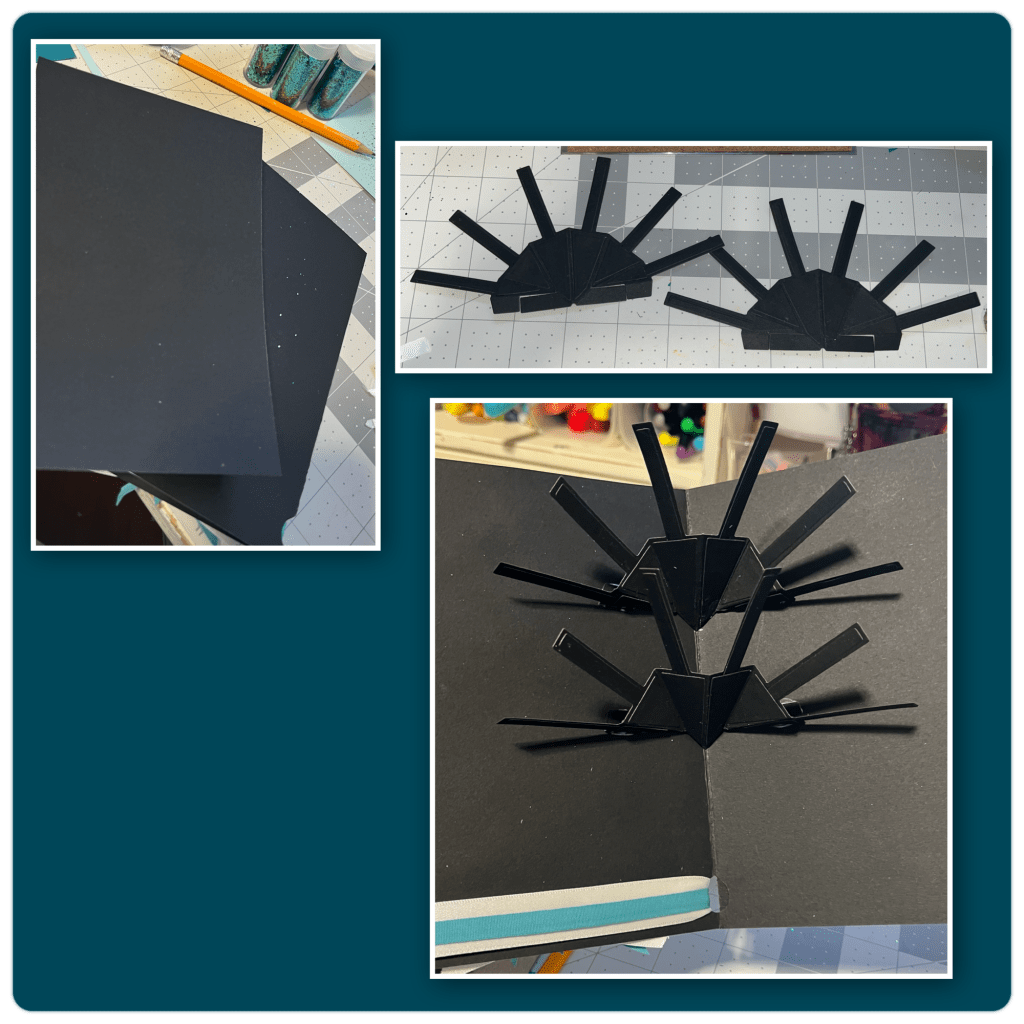
I cut out and assembled 2 Photo Fan Pop Up mechanisms and add them into the card (Karen has a video tutorial on the product page at the link ⬆️ )
I wanted there to be a bit of interest to some of the butter flies so I used an old Stampin Up! Stamp and stamped differed shades of blue onto the cardstock as shown below. I used white, a lighter blue and a darker blue, some I stamped on and some I didn’t. I diecut the butter flies from the Butterfly Collage Addon, then I coloured with alcohol markers, and highlighted with a white Gelly Roll Pen. It’s hard to see but I also added a little bit of Wink of Stella glitter.
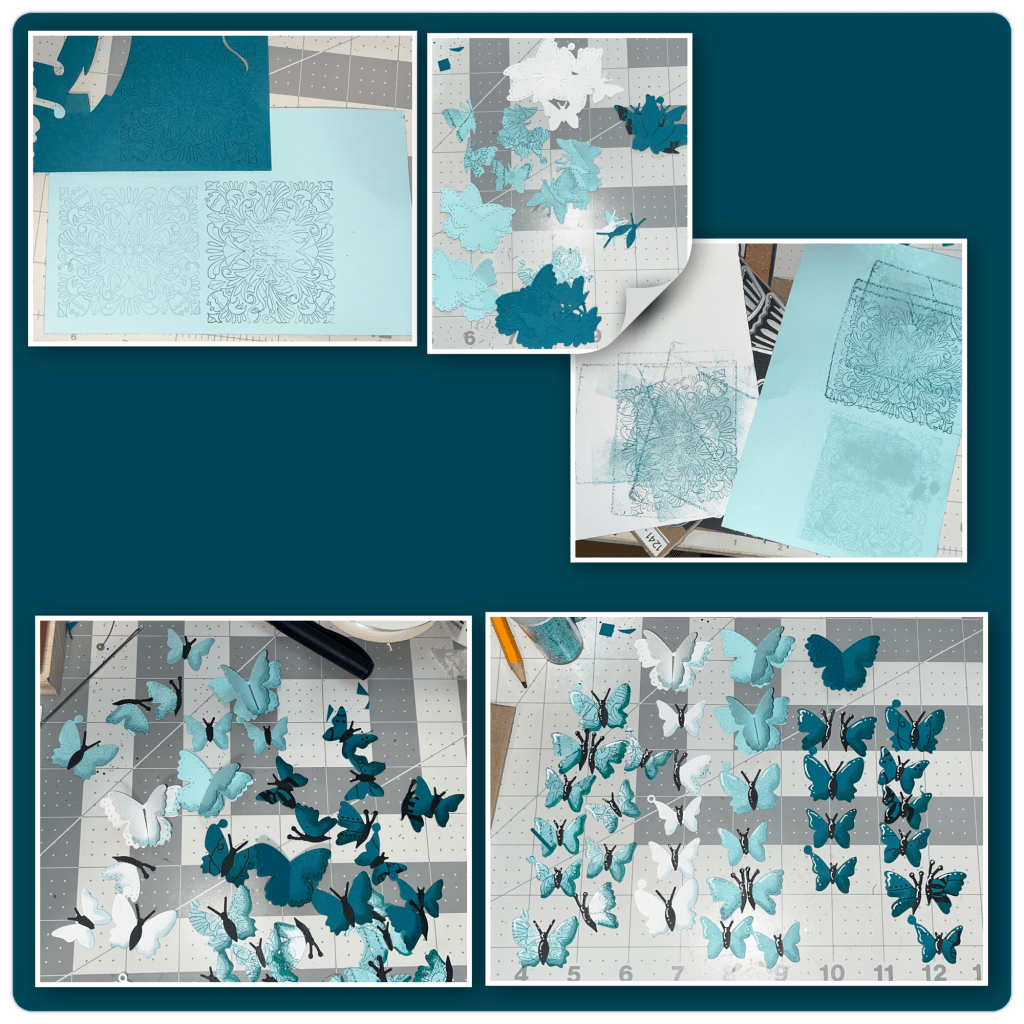
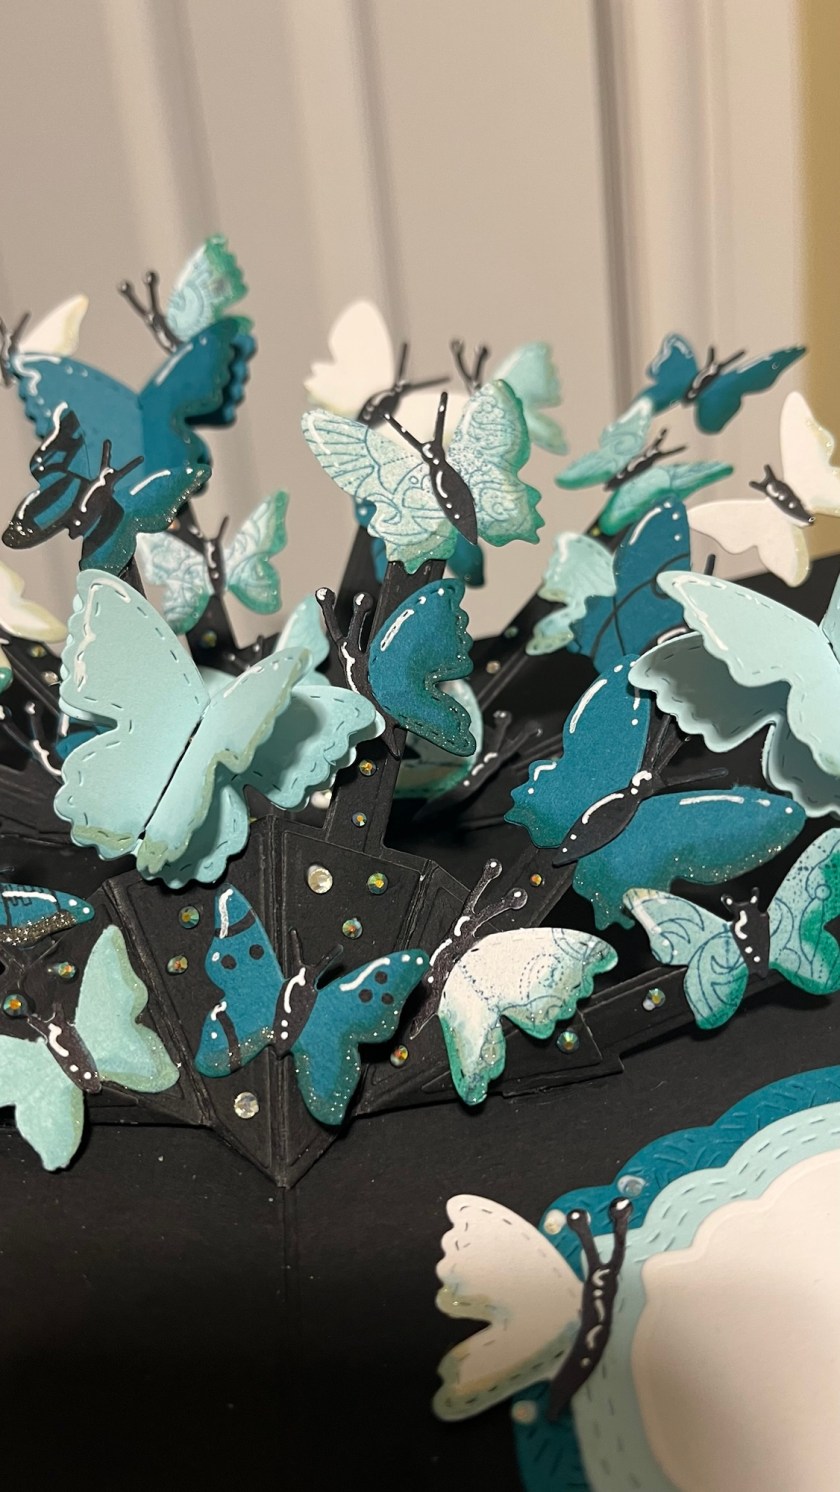
I like to add an extra layer to the flapping butterflies but I still like them to have a bit of control so I add a small strip of paper to the back, they still have dimension but they don’t flipped to far back when opening and closing the card. I started adding to the arms and then I started filling in the spaces. Opening and closing the card between each new butterfly to make sure they don’t catch on each other.
Using dies from the Rectangles and Labels Crosshatch and Greeting Labels I layered the three colours as shown to make a place to sign, and added a couple of butterflies. I added some itty bitty gems for a bit of sparkles.

Other Tools used
