

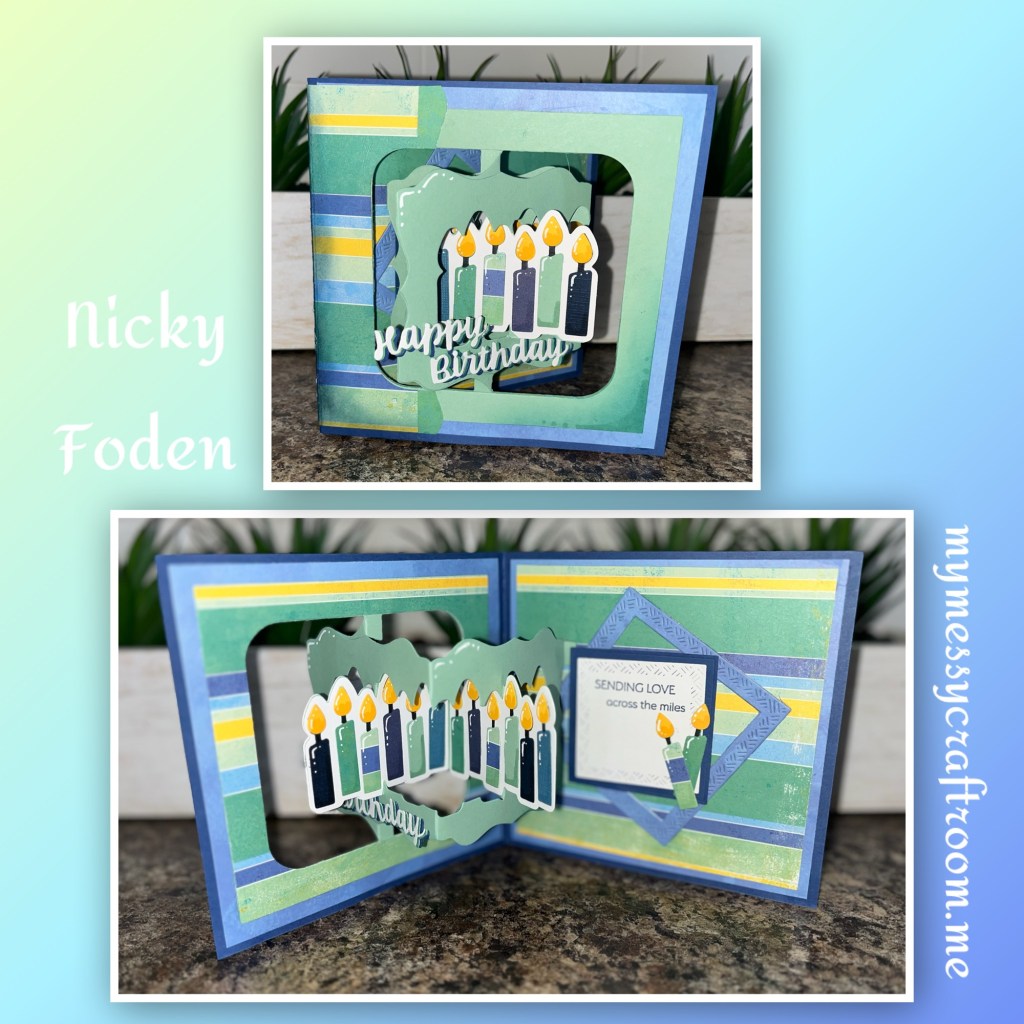
Hello, hello, crafty pals, today is the Karen Burnistons April Design team challenge and this month challenge is “designers choice” and you’d think that would be easy, but do you think I could come up with something lol. I was totally overthinking it. In the end I was bopping around Karen’s Webisite and I came across this Love Hearts Pop-up Instruction Sheet and thought it would be fun. I swapped out the Hearts add on for the Birthday Candles add on and this is what I came up with.

All the fun is in the reveal, to see this card in action please check out my FACEBOOK page, feel free to join if you would like to share your own crafty creations. You can also see a video of this card on my INSTAGRAM page.
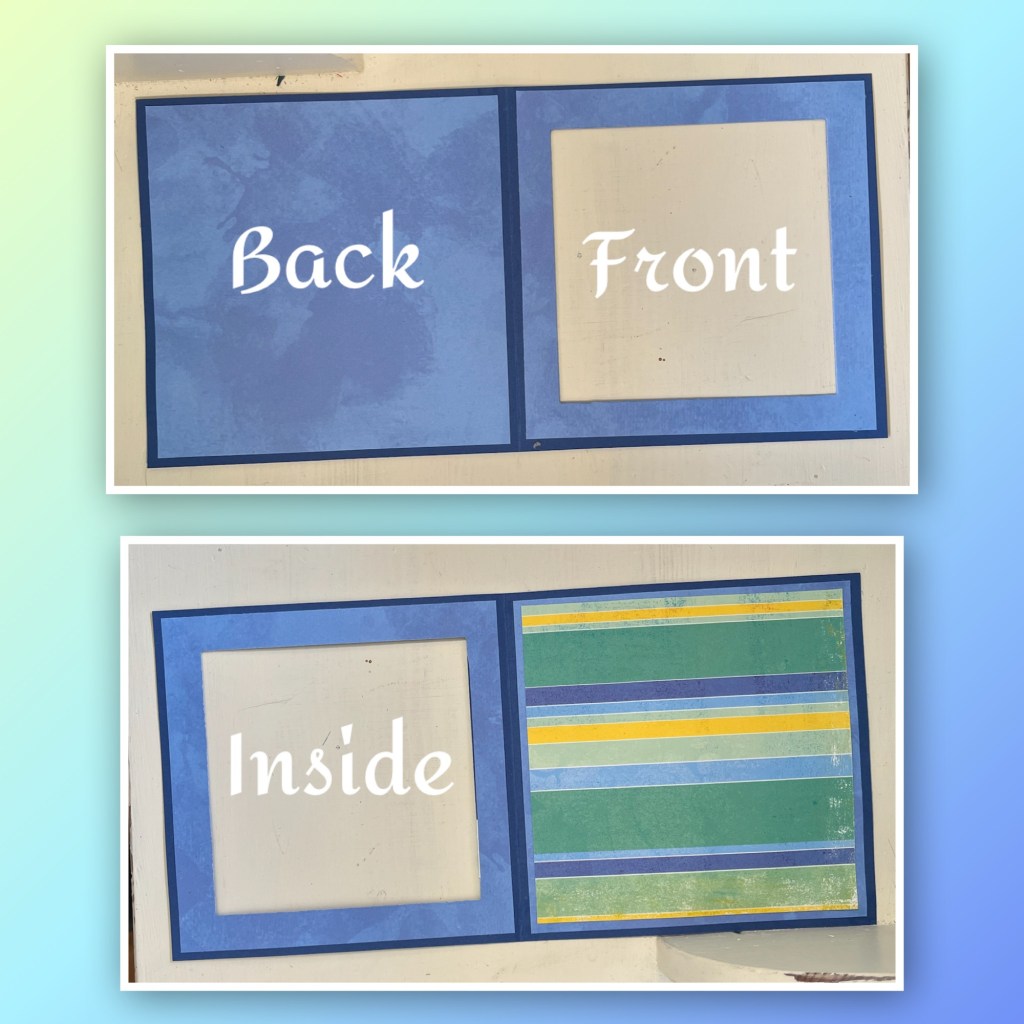
I changed the dimensions slightly from Karen’s and made my card a 5 1/2” square. I cut the card base and panels as shown below.

Add the layers to the card base as shown. The second striped piece will be used in a later step.

Using the largest square from the Squares Crosshatch I cut the centre out of the card front.
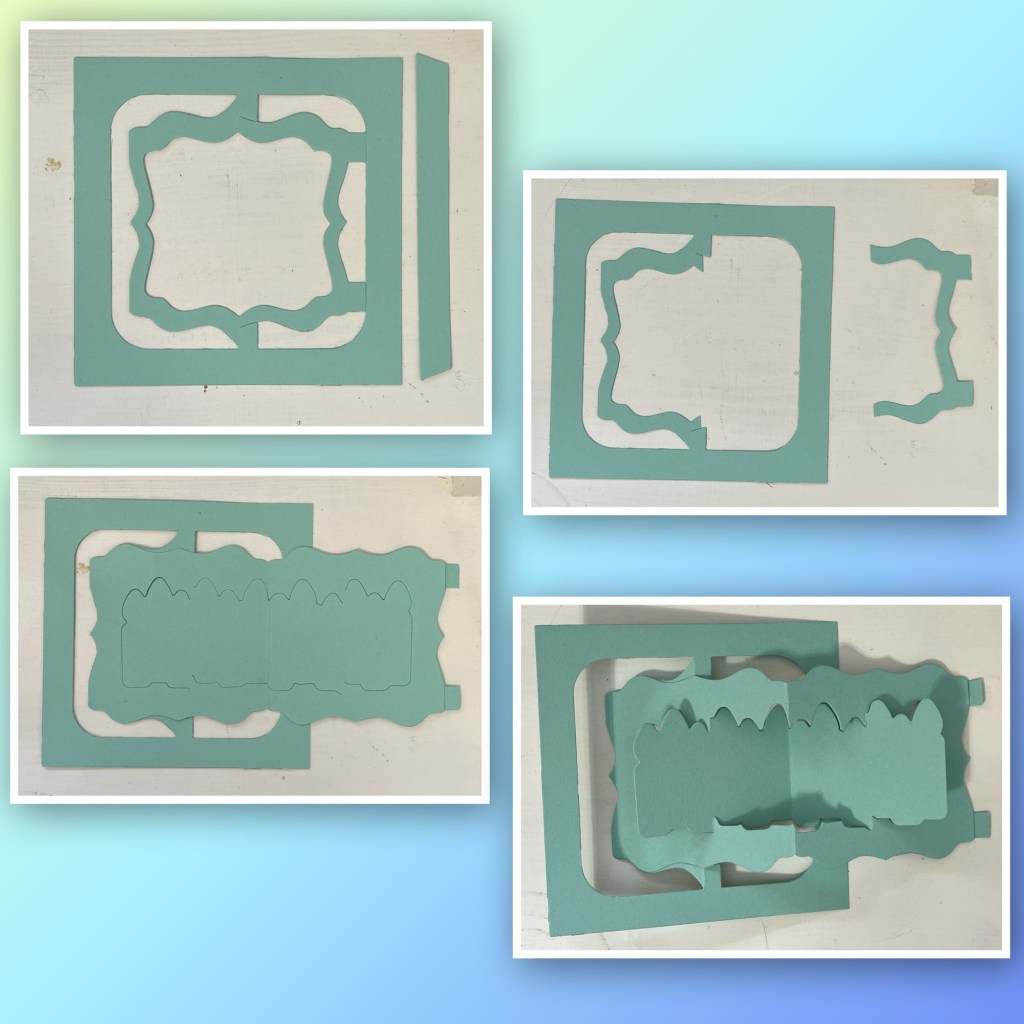
Following Karen’s instructions I cut out one panel from the Fancy Label Accordion, cut out the centre using the coordinating die and the long tab on the right side. Trim the right side of the center frame as shown. I cut out the Birthday Candles Pop Up panel and add it to the centre frame. Then add the pieces that was cut off from the center label to the end of the candle panel. Fold as shown.
Take the second striped panel and lay it on the left side (don’t glue it down), center it, then lay the Fancy Label Accordion die and center. Tape the die to the paper and diecut. Cut the middle out and glue the striped frame over green accordion piece as shown.
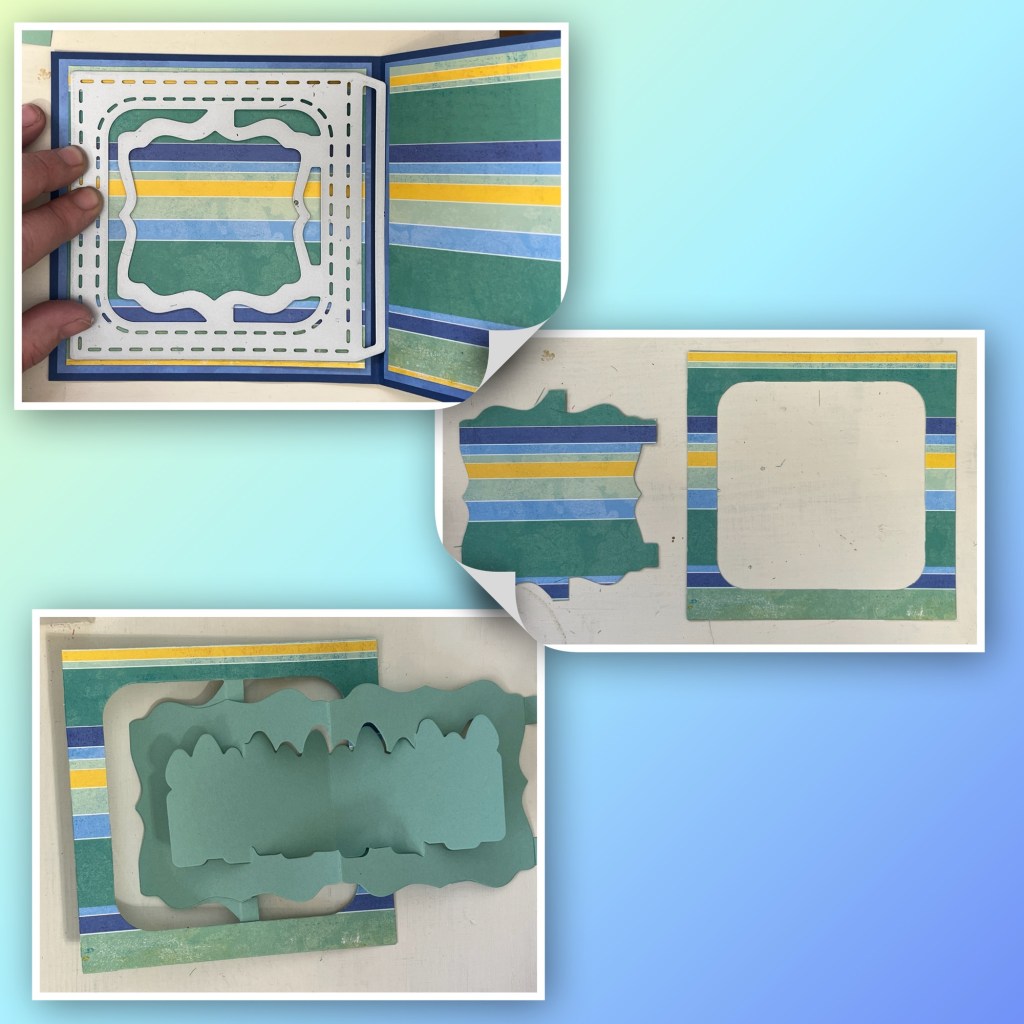
Die cut the Birthday Candles panel from white cardstock. Cut out the middle section and add it to the accordion piece as shown.

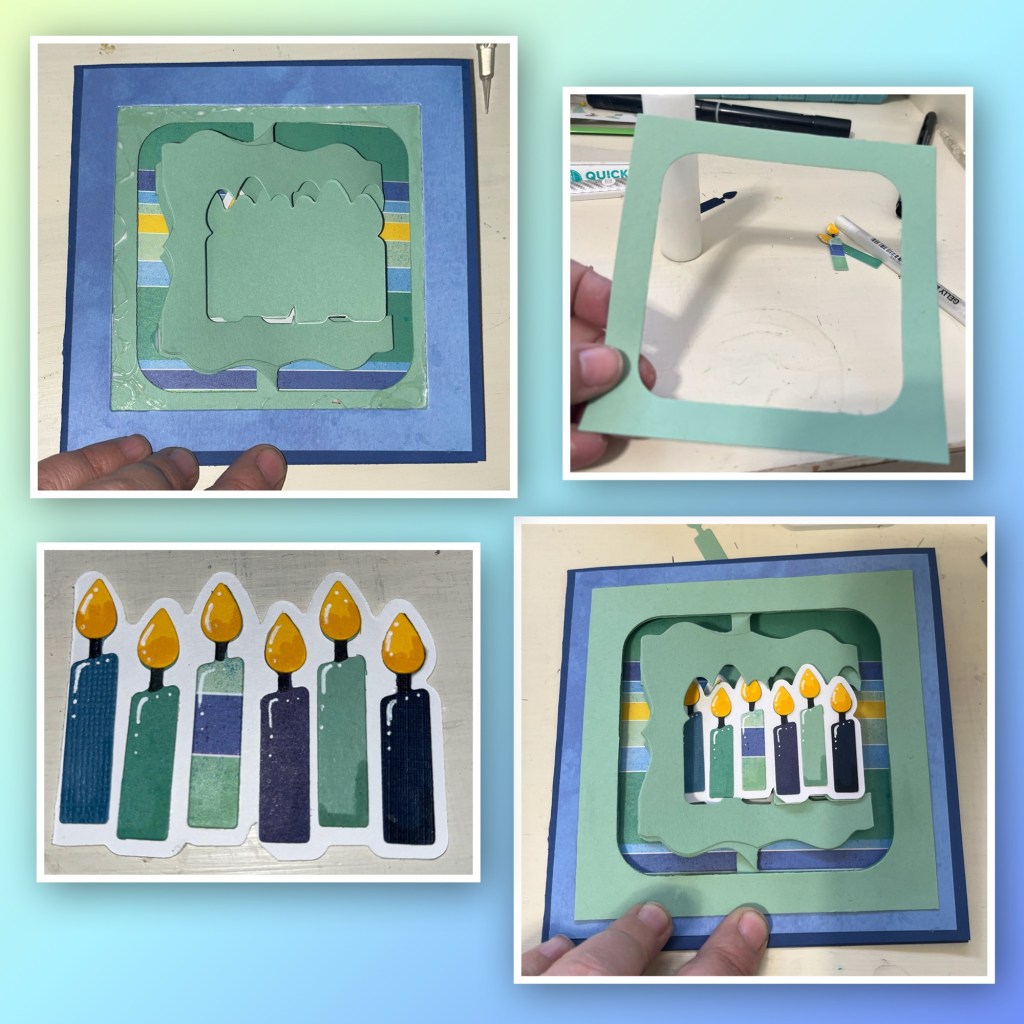
Cut and assemble the candles. I added shading with a Versa Mark Marker, and highlights with a white Gelly Roll pen. Add the candles to the accordion piece. Take the accordion piece, center on the left side and glue in. Fold the card into the closed position, add glue to the two tabs on the right side to attach the right side.

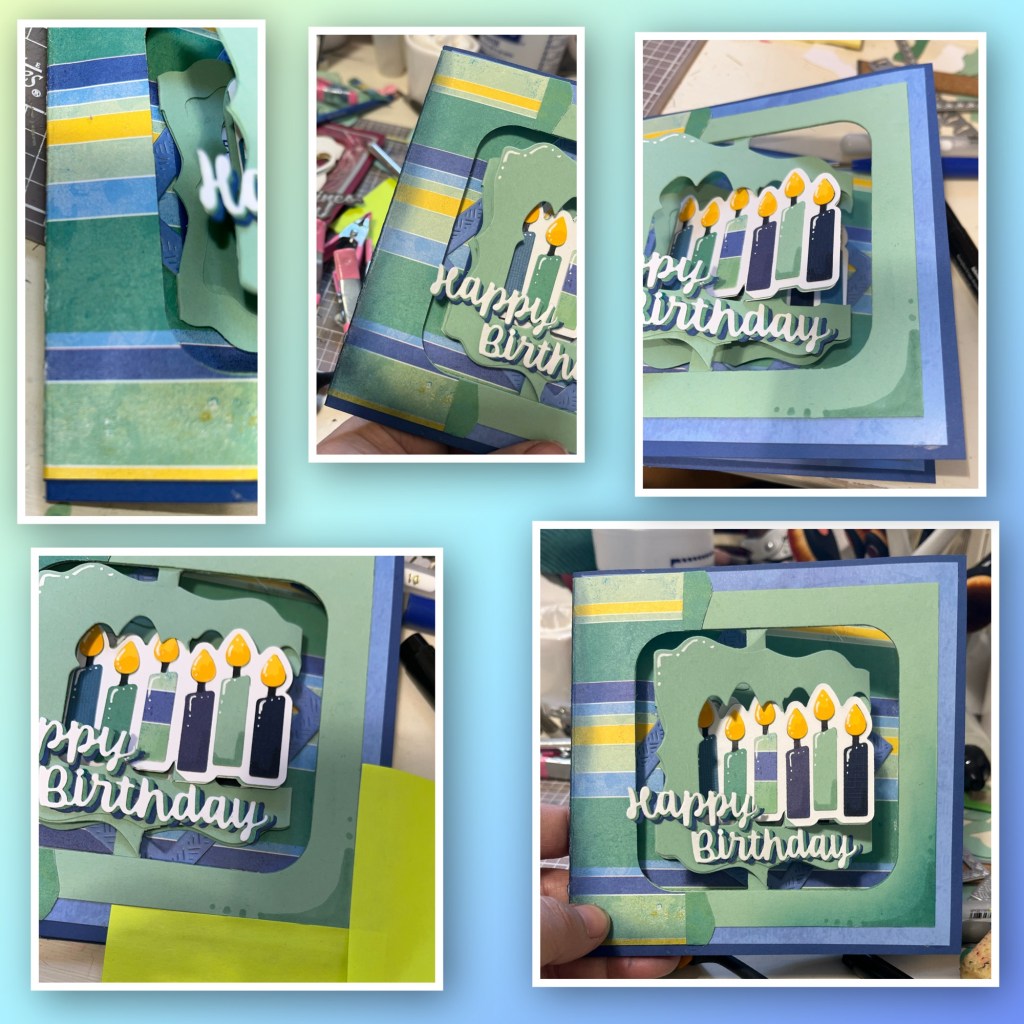
This is what the card looks like from the front. I cut out another Fancy Label Accordion panel, and cut out the center so you have just the frame, then add to the card front. Cut out another white piece like shown above, add candles then add to the front of the mechanism.
The blue pic below is of the card base before I added the layers and there is a small hole in the side. So I took the last scrap of the striped paper and cut it to 2 1/4” by 5 1/4”. I scored it at 1/4”. Lay it down on the left side where it will be in the finished card. From the inside trace the hole so you know where to cut the paper. Line the Fancy Label accordion die with the pencil line and cut. You now have the perfect shape to fit around the window. Glue down, I used the pink clips to hold it in place until the glue dried. .

I didn’t like the blunt edges so I took a scrap from when I cut out the stripes (the green is the back side) I cut it in half and covered the edges of the striped border.
I cut out Happy Birthday from white, green and twice from blue. And layered them as shown and added to the card front.

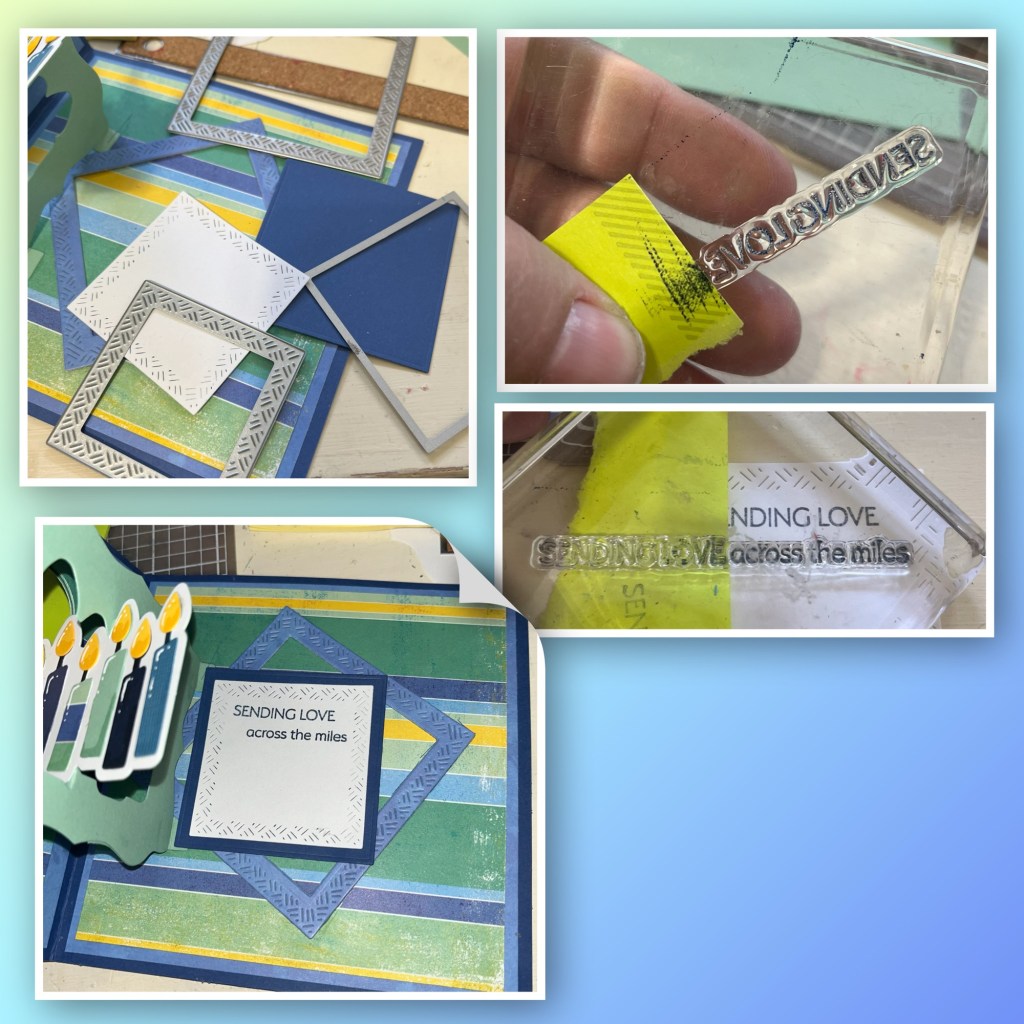
I wanted to use the blue square that was originally cut out from the front of the card, I cut it into a smaller frame using the Square Crosshatch set. I also cut a darker blue square and a white square.
I wanted to use the greeting from the Special Delivery Stamp set but it was too long. So I masked the second half while stamping the first half the masked the first half while stamping the second half.
I added all the squares as shown.
I noticed that the stripped paper was cracking on the side so I used a brush and navy blue ink to ink the edges so it wouldn’t be as noticeable. I was adding shading with a Versa Mark marker and highlights with a white Gelly Roll pen. I didn’t like the how the Versa Mark looks so I used a light green ink and brushed it over.
Other Tools used

Thank you for sharing your card and the instruction. You’re right, these colors are a good choice. I started paper crafting after going to a stamp party and wondering how stamps and dies could go together.
LikeLiked by 1 person
Great card with imipressive detailed instructions. I started paper crafting when I felt the need to get my kids pictures into albums and now that they are grown I have moved on to making cards.
LikeLiked by 1 person