
Yay I got to play Craft Roulette this weekend , and make a card I needed to have done sooner then I typically get them done. Lol. Gotta love when things fall into place and I really love how this card turned out!!!

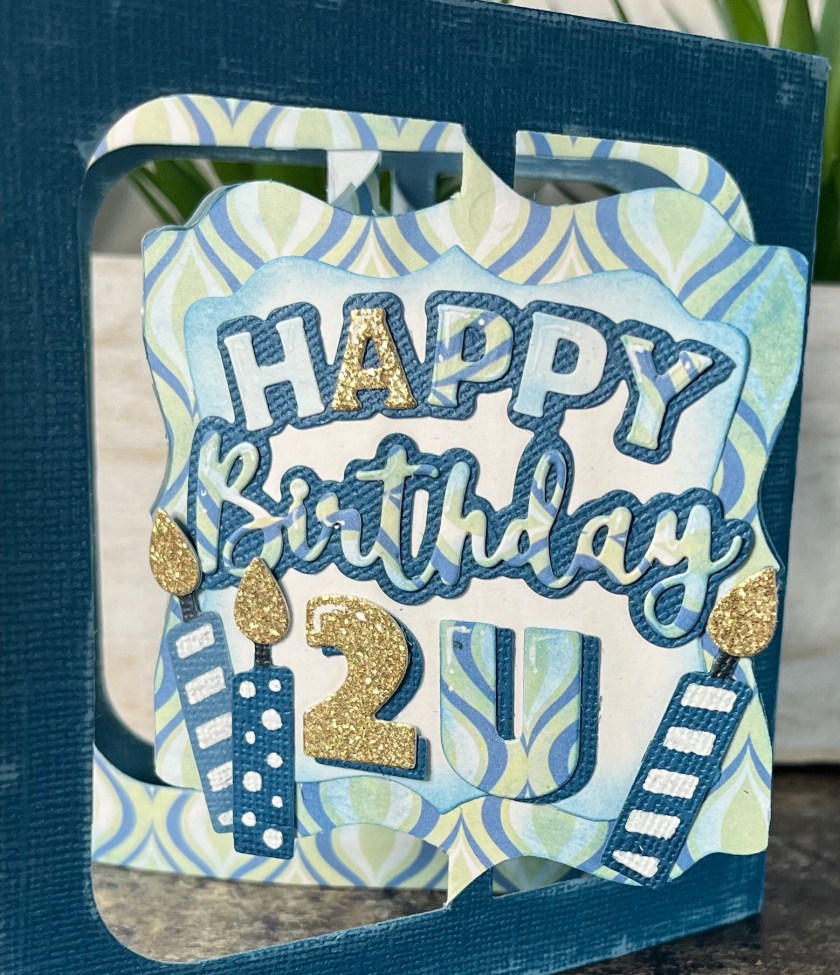
Soooo I really wore my stretchy pants for this one, as typically an A2 card is a specific sized card that is 4 1/4” x 5 1/2” and I don’t know how I forgot this parameter when I started the card. Who I am kidding, I got excite when I found card stock to match this fun paper that reminded me of a blue and white tea set that I own, and the green for green tea, and that the candles had “stripes” I totally got half way through assembly when I had that ooh oh moment. There really isn’t a way to make a square accordion card into an A2 so I was just going to finish the card and forget about submitting then I had the idea to mix papers on the greeting on the front and made the “A” and the “2” in gold. oh and I also fashioned the dog into my sweet Lexi wearing a party hat. Phew parameters met ✔️
All the fun is in the reveal, to see this card in action please check out my FACEBOOK page, feel free to join if you would like to share your own crafty creations. You can also see a video of this card on my INSTAGRAM page.
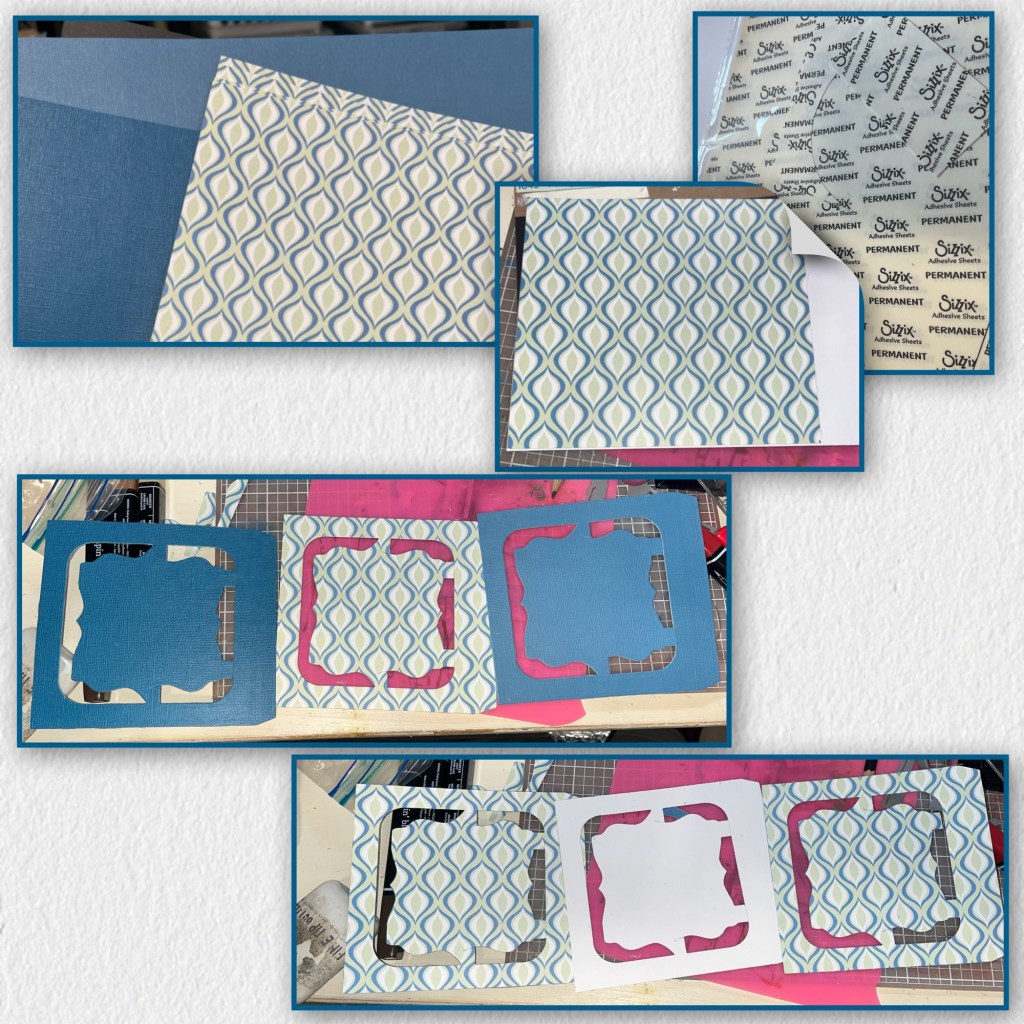
The pattered paper is from my stash (probably from Costco years ago) the 2 different blues are Color Core Cardstock also from my stash. Neither the paper or the cardstock is thick enough to make an accordion card so I used some Sizzix double sided adhesive sheets and put it on the back of one each of the paper and the cardstock, on the back of the patterned paper I used white cardstock, and on the back of the blues I used the patterned paper. I diecut each of the 3 pieces using the largest die in the Fancy Label Accordion set (Karen has a video tutorial on the product page at the link ⬆️ ) . This is what they look like on the front and the back.
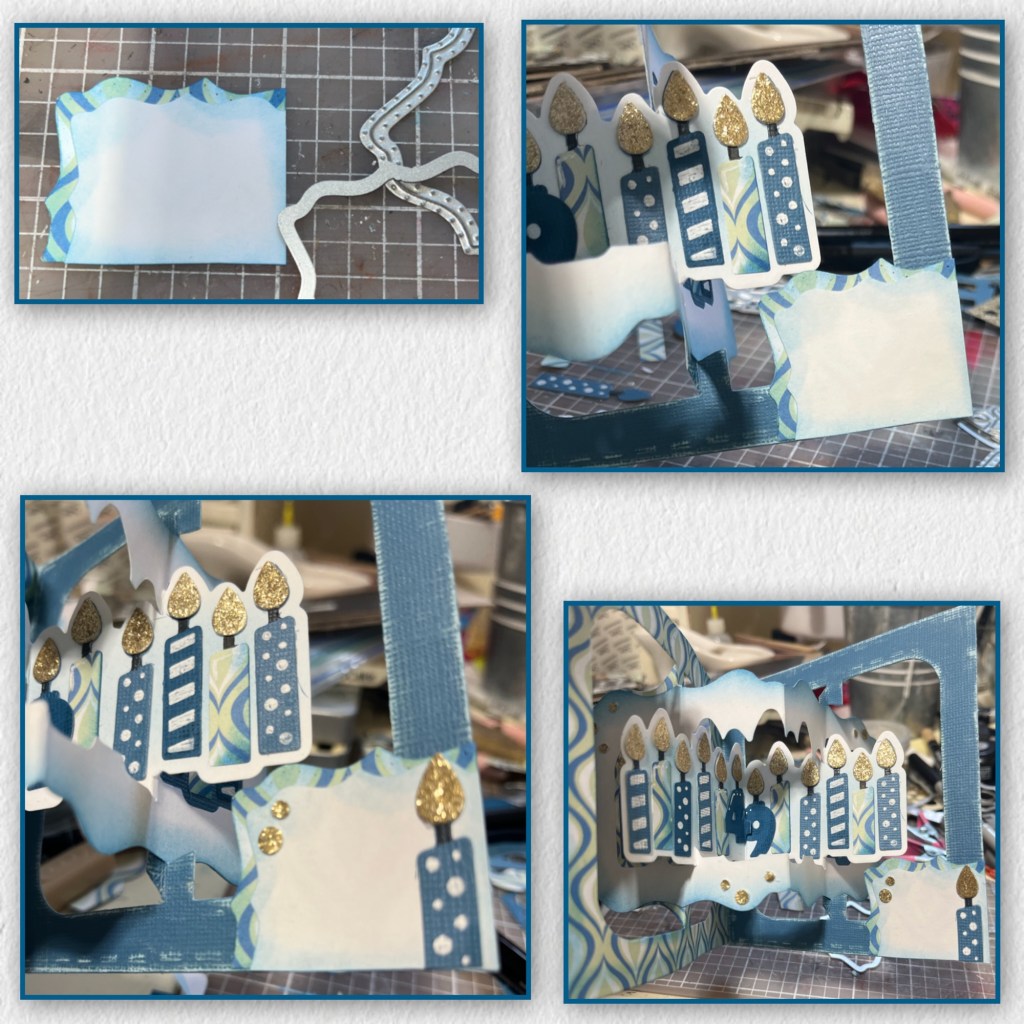
Die cut the Birthday Candles Add on piece, I inked the edges with blue ink to soften them a bit. I missed a few photos, but I diecut the candles from the 2 blues and the pattered paper, and used a white Jelly Roll pen to draw the stripes and dots using the stencil feature on the dies. I inked the edges of the patterned paper using the same blue as on the panel. I wanted the 49 to look like candles so cut the tops of the candles and adhered them to the back of the 49. I blacked out the wicks of all the candles and added gold glitter flames to them.
***please note that the photo of the panel folded with the candles, I have the folds reversed, they need to be opposite of what the photo is.

Because it is Color Core Cardstock I scuffed up all the edges, and I inked the edges of the patterned paper and the white cardstock. I started to assemble the card (Birthday Candle add on instructions)

Add the front panel. Using Label dies from the Fancy Label accordion set I cut layers for the front and back of the first panel. I used the Happy Birthday Lorna Label Add on and cut off the label to use the greeting. I also cut the”2” from Numbers set and the “U” from the Alphabet set using a combo of the papers used making sure the “A” and “2” are cut from gold glitter card stock. I decided to add a shadow behind the “2U”. For the inside label I assembled the dog from the Cat and Dog set and added a few candles.

I needed a place to sign, so I layered a label as shown and squared the corners so it will tuck into the corner of the card. I used a Crop-o-dile to punch out some small gold circles and added them randomly around.
I wasn’t in love with how the back looked so I cut out another panel from the patterned paper, and inked it up to match the rest. I cut out the center, and cut through the the frame so I could cover the white of the middle frame. I cut the centre in half to cover the back of the candle panel. If I were doing this again I would have had the back all be the same paper or colour from the beginning.


Other Tools used
