

I got to have some fun playing Craft Roulette. I’ve been needing to make a baby card and the parameters for this week gave me the perfect opportunity.
This is how I met the parameters, babies are good tidings, I used a paper pack called “Best Summer Ever” by Echo Park, I used a triple pop up mechanism, and I tied 2 bows on the front of the card and one on the bear on the inside.

All the fun is in the reveal, to see this card in action please check out my FACEBOOK page, feel free to join if you would like to share your own crafty creations. You can also see a video of this card on my INSTAGRAM page.
So I have made the decision to reel in my posts a bit. I spend hours just editing photos and writing the blog post. If it is part of a new release or a blog hop I will write longer posts, but some of the others I’m going to try to condense things a bit. Especially if Karen has videos already created on how to make the card or it is covered in an assembly video. I post to her website anyway and her videos can usually be found right under the product that I post to.
This card I will actually post directly to Karen’s YouTube post , this card technique is part of a virtual class that she did in February, I can’t give complete directions anyway because it was a paid class, but I thought I would share my take on it. Karen’s virtual classes are a great way to learn alternative assembly directions. This dieset was used on the second card in the video.
1A- cut and score the card base, and cut the panels
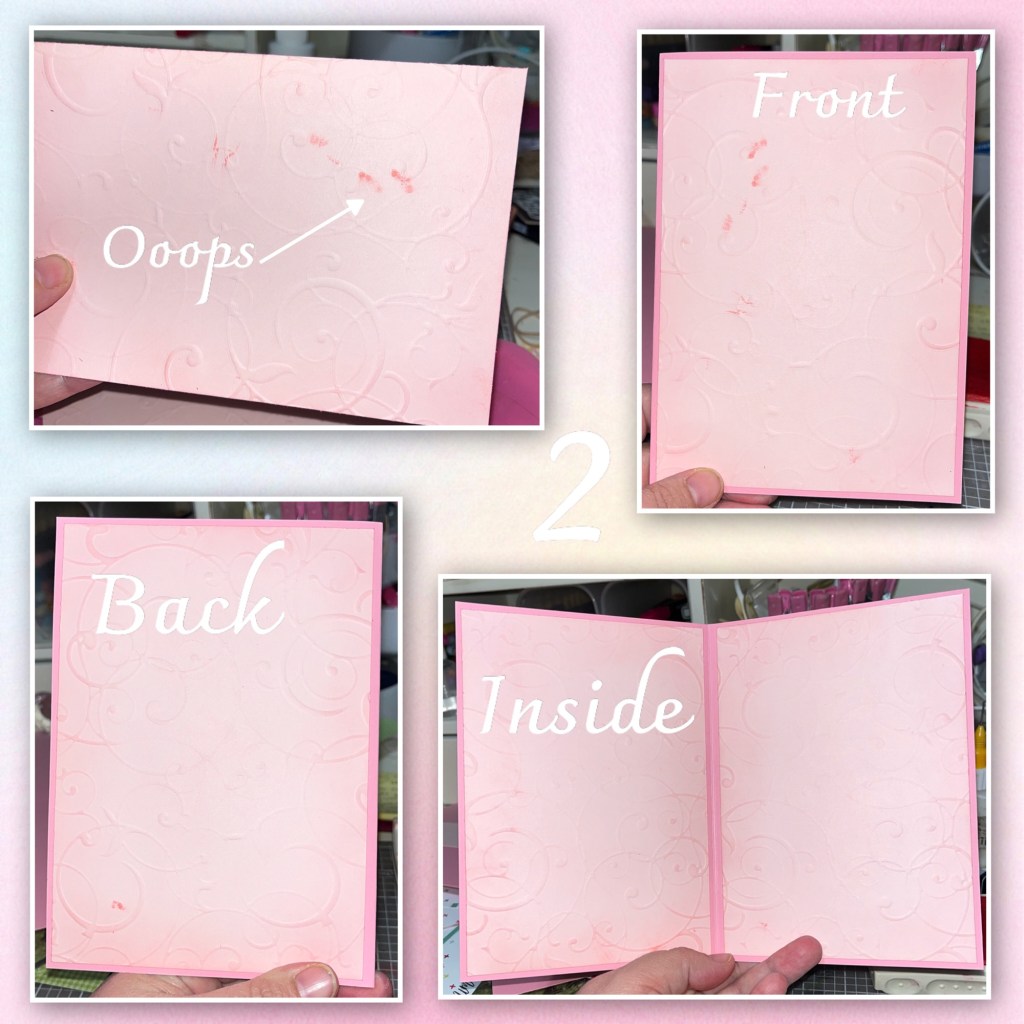
B-I used a Pattern Plate to emboss the swirls into the card stock
C- I sponged ink around the edges of the lighter pink panels.

Oops I got inky finger prints on a panel
2-add the panels to the card base. The inky one I put on the front.
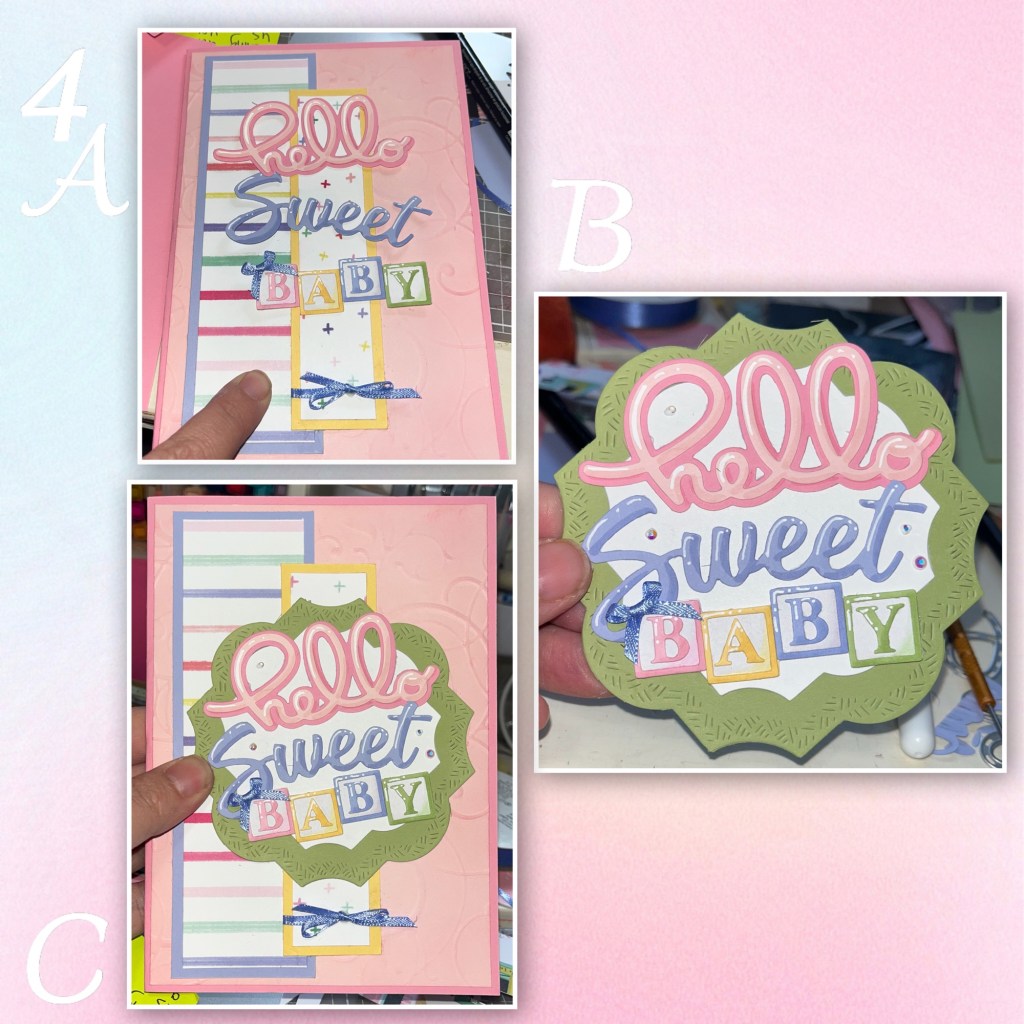
3A- I only had scraps of the patterned papers that I liked so I just matched them up with cardstock and trimmed the cardstock that way. I didn’t measure.
B- I diecut Hello, Sweet (You’e Sweet set) , and Baby (Baby Charms) I added shading with a Versa Mark Marker, and highlights with a white Gelly Roll pen. On the word baby I used alcohol markers to add shading.
C- cut and layer the 2 largest Labels Crosshatch from green and white.

4A- I was originally going to just put the words on the card but found it busy and hard to read
B- so I added the words to the label and added a few itty bitty gems.
C- I added the label to the cardfront and a bow around one of the patterned paper strips.
5A- I cut out the Raising Platform pieces to make the mechanism, and I will refer to Karen’s Video for instructions.
B- I cut out the the pieces to decorate and assembled the label layers.
C- add the pieces to the mechanism. The baby elements come from the Baby Charms and the Teddy Bear is from the Winter Animals

6A- I added some layered patterned paper pieces. Again I was using scraps so I just made the layers work.
B- I diecut a bunch of swirls from the same Raising Platform set and added the, randomly around.
C- the yellow cards stock was cut a little uneven so that’s where I added another layered label for a place to sign and added a swirl.
The empty tag on the left side will for the babies name


Other Tools used

Amazing as always this is just amazing and thankd for the details x
LikeLiked by 1 person