
“Bunny Ears“ that is the challenge that Karen Burniston gave the design team for this months design team challenge, and what a fun challenge. I’m such a goofy card maker because I never really have a full plan when I sit down to make my card. For this card I knew I was going to have the big bunny on the front, and I knew I wanted to use a mechanism that I haven’t used in a while so I chose the WaterFall Card. Next I chose the pretty patterned paper that was part of a long retired Stampin Up pack then the matching cardstock. Everything else fell into place as I went along, and this is what I came up up with.
**** and for those of you who like when I explain and fix my mistakes I have quite a few on this one lol.
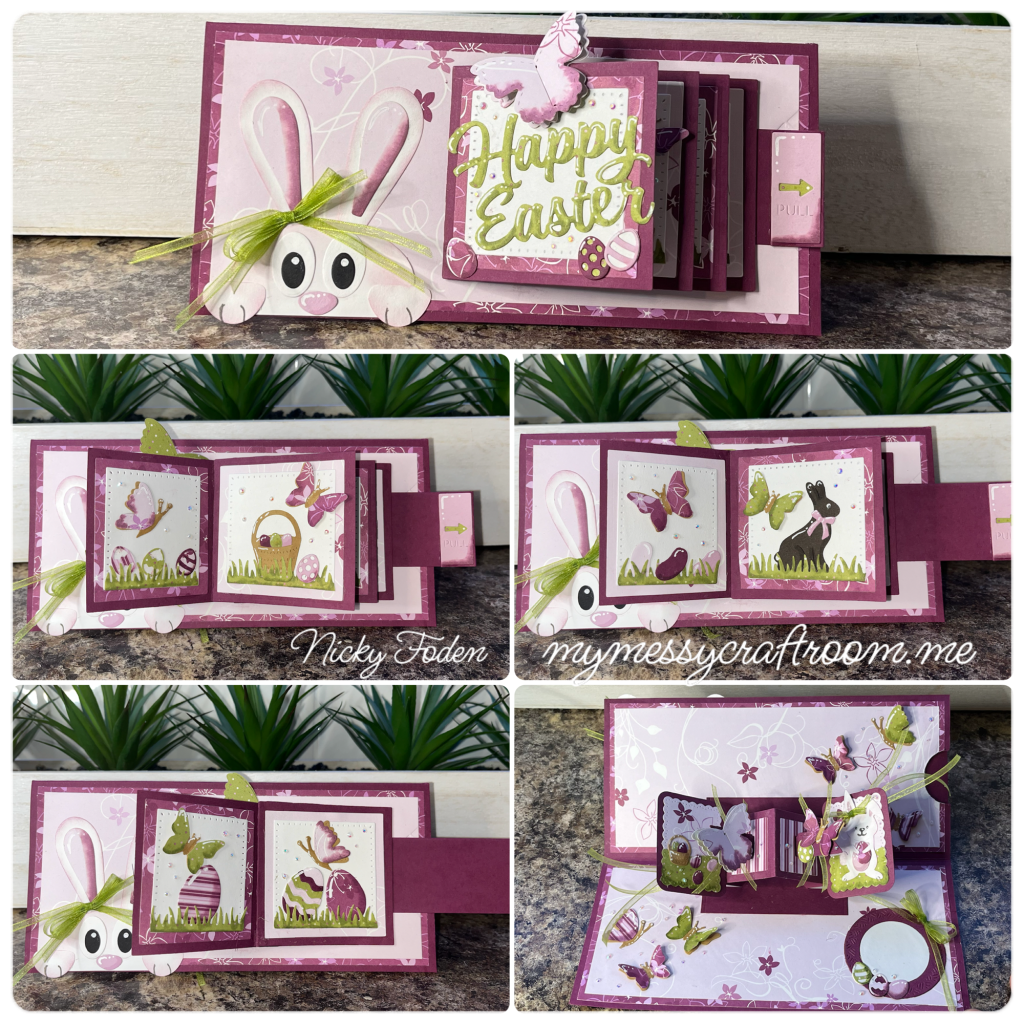
All the fun is in the reveal, to see this card in action please check out my FACEBOOK page, feel free to join if you would like to share your own crafty creations. You can also see a video of this card on my INSTAGRAM page.
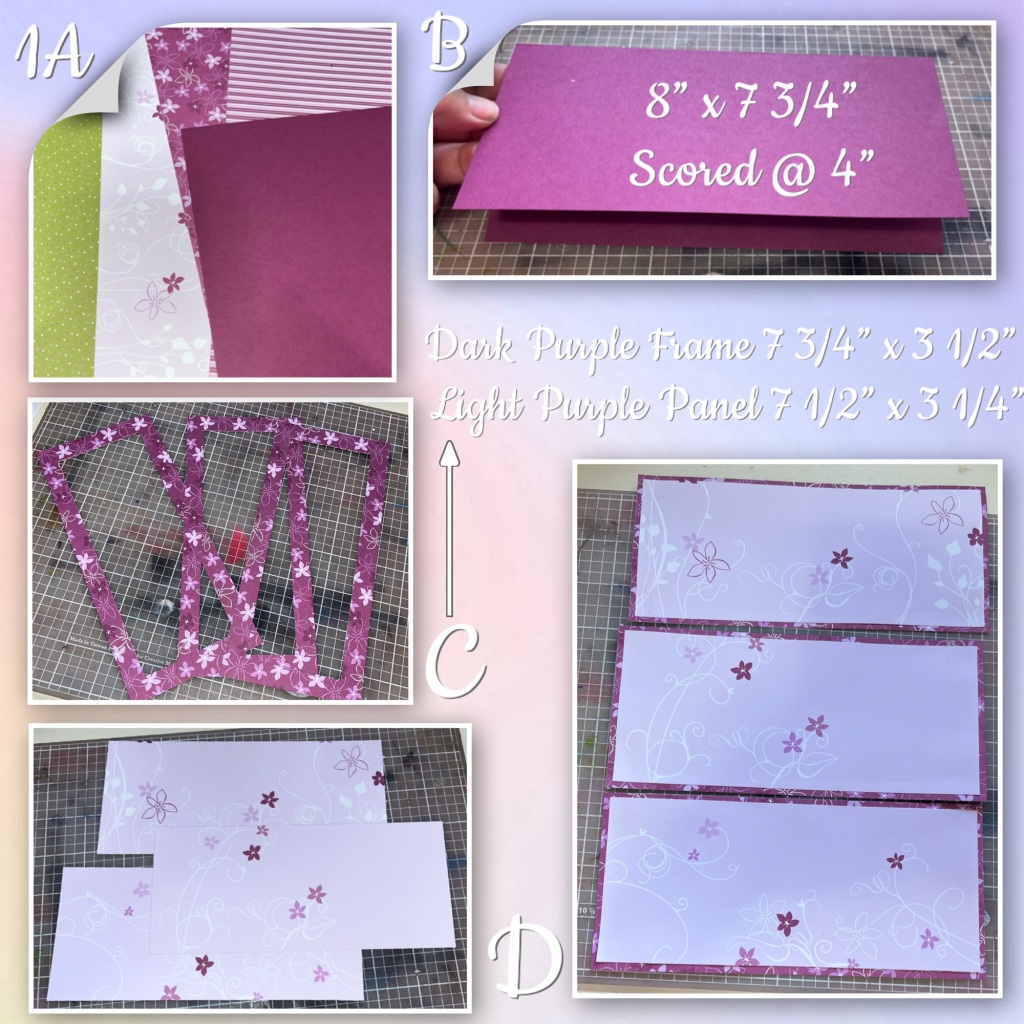
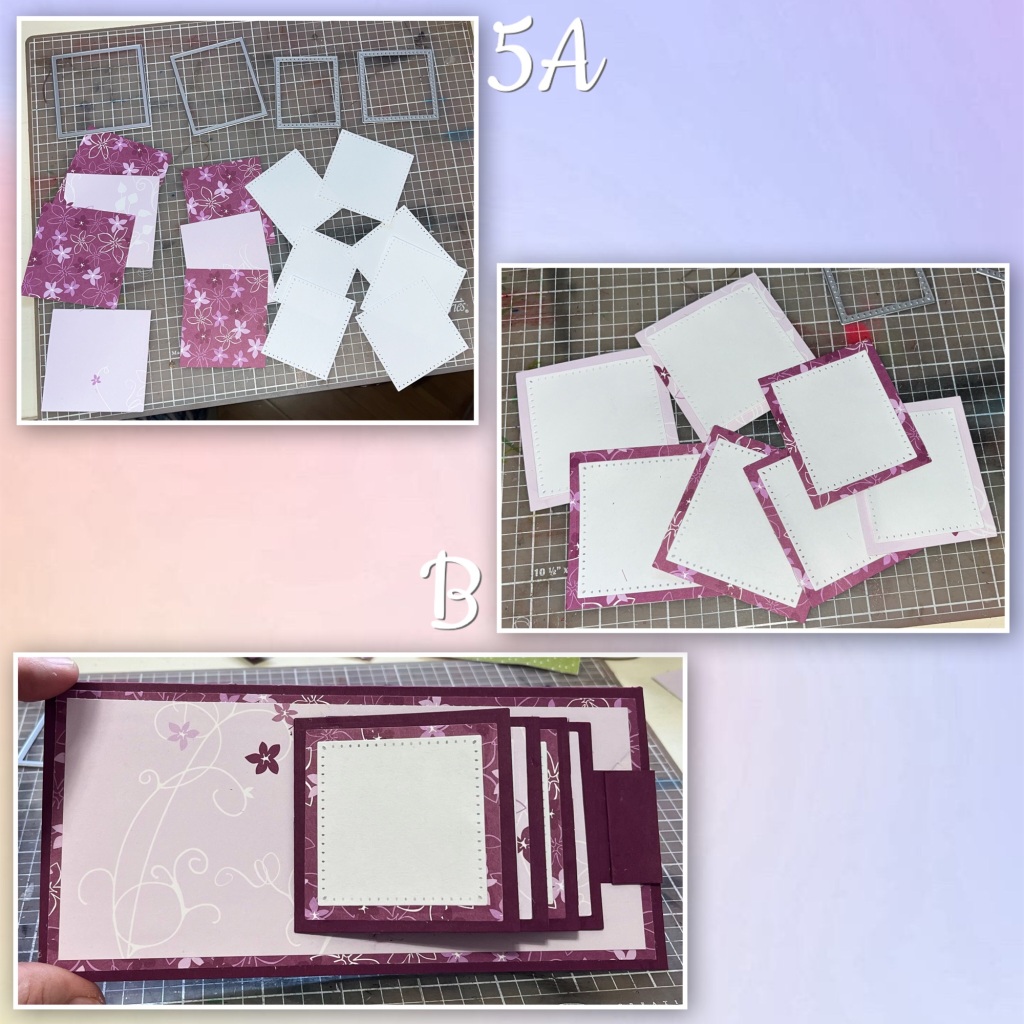
1A- the patterned paper is double sided and from the same retired SU paper pack
B- I cut the slimline card as shown BUT if I were making this card again I would keep the front and back panels separate for a bit longer, I would have the front panel have an extra tab that would run the long way across the top and attach it to the back after step 2B, because there is a mistake coming up because I did it the way shown.
C- I cut the patterned paper as shown. I cut the darker purple as a frame to cut down on the bulk and because I didn’t want to waste paper.
D- add the lighter paper over the darker frames.
2A- I added the completed panels to the front, and inside as shown. Again this is leading to a big mistake. If I was doing this again, the top and bottom half of the card base would still be separate pieces and I would not have put the patterned paper panel on the inside yet.
B- here is when I first noticed my first mistake. Because I needed to cut the semi circle into the card base, I had to run the whole card folded through the Big Shot because the card was too wide when opened to run through the machine. And it was also too thick because of all the layers so I took a small corner of a cutting pad and just squeezed it in to cut the semi circle. So the semi circle didn’t cut all the way, I had to use scissors to get it out and the cutting pad left a indentation on the front, and both panels on the inside.

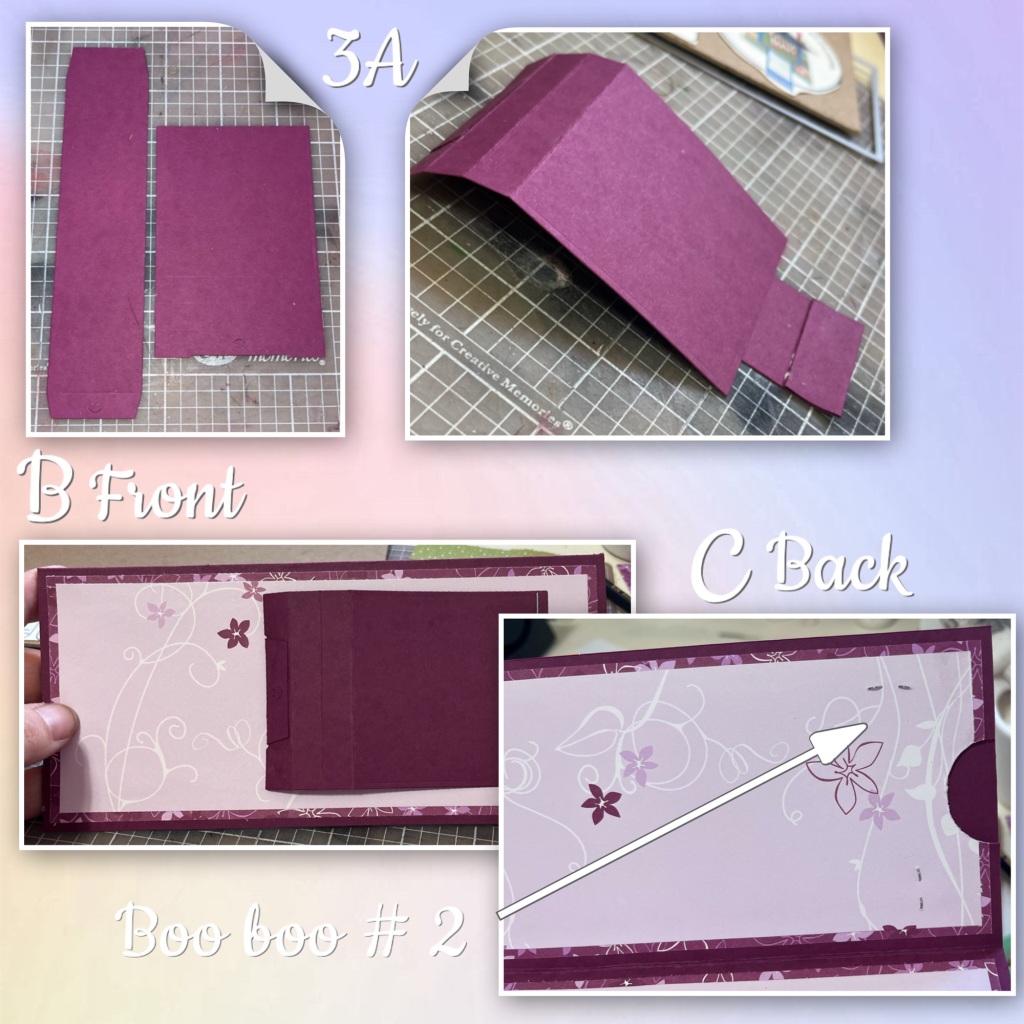
3A- I die cut the pieces to the Waterfall Card and started the assemble (Karen has a video tutorial on the product page at the link ⬆️ )
B- it is best to add the Waterfall mechanism to the card base using stables or brads.
C- this is where I noticed my second big mistake, the staples went through and are now clearly visible on the inside.
If I were making this card again I would have attached the card front to the back, and only put the patterned panel on the front then attach the Waterfall mechanism. Next I would have added the patterned panels to the inside.
4- I continued on adding the panels to the Waterfall mechanism

5A-using the dies shown from the Waterfall Card set I cut pattered paper and white pieces as shown. Also layer them as shown.
B- add these squares to the waterfall pages.
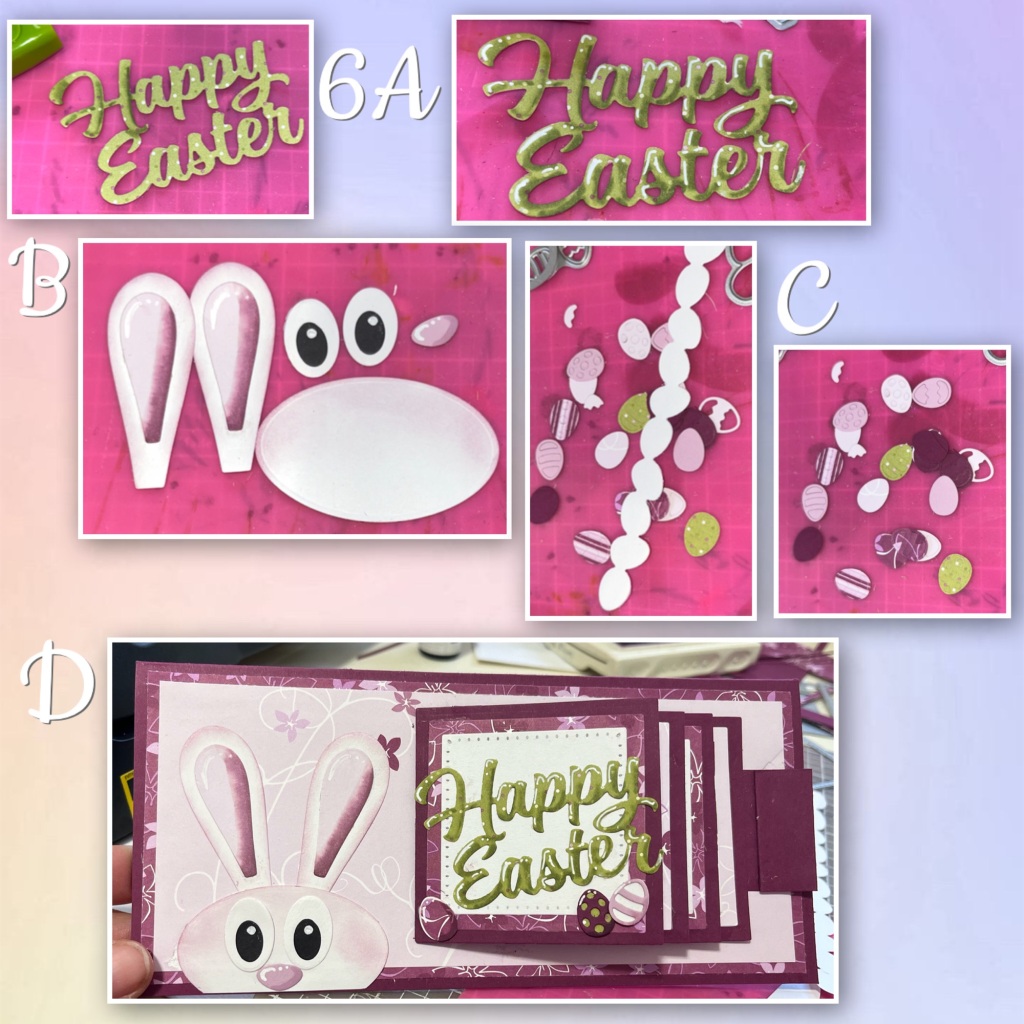
6A- I diecut the Happy Easter from the green patterned paper. I used an alcohol marker (retired Stampin Up) a white Gelly Roll pen to add shading and highlights.
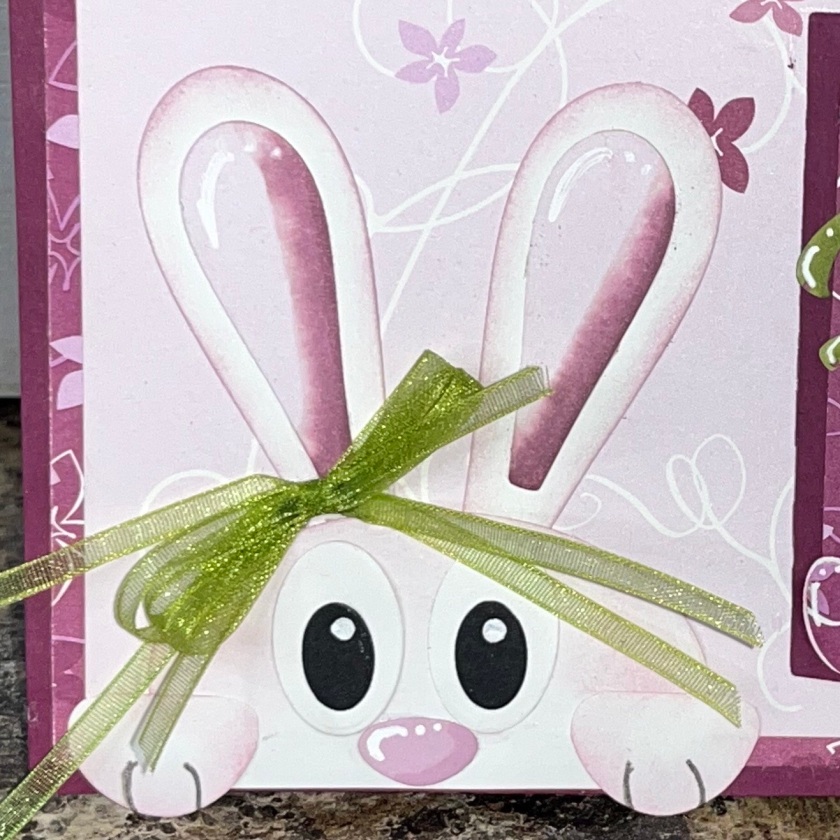
B- I diecut and assembled the bunny pieces from Animal Add Ons 5, I used a purple alcohol marker, and white Gelly Roll pen on the ears, and I also sponged the bunny pieces with a light purple ink (retired Pale Plum from SU)
C- I diecut and assemble the Easter Eggs from the Easter Borders set. I added shadding and highlights with the same makers that I have been using.
D- start adding pieces as shown. I wanted it to look like the bunny was peeking out from below the card.
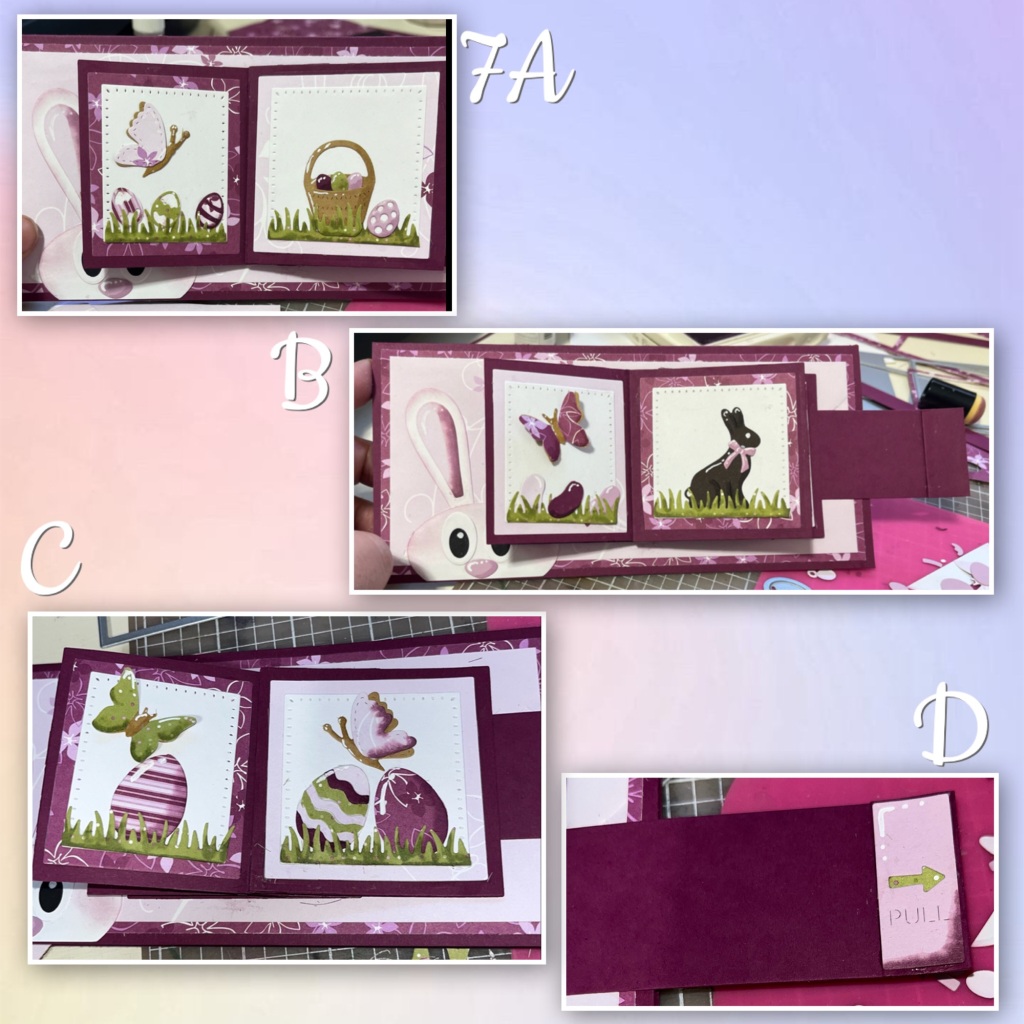
7A- I started decorating the pages. The basket is from the same Animal Add on set as the bunny pieces. The butterfly is from Butterfly Collage Add on. To make the butterflies I cut them out of the same light brown as the basket and the patterned paper. I trimmed the body off the patterned paper piece then added to the brown piece slightly off set.
B- the jelly bean and chocolate bunny are from the Easter Charms set
C- the large eggs are also from the Easter Charms set.
D- I added the the “pull” piece and arrow from the Waterfall Set to the pull arm.
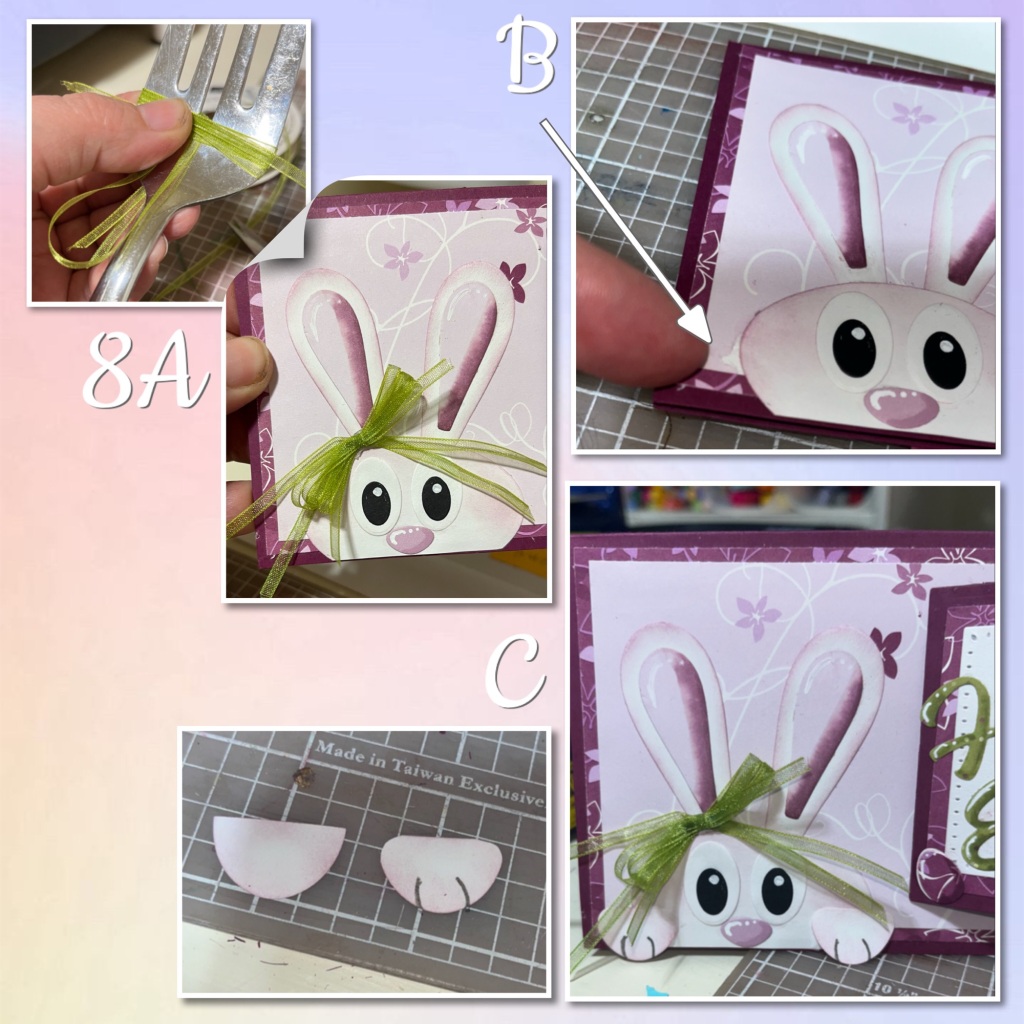
8A- I thought the front was missing a little something so I made a cheating fork bow. I just put a piece down the middle of the fork, wrapped a ribbon around the fork several times then tied the middle piece around the wrapped piece. and added it to the bunnies ear.
B- I almost missed another mistake. When I adhered the bunny head, it wasn’t straight so I took it off the straighten it. I accidentally ripped the paper below. So I added a little piece of adhesive to the ribbon and stuck it too the ripped piece so the rip would stay covered.
C- I thought the bunny was missing something so I added paws so it would help with the look of it peeking over. The paws are actually the tips of the pink part of the bunny ears.
I was having so much fun I decided to carry on with the inside. Also I still need to find a way to cover the staples.
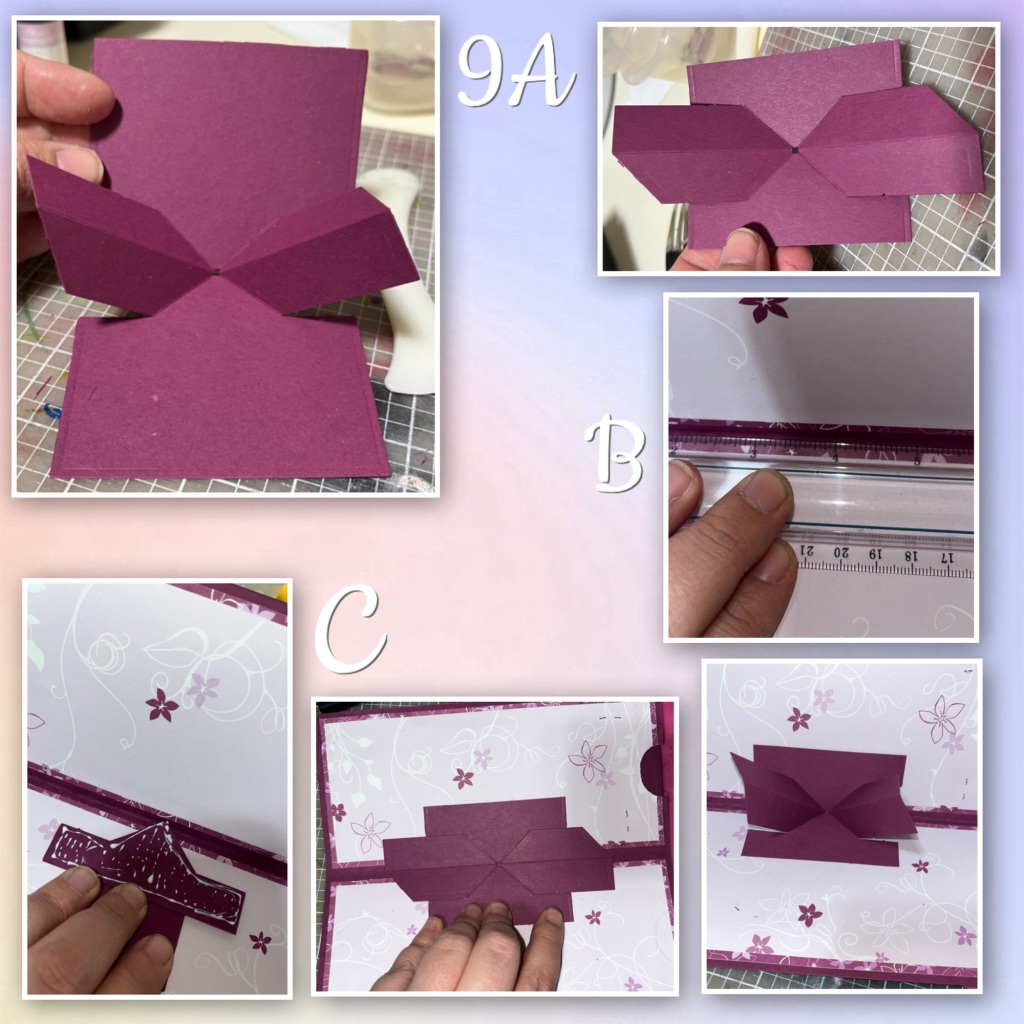
9A- I diecut the mechanism for the Little Twist Label dieset. (Karen has a video tutorial on the product page at the link ⬆️ ) So this is another situation where had I planned ahead I would have done it a bit different. The flaps on the mechanism were going to cover too much of the patterned paper so I decided to trim them as shown. I wasn’t sure if it would work. But it did.
B- I measured the very middle of the card in the fold
C- add the mechanism to the card base as shown.
10A- I cut out and assembled the following pieces for the inside mechanism
B- add the twist labels to the mechanism

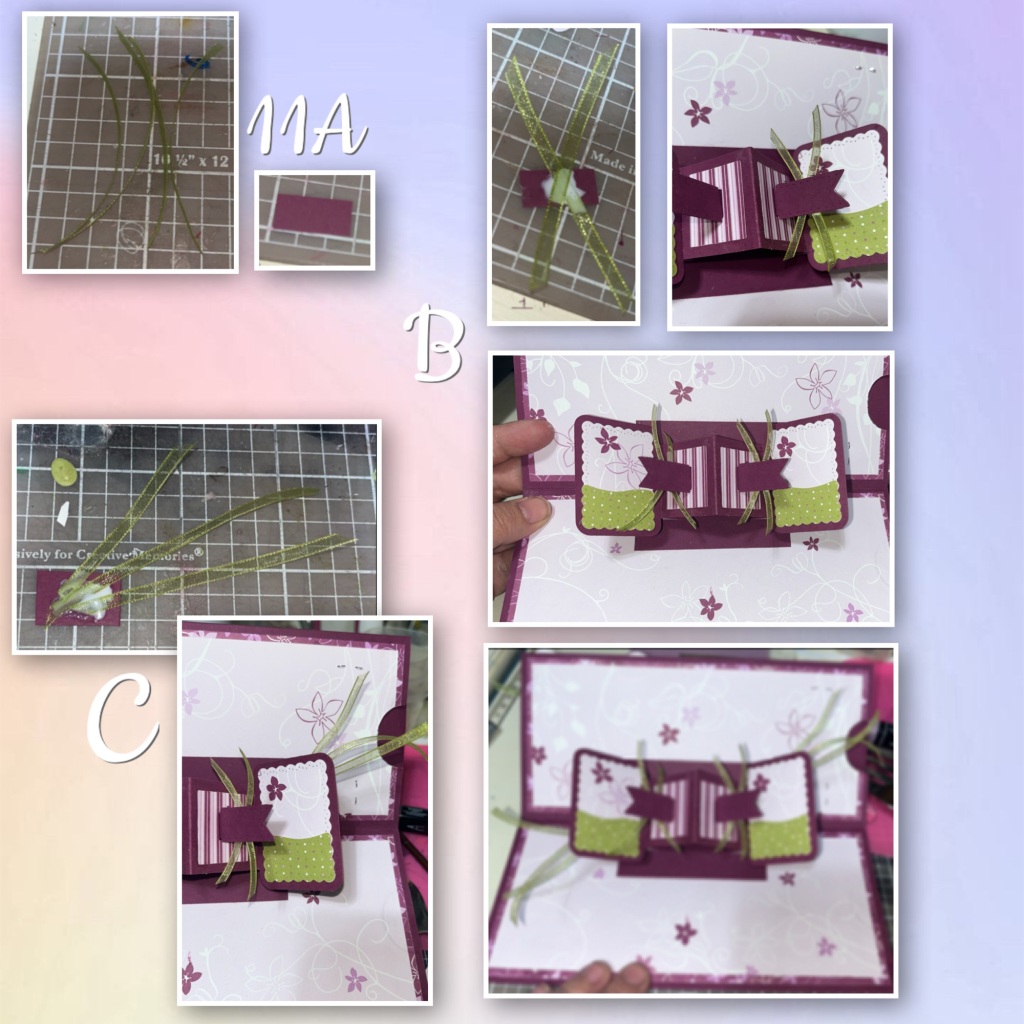
I really liked the green ribbon so I was I was trying to figure out a creative way to add them inside the card
11A-I cut 4 pieces about 2”, and 2 little rectangles about 3/4” x 1/4”
B- I criss crossed 2 ribbons behind each little rectangles then glued them behind the banners.
C- next I cut 6 – 4” ribbons, and 2 rectangles about 3/4” x 1/2” . I glued 3 ribbons to each rectangle as shown then glued on to the top right corner and one to the bottom left of the twist labels piece.
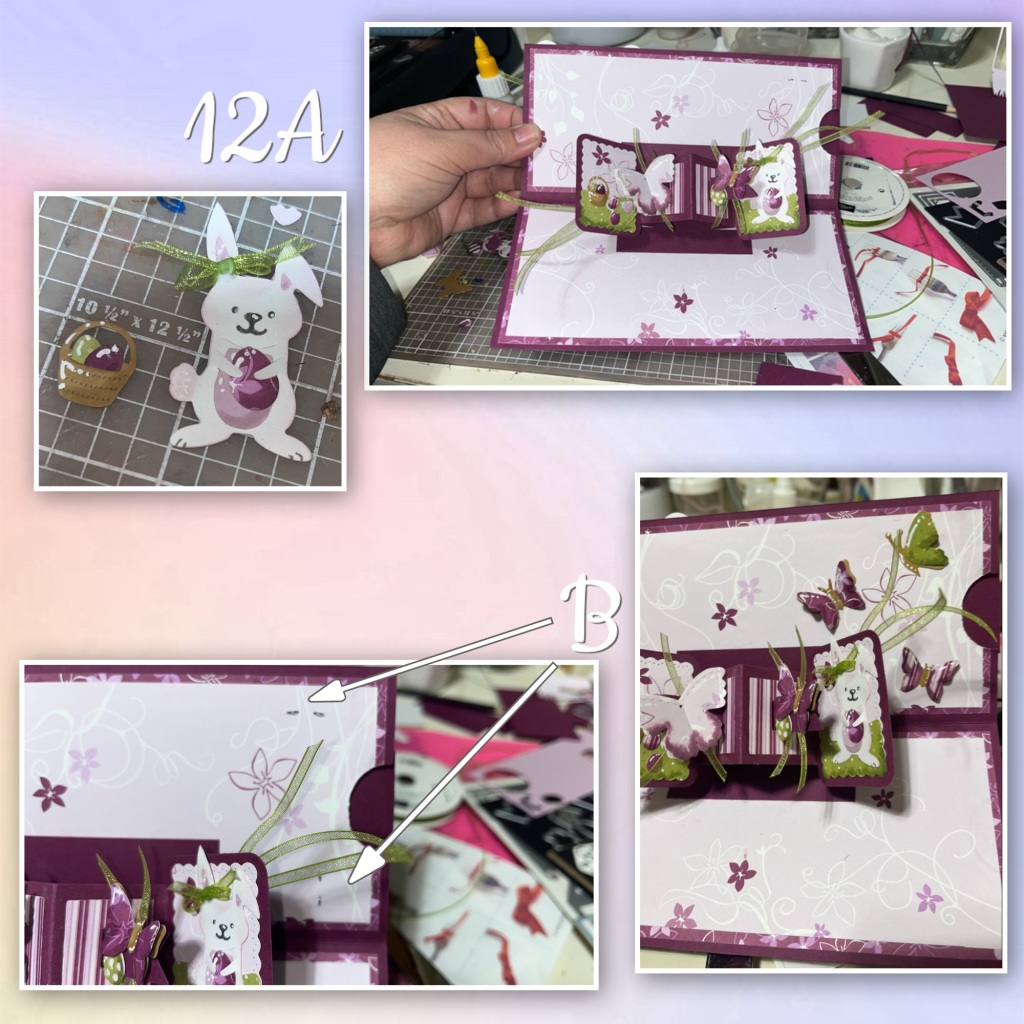
12 A- here comes the little bunny, he is from the Spring Animals dieset. I decorated the panels with the bunny, her basket and some of the eggs and butterflies left over from the front.
B- now it’s time to deal with these dang staples. I covered them with butterflies
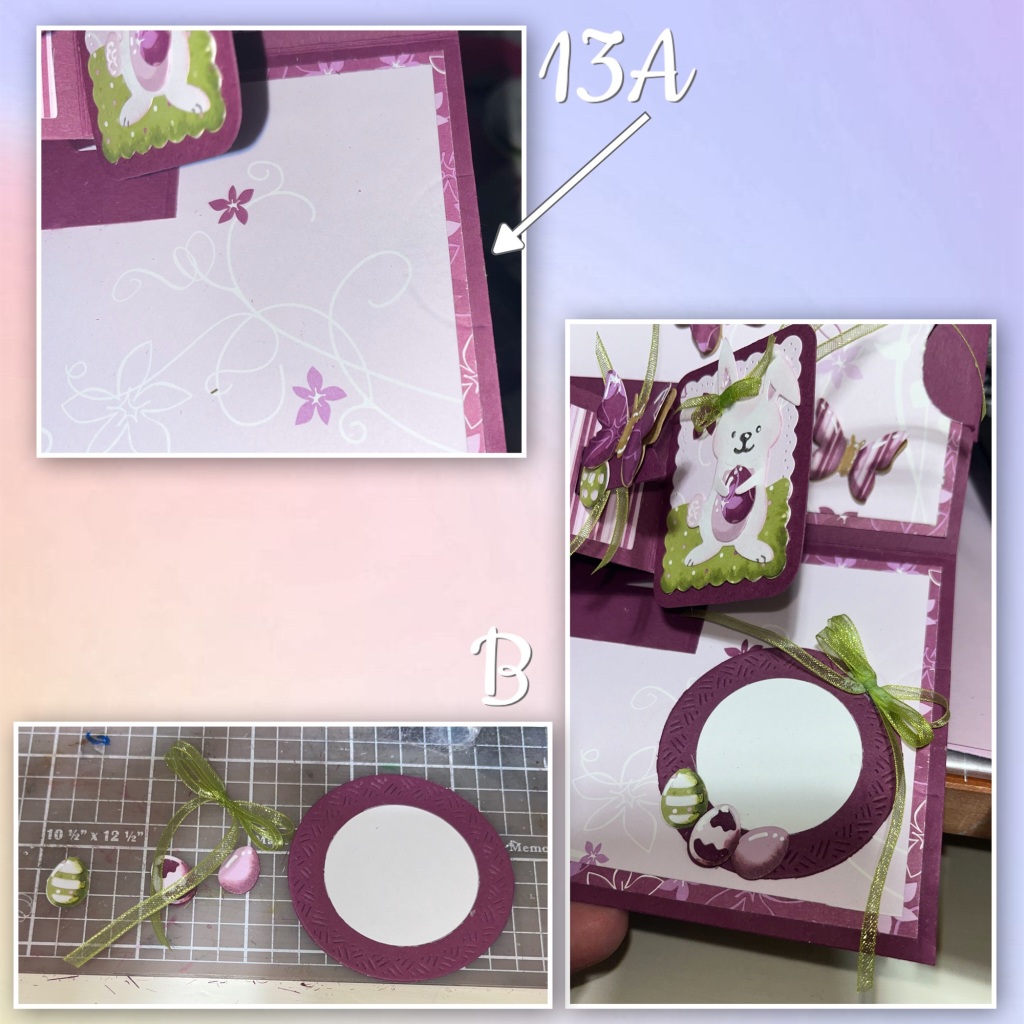
13A- it wasn’t very noticeable in the earlier photos but here is a dent in the inside from when I diecut the semi-circle out during step 2B
13B- diecut and layer 2 Circles Crosshatch, add a bow and a few eggs. It doesn’t completely cover the dent but it distracts from it.
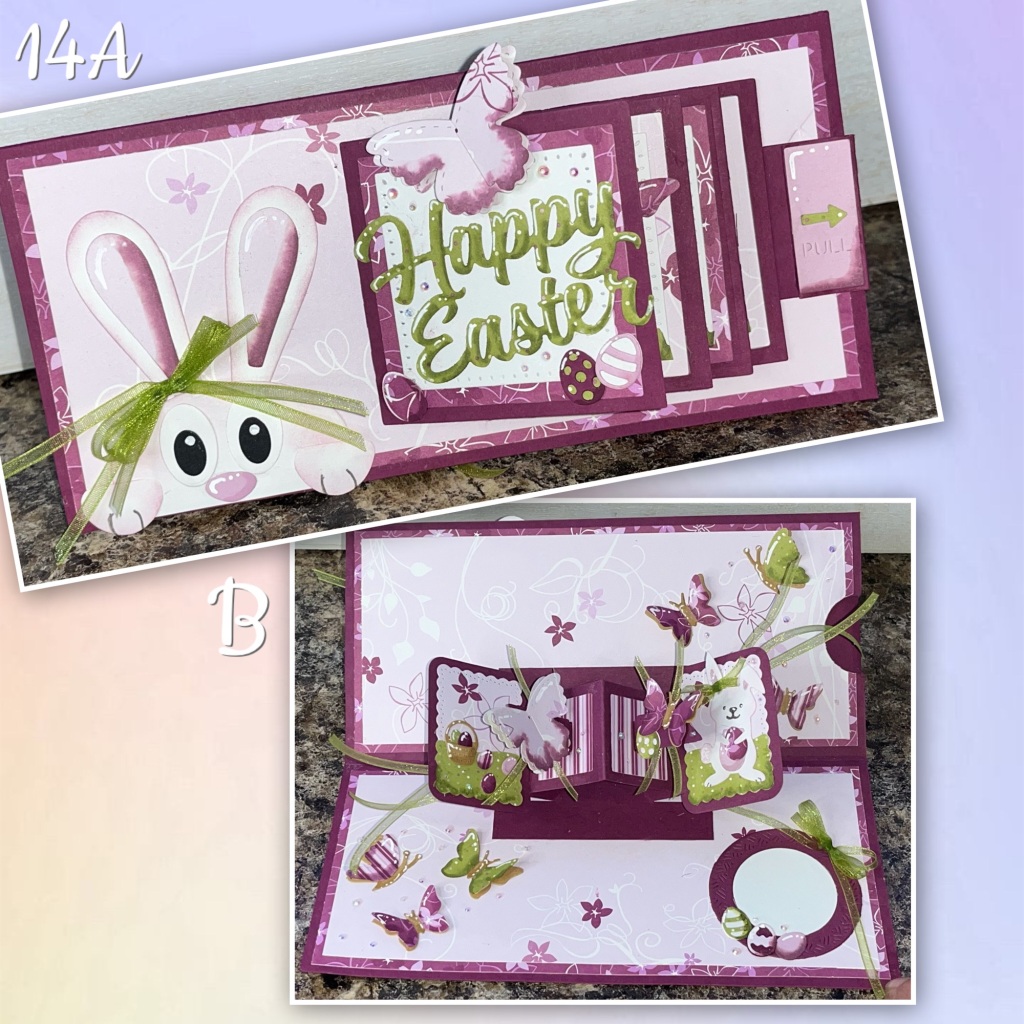
14A- I added another butterfly to the front and some little gems.
B- I added some butterflies to the bottom left to balance out the card. I also added some itty bitty gems.
Other Tools used

Lovely design, papers, steps you always offer us on your blog and this is a fabulous fold xx
LikeLiked by 1 person