

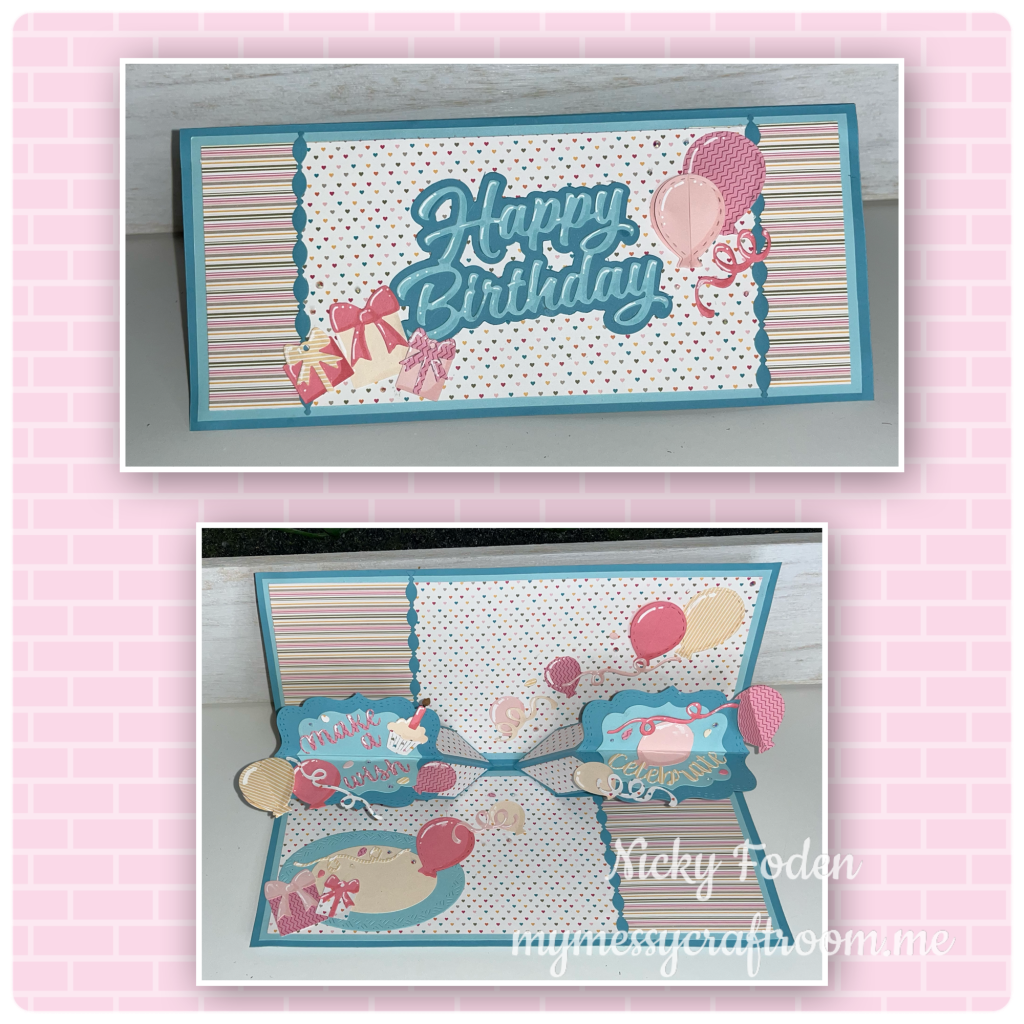
Happy New Year🍾 and welcome to my first blog post of 2024. This post is also the first Karen Burniston design team challenge and the challenge is “Raise it up” using the new Raising Platform dieset. I decided to have 2 mechanisms and placed them horizontally as opposed to vertically
All the fun is in the reveal, to see this card in action please check out my FACEBOOK page, feel free to join if you would like to share your own crafty creations. You can also see a video of this card on my INSTAGRAM page.
I decided I wanted to make a slimline card, and I chose the colour palette from the patternen paper shown in step 2
1A- cut the card base and panels as shown below
B- add the panels to the front, back, and inside.

2A- The patterned paper that I had to work with came from a 6” x 6” double sided patterned paper pack (retired Stampin Up) so I decided to use two patterns as shown, to span the length of the card.
B- I cut borders from Border Blends Party
C- Add the patterned paper and cover the seams with the borders as shown.

3A- Die cut two of the mechanism pieces from the Raising Platform dieset (Karen has a video tutorial on the product page at the link ⬆️ )
B- Measure and mark the center of the card, in the fold.
C- add the 2 mechanisms using the mark in the middle for reference, I also added patterned paper to the mechanism arms, matching the paper that is next to.

4A- Cut the labels from the Raising Platform set, and fold horizontally as shown
B- add the labels to the arms, and make sure that they are placed so when the card closes they don’t squash into each other. I had to try a second time, because the first time they were too close, the second time they were just right.

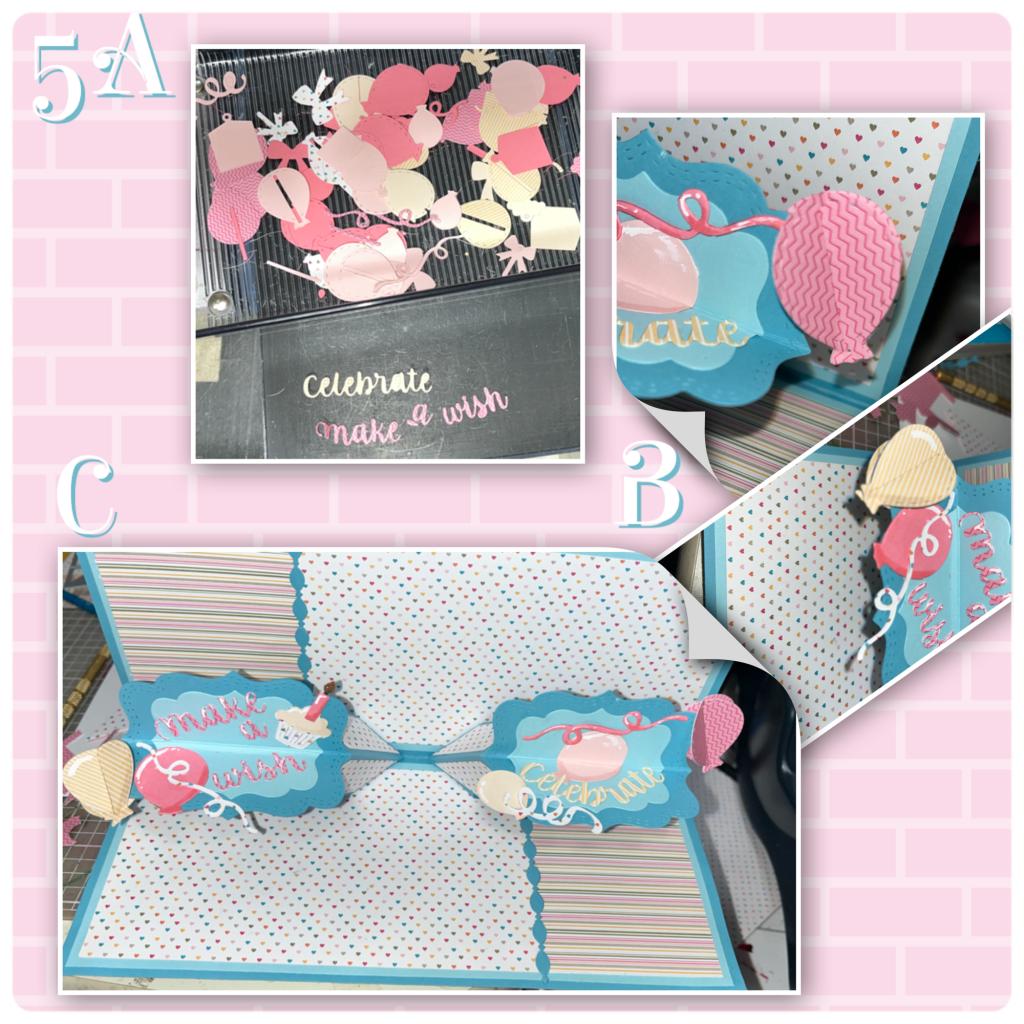
5A- I die cut pieces from the paper pack, and coordinating cardstock using the following dieset… Big Birthday Charms, Birthday Charms, Balloon Collage Add on, Word Set 2 Birthday, and the long curlies are from the Raising Platform set. I added shading with a Versa Mark Marker and highlights with a white Gelly Roll pen
B- add the elements to the card. To keep the double-layered balloons from being too floppy I adhered the ends of the balloons together and gave it a slight twist to add the look of dimension with out them flopping backwards.
C- this is what it looks like by this point.
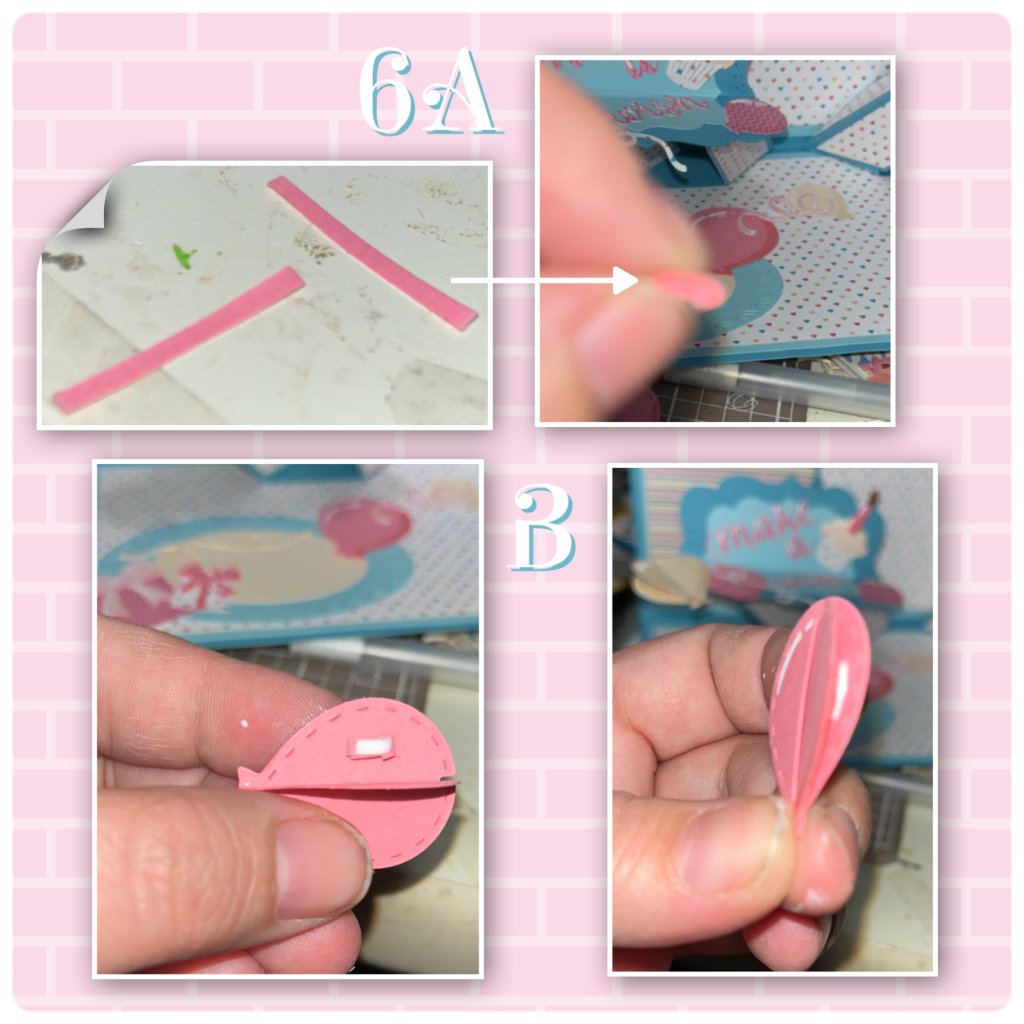
6A- I wanted some of the double-layered balloons to stay slightly opened after adding to the card so I took 2 thin strips of matching cardstock and rolled them up,
B- I adhered them between the layers to act as a spacer. I did this on both sides. (this balloon can be seen in photo 7A)
7A- add balloon and streamers to the card base. I wanted the balloons to look like they are floating up from the bottom left to the top right.
B- I layered a couple of ovals from the Ovals Crosshatch for a place to sign.
C- I added gifts and balloons to the ovals, and I also added itty bitty gems randomly around.

Now for the front
8A- add the same pattern papers as the inside, I chose a bit of a different configuration
B-add the same Border Blends to cover the seams.
C- I layered the Happy Birthday over the Happy Birthday Shadow and added more gifts and balloons as shown. Also added a few itty bitty gems. The light pink balloon as spaces in it like the balloon in step 6

Finished card.

Dieset used
Other Tools Used

Your card is beautiful and am so appreciative of the tutorial!! Have pinned to refer to when I get my set! This is so delightful with all of your added balloons and lace die cut! Really beautiful and inspired me to purchase!!
LikeLiked by 1 person
thank you for the details – lovely card!
LikeLike
Spectacular design, and love your special way of showing us how to do it on your blog.. I look forward to another year of your inspiring work. x
LikeLiked by 1 person