

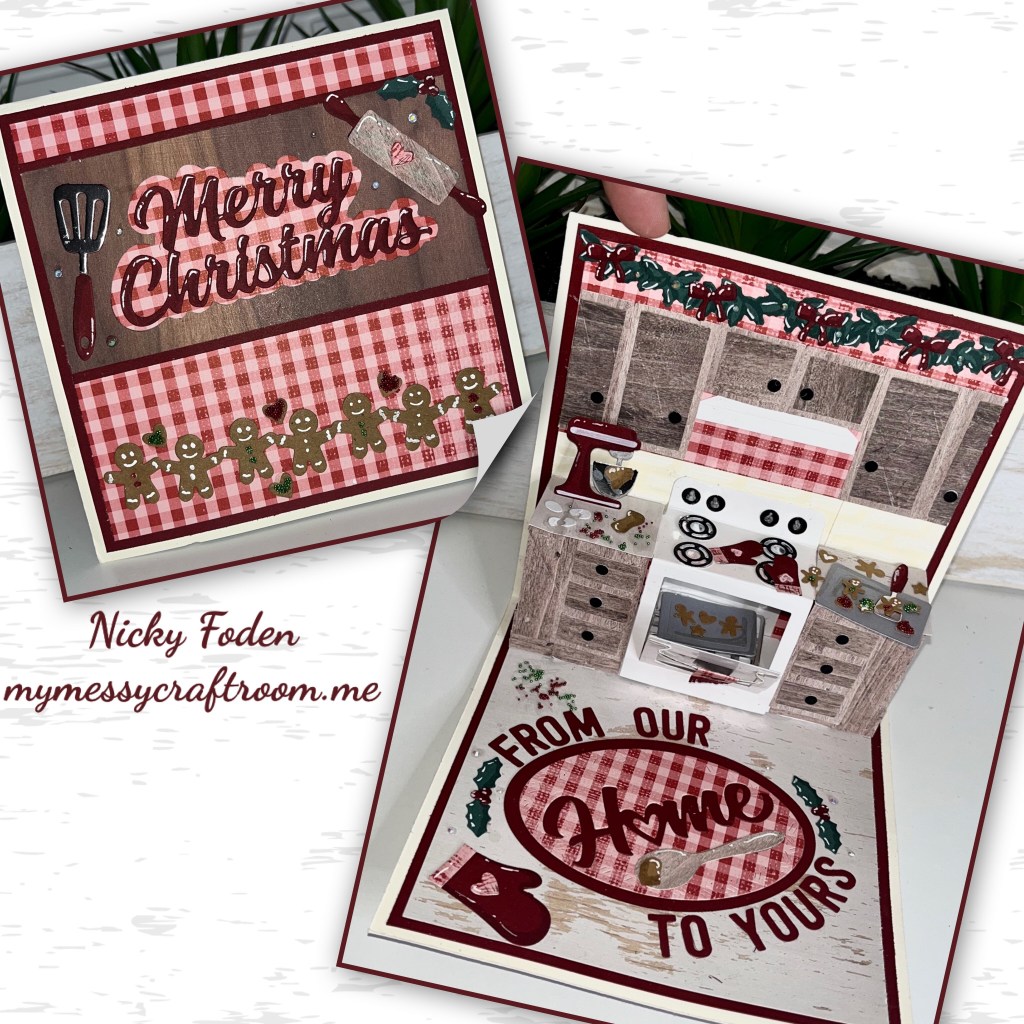
Hello crafty friends, it’s time for the Karen Burniston Design team challenge and this months challenge is “What’s Cooking?” and we were to use the Oven Pop Up dieset on our cards. I decided to make it a bit rustic, and I thought it would be fun to make a bit of a mess, if I were baking there would most defiantly be a mess. This is what I came up with.

All the fun is in the reveal, to see this card in action please check out my FACEBOOK page, feel free to join if you would like to share your own crafty creations. You can also see a video of this card on my INSTAGRAM page.
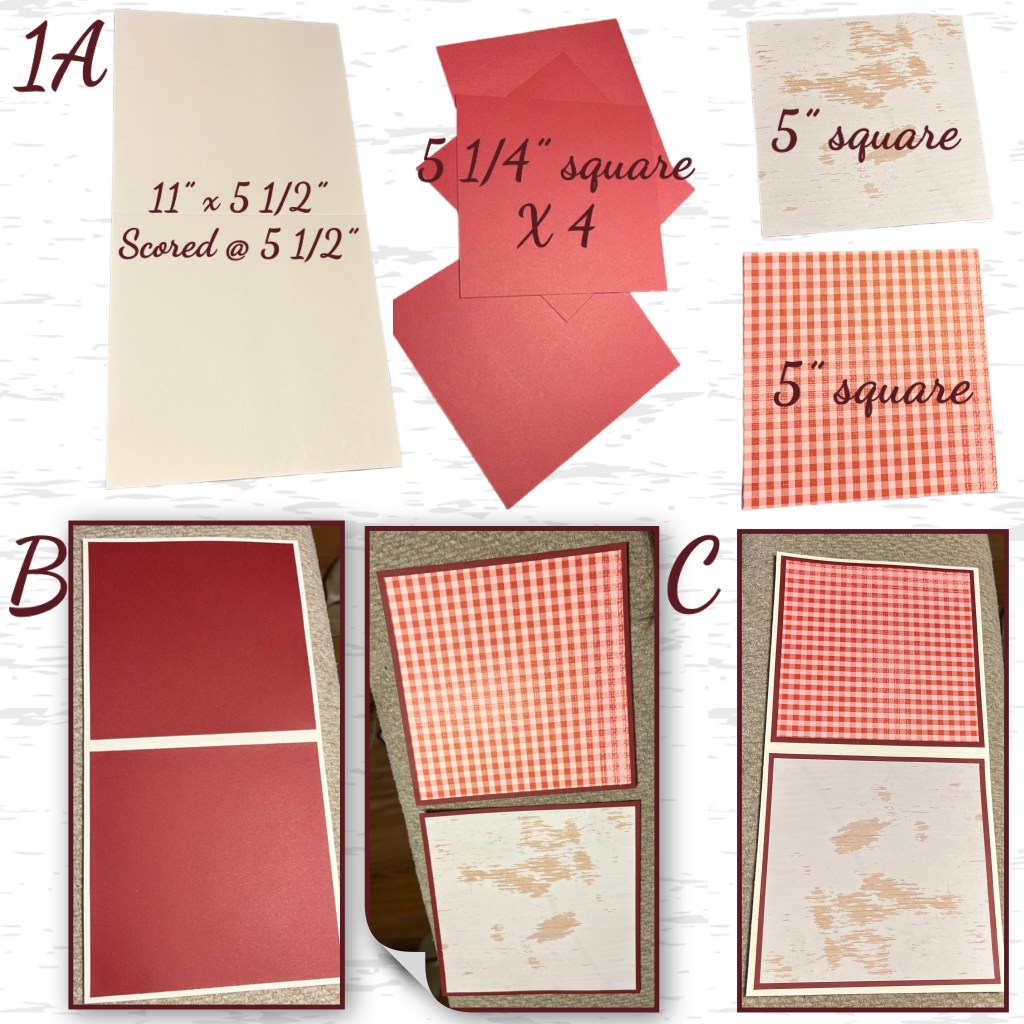
I decided to make a 5 1/2” square card, all the wood grain paper and plaid paper are retired Stampin Up. The solid colours are from my stash.
1A- cut the cards base and panels as shown. The vanilla card base was pretty light so I felt the need to add the panels to the front, back and inside.
B- I added the red panels to the front and back sides of the cards.
C- layer the panels as shown and add them to the inside of the card.
2- Diecut the pieces from the Oven Pop up, and the Oven Extras and start to assemble (Karen has a video tutorial on the product page at the links ⬆️ ) I kind of messed up the racks but I’m going to see if I can still make them work (waste not want not) I also doubled the tile background to go across the whole length of the card.

3A- I started assembly by adding the tile backsplash and the oven. I trimmed off the excess backsplash as both were too long.
B- I used itty bitty strips of paper to fix the oven racks from the back side.
C- I added 2 of the box platforms and added the oven racks. And started adding the cabinets.

4A- I wanted to add more cupboards to the sides so I used some thin strips of paper to extend them as shown ⬇️
B- the counter tops were noticeably uneven so I used box platforms and glued them to the wall and under the counter tops to even them out. Then added the white tops.

5- I continued to add accessories, then the upper cupboards. I thought it would be fun to make the counter tops messy so I added some cracked eggs and glue to look like runny egg whites. I added red and green micro beads to use as sprinkles and added them to the mess and to the tops of the ginger bread cookies. I also added garland from the Fireplace Extras 1 Christmas along the top.

6A- using ovals from the Ovals Crosshatch I layered the plaid and red ovals. I cut “Home” from the Home Sweet Home dieset out of the center and added it to the inside of the card.
B- I cut “from our to yours” from the Mini Alphabet and Numbersset. The used the Baking Charms, The Holly leaves are also from the Fireplace extras set.

7A- I cut a 2 1/2” x 5” wood pattern paper and added red strips to the sides. I added the Merry Christmas and the Merry Christmas Shadows and the Baking Charms . I added the gingerbread man border from Christmas Borders 1 along the bottom. I added a few heart cookies with sprinkles as well.
B- they are hard to see but I added a few gems to the front and inside.


Dieset Used
Other Tools used

Great card. I love your wood grain cabinets. My kitchen looks like that a lot especially after cooking sweets which I prefer over savory.
LikeLiked by 1 person
Great card! Appreciate the directions! That’s a lot of work. Definitely a keeper
LikeLiked by 1 person