

What’s better than one beach bar, what about 2, or one beach bar and one surf shack? I thought it would be fun to make a little beach scene.

All the fun is in the reveal, to see this card in action please check out my FACEBOOK page, feel free to join if you would like to share your own crafty creations. You can also see a video of this card on my INSTAGRAM page.
1-3 I created a gate fold card using the dimension below
3- make sure when adding the second panels to the main card base the side with the gusset fold stays on the left.

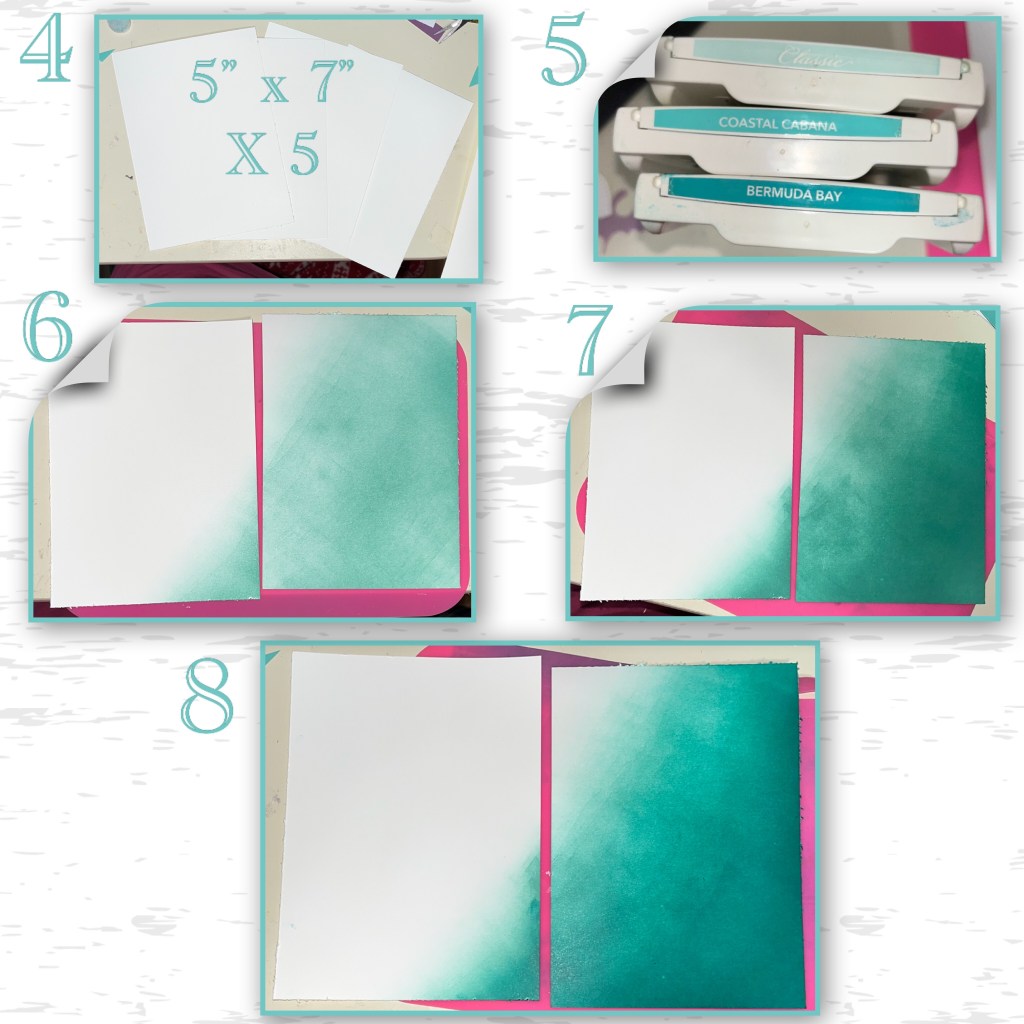
4- cut out 5 white panels, I’m only colour three in these steps (I actually ended up needing a 6th)
5- pick out 3 inks in 3 shades, a light, medium, and dark shade
6- starting with the lightest shade, and a brayer, roll on the lightest shade as shown
7- do the same with the medium shade, leaving some of the lighter shade still showing along the shore line
8- next with the darker shade, leaving some of the medium shade and lightest shade still visible.
Hint- if you go lightest to darkest you do not need to clean the brayer between colours
9- pick 3 shades for the sand, a light, medium and dark
10- starting with the lightest shade and a clean brayer roll the ink on as shown, I like to leave a bit of white at the shore line between the sand and the water.
11- add the medium ink as shown
12- add the darkest ink as shown

13- I made a mess, I used Smooch spray in a dark brown and a white, both nozzles broke so I used a small paint brush to flick it on. I only used the brown on the sand, and I used the white on the water and the sand.
14- I die cut the panels using the largest rectangle from the Rectagles and Labels set.
15- add them to the card base
16- I used embossing paste along the shore line over the white to make it look like a crashing wave.

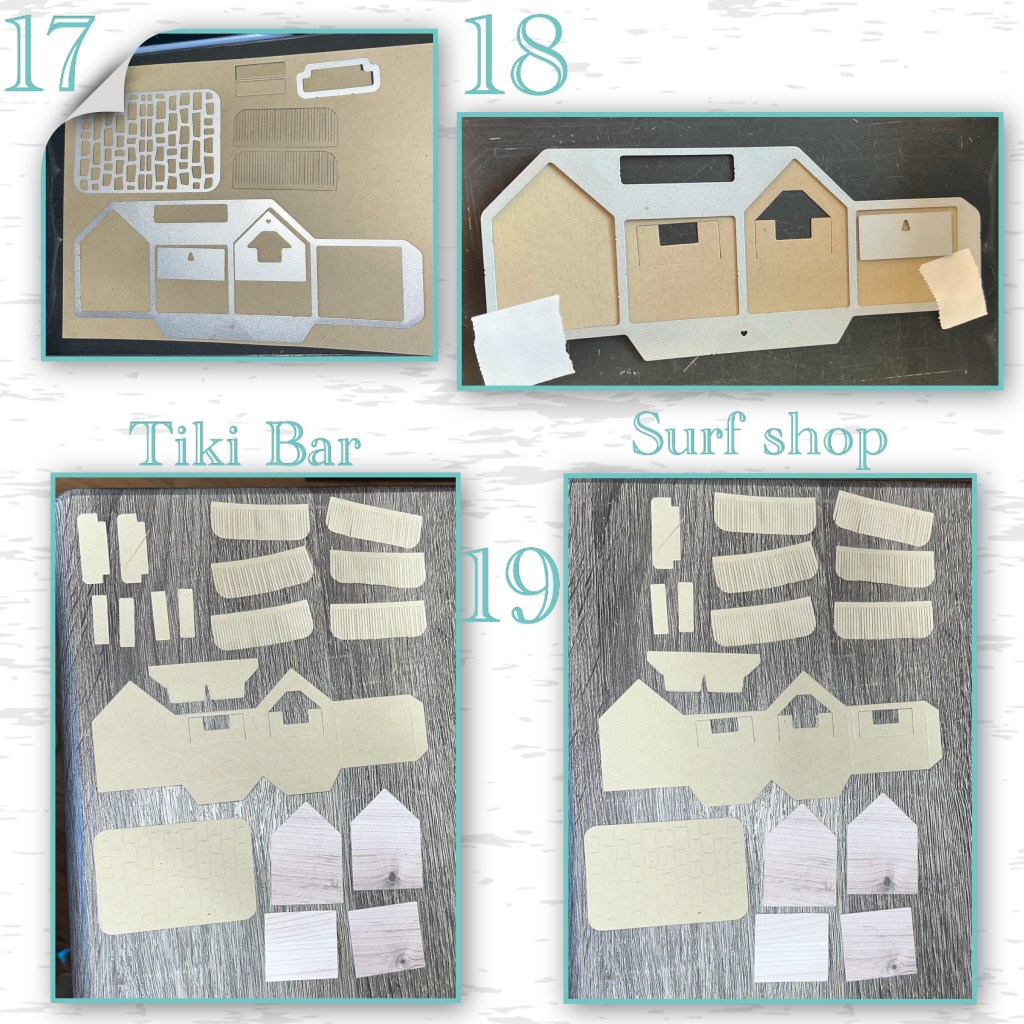
17- diecut the pieces from the Tiny House pop up set and the Beach Bar Tiny house add on
18- I decided to cut 2 windows out of the surf shack
19- I needed slightly different pieces for the bar and the shack, also I used the Dog House Tiny House add ons to cut out the wood grain paper.
21-23- Karen’s video shows all the steps on making the Beach Bar, but here are some photos of my progress (21- because of the layers I diecut the pieces from the front and the back. )

24-28- the SurfShack is the same as the bar but I added another window. Also I ended up cutting off the bar supports because the house wasn’t going to be on a fold.

29- i added the beach bar to the fold the same as adding any house (see video at the bottom)

I did have to do some trial and error to get the surf shack in
30- I needed 2 bam boxes (video link will be at the bottom)
31- trim off one of the flaps under the house
32- add the bam boxes inside as shown

33-ooops the Bam boxes are visible through both windows 🤦🏻♀️
34- I added an open side to cover one bam box
35- I added the crab with some cash in the front window

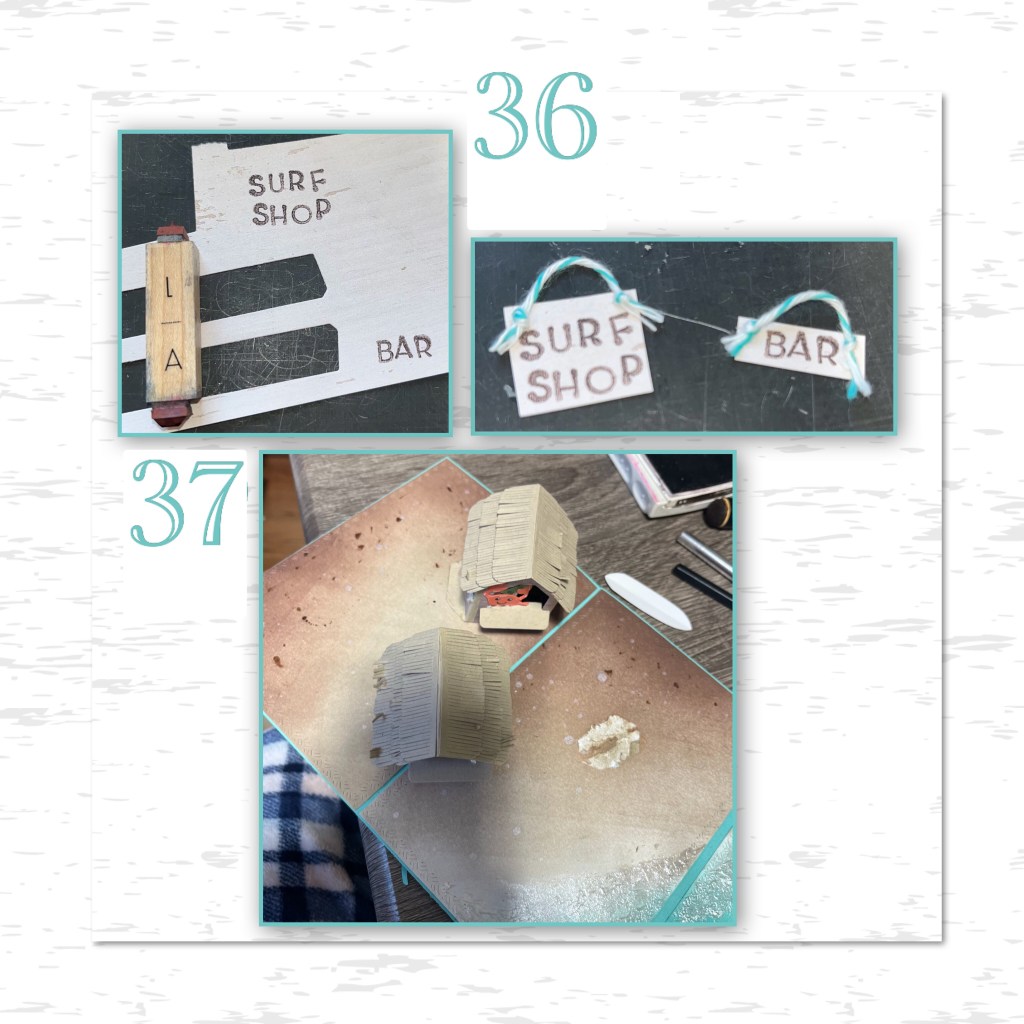
36- I thought the open sign was so cute I made a bar and surf shop sign with some itty bitty stamps I have and some bakers twine.
37- add the surf shack to the card by it’s flap on the left side. I originally wanted it closer to the water but it wasn’t popping open with one bam box so I had to remove it to add the second bam box.
38- I cut a surf board template, then made some different-looking surfboards using the beach borders and some flower pieces left over from another project.
39- the pieces used to make the towel, the fringe on the towel are actually cut with the Thatched roof die from the Beach bar set.

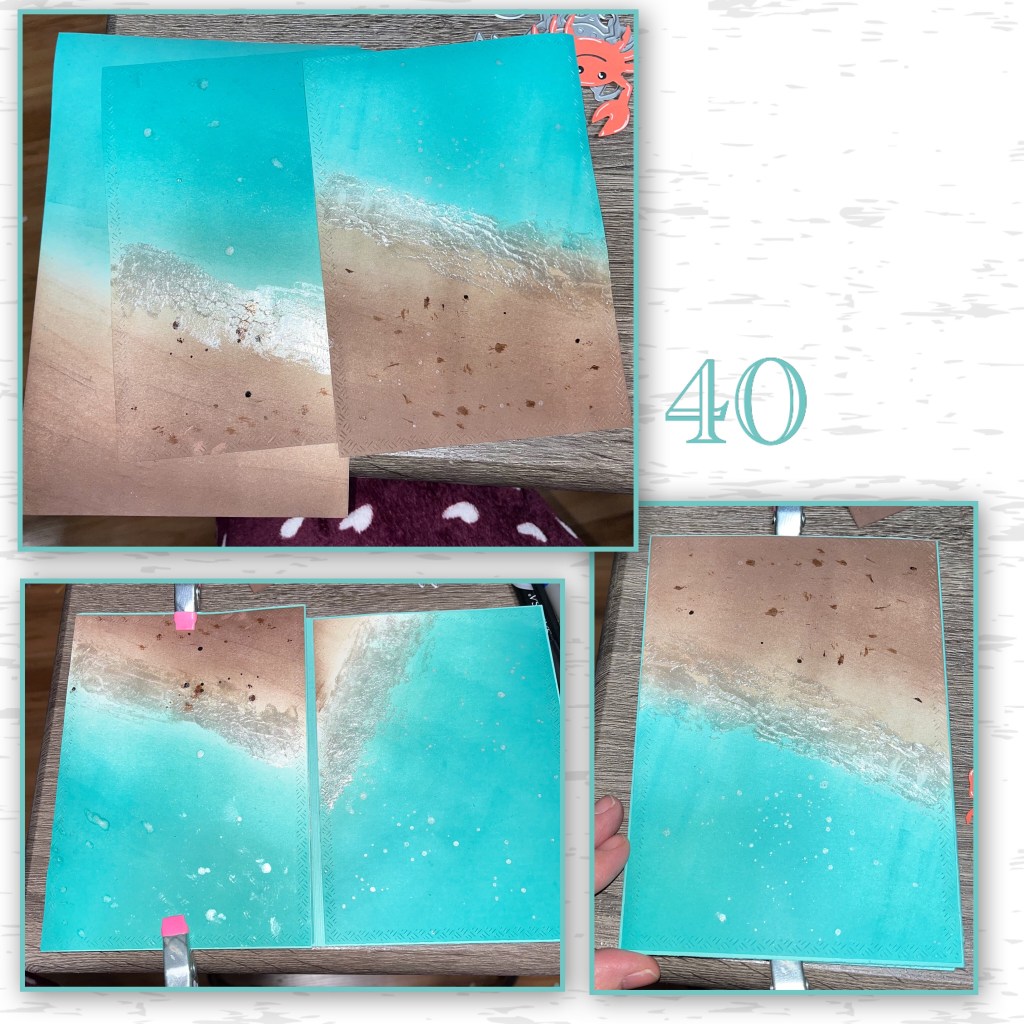
40- the extra white pieces from step 4- I linked up the same as I did in the early steps. One is going to be the front, one is going to be panel seen when you first open the card and the last one is for die cutting the words I will use and some of the bam box pieces. Die cut 2 of them with the largest Rectangle crosshatch die, add one to the front and one to the inside
41- make another bam box, I diecut the decorative pieces from the blue part of the extra piece that I inked up in the previous step. I also made another surf board. And die cut the crab family (all dies will be listed below) add the bam box to the card as shown. The palm leaves are from the Beach bar set. Word set 16
42- the coconut drink was made 2 small circles and the umbrella and stir stick form the Happy Hour set. I did have to trim the sides of the umbrella, and I bent the stir stick to make a straw.
43- add the drink to the largest crab and add to the Bam box surf board

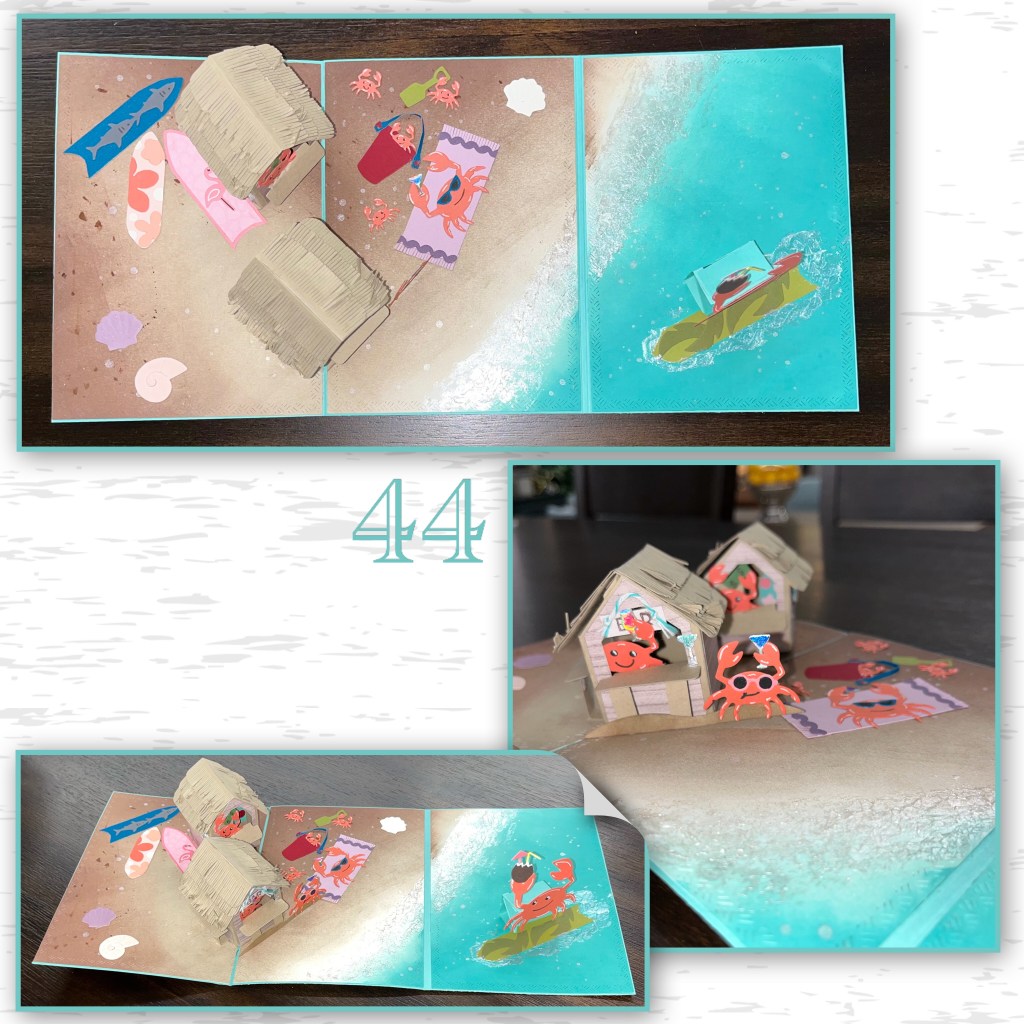
44- I added the decorative pieces to the card (I used the towel to cover my mistake)
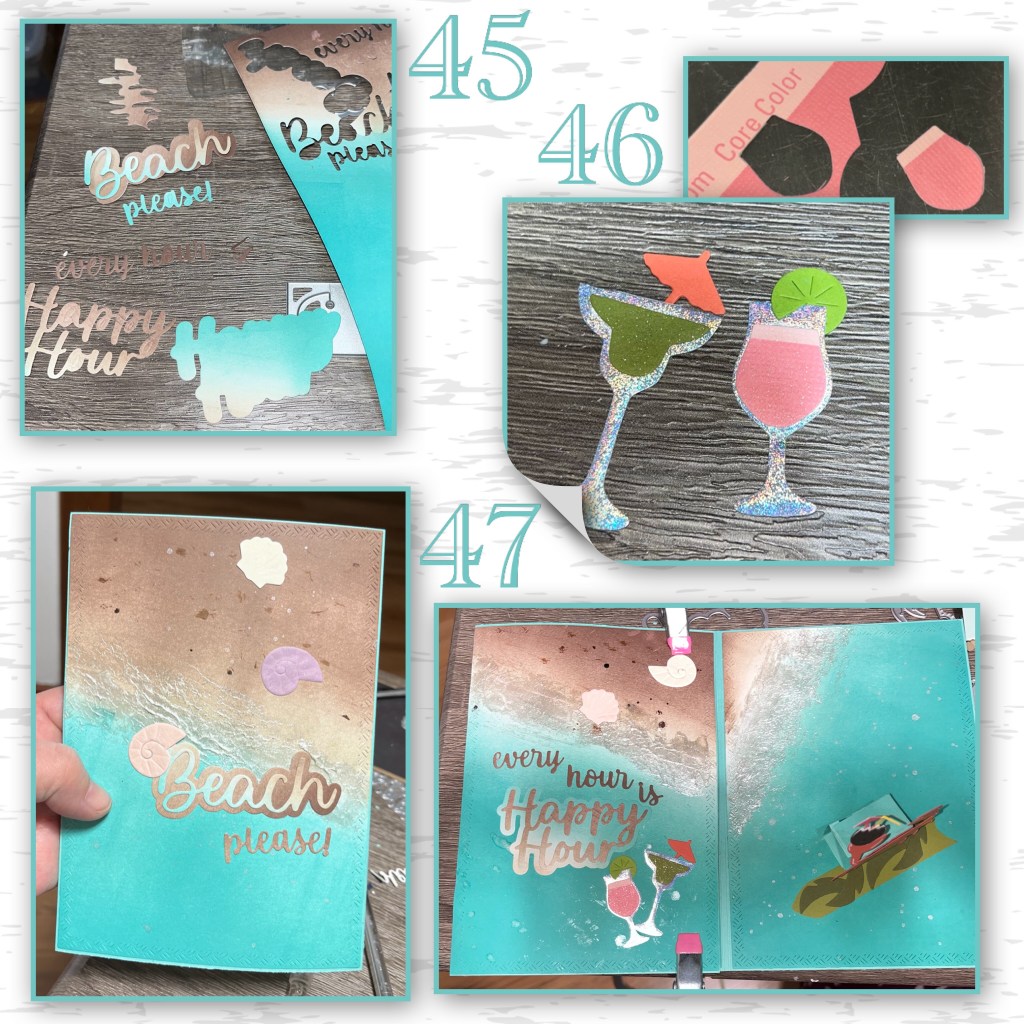
45- I die cut “Beach please every hour is Happy Hour” from the extra inked up cardstock.
46- die cut some cocktails from the Happy Hour die set,
47- add the elements to the card
48- as always I forgot to add the magnets so I had to slip a few in.

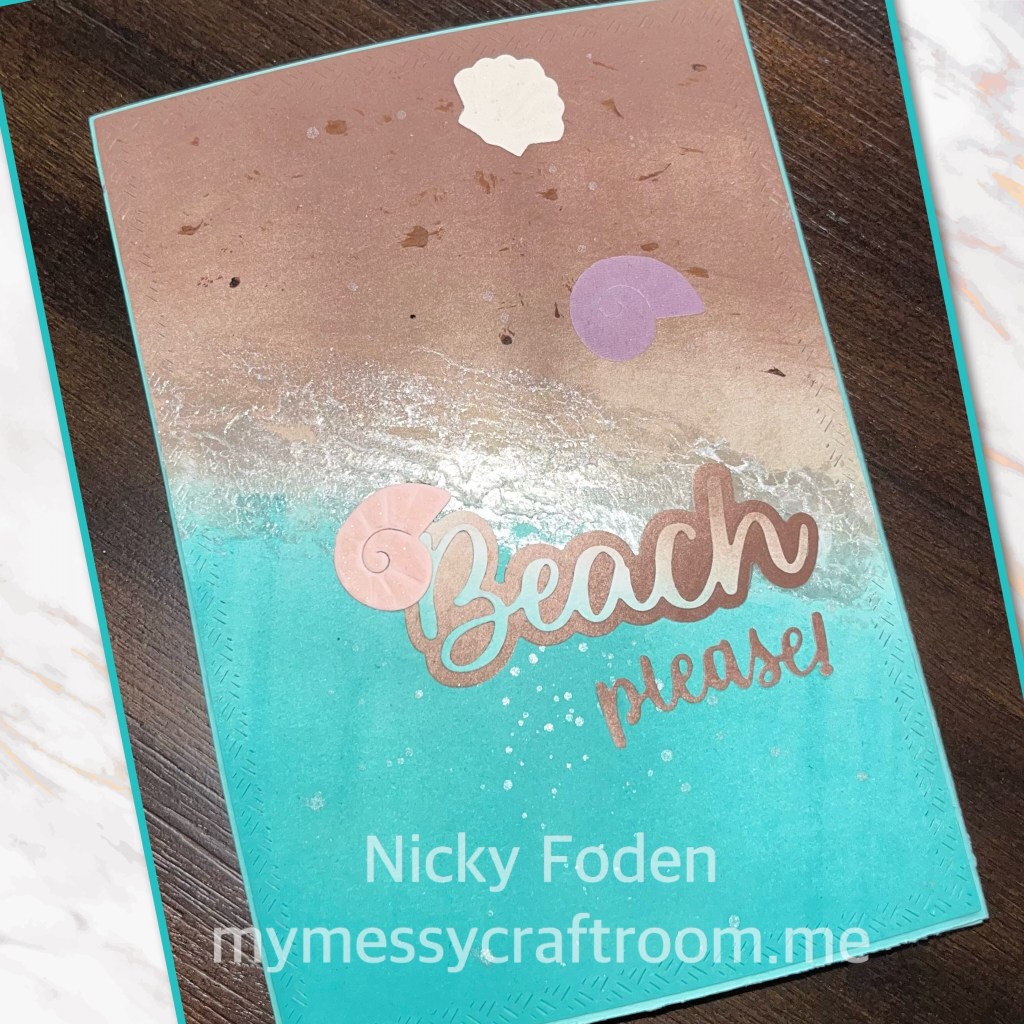
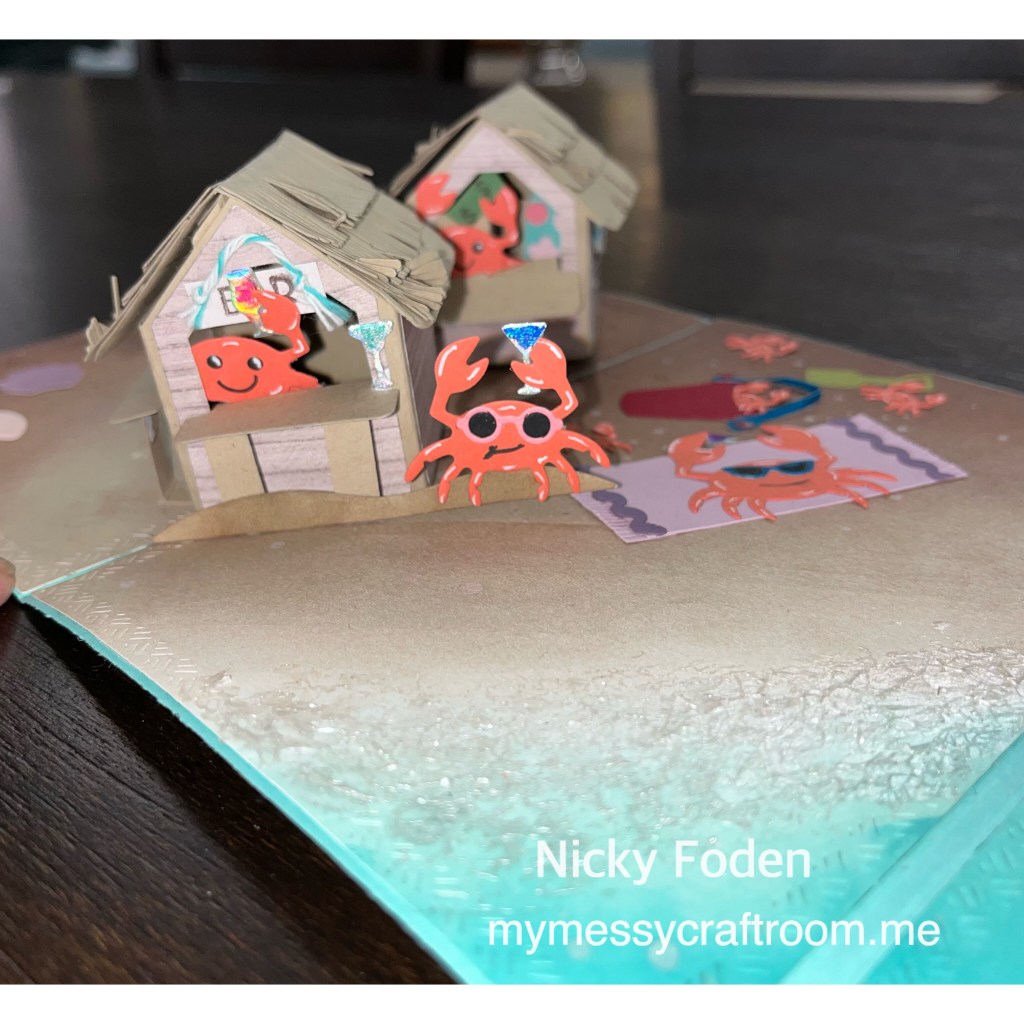
Front
First side open
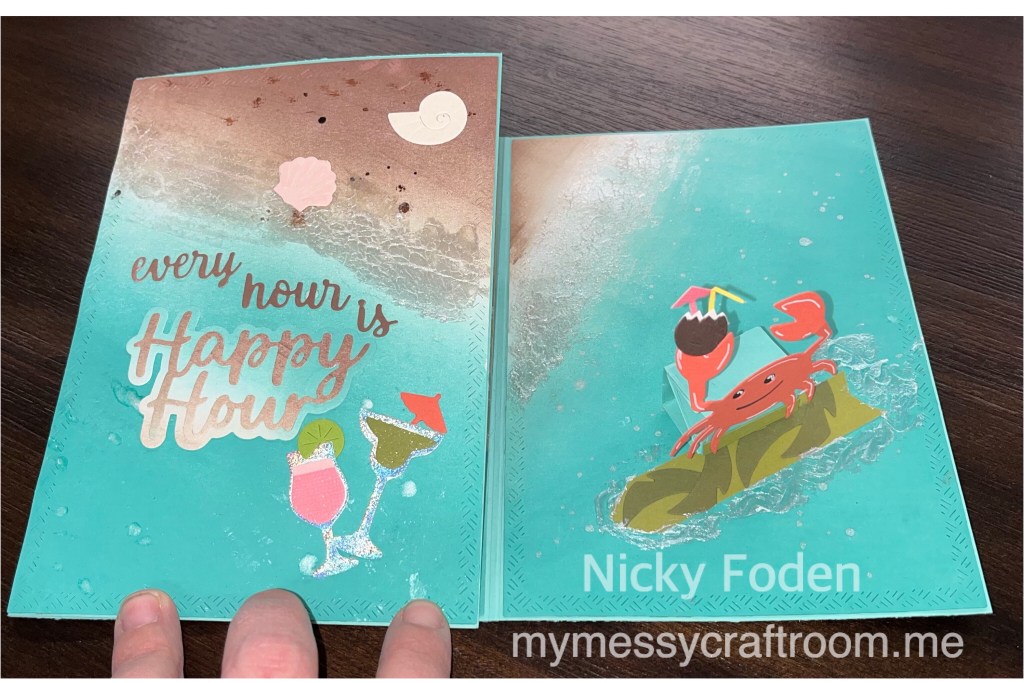
Completely open

Diesets used
Tiny House Video can be found here
Dog House Tiny House Add on used for wood grain diecuts, video for adding bam boxes to pop up the Surf Shack
Rectangles and Labels Crosshatch
Bam Box video can be found here
Beach Charms littlest crabs, flamingo and shark on surf boards
Sea Charms small crab and shells
Sea Animals medium crab
Ocean Animals largest crab
Tiny accessories 1 sun glasses
Adirondack Chair pail and shovel (mine is from a previously released set)
Tools
