

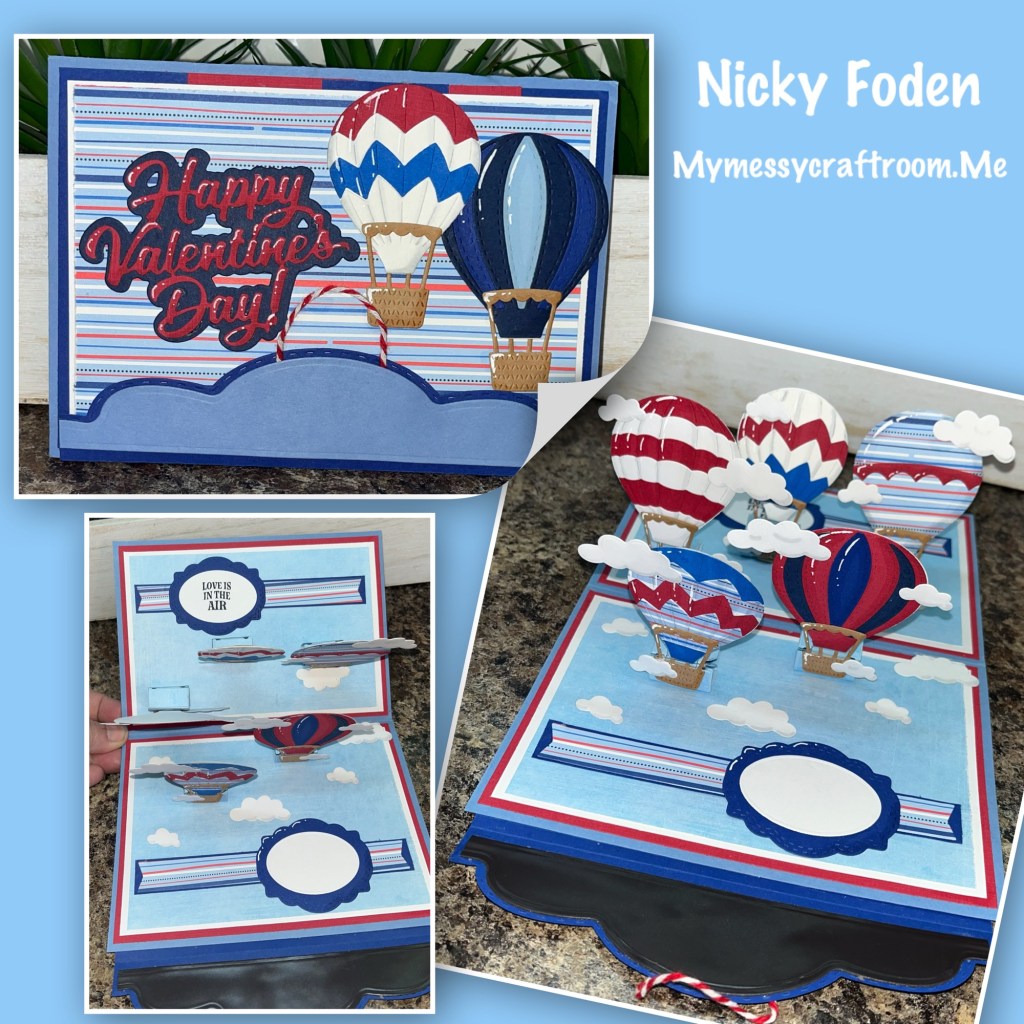
Hey hey crafty friends, I’ve got 2 bog posts in a row this week. Yesterday was BLOG HOP day, and today is Designer Challenge day. This months challenge is “Love is in the Air” so I decided to use the new Hot Air Balloon to make a Valentine’s Day card for my Husband (🤫 he does’t follow my blog lol)

All the fun is in the reveal, to see this card in action please check out my FACEBOOK page, feel free to join if you would like to share your own crafty creations. You can also see a video of this card on my INSTAGRAM page.
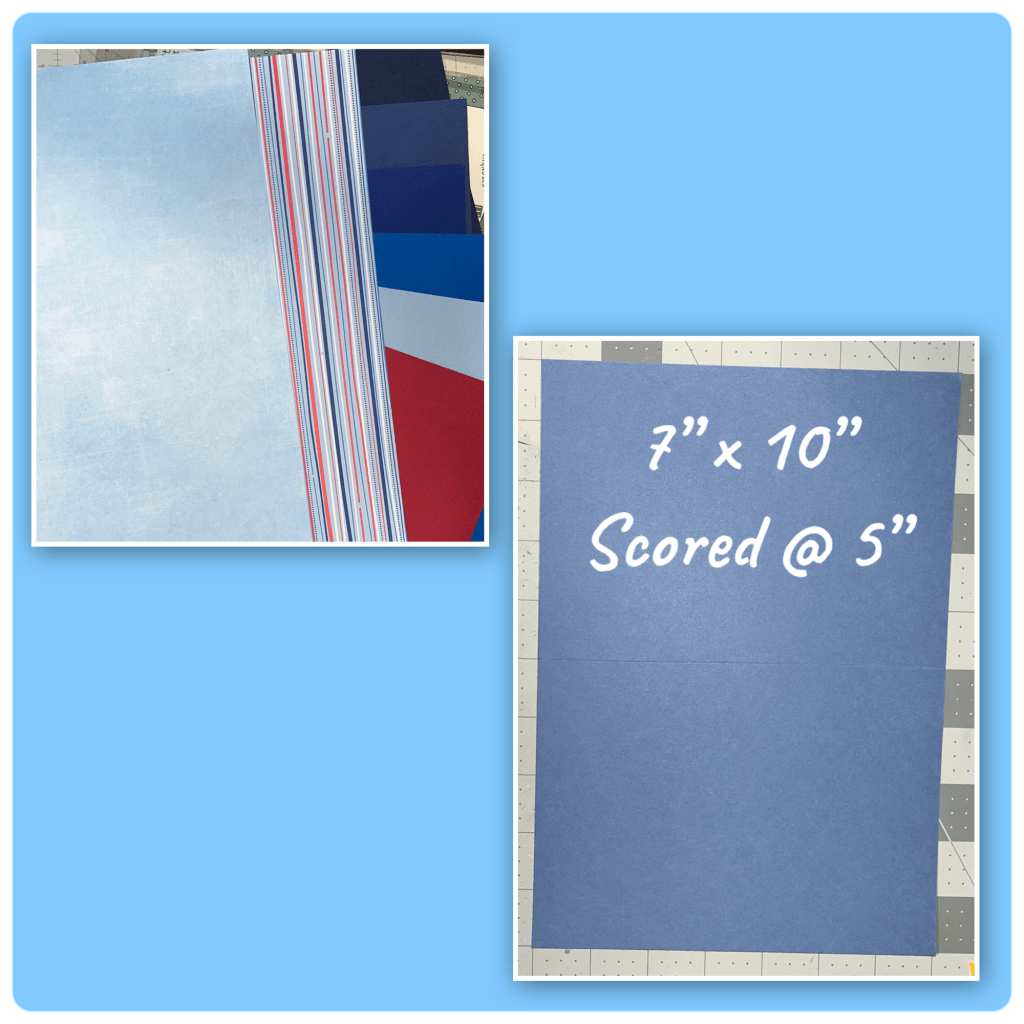
The first thing I did was pick this striped paper and then found some coordinating coloured cardstock. I found a slightly patterned blue paper to use as the sky. I made a 5”x 7” card using the dimensions below.
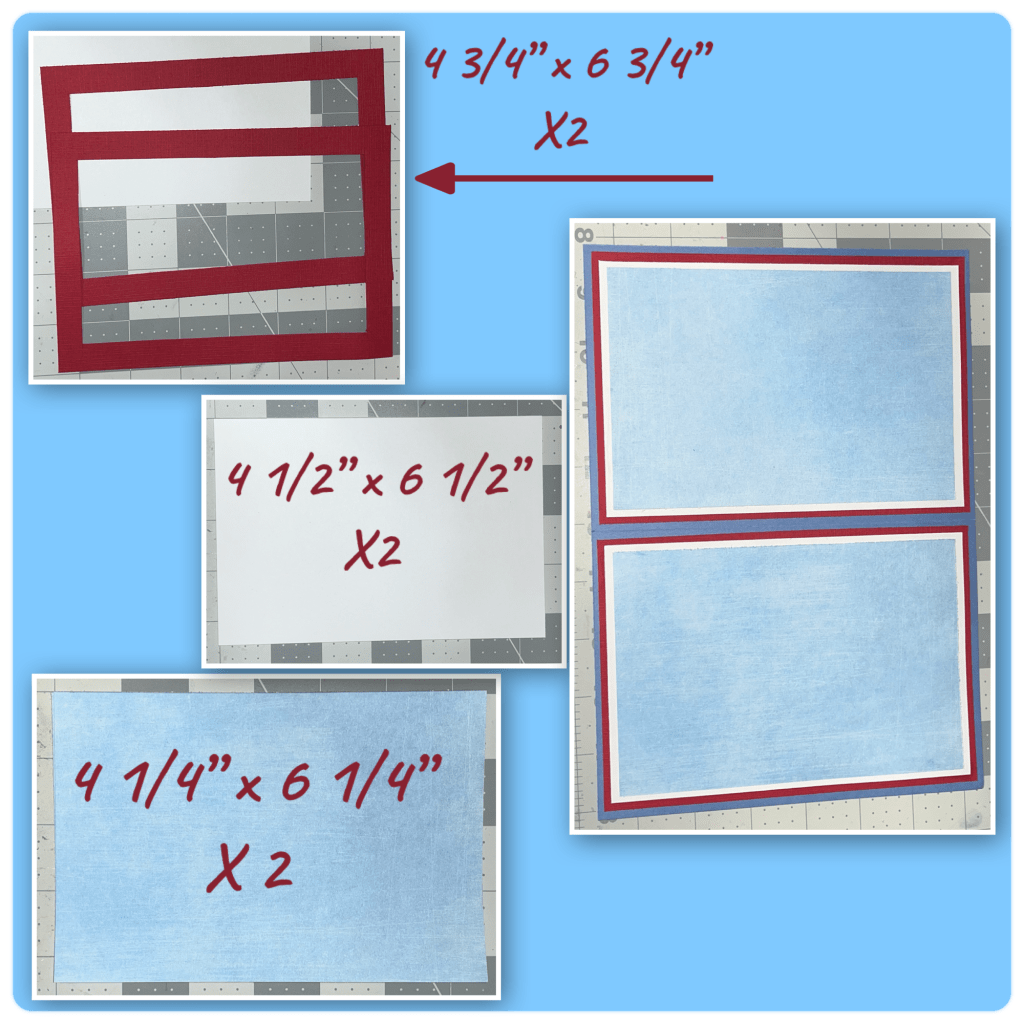
I started by cutting the layers for the inside as shown below. I cut the centers out of the middle of the red because I would need it for the balloons. I cut the other layers and added them to the cardbase as shown below.
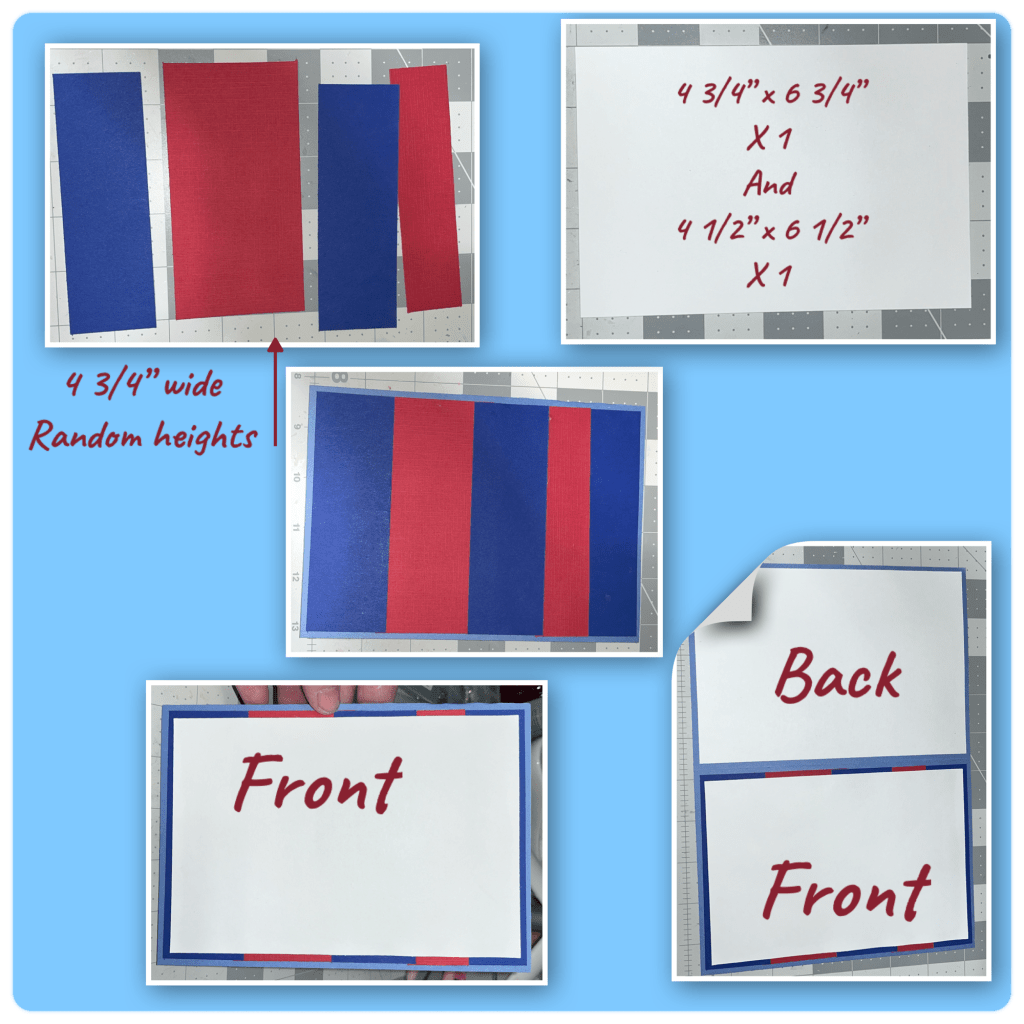
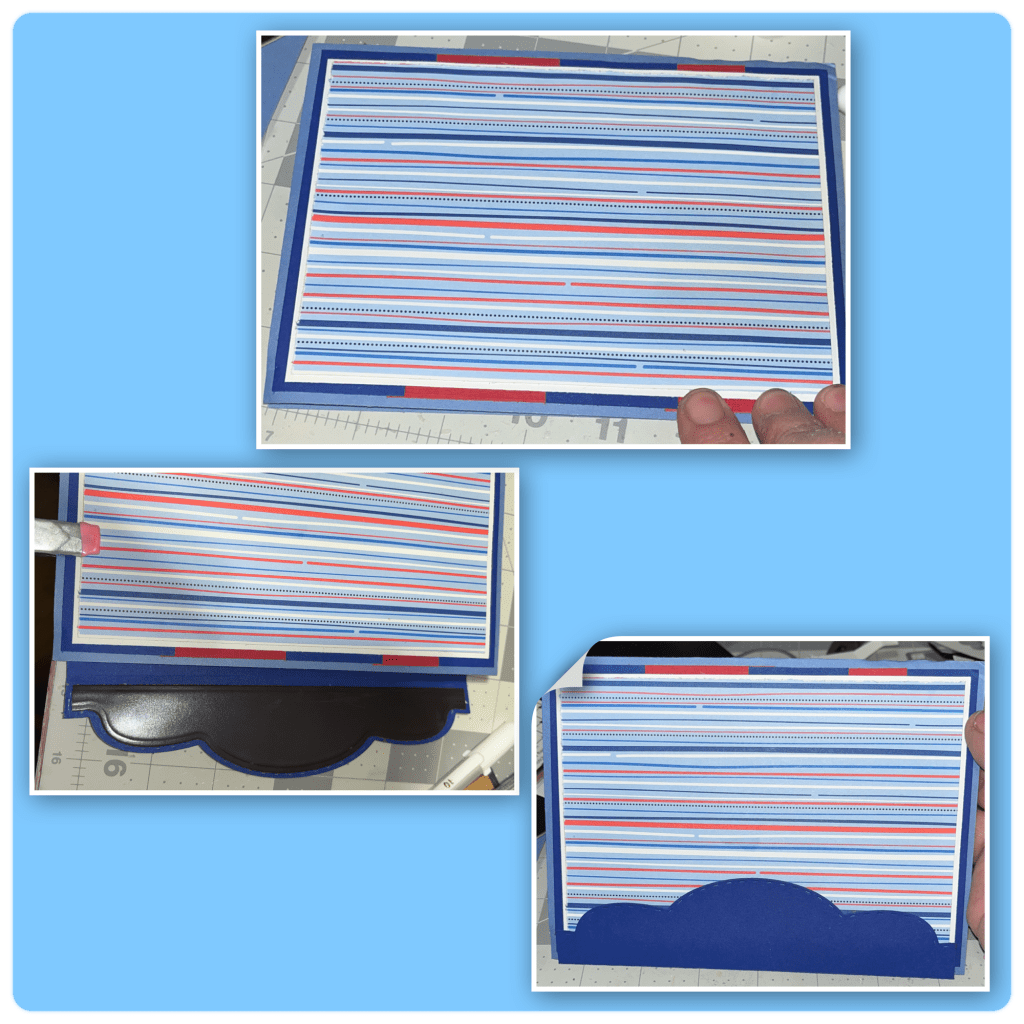
Because I only had one sheet of red cardstock I didn’t have enough to make a whole matt for the front of the card, so I made a striped background. I made the stripes random widths, and 4 3/4” high (opposite of what I wrote in the pic below)
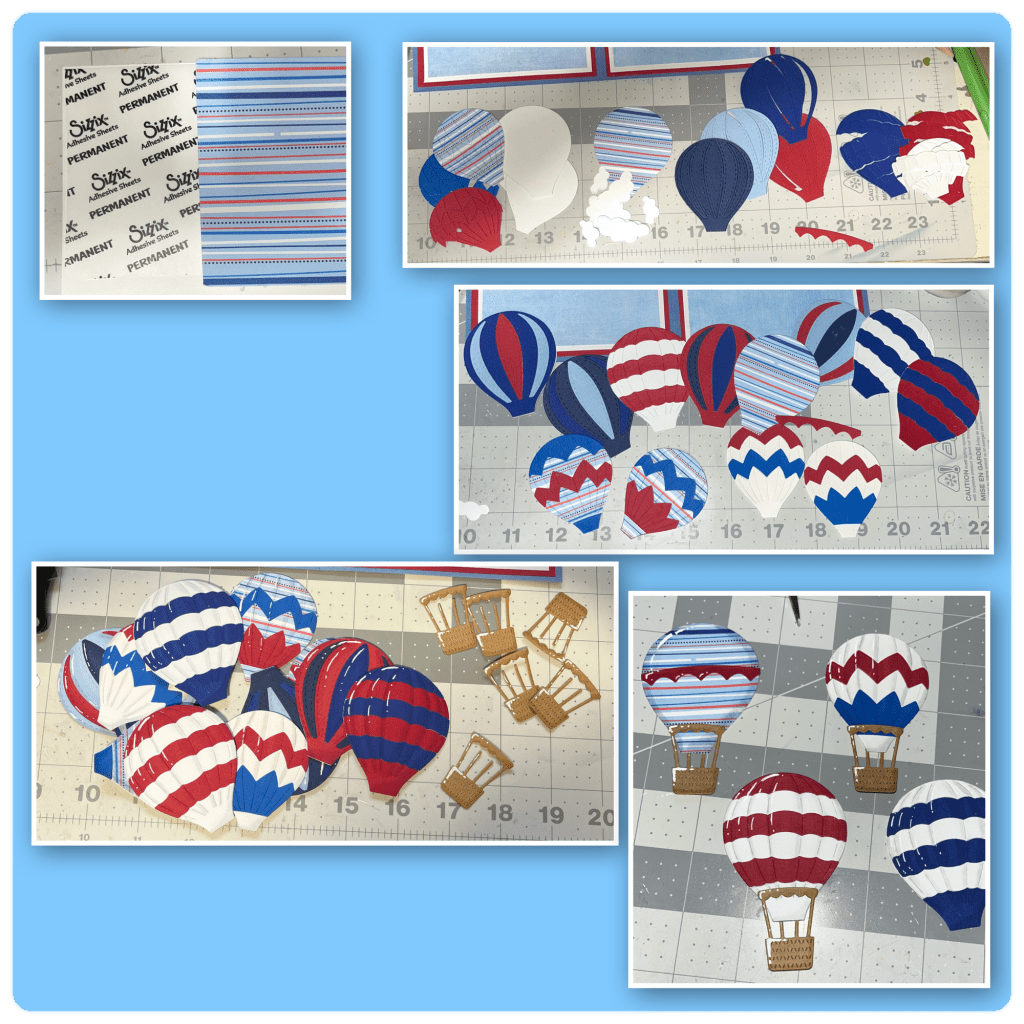
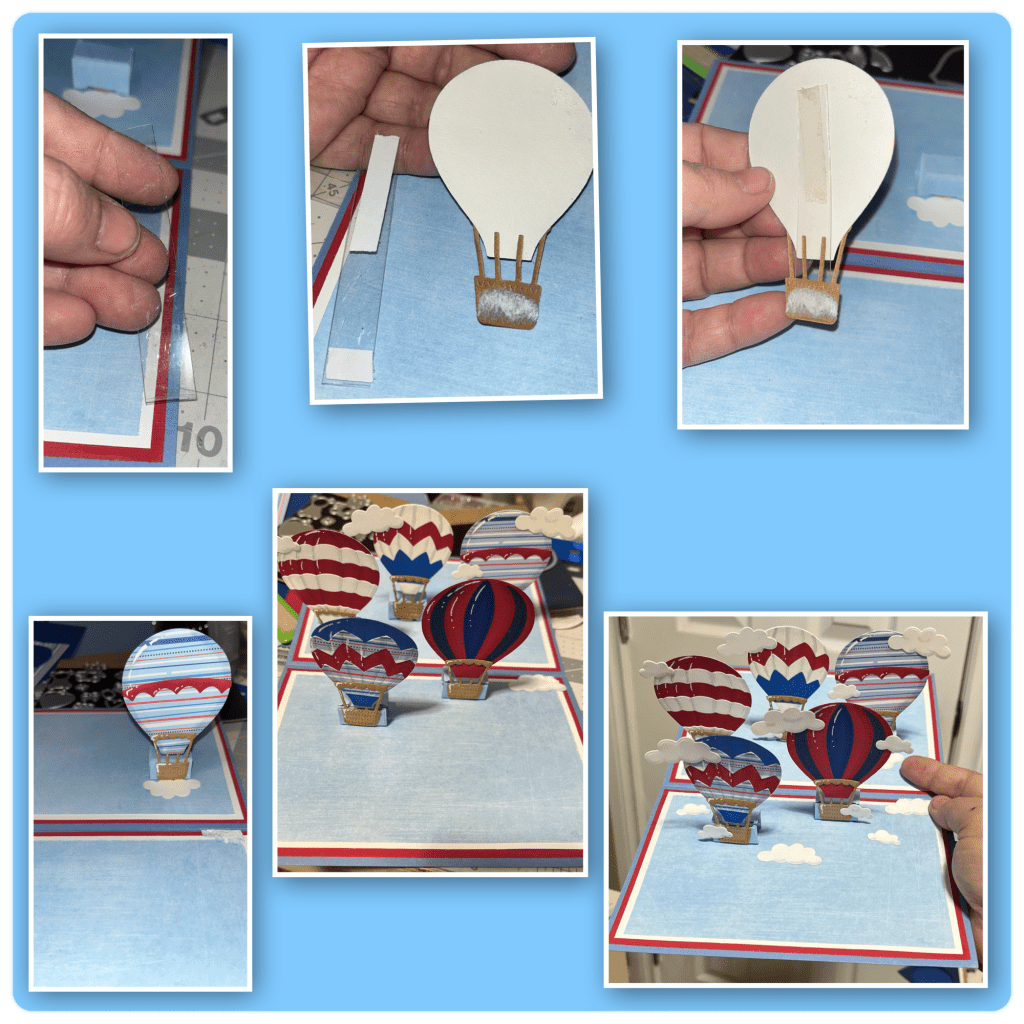
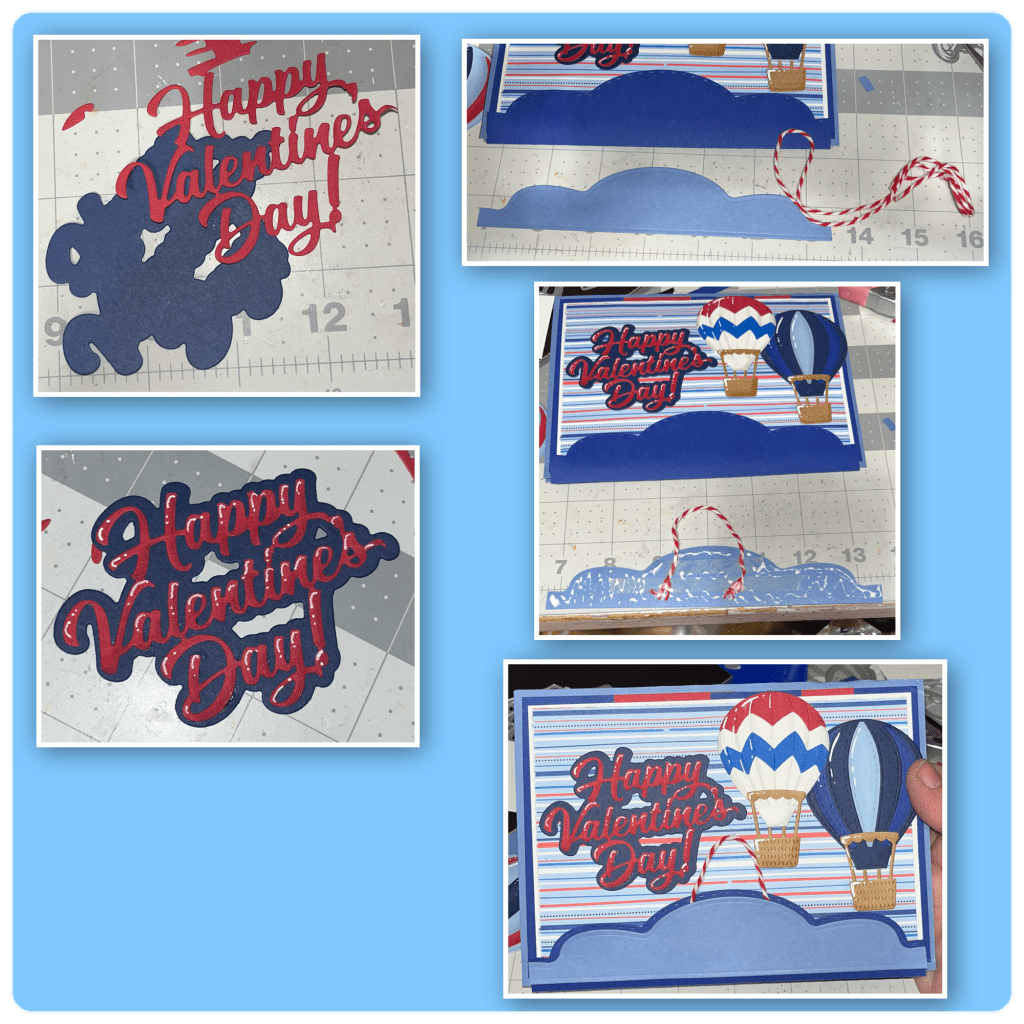
I wanted to make a balloon out of the striped paper but it wasn’t thick enough so I added double sided adhesive to the back and added it white cardstock. Using the Hot Air Balloon die set I cut several balloons. They are designed to come apart so you can mix and match stripes. I made more balloons than needed because I wanted to use up all the pieces.
Believe it or not but I did all the shading of all the balloons with just one light grey alcohol marker and a blending pen. I added highlights with a white gelly roll pen.
I was originally going to use the Flip Frame Pop Up and the fold splitter from the Tiny Trees but soon realized the balloons would crash into each other so I changed my mind, and while removing the mechanism I tore the paper. I cut out 5 Small Scenes Bam Box (Karen has a video tutorial on the product page at the link ⬆️ ) I used clouds from the Hot Air Balloon to cover my torn paper.
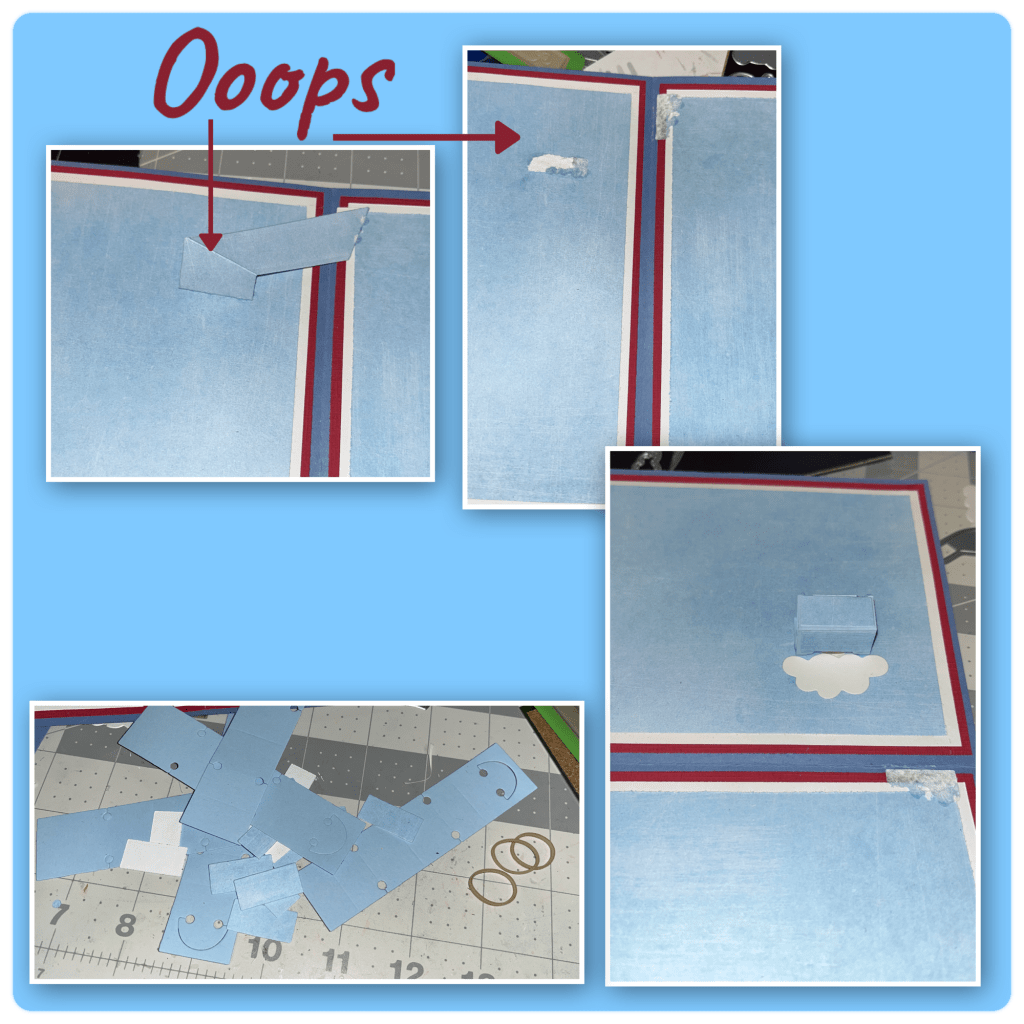
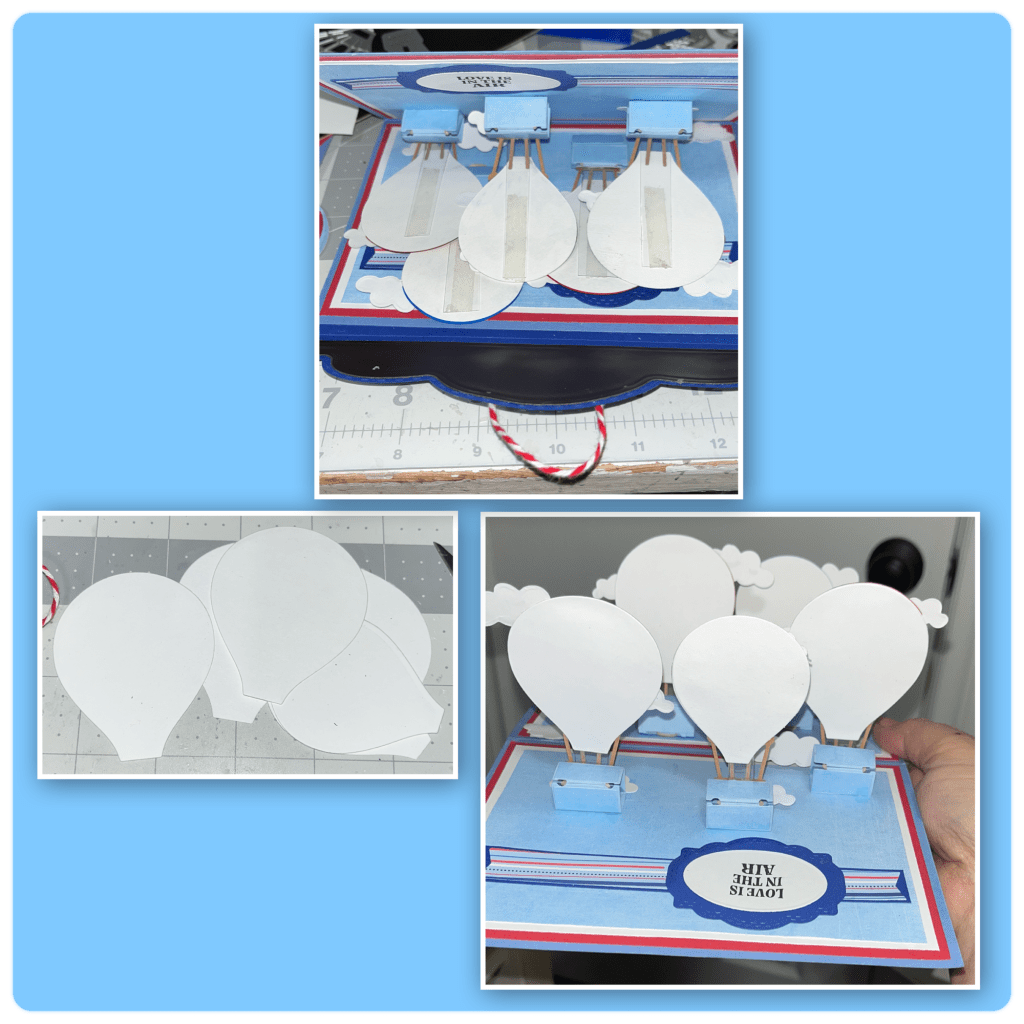
I needed the balloons to stand tall so I took plastic strips (I cut up some old packaging) I added sticky strip to the plastic strips where it will be covered by the balloon and the basket. I added the balloon to the Bam Box, I added more balloons and clouds to the inside of the card.
IMPORTANT – if you want the card to close then all the Bam Boxes on the top half (above the fold) all have to fold back so the Balloons will lay back with the tops of the balloons at the top edge (be mindful not to go over the edge). The bam Boxes on the bottom half (below the fold) need to fold forward so the tops of the balloons fold towards the front so the top edge of the balloons will come up to but not over the bottom edge of the card.
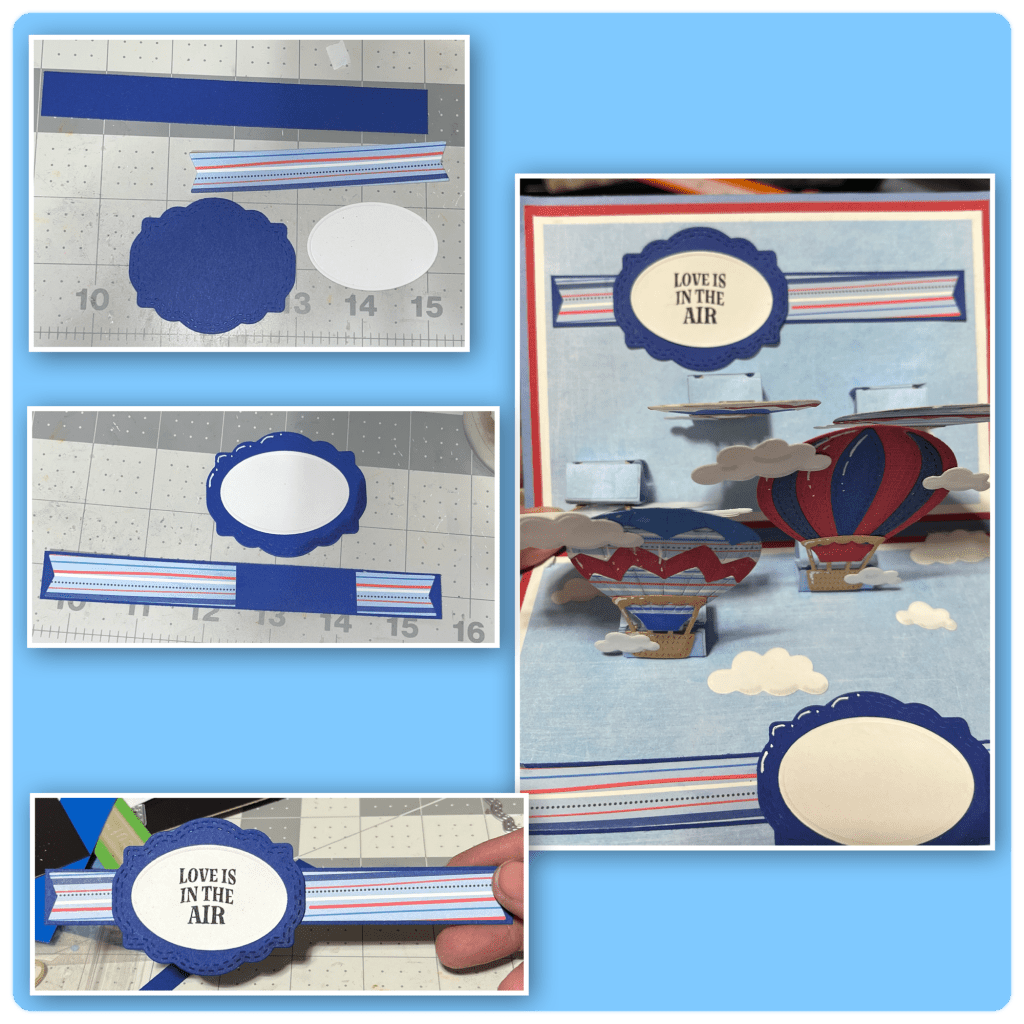
Because of all the empty space I needed to allow for the balloons to fold into their closed positions I decided to add a borders. The banner, label and oval are from the Greetings Label. I cut the blue stip to be slightly wider that the banner, and I wanted to give the impression that the banner is longer so I cut it as shown and then added the label to cover the gap. The stamped greeting is from Love Notes Clear Stamps. I added another border with a label to sign.
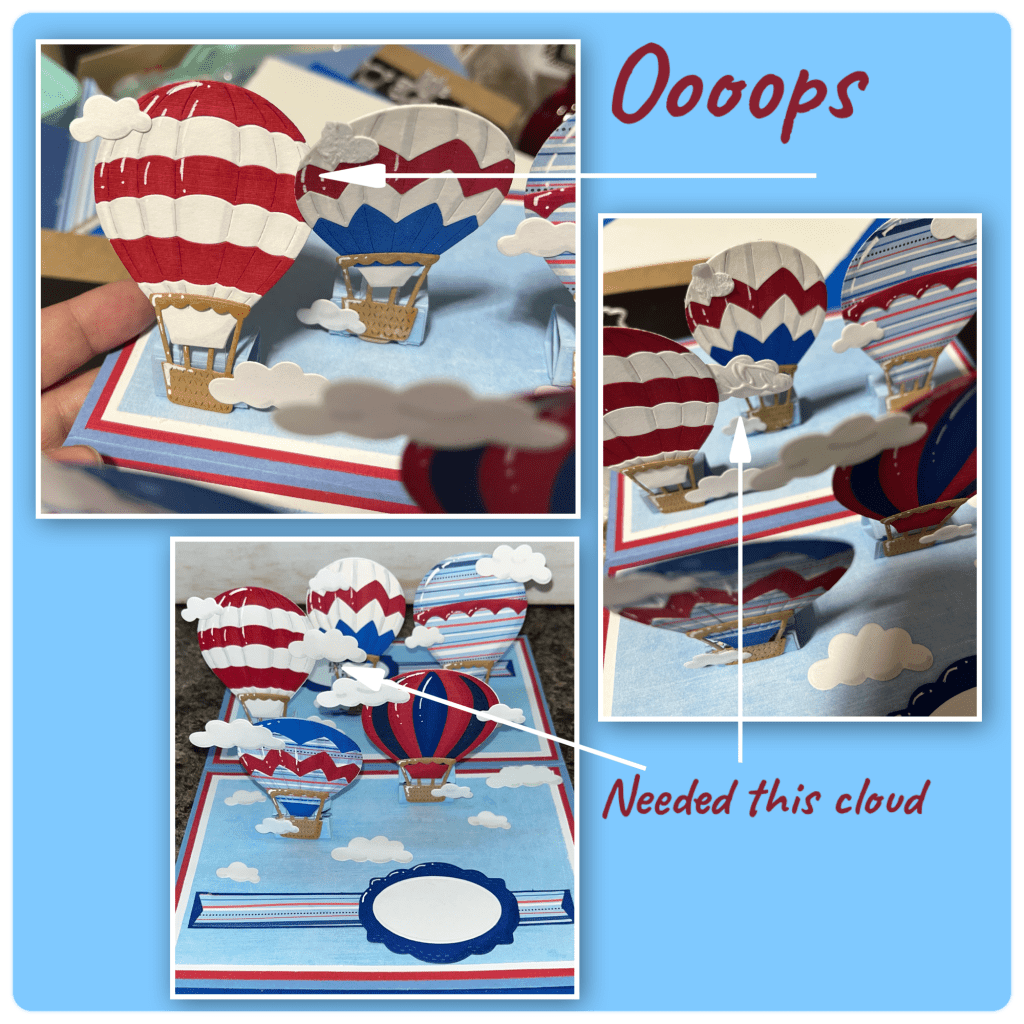
This is where I noticed that when closing the card 2 of the balloons crossed over each other and got stuck. So I added a bigger cloud to the right side of the red and white balloon and a smaller balloon on the red, white and blue balloon to cover where I had to remove a balloon that I had to remove. Just by changing the position of the clouds made all the difference.
Because I have 5 Bam boxes the card needs to be held closed. I wanted to try something different, I recently purchased some magnet sheets from Amazon that are quite thin so I thought I would see if they could be diecut, and they can. I used the Long Flap And Closure to cut the main flap piece from blue cardstock and the inside piece used to diecut the magnet piece. I cut a long rectangle from the magnetic sheet as well. I added the magnet rectangle to the bottom of the card front and attached the blue flap as per Karens directions (Karen has a video tutorial on the product page at the link ⬆️ ) I then cut a striped paper to the measurements below.
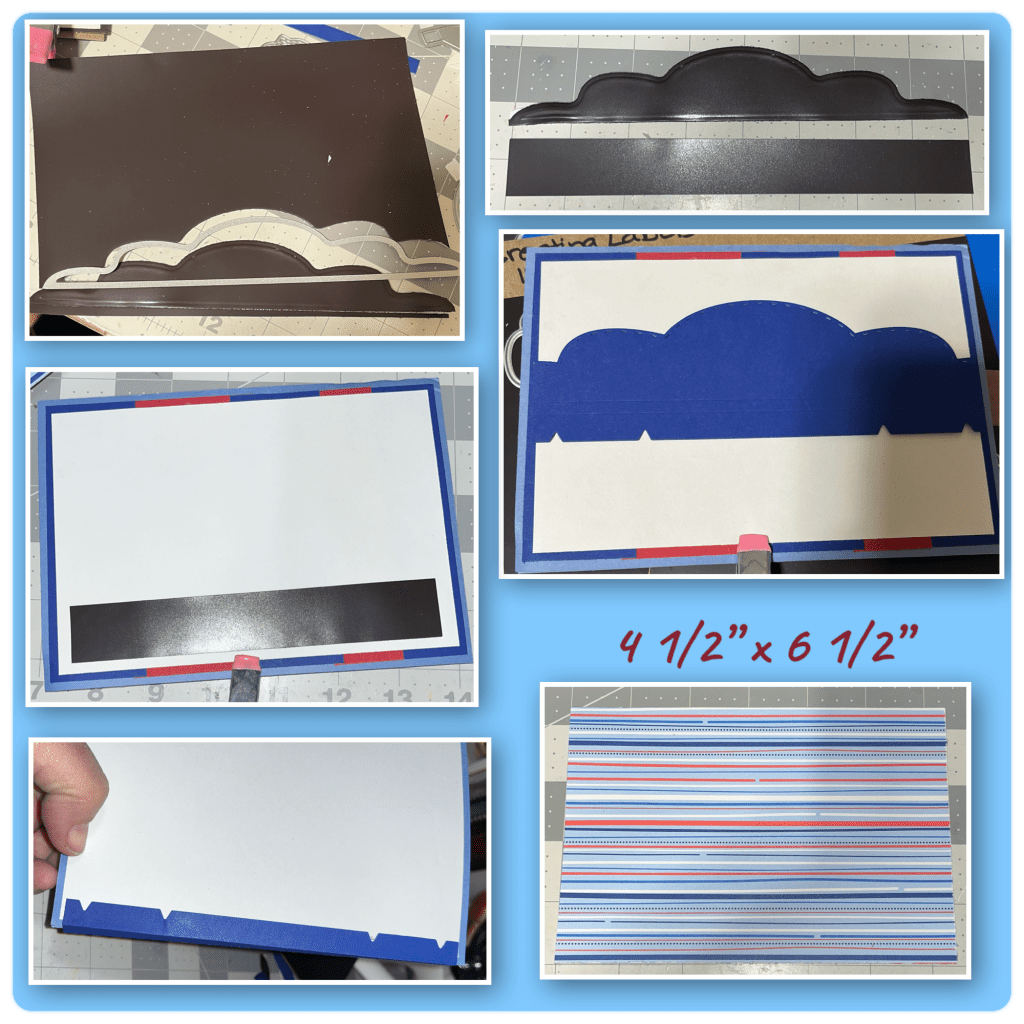
I covered the front (including the magnet) with the patterned paper, and added the magnet flap to the inside of the blue flap, it will hold the cold closed.
I assembled the Happy Valentine’s Day with the Happy Valentine’s Day Shadow, I added shading with a red alcohol marker and highlights with the white gelly roll pen. I cut a lighter blue piece to cover the front but I first added a piece of red and white bakers twine. I added a few balloons to the front to finish it off.
When closing and opening the cards the backs of the balloons are visible and I didn’t like the look so I diecut the solid balloons (the piece that the striped pieces attache to) and added them behind the balloons to give it a cleaner look when opening and closing the card.
Other Tools used
