
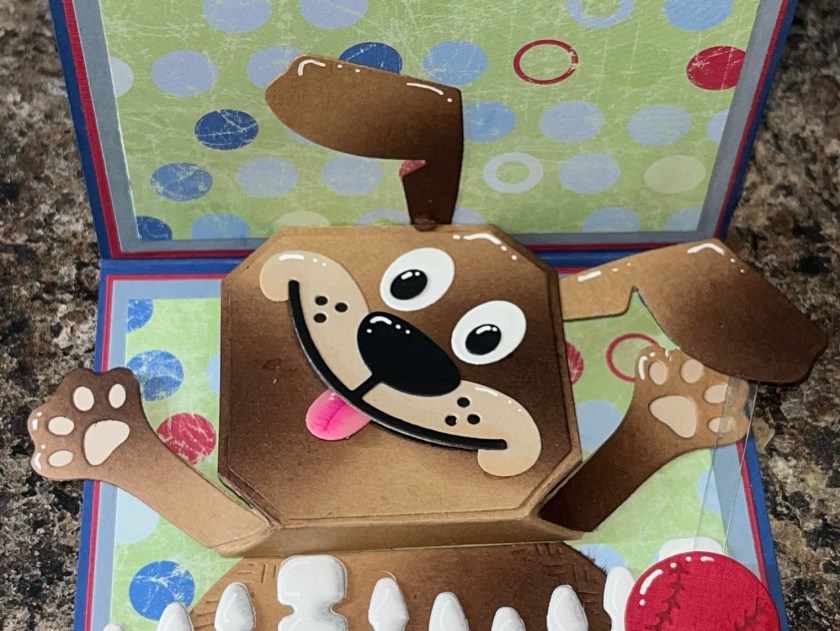
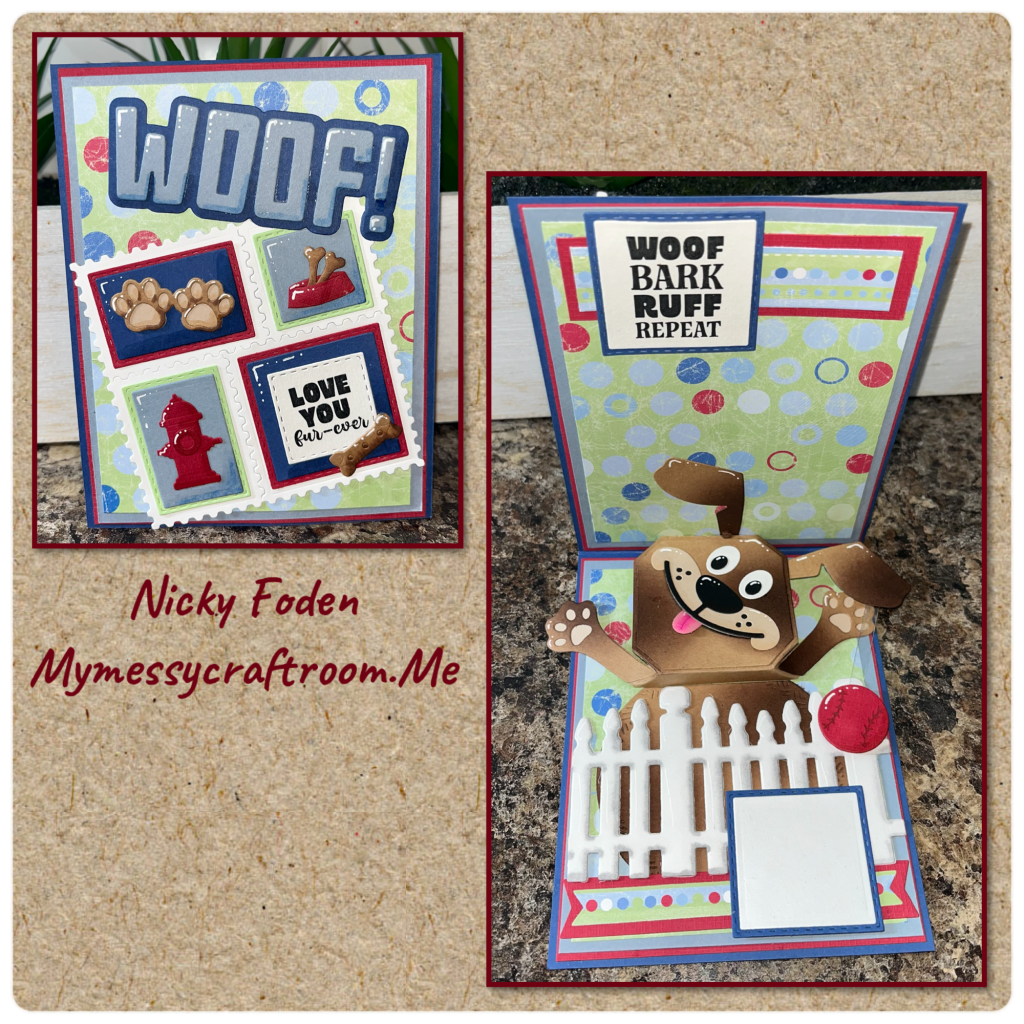
I just love how happy this card turned out, this cute pup just makes me smile. I chose the patterned paper from my stash and picked some matching cardstock and this is what I came up with.

All the fun is in the reveal, to see this card in action please check out my FACEBOOK page, feel free to join if you would like to share your own crafty creations. You can also see a video of this card on my INSTAGRAM page.
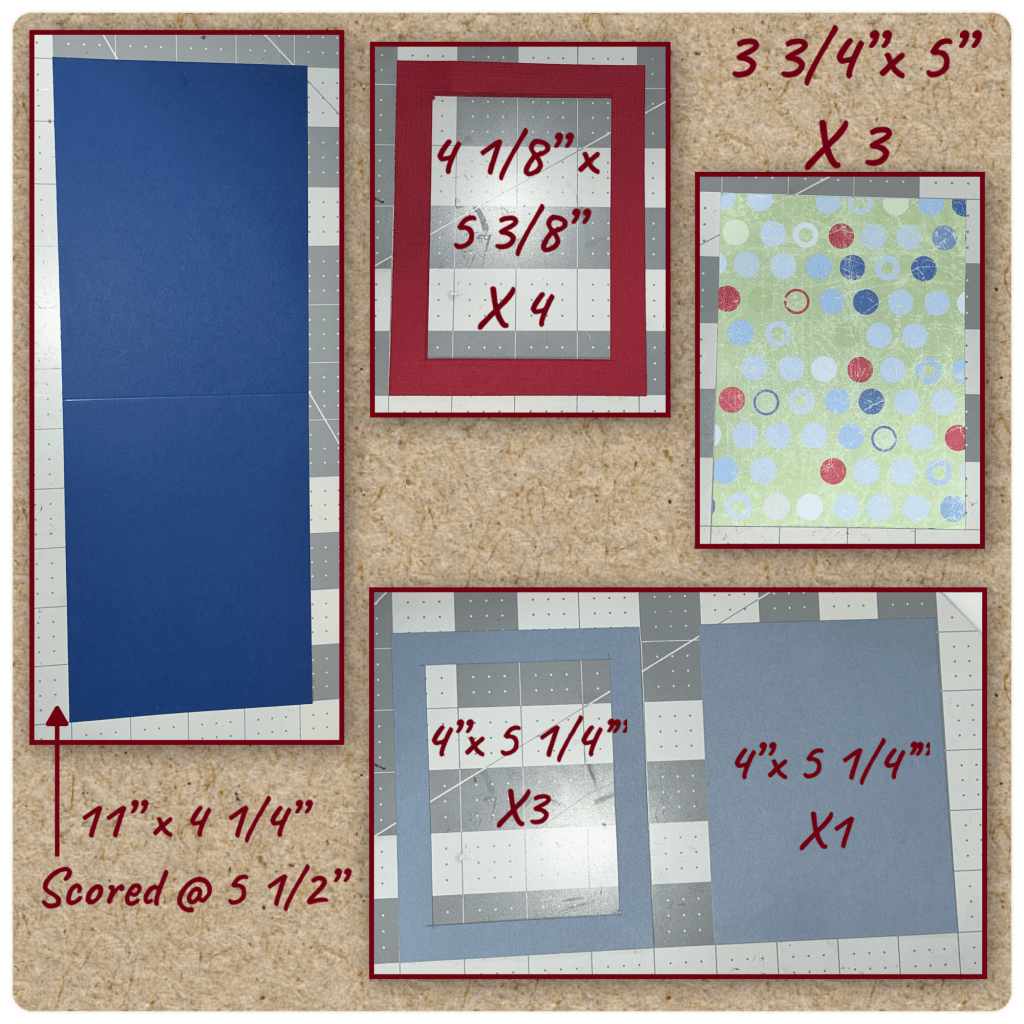
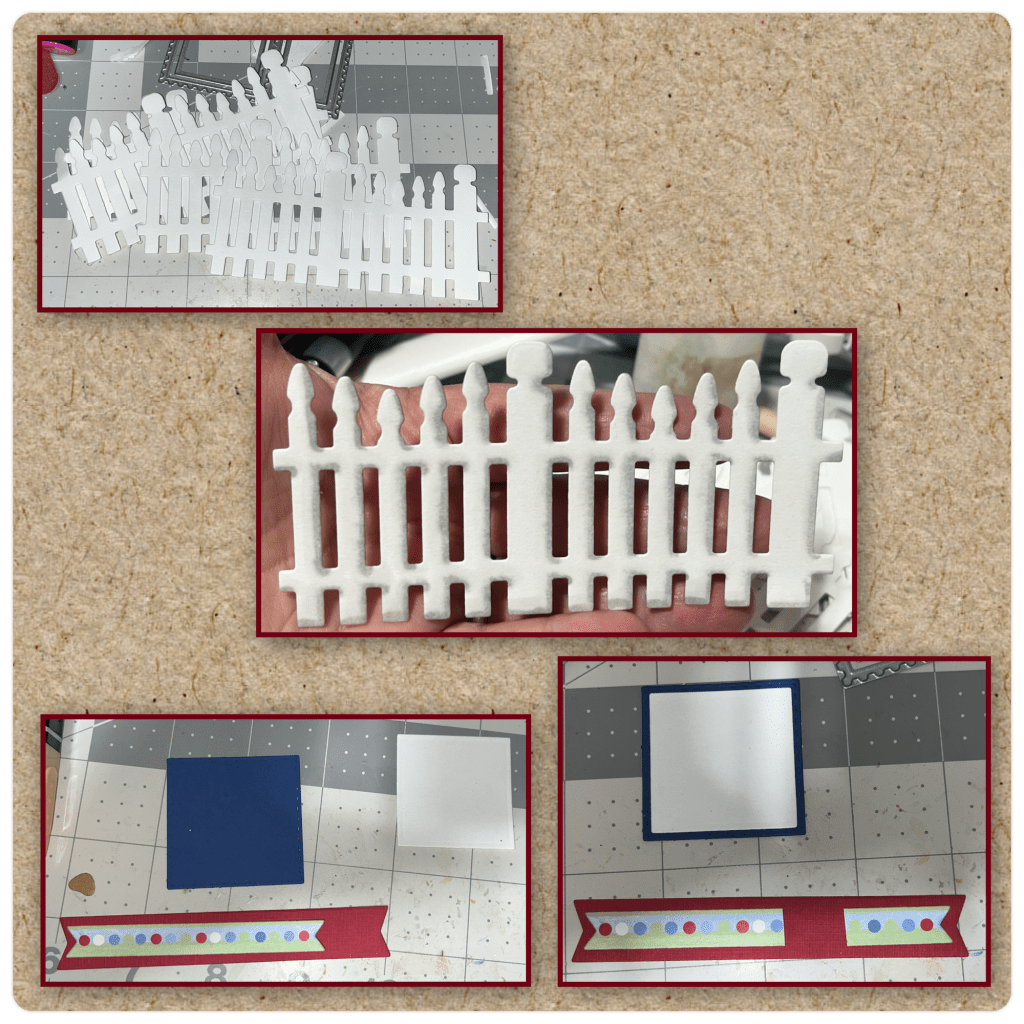
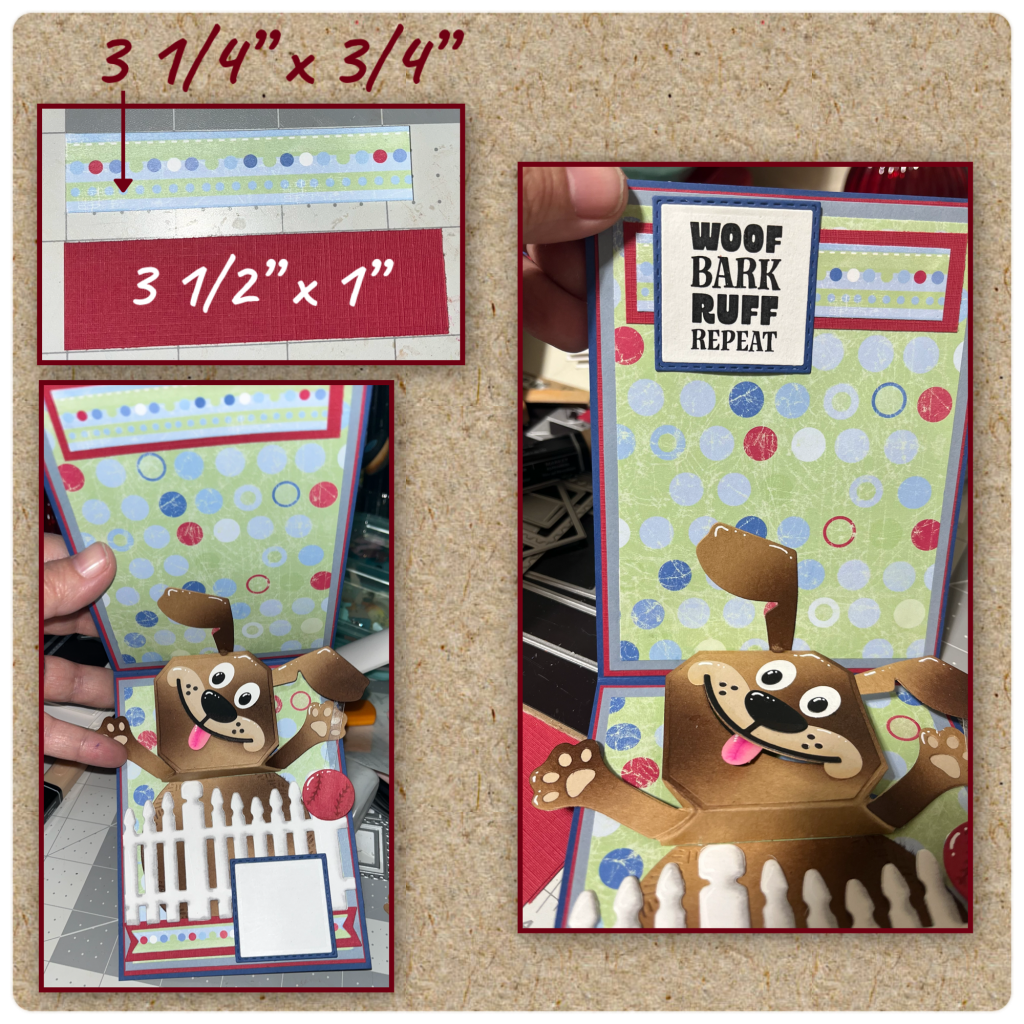
I made this into a 5 1/2” x 4 1/4” top fold card. I cut the panels as shown below. I cut the centers out of the ones shown to conserve cardstock and lesson the bulk.
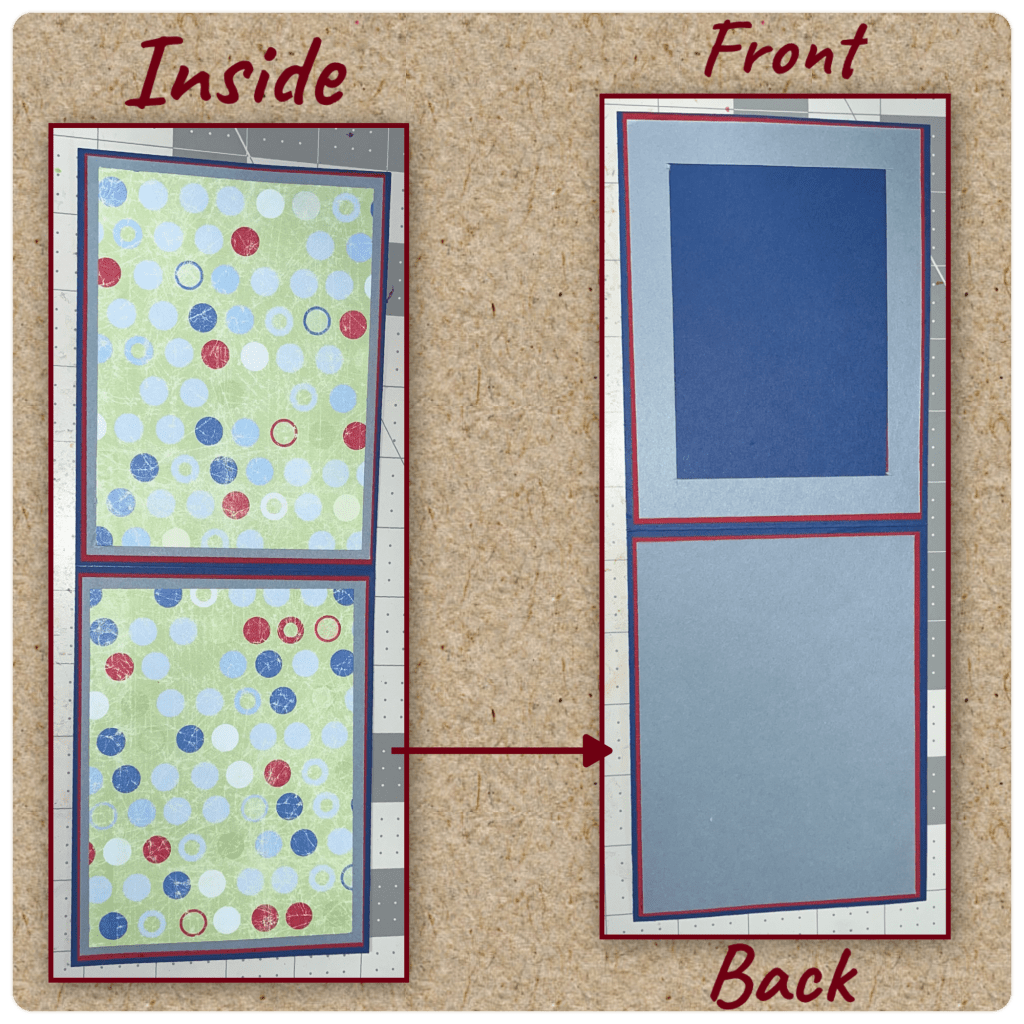
Add the panels as shown. I forgot to take a photo of the front panel with the patterned paper. It should look like the inside.
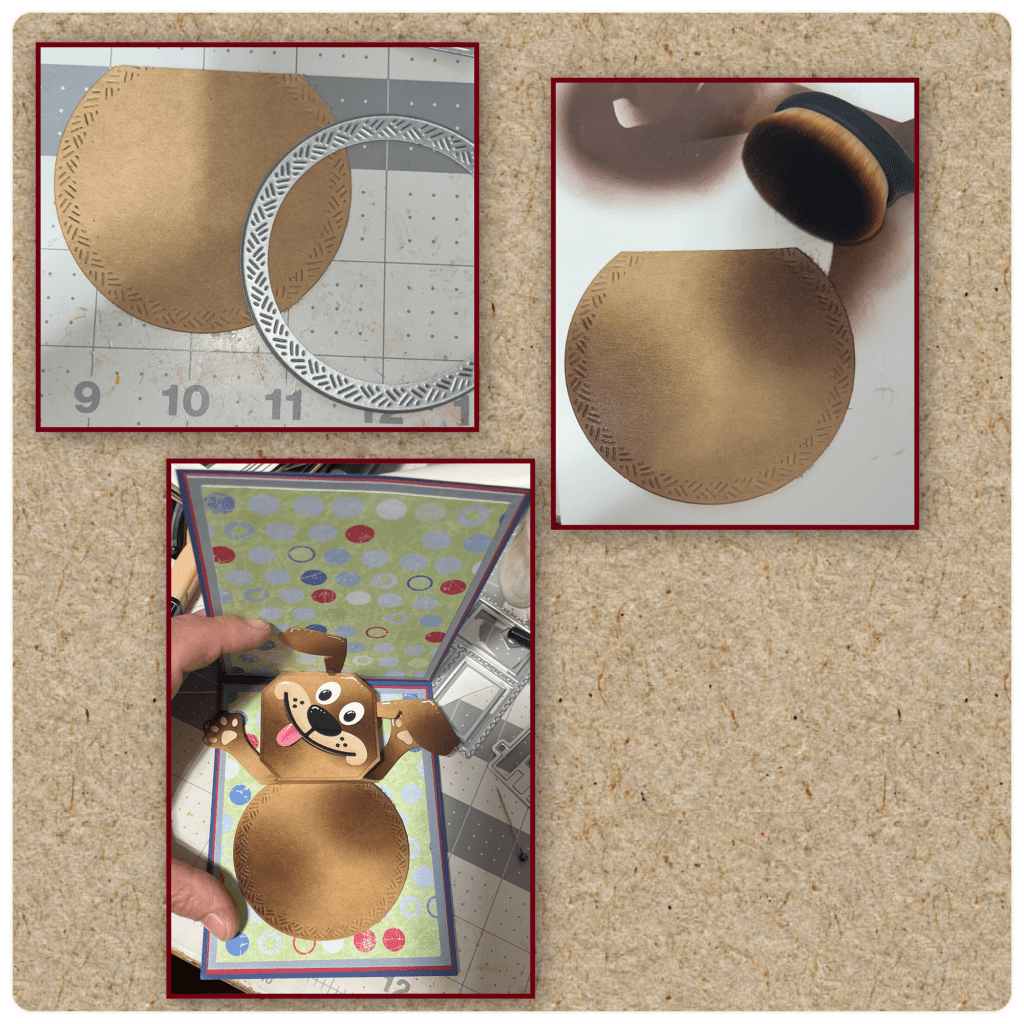
I cut the pieces of the Playful Pop Up and the pieces of the Dog and Cat playful Add on as shown. I wanted to add some texture to the dog so I brushed on a darker ink as shown, then assembled the face and paws. I highlighted with a white Gelly Roll pen.

I assembled the mechanism (Karen has a video tutorial on the product page at the link ⬆️ ) and attached it to the card.
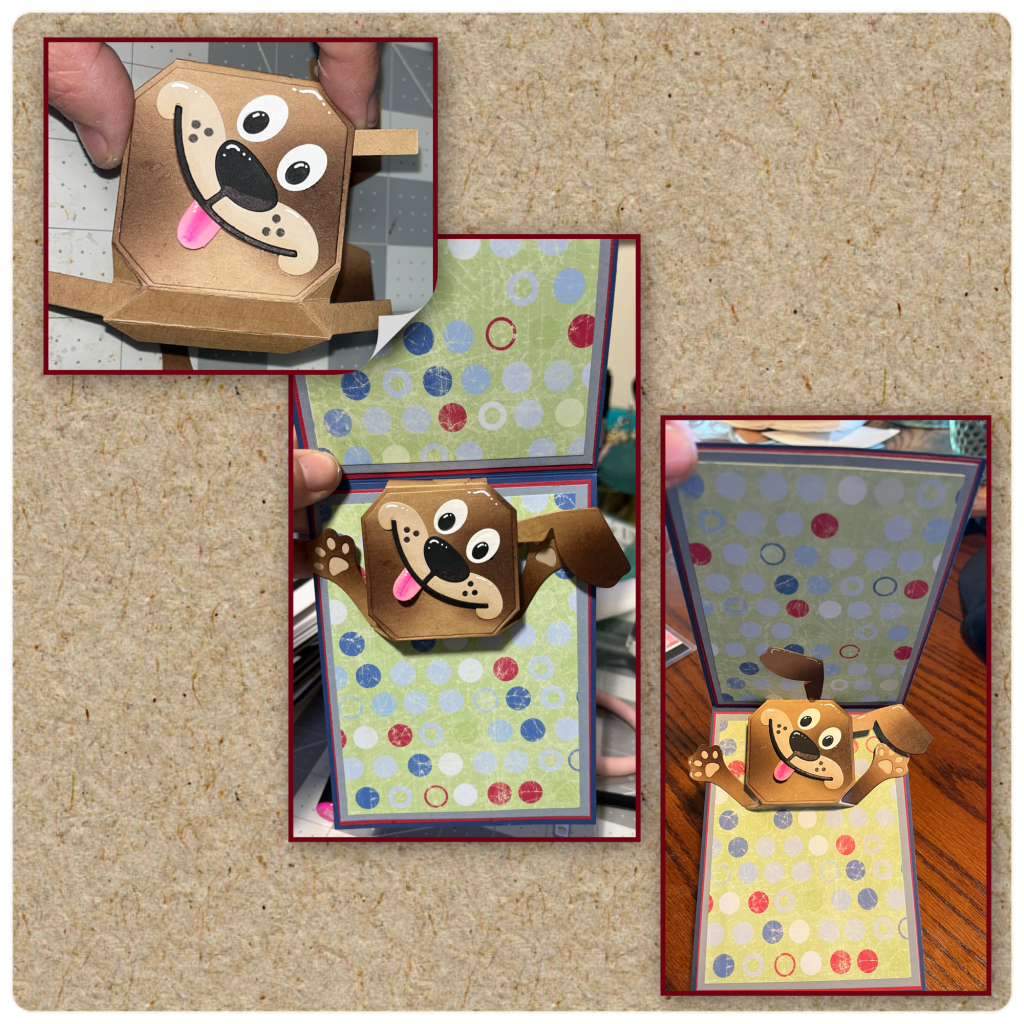
I didn’t want a floating head, I wanted to create more of scene so I cut a circle from the Circles Crosshatch , cut a bit off the top, I lined it up the so the flat side of the circles is the same width of the mechanism. I brushed with brown ink as shown and attached to the card.
I thought that it would be cute to have it look like he was behind the fence. So I cut 4 Fence Add On pieces. I glued them on top of each other to make it a little sturdier. I added shading with a grey alcohol marker. I wanted a fun border along the bottom so I cut the two Banner borders from the Greetings Labels. The stitched square is also from the Greeting Labels and the smaller square is from the Postage Pop up. The smaller banner is quite a bit smaller so I cut and assembled as shown because I am going to cover the gap with the square.
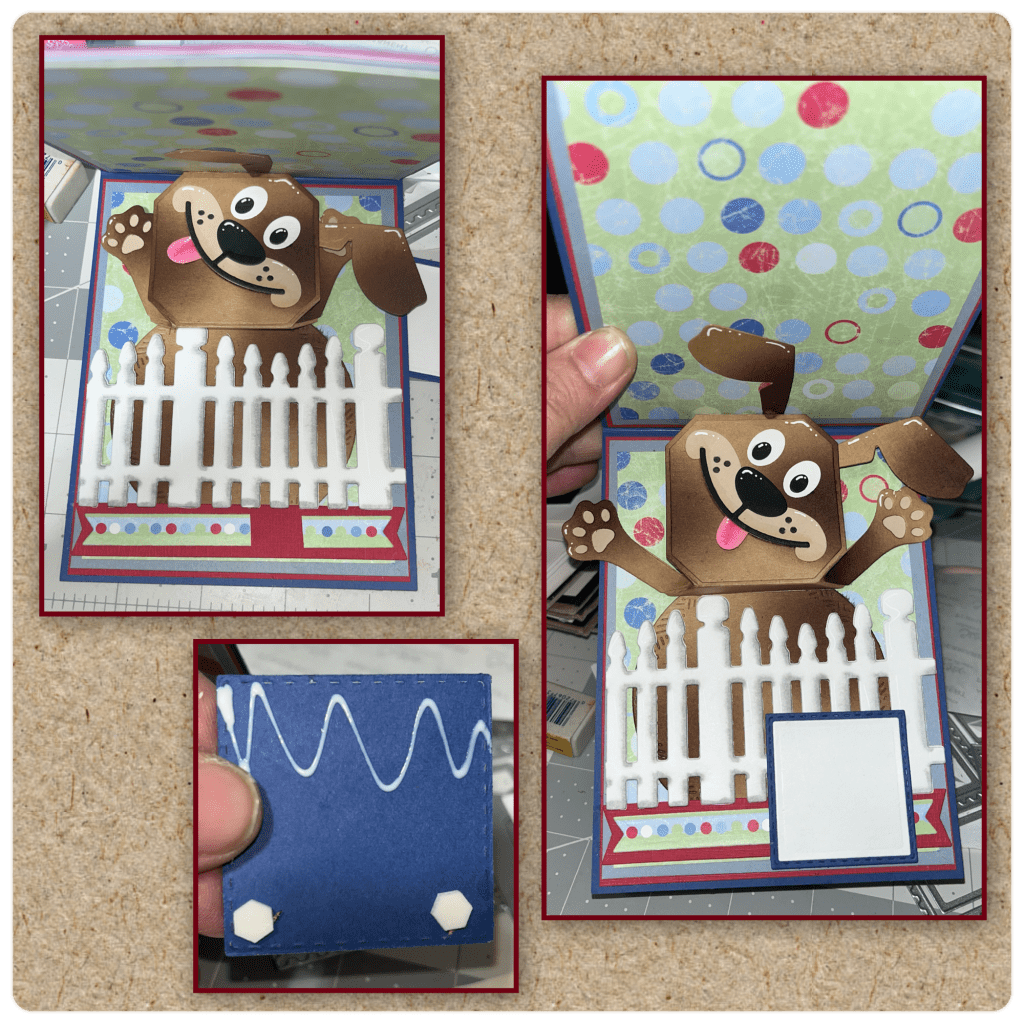
Add the fence and the label as shown. Because the fence is higher than the bottom of the card I added liquid adhesive to where the square will attach to the fence and a foam adhesive for the bottom and added to the card as shown.
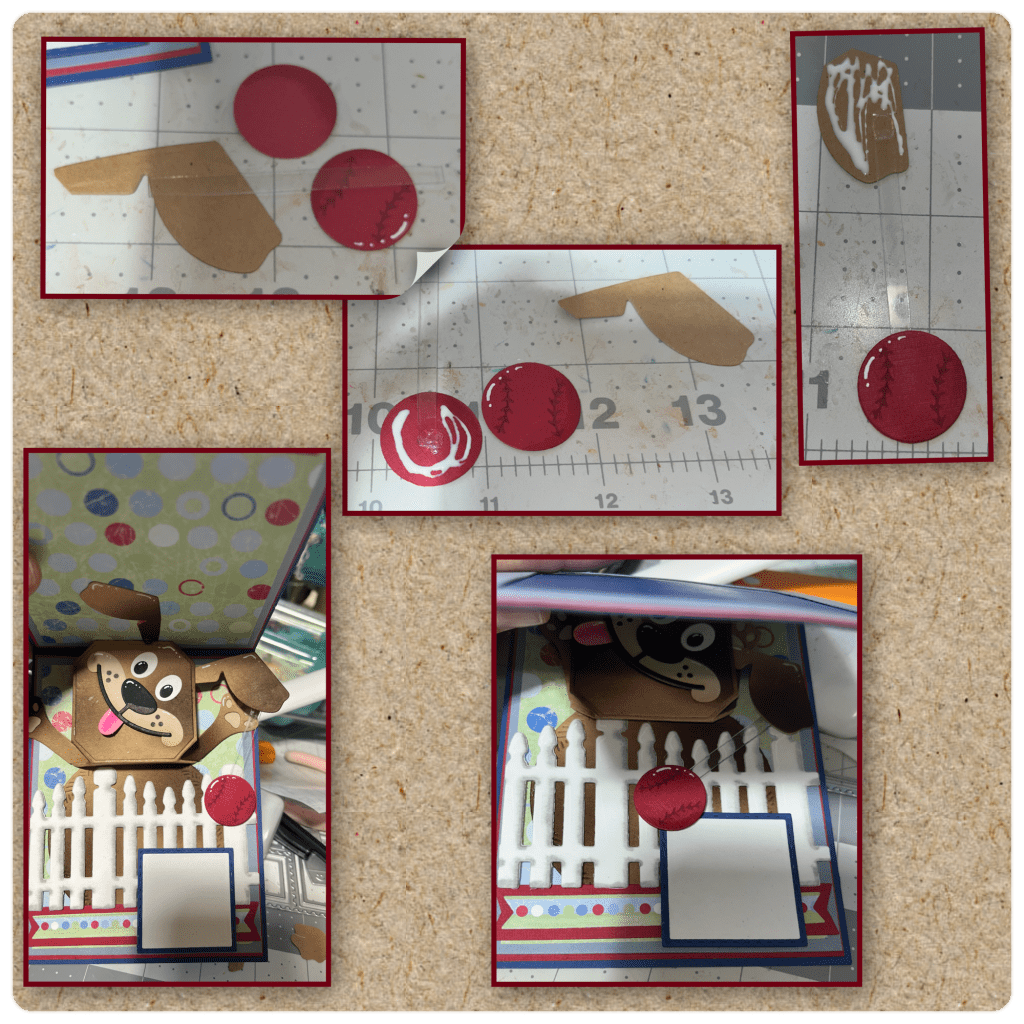
I thought that it would be really cute to add a ball and have it also have some motion. I was going to add it to the right side paw but it wasn’t going to move the way that I wanted it to, so I decided to add it to the ear. I cut out 2 balls from the Sports Charms, another right side ear and a stiff piece of clear plastic (I’m pretty sure the plastic from an old package) Sandwich the plastic between the 2 balls. I used a glue dot to adhere the plastic but liquid glue where the cardstock will glue to cardstock. Add the other end of the plastic to the ear as shown then attached this ear to the back of the ear on the dog so the plastic is sandwiched between the 2 pieces. The ball will move from side to side as you open and close the door.
I wanted a bit of a border on the top so I cut out the pieces as shown with a square that is the exact same as the square at the bottom of the inside. I stamped the greeting from the Dog Sayings Clear Stamps. And added the pieces as shown.
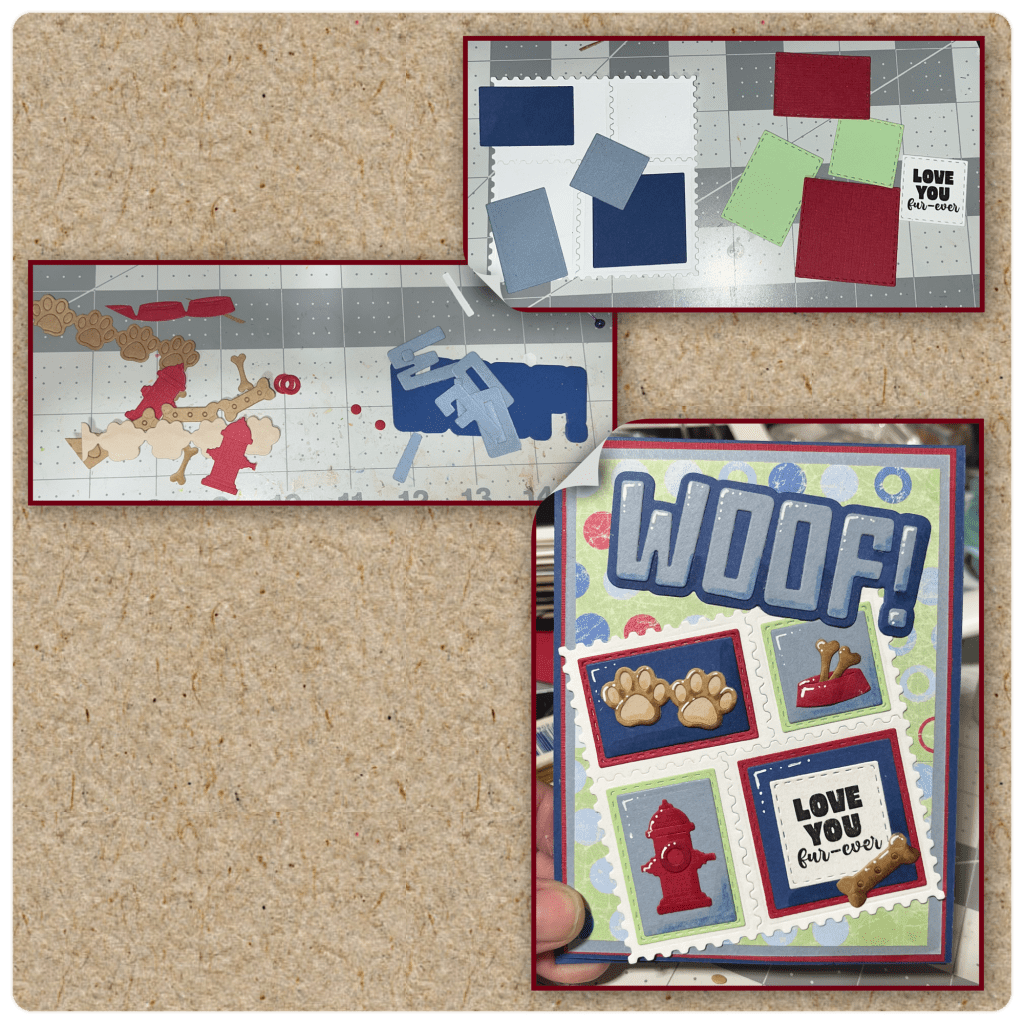
Now for the front…. I cut out the pieces from the Postage pop up (white square with blue layers), and Greeting Labels (red, green and white stamped piece).The dog pieces are form the Dog Borders, and WOOF! I assembles the pieces and added shading with alcohol markers, and highlighted with a white Gelly Roll Pen and assembled as shown.
Other Tools used

Adorable 💙 fabulous detail on your blog 🐕
LikeLiked by 1 person
Love how you added motion to the ball. Thanks for the idea & tutorial!
LikeLiked by 1 person