
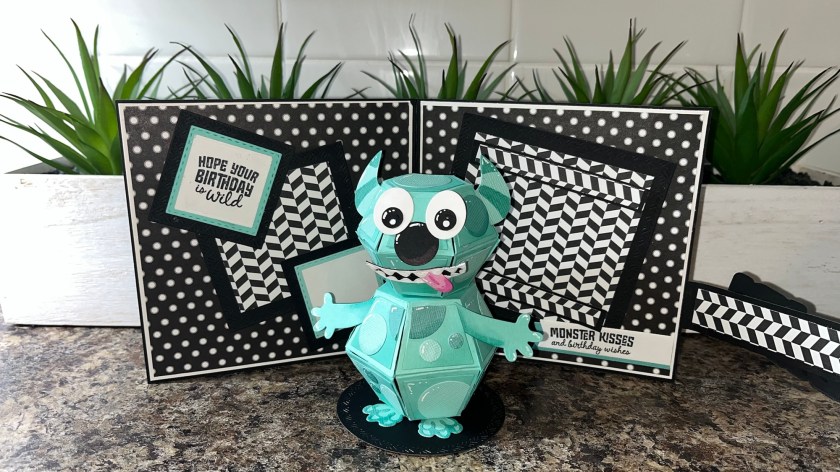
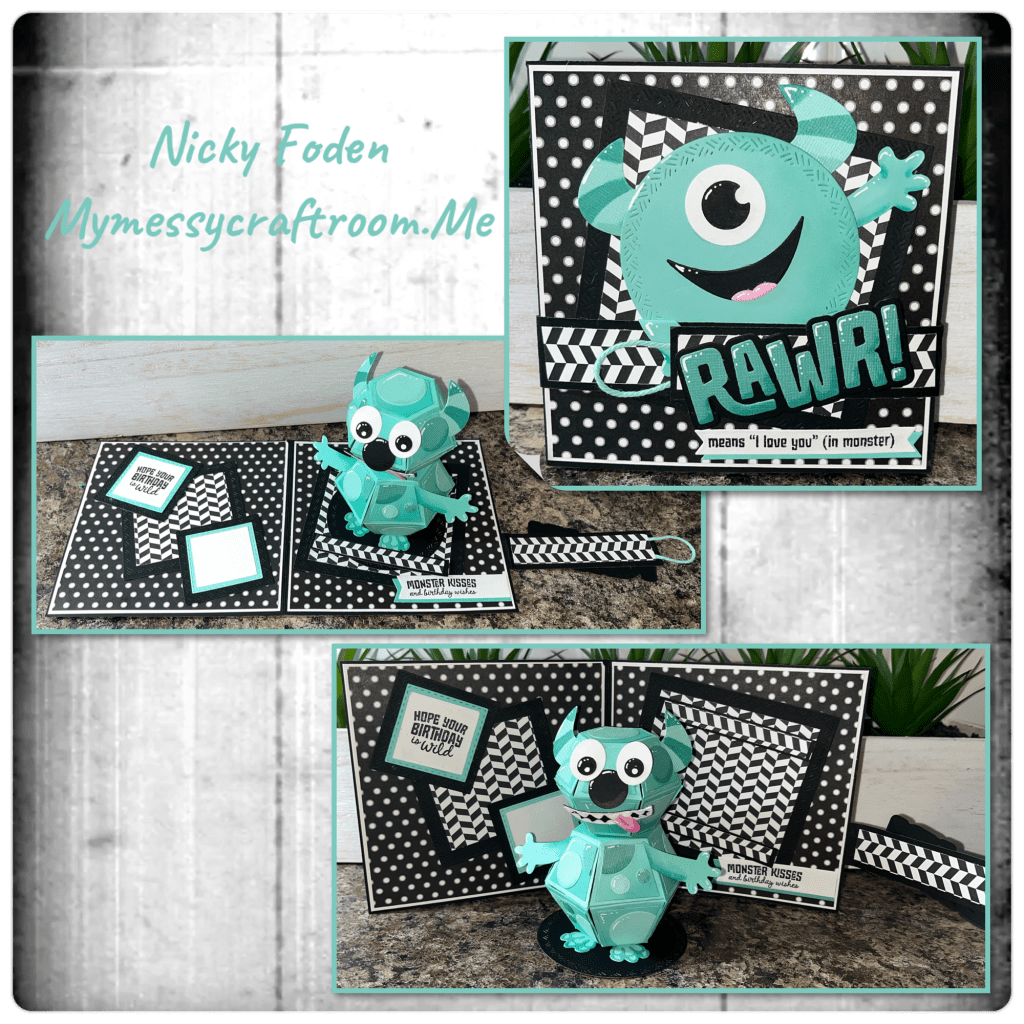
I thought that I would get a bit creative with the Monster Playful Add on, They are meant to go on the Playful Pop Up but I thought I would see how they work on some of the pop up balls. I think it turned out pretty cute.

All the fun is in the reveal, to see this card in action please check out my FACEBOOK page, feel free to join if you would like to share your own crafty creations. You can also see a video of this card on my INSTAGRAM page.
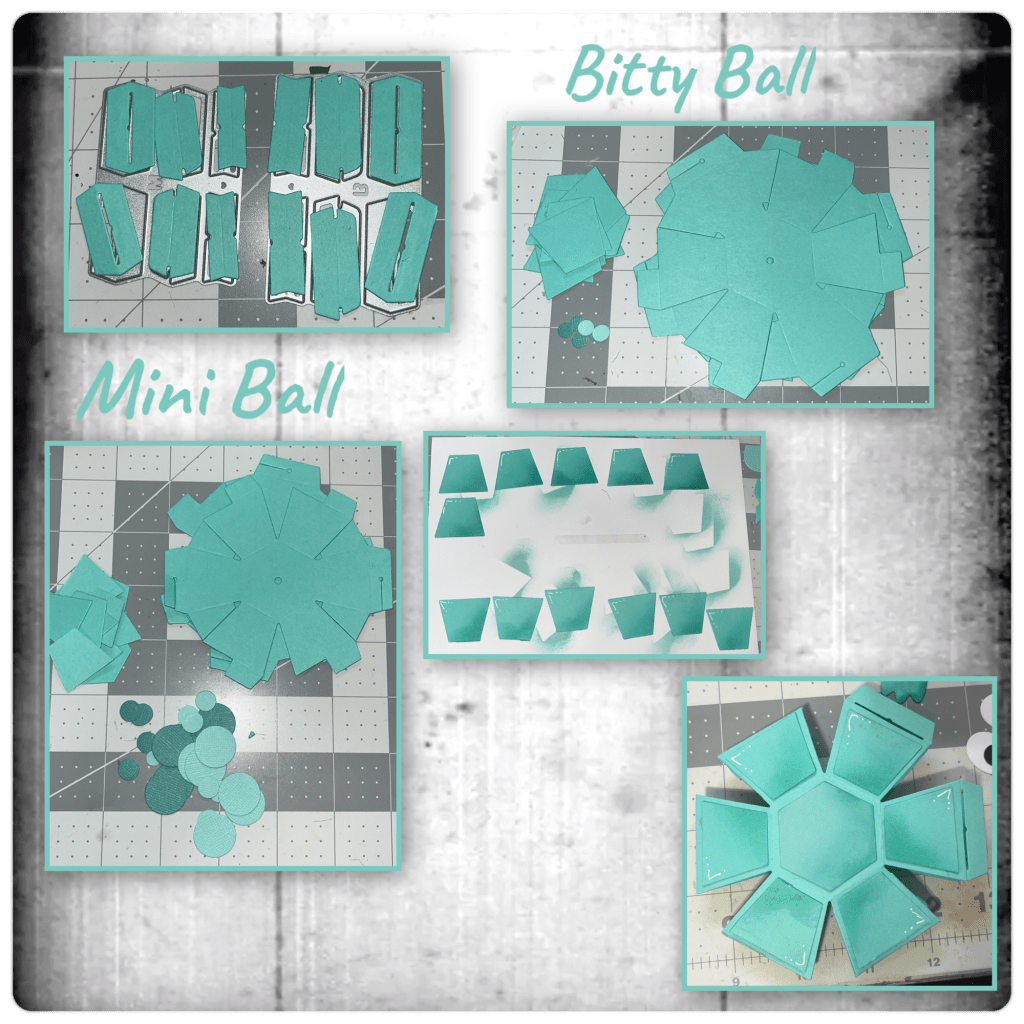
I made this card for the last new release, but I haven’t had the chance to blog about it until now. I was anxious to see how the new Access Tabs would work and I have to say they are a game changer. I die cut the pieces from the Mini Ball Pop up, Bitty Ball Pop up. And I also cut the pieces for Mini Ball Access Tabs , and the Bitty Ball Access Tab. The circles that are in the photos were cut from the same sets they are pictured with. I used a brush and inked the edges of the trapezoid shapes and added to the balls as shown.
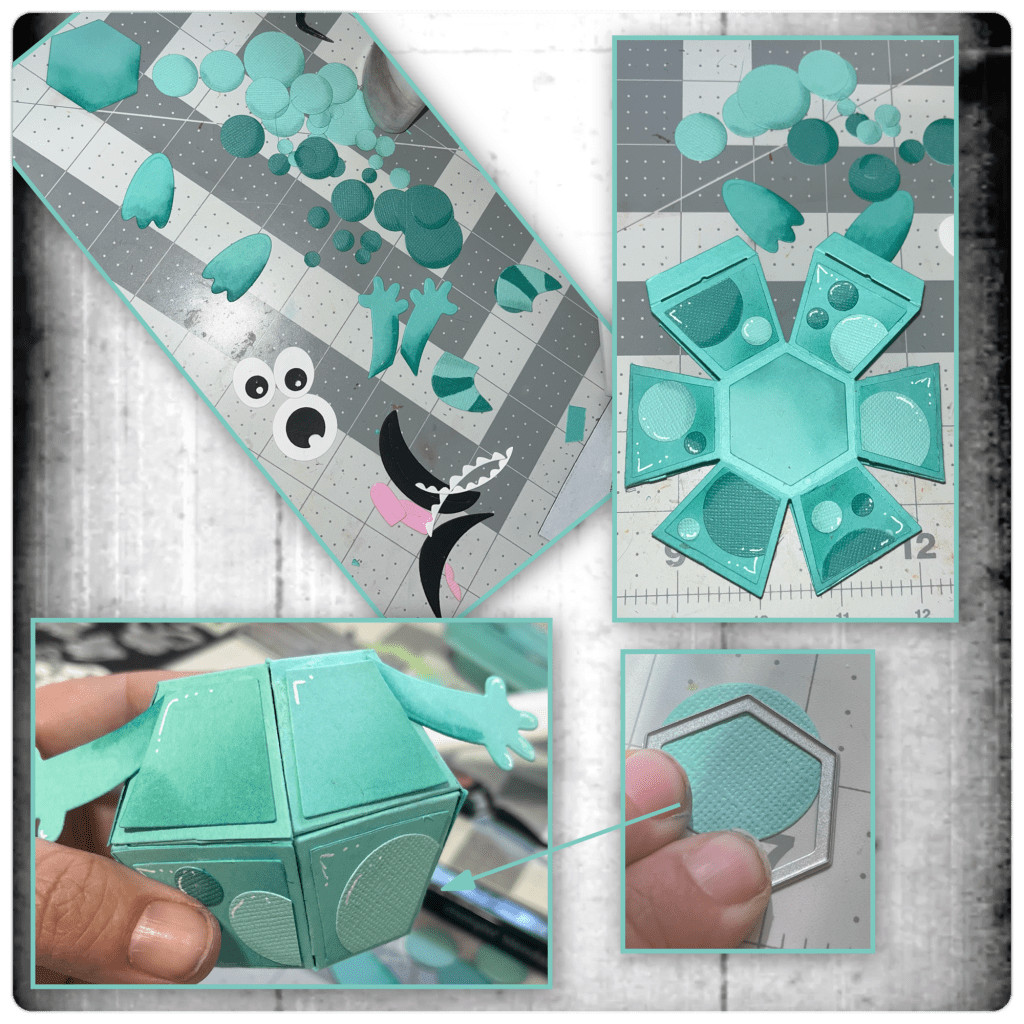
I diecut the pieces from the Monsters Playful Add on. I coloured them and the dots with alcohol markers, and highlighted with a white Gelly Roll Pen. I started adding to the balls. Use the trapezoid dies to cut the circles to fit some of the different corners.
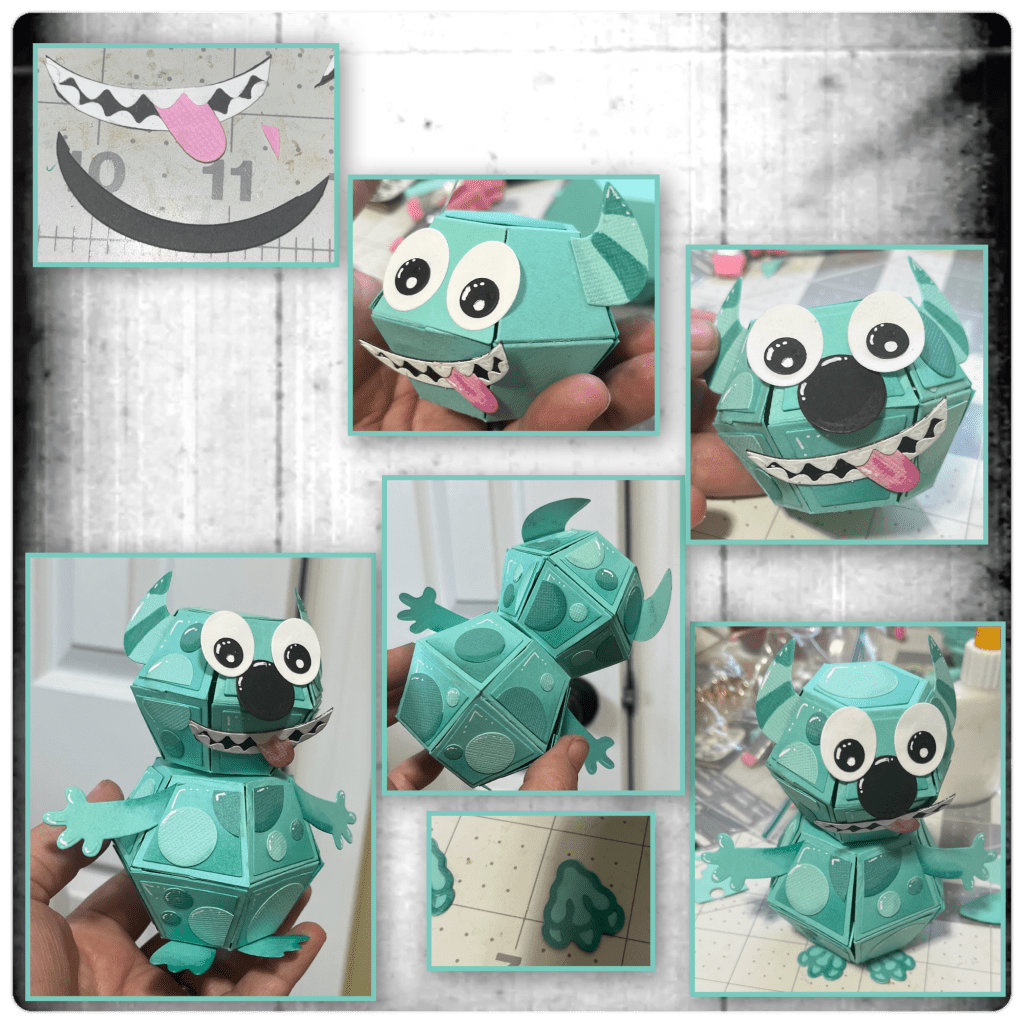
The mouth was a little bit too big so I trimmed it as shown. I added the pieces, I think the nose really adds to the character. Next time I might make a different choice with the mouth. To see if I can get it to fit a bit better. The feet are from the RAWR die set.
Now it’s time for the card base. I decide that I wanted the colour of the monster to pop against the card base so I was going for a black and white base. I cut the card base and the panels as shown below.

Using the Squares Crosshatch I cut a black panel and a patterned label, Using the Circles Crosshatch I made the face for the monster and used the Monsters Playful Add ons for the rest of the face. I forget the dimensions of the wrap but it wraps around the whole card and over laps by a couple of inches. After adding the squares and the monster I adhered the band to the back and to the left side.
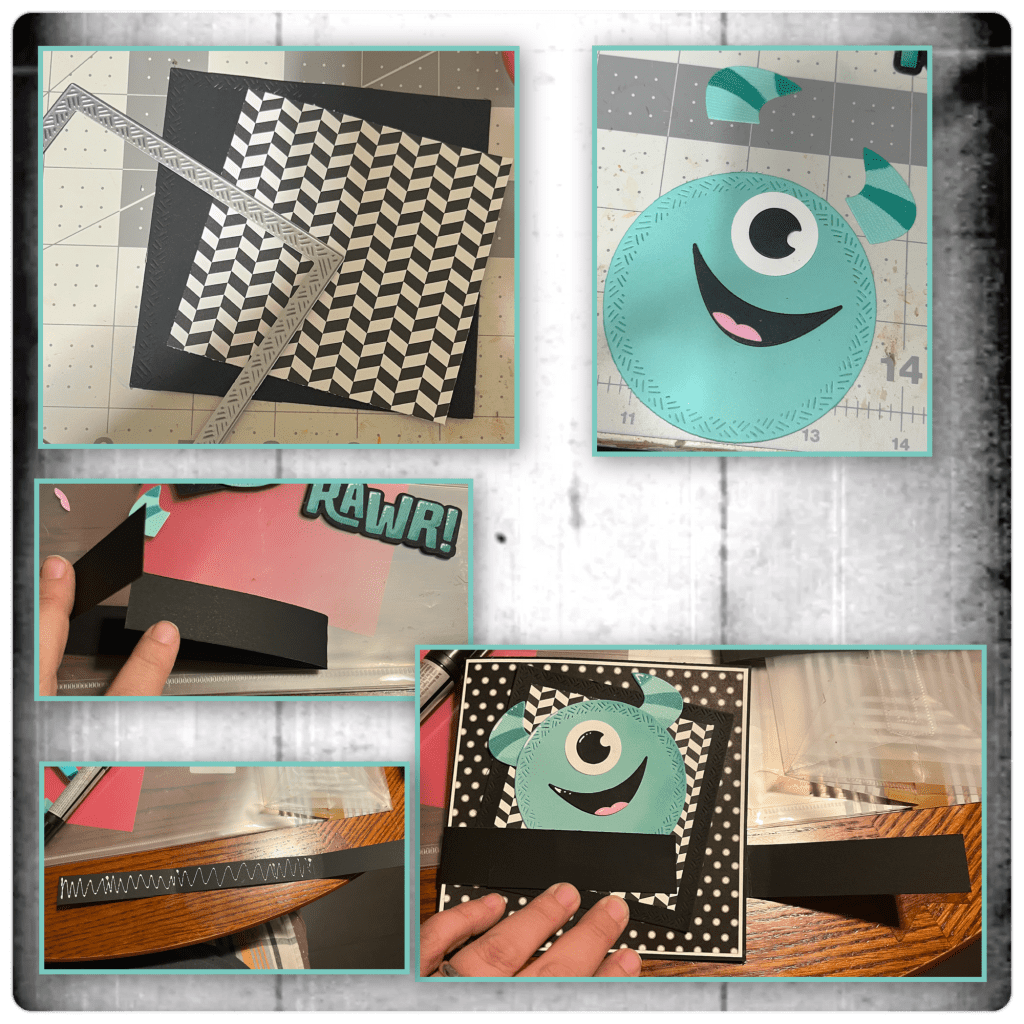
I cut out some patterned paper strips that will cover the band. First added magnets to the left side of the band then covered with the patterned paper, I matched up the magnets and added adhesive to the top, closed the flap to stick the magnets to it then I added some matching string. I then added the pattern to paper strips to the front and the back of the flap.

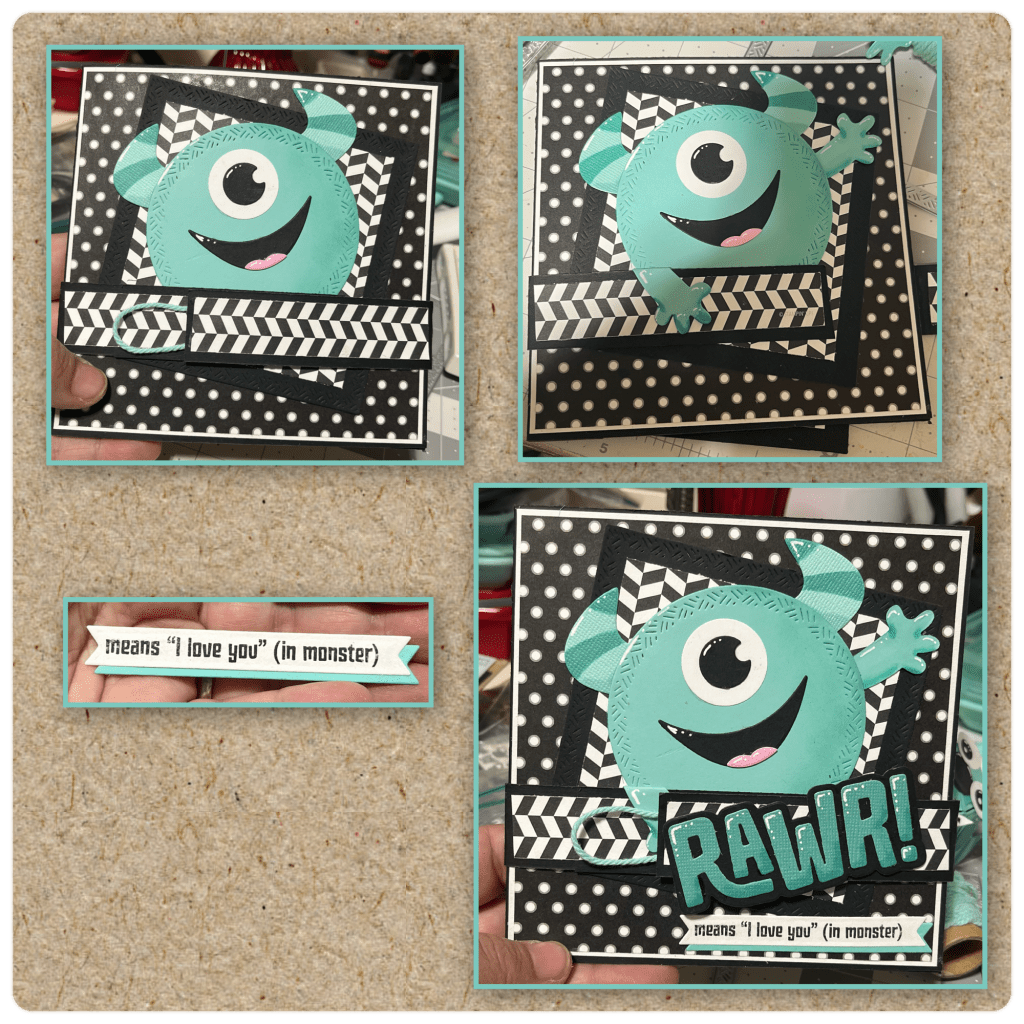
I added the monster arms as shown. The stamps are from the Monsters Sayings and I diecut the banner from the Greeting Labels as shown. I added the greeting and Rawr as shown.
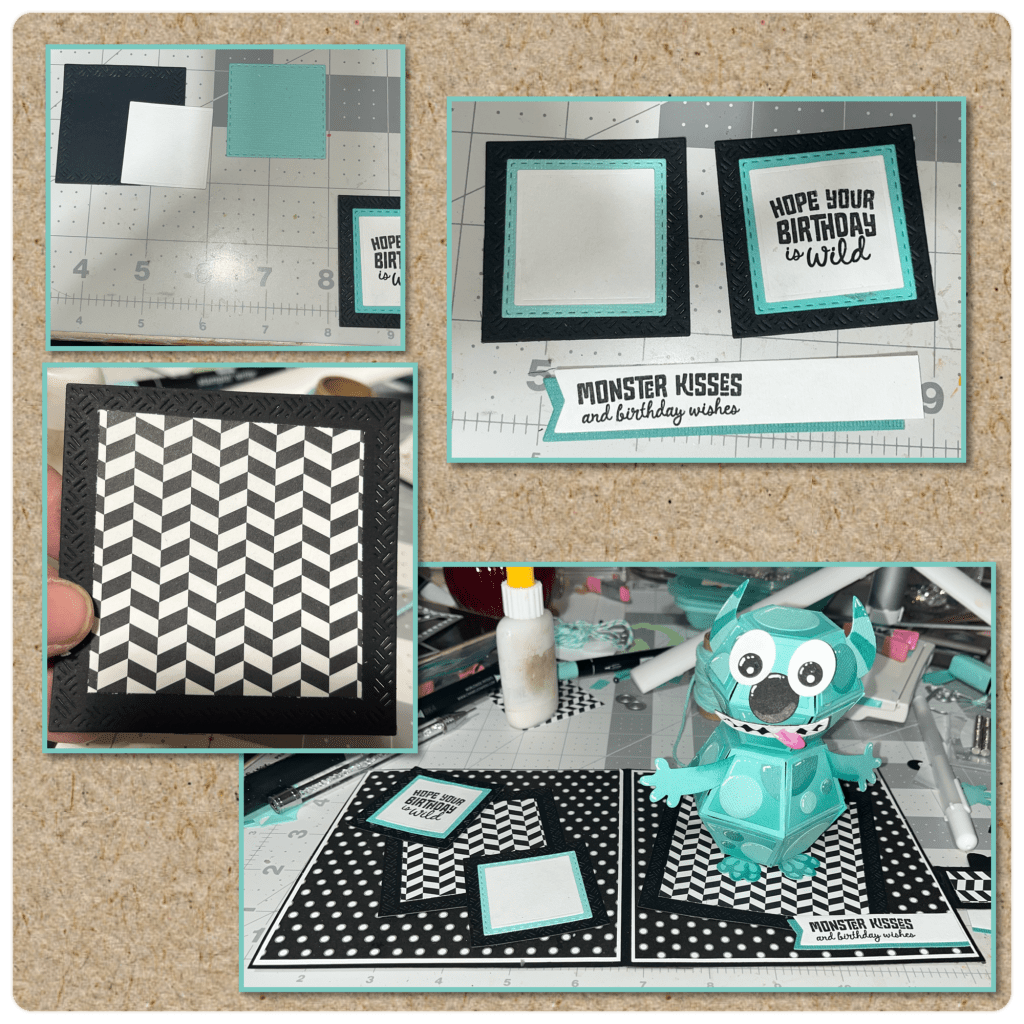
I used the Squares Crosshatch to make the large squares and the squares from the Postage Pop Up and the Greeting Labels for the small squares. The larger banner is also from the greetings labels . I stamped the messages from the Monsters stamps and added as shown.
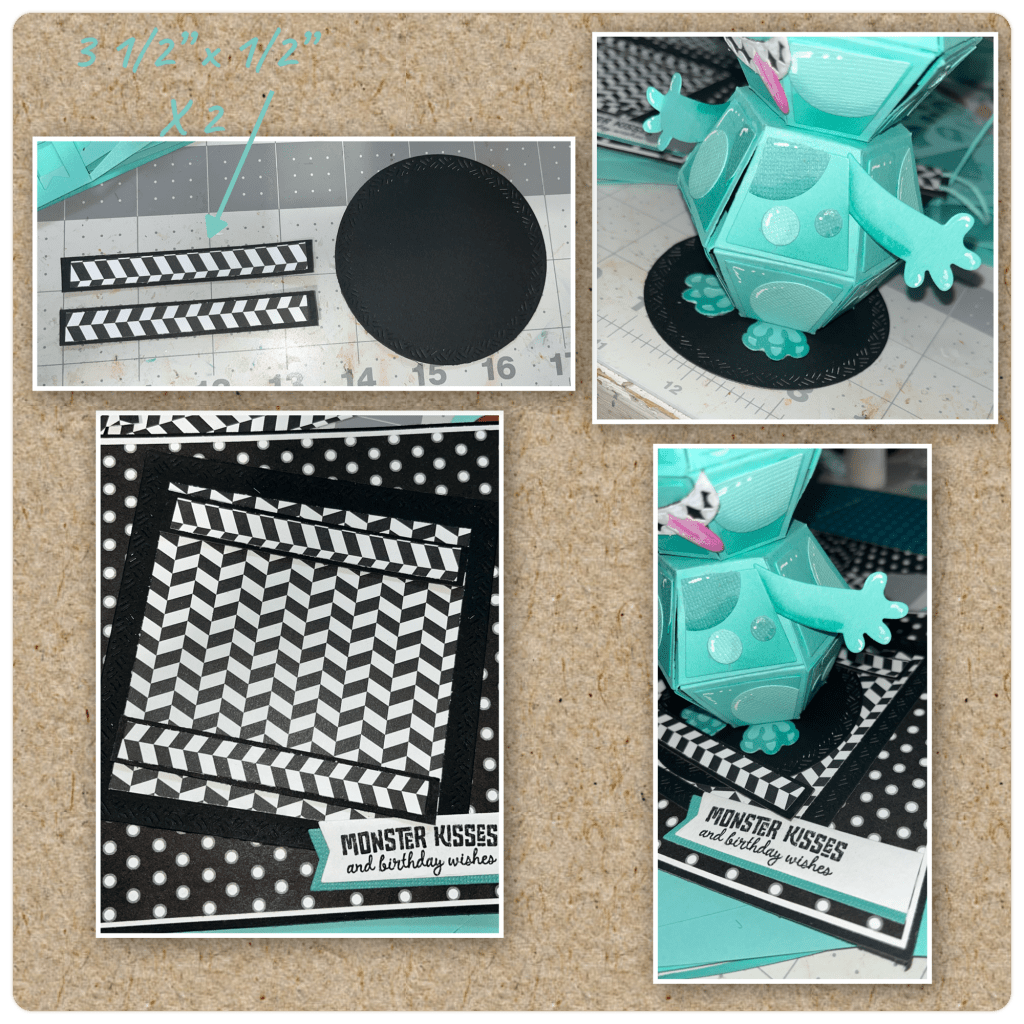
I decided that I didn’t want the monster to just fly out when opening the card so I added him to a Circles crosshatch. I cut the strips as shown below and added to the right side square as shown. You want them close enough that when the circle slide in it just won’t fall out. But far enough that you can slide one end of the circle in and still be able to slip in the other side of the circle.
Other Tools used
