

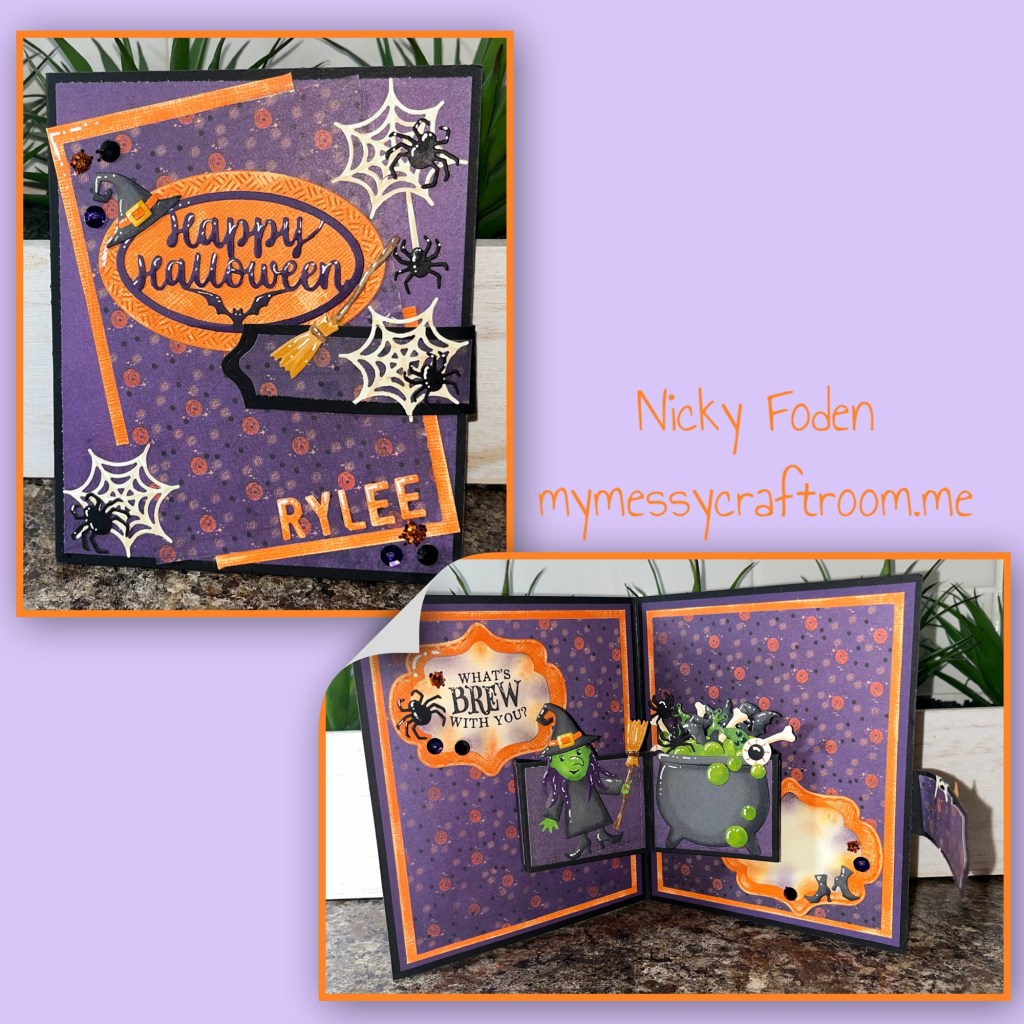
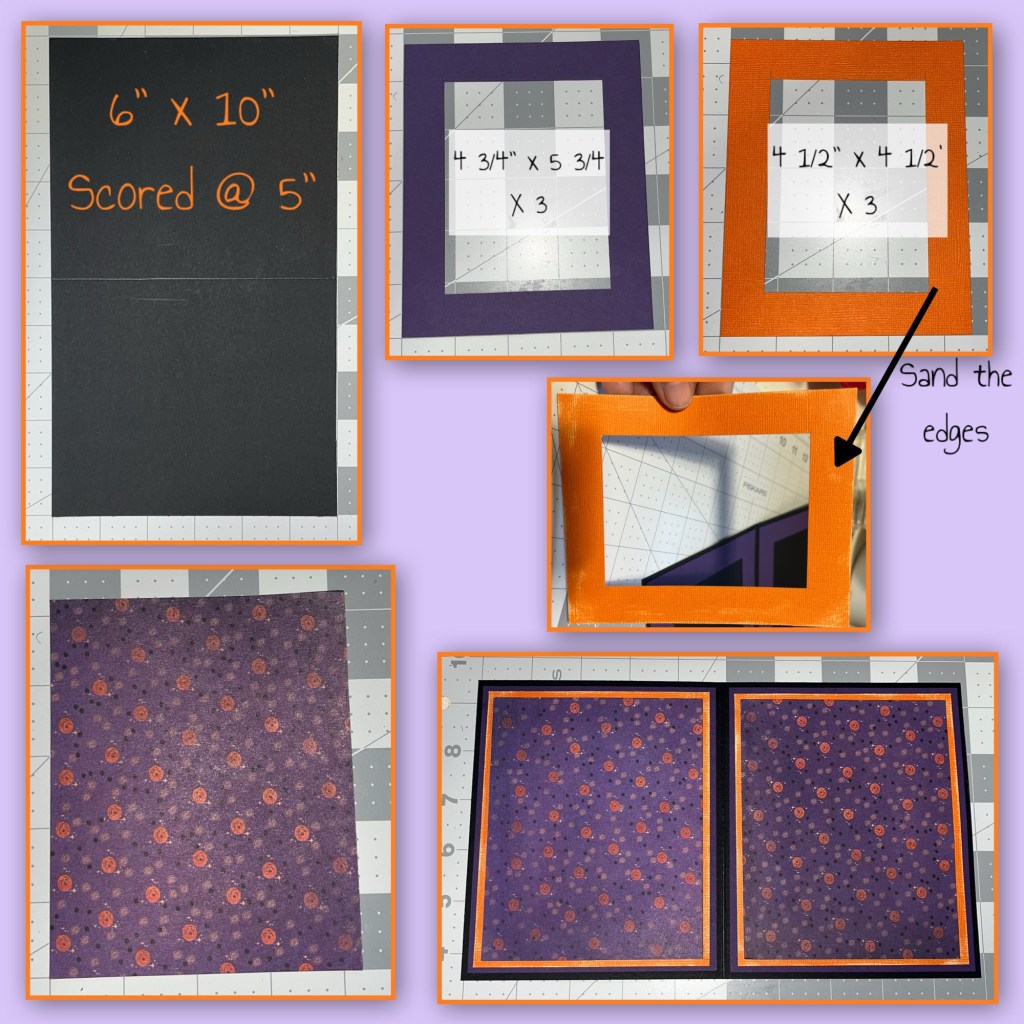
Today I am sharing the second card in my Halloween series, I needed 3 Halloween cards and decided I would make all 3 using the same card base. The card size and the inside layers are the same. I chose different mechanisms, and different card fronts for each card.
All the fun is in the reveal, to see this card in action please check out my FACEBOOK page, feel free to join if you would like to share your own crafty creations. You can also see a video of this card on my INSTAGRAM page.
Like mentioned above I created the same card base using the layers as shown below. I cut the centers out some of the layers to lesson the bulk and conserve cardstock.
I knew that I was going to use the witch and cauldron and wanted the brew to pop up, I decided on the Stocking Pop Up (Karen has a video tutorial on the product page at the link ⬆️ ) When I was adding the purple layers to the front of the mechanism I realized that I originally cut out the wrong piece for the sides. It was too long so be mindful to grab the right piece.
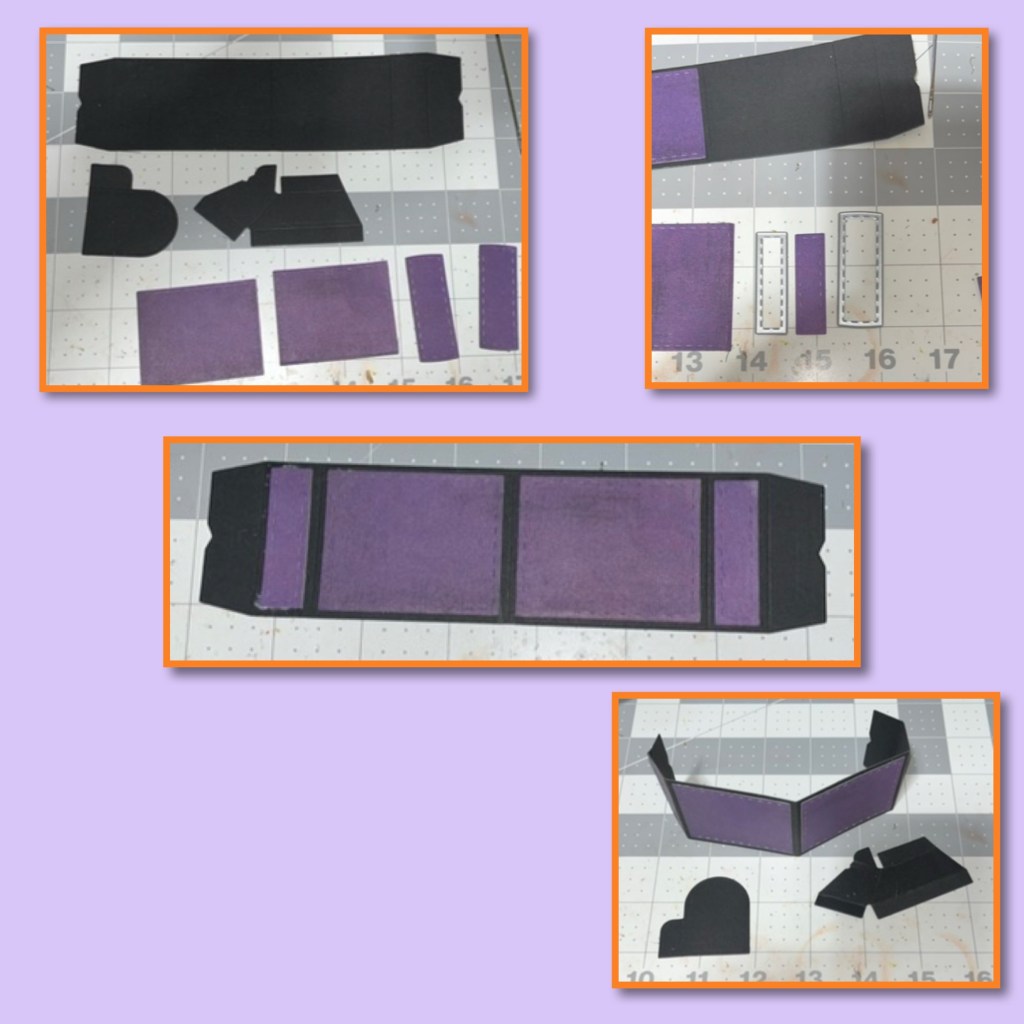
Add the mechanism to the card base as per Karen’s Directions.

I cut out the pieces to the Witch and Cauldon I coloured using alcohol markers, and added highlights using a white Gelly Roll Pen, and assembled as shown. I coloured one of the arms upside down so I cut and coloured a second one.

I stamped this image from the Halloween Phrases and inked the edges. I cut the layers using the Lorna Label and added to the card. I cut a second set a matching layers, I had to trim a slit in this layer to get it to fit under the mechanism.

For the front, I decided to used some scraps so I trimmed them and layered as shown.

I assemble the Happy Halloween from the Halloween Charms. I wanted a magnet closure, I added a small magnet as shown, and covered with the spider webs from the Halloween Scene set. I added a second magnet and covered it with the broom. To attach the magnets to the band (shown on the next slide) add the magnets over the other magnets and added adhesive to the top of the magnet.
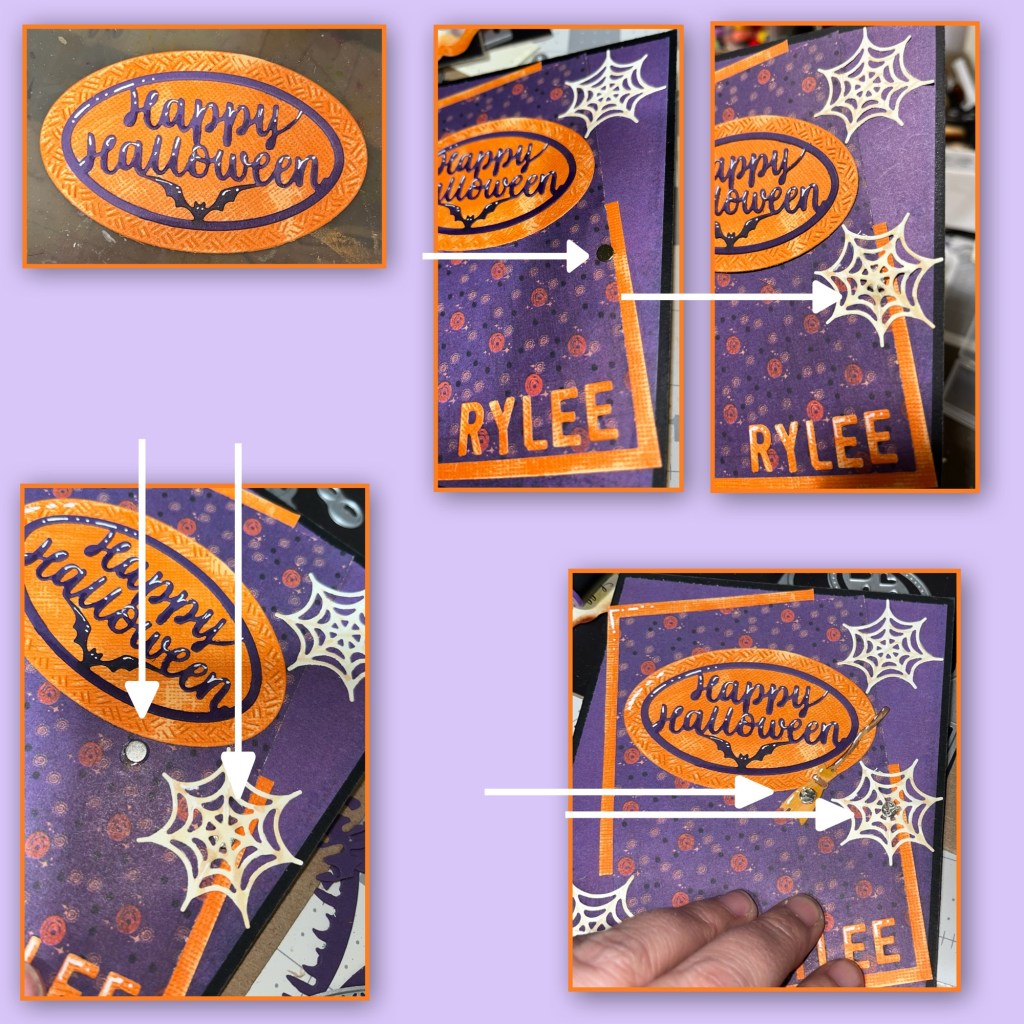
I cut the band as shown below and trimmed the edge using the Lorna Label die. I cut layers of patterned paper for the front and the back of the band, 1/4” smaller than the black band. close the flap to attach the magnets to the inside of the band, then cover both sides of the band with the patterned paper. I added a broom head and a spider web to the band over the ones that are under it so they line up. I added more webbing and some spiders. I added “Rylee” using the Mini Alphabet and Numbers

I thought that it needed a little bling so I added purple sequins, black gems and blobs of glue with orange glitter randomly around the card.

Deists Used
Other Tools used
