

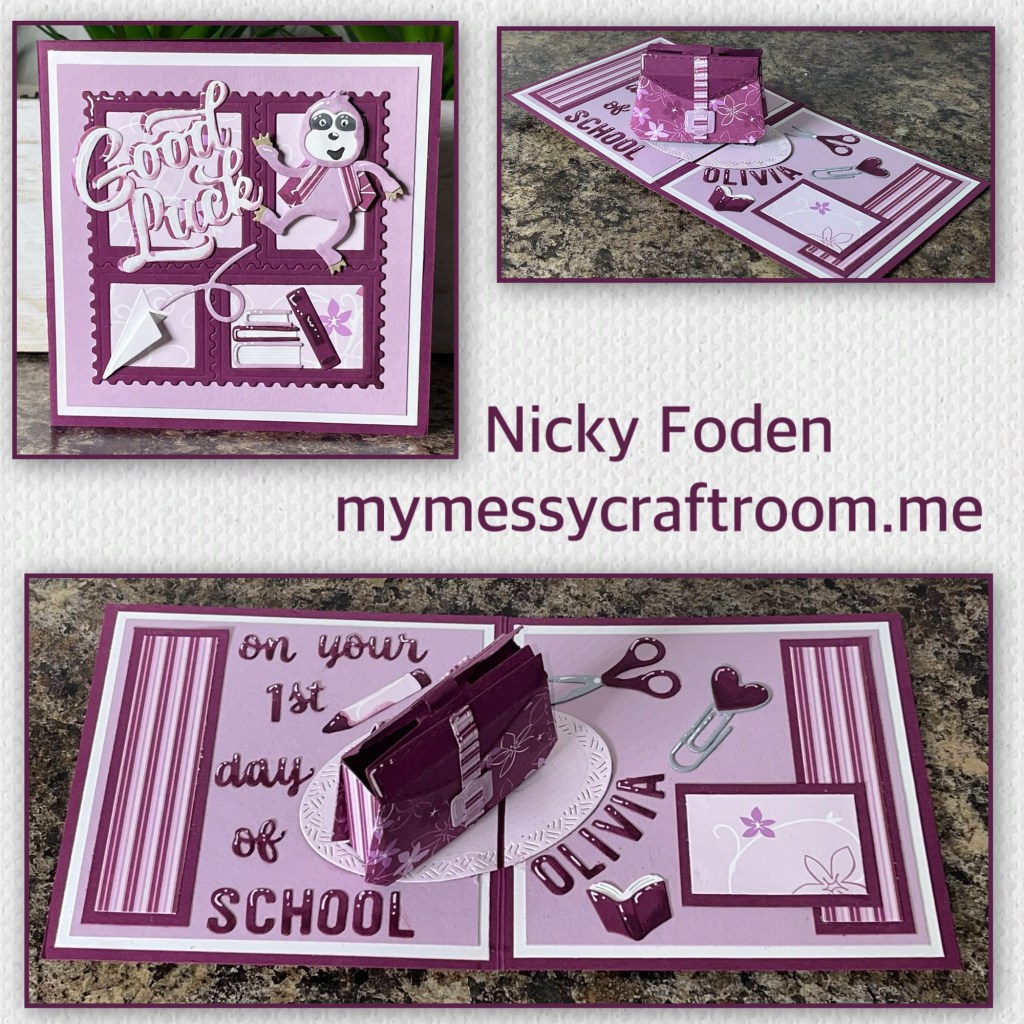
I never thought I would be making “back to school cards” but my grandchildren get so excited when they get new cards I literally look for excuses to make them for them. One of my gals has a special stuffed friend so I thought I would I add it to the card as well.
All the fun is in the reveal, to see this card in action please check out my FACEBOOK page, feel free to join if you would like to share your own crafty creations. You can also see a video of this card on my INSTAGRAM page.
I thought it would be cute to make a little card so this is going to be a 4 1/2” square card. I cut the card base and panels as shown below.

I used the Postage Popup die set to make the front of the card. First I cut the background using the die shown and cut into pattern paper, then I inlaid the smaller pieces to cut the frame, combine the 2 pieces as shown.

Add all the panels and the die cut piece to the card as shown.

I thought it would be cute to try and turn the Purse Pop Up into a backpack. (Karen has a video tutorial on the product page at the link ⬆️ on how to assemble and install the purse). To change it into a back pack I cut the handle off the top. I cut 3 buckles, and extended the strap that will go on the front. I cut 2 strips of paper to use as the straps, they are slightly too big to fit through the buckles so I cut the centers out of the buckle pieces and glued to the straps so it looks like the paper goes through. I add the pieces as shown, the flap and the long strap to the front and the two thicker straps to the back.

I added to the card as per Karens directions, and this is what it looks like from the front, back, and the top.

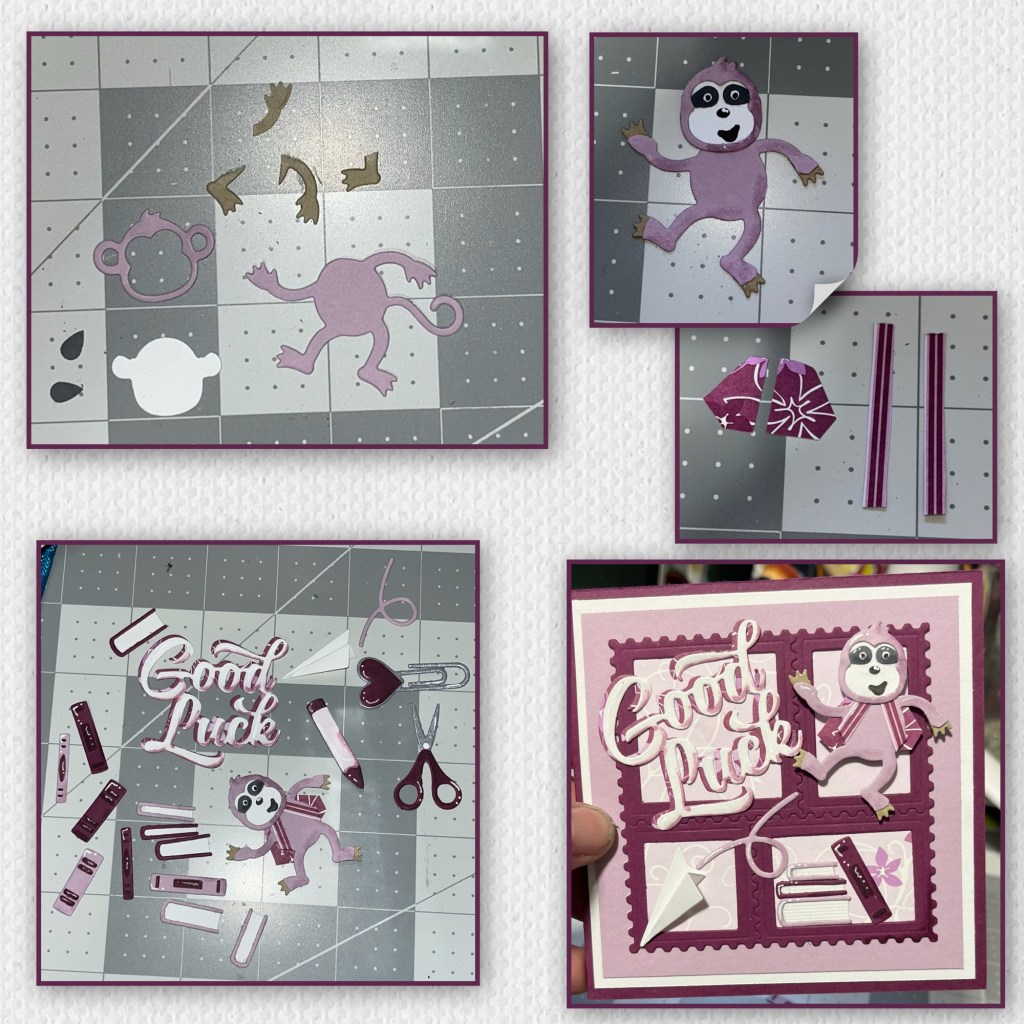
Now for the fuzzy little friend. My sweet girl just LOVES sloths, so I made one to resemble her favourite. I used this monkey die set and cut all the pieces as shown. I cut extra hands and feet from a light tan cardstock to make the claws. To make the grey mask pieces I used an older tear drop punch (I believe it was from Martha Stewart). I cut the ears and tail off. I also cut the end of the purple fingers and toes and the fourth fingers to make it a 3 toed sloth. I added the tan pieces to the hands and feet. I added shading with a Versa Mark Marker, and highlights with a white Gelly Roll pen. I hand cut the pieces to make a little back pack. I decided to split the back pack in half so I could line it up just right. I cut and assembled pieces from the Book Worm die, the Office Charms and a few pieces from the Postage Pop up set. I also cut out Good Luck out twice. One from the light pattered paper and one from the darker, I used an alcohol marker to add shading and a white Gelly roll pen for highlights. I added the pieces as shown.
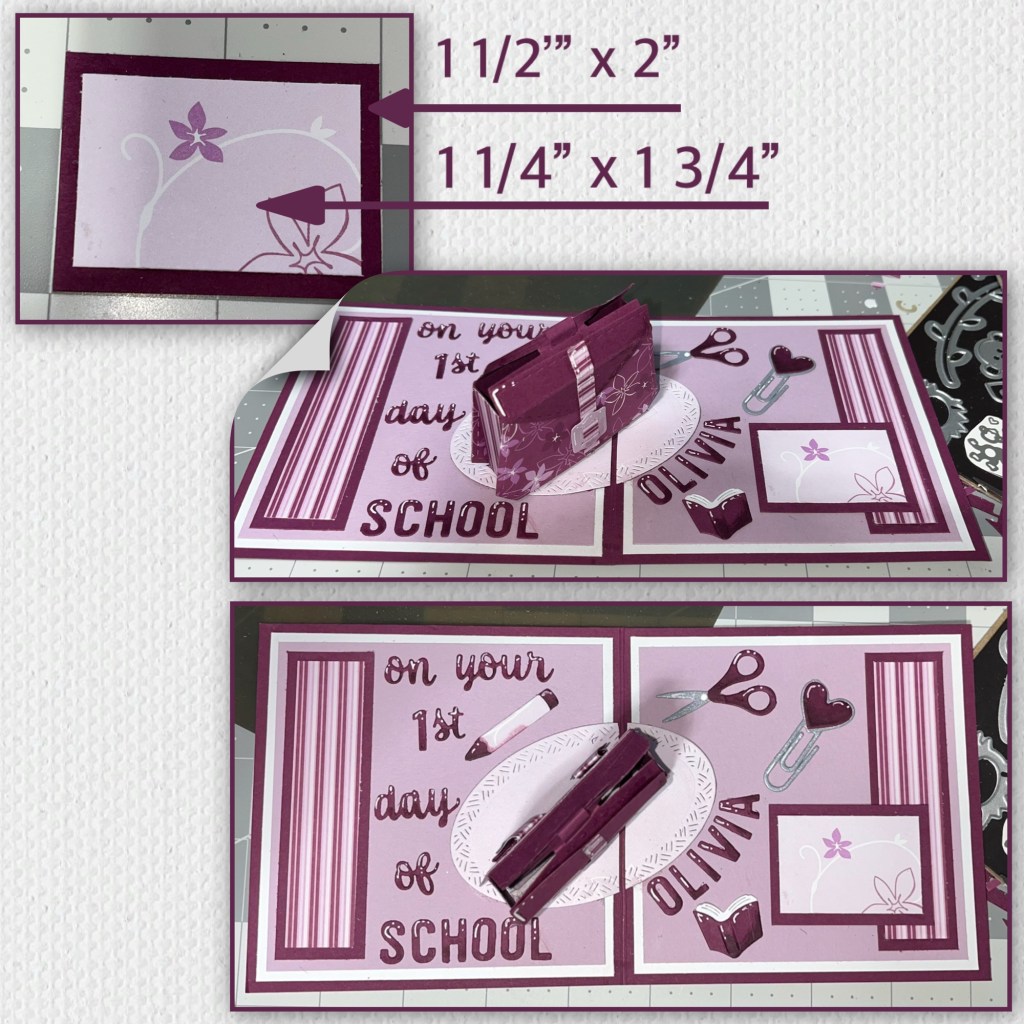
Using multiple sets (listen at the bottom) I created the inside sentiment , I added shading with a Versa Mark Marker, and highlights with a white Gelly Roll pen. I cut two borders (dimensions below) and added to the card.

I added one more block (dimensions below) for a place to sign, and added the last of the pieces.

Postage Pop Up– stamp collage on the front, paper airplane, swirl,
Book Worm – books
Office Charms– crayon, scissors, paper clip.
Word set 18- Connectors – on, your, of
Word set 2- Birthday– day (cut it off of Birthday)
Numbers– st (for the 1st)
Mini Alphabet and Numbers – school, Olivia, 1
Other Tools used
