

Hello and happy belated Mother’s Day. Even though I had this card completed a few weeks ago, I needed to wait until the recipient received her card. My colour pallet was chosen from this fun patterned paper from my stash.
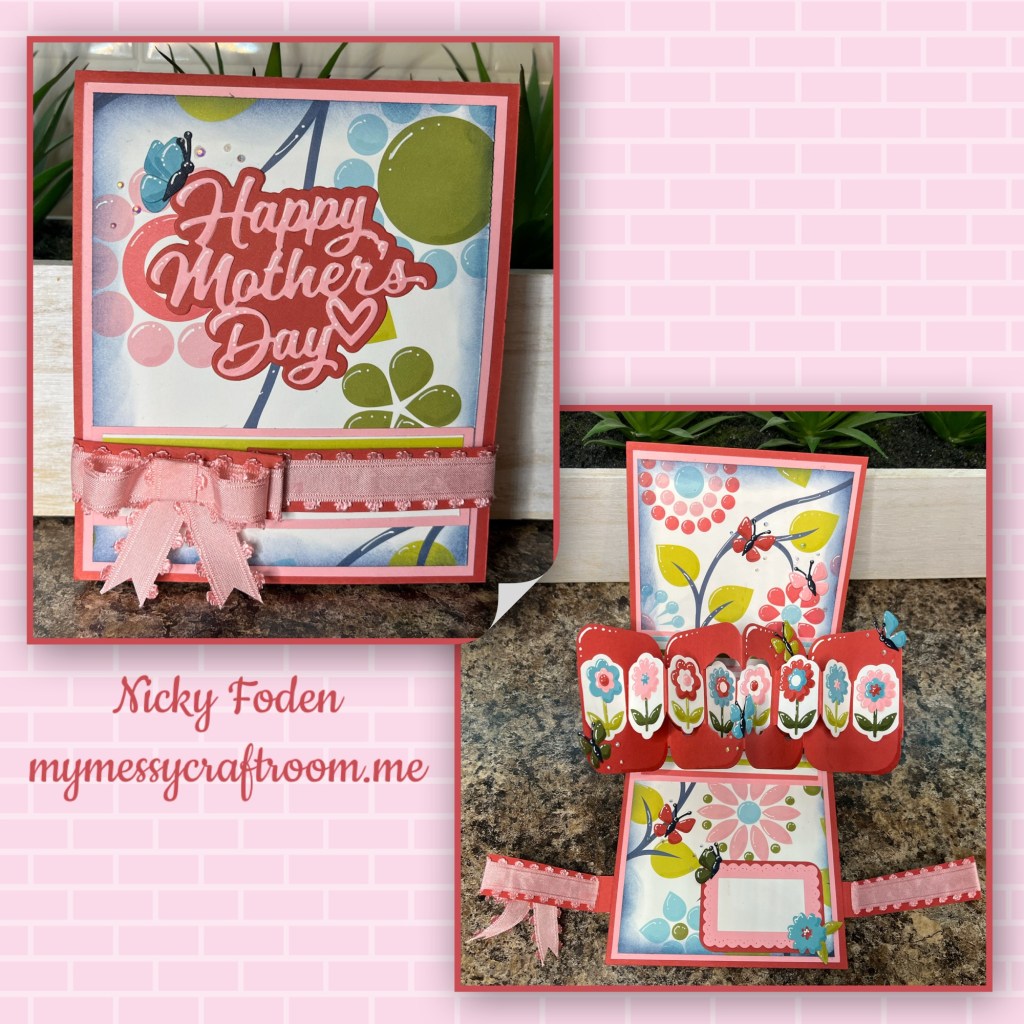
All the fun is in the reveal, to see this card in action please check out my FACEBOOK page, feel free to join if you would like to share your own crafty creations. You can also see a video of this card on my INSTAGRAM page.
Cut the cardbase and panels as showed. I cut the centers out of the panels to conserve cardstock, and to get rid of some of the bulk. I sponged the edges of the the patterned paper with navy ink and I added shading with a Versa Mark Marker, and highlights with a white Gelly Roll pen to the flowers on the paper.

I cut pieces from the Flower Pivot Panels and the Twist Panel Pop up and followed Karen Burnistons VIDEO (second half of video) to combine them into this fun pop up. I wanted the flowers to be against white card stock. So I cut the Flower pivot panels from white and trimmed out the centres and added them to the panels section as shown. 

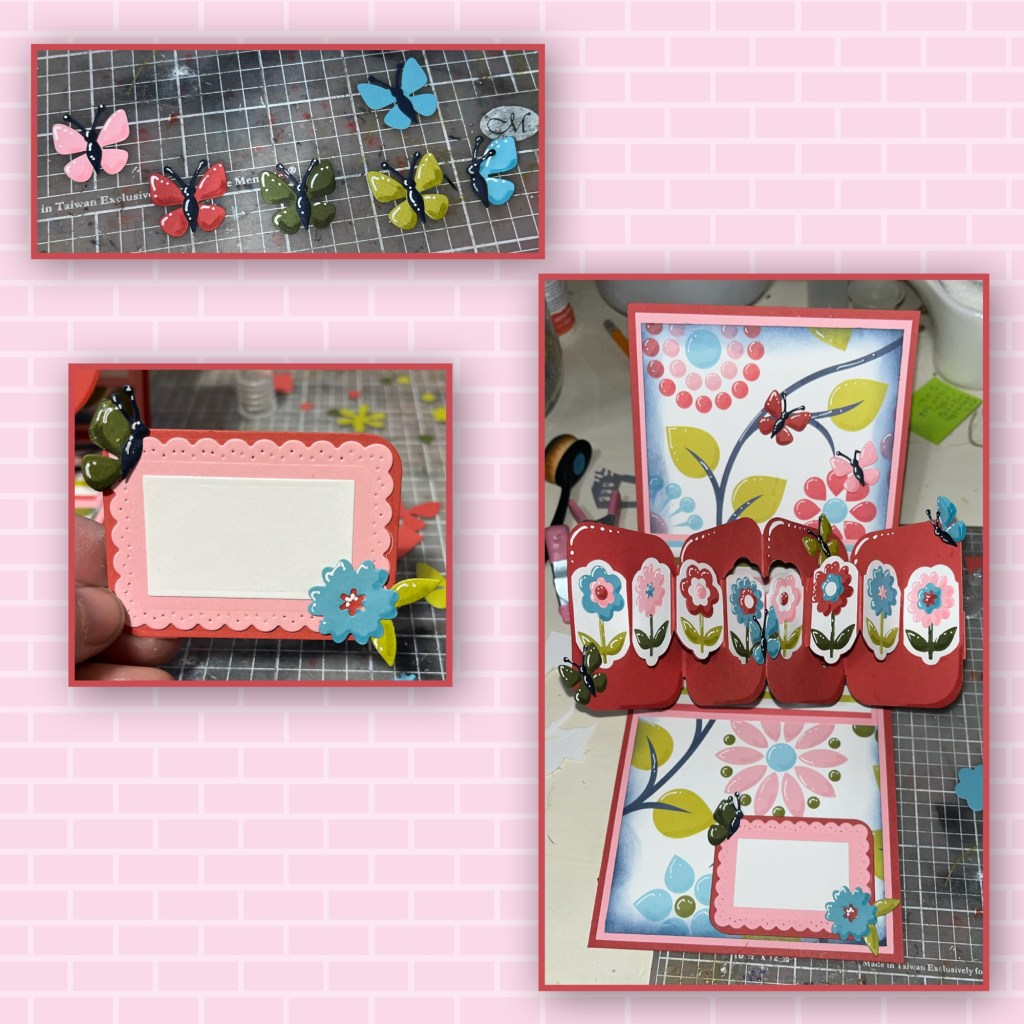
I cut and assembled the flowers with coordinating colors. When adding to the panels, I thought the ends looked kind of bare so I added an extra flower on each end to fill in that space. I added shading with a Versa Mark Marker, and highlights with a white Gelly Roll pen to the flowers and the panels 

I assembled the mechanism piece from the Twist Panel pop-up by following Karen’s tutorial.
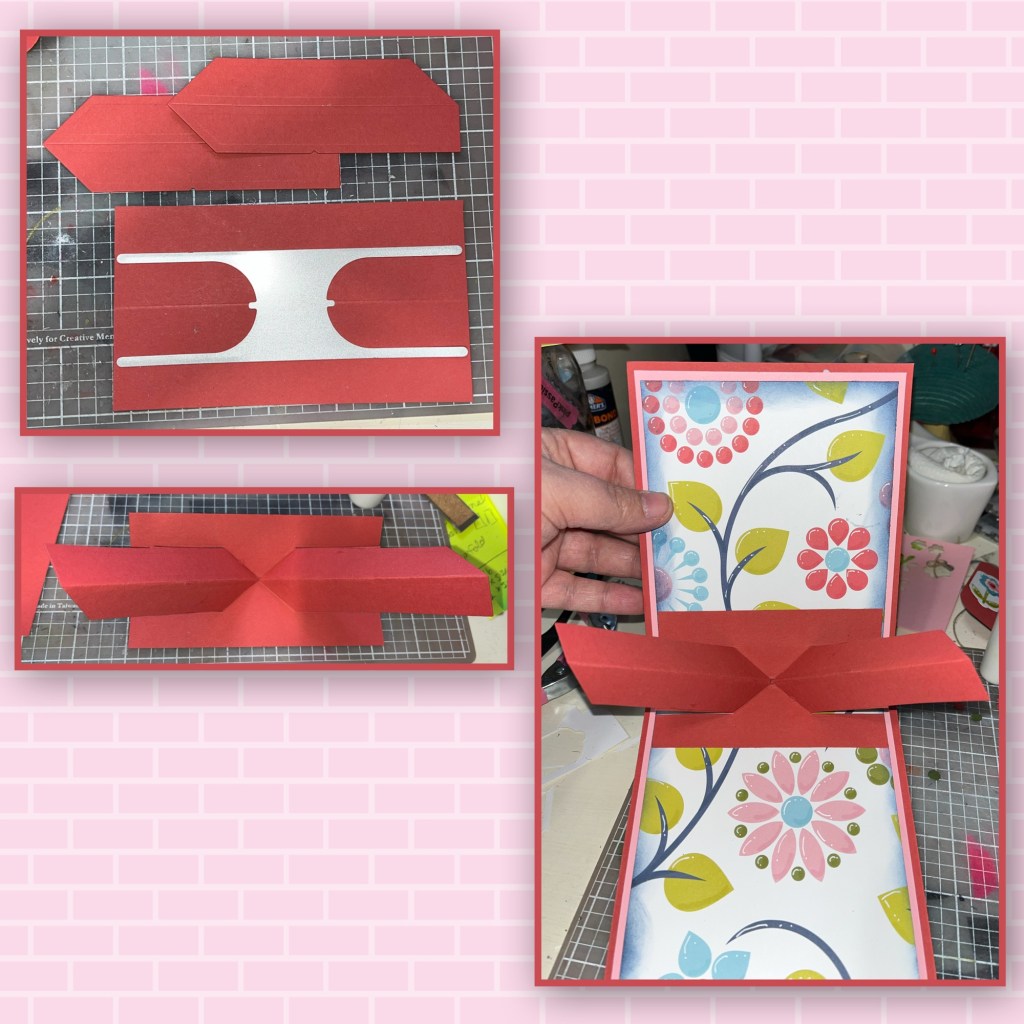
I didn’t like how the red of the mechanism looked. So I created two borders as shown below and use them to cover up as shown. Then added the Twist Panel Section.

I cut and assembled the butterflies from the Flower Pot Add ons, and a block to use a place to sign using pieces from the Twist Panel Pop up. I added shading with a Versa Mark Marker, and highlights with a white Gelly Roll pen. I added all the pieces as shown.
The card didn’t want to stay closed nicely, so I decided to add a belly band. I knew I wanted to use a ribbon so I just made sure the belly band was slightly wider than the ribbon and that it would wrap around the card and overlap in the front. I added magnets as shown under the ribbon so when the flaps overlap each other, so the closure stays closed and you don’t see the magnets.

I wanted to add faux now by cutting ribbon as shown. I make a loop with the long piece, wrap the short piece around the middle and I fish tale cut the last piece, fold it and adhere it to the back. I find glue dots work best for this. I added it to the left side of the belly band.
I added Happy Mother’s Day as shown.

I thought the front needed a little something, so I made another border to match the two on the inside, slightly wider than the belly band and added it under the belly band to the card front.

I added some itty bitty gems randomly around the front and the inside.

Other Tools used
