

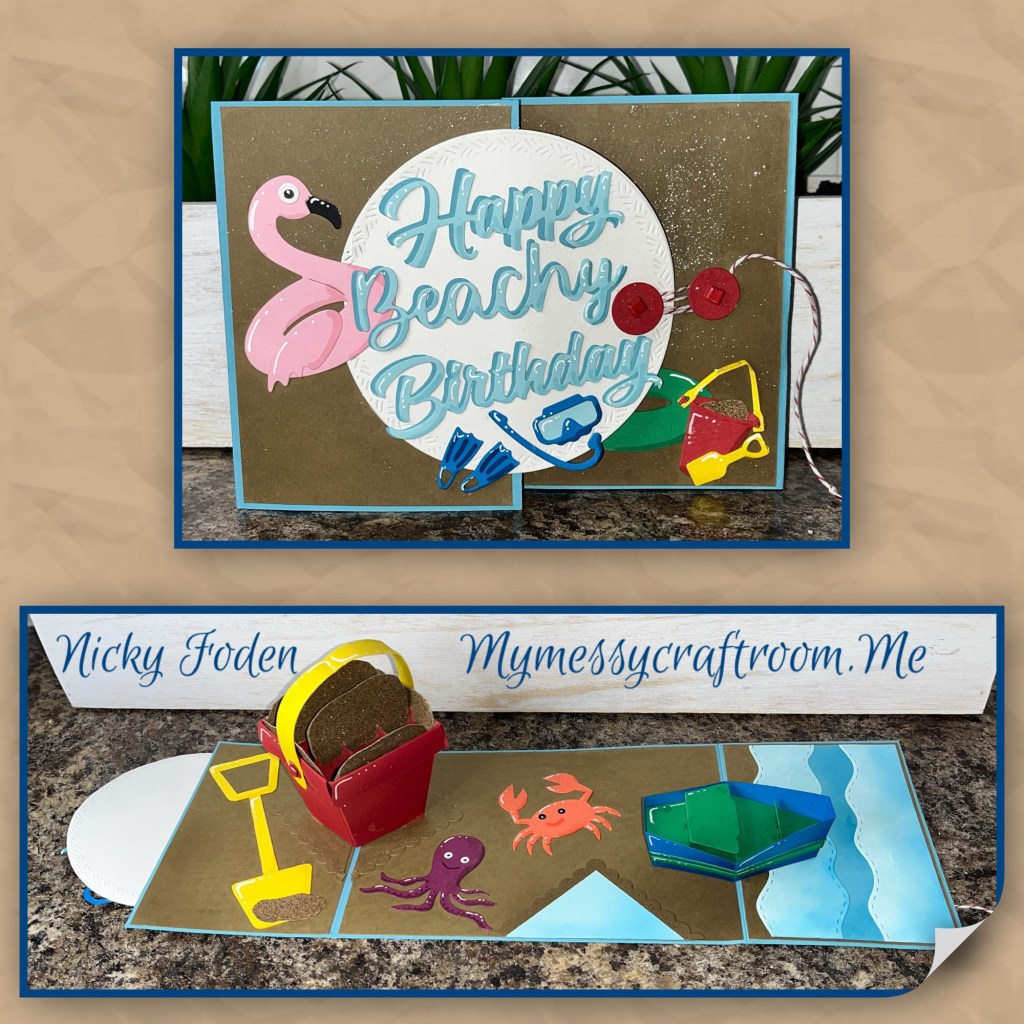
At first I wasn’t sure what I was going to do for this month’s Karen Burniston design team challenge. Karens challenge to us is “Lake or Ocean”. Well as some of you know I grew up in a town that is on the shores of Lake Huron, so I knew I wanted to lean towards lake. I also knew I wanted to do something a little different than what I’ve previously done, or else would it really be a challenge 🤷🏻♀️ So I thought for a bit, what else can you do at the beach and then it hit me… play with sand toys. And this is what I came up with.

All the fun is in the reveal, to see this card in action please check out my FACEBOOK page, feel free to join if you would like to share your own crafty creations. You can also see a video of this card on my INSTAGRAM page.
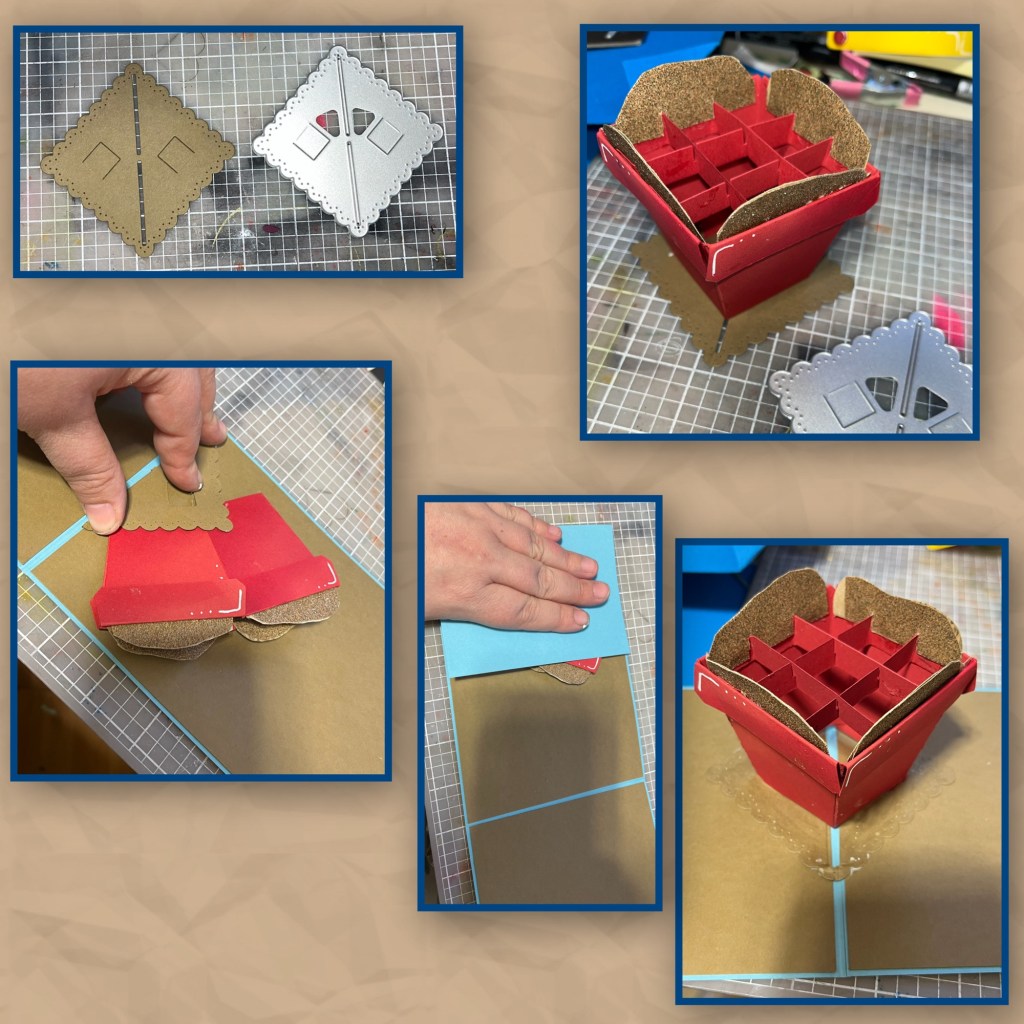
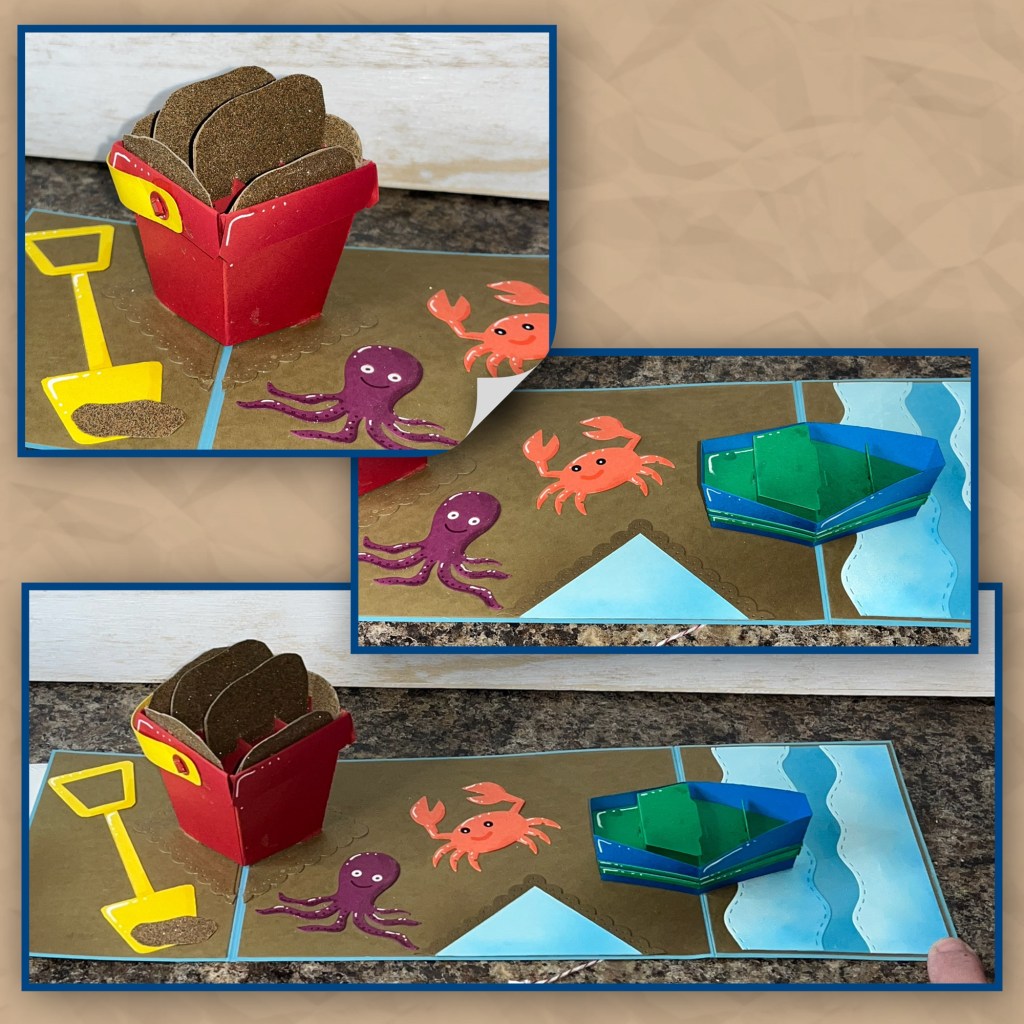
I knew I was going to make a “toy boat” but to make it look like a toy I needed to bring down the scale of the boat. I decided to use the Flower Pot Pop Up to make a sand pail. I used post it notes along the edges as I brushed in some red ink to the bottom left of each panel of the pot to add shading. I added white gel pen for highlights as show. I assembled the flower poy (Karen has a video tutorial on the product page at the link ⬆️)
To keep the flaps down and in a good position I used foam tape to hold them in place.
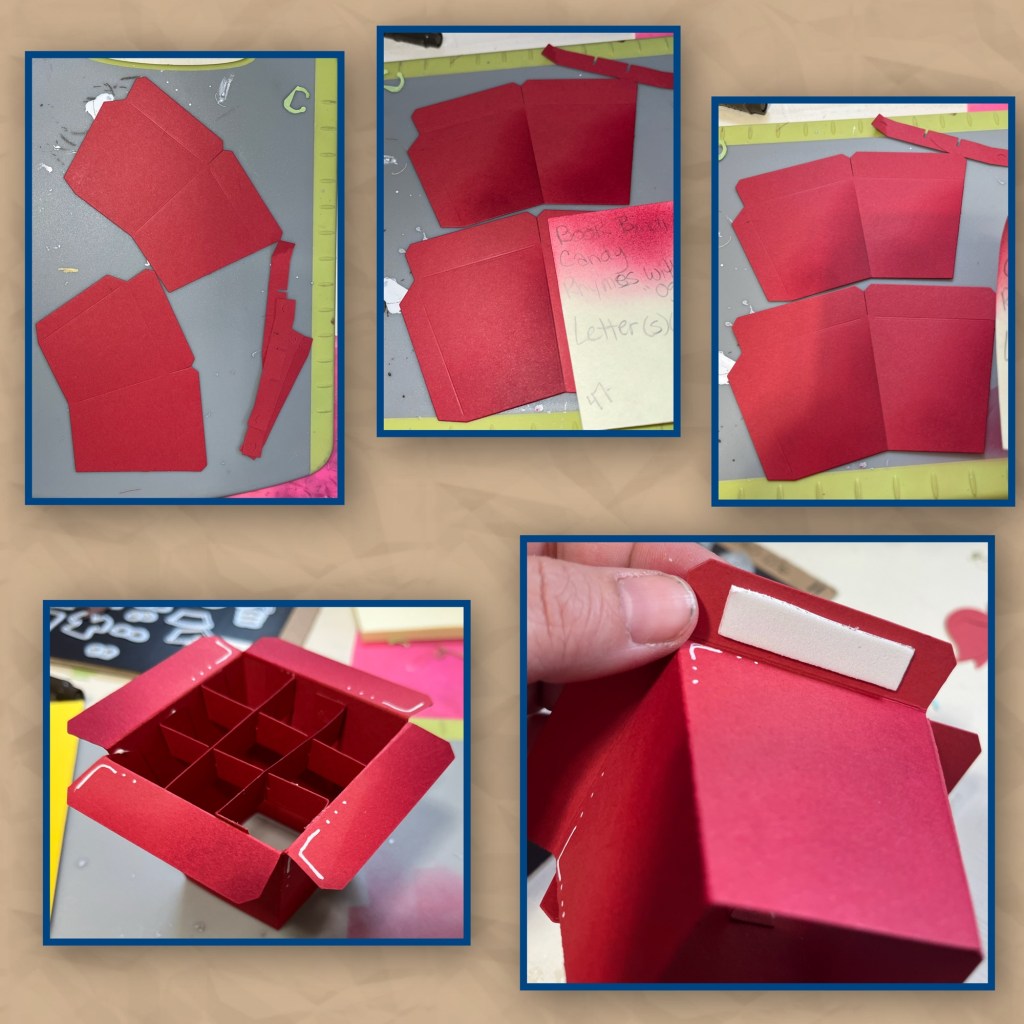
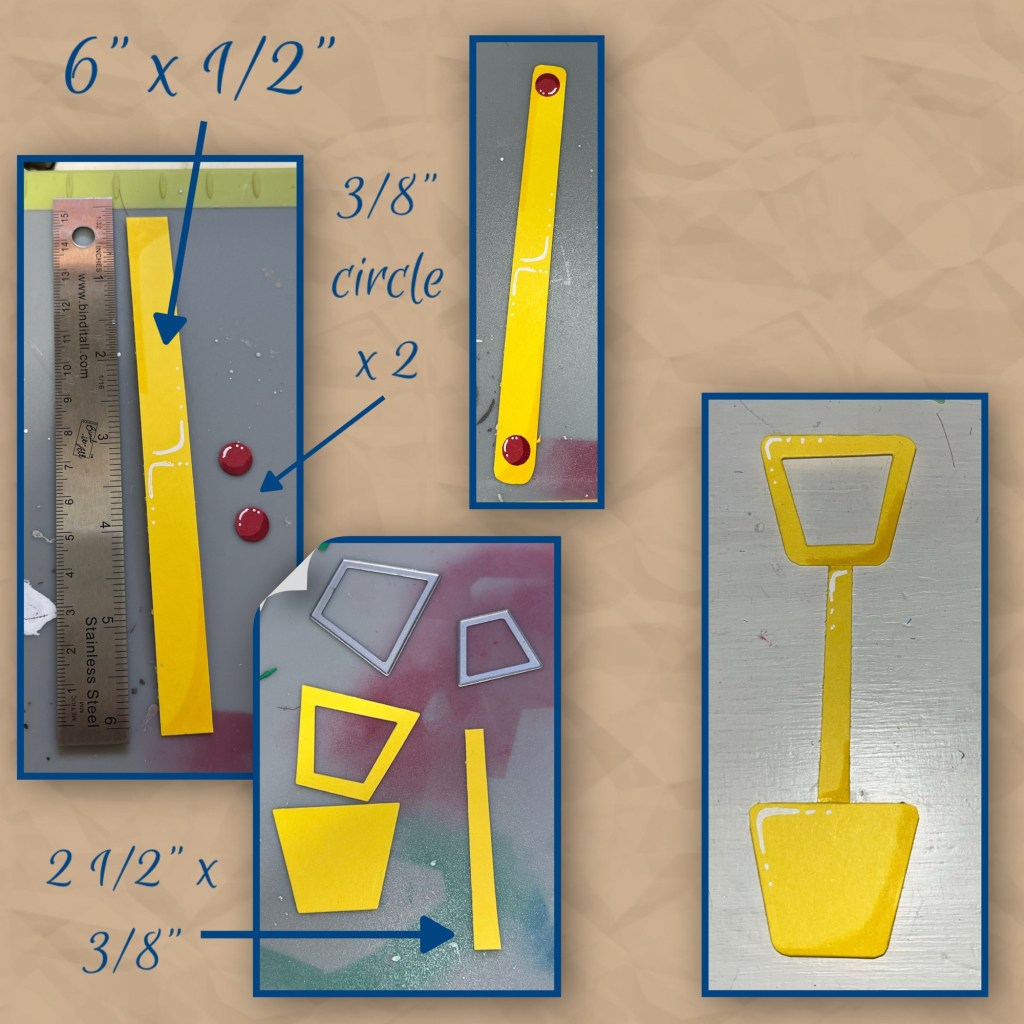
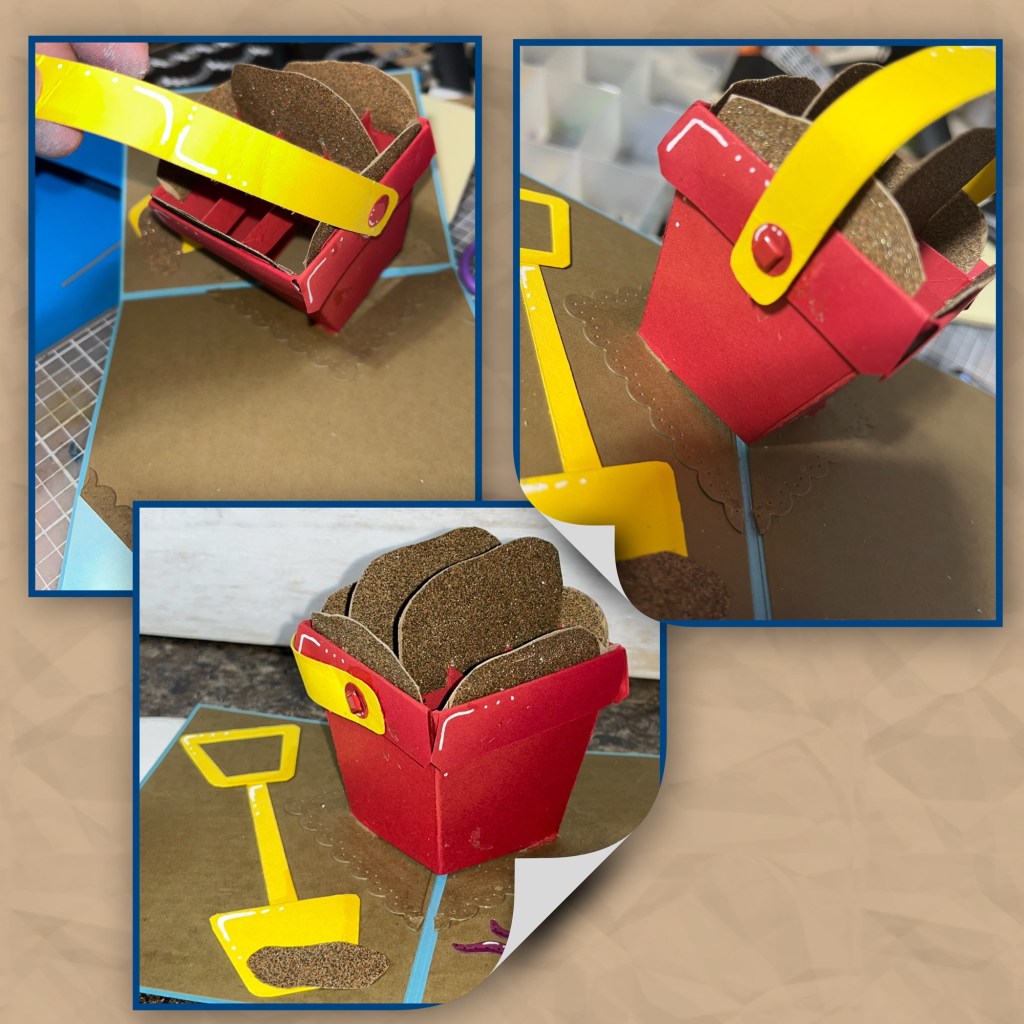
My sand pail needed a handle so I cut the pieces as shown below and set it aside for now.
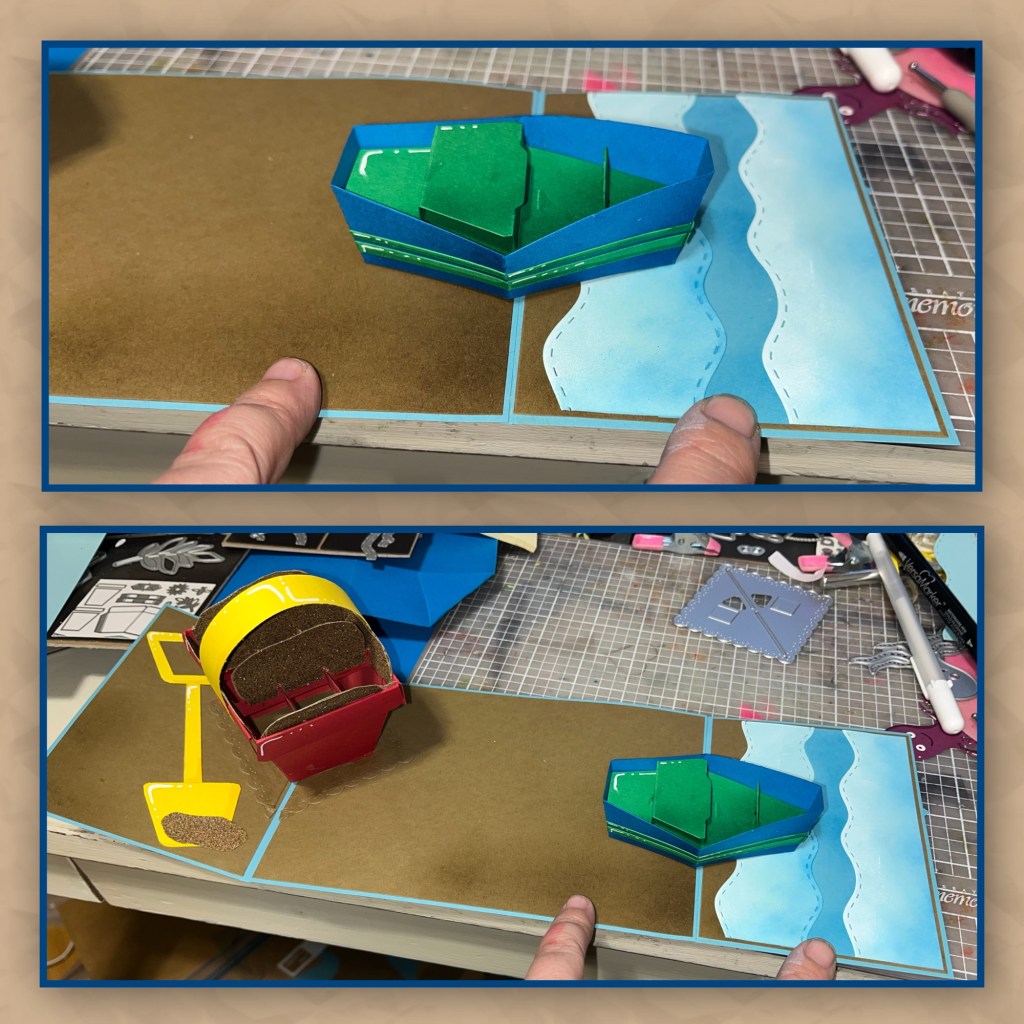
I used the trapezoids from the Surprise Ball Pop up, and the Mini Ball Pop up as shown below to make a shovel. I added shading with a Versa Mark Marker, and highlights with a white Gelly Roll pen, I also rounded the corners.
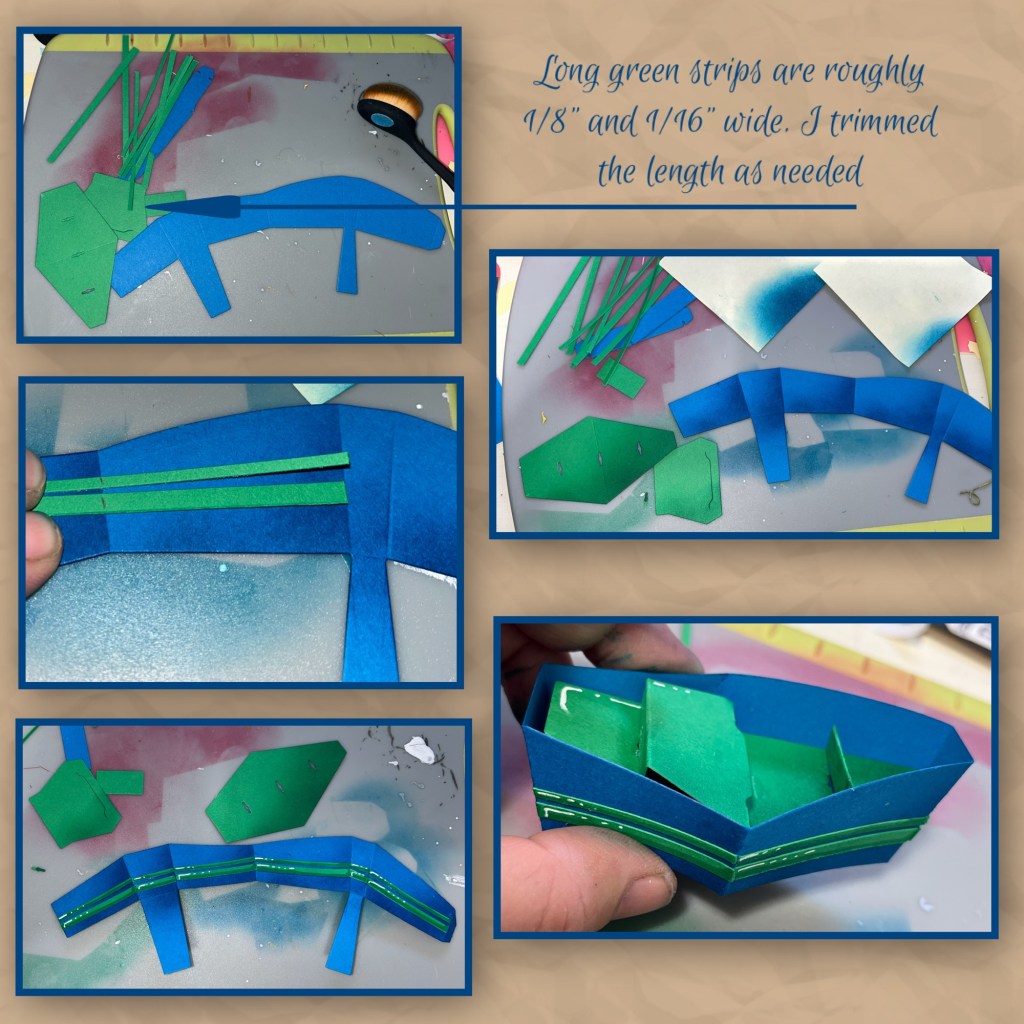
Because I wanted the Boat to look like a toy I wanted to use bright colours and I decided to give it stripes. I used a sticky note,a brush, and matching ink to add shading to the bottom right of all the boat pieces. I added the stripes to the boat, section by section. I didn’t want the stripes to have to fold with the boat so I cut them to fit each section. I added shading with a Versa Mark Marker, and highlights with a white Gelly Roll pen.i assembled the boat (Karen has a video tutorial on the product page at the link ⬆️)
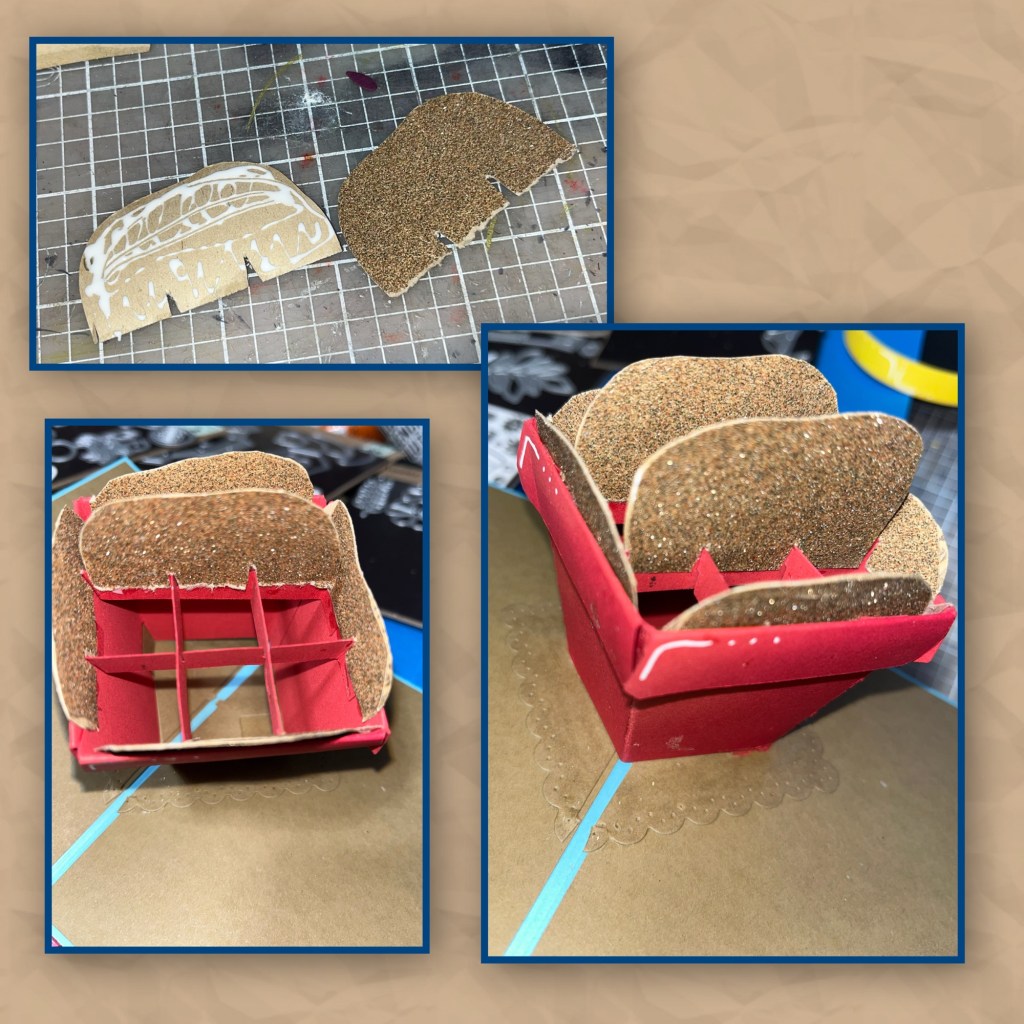
I cut mounds of sand from actual sandpaper (using old scissors) and marked where I would cut the slits that line up with the grid inside the pot. I cut them in doubles so I could glue them back to back. I also cut sand for the shovel. I didn’t add the inside mounds of sand yet.

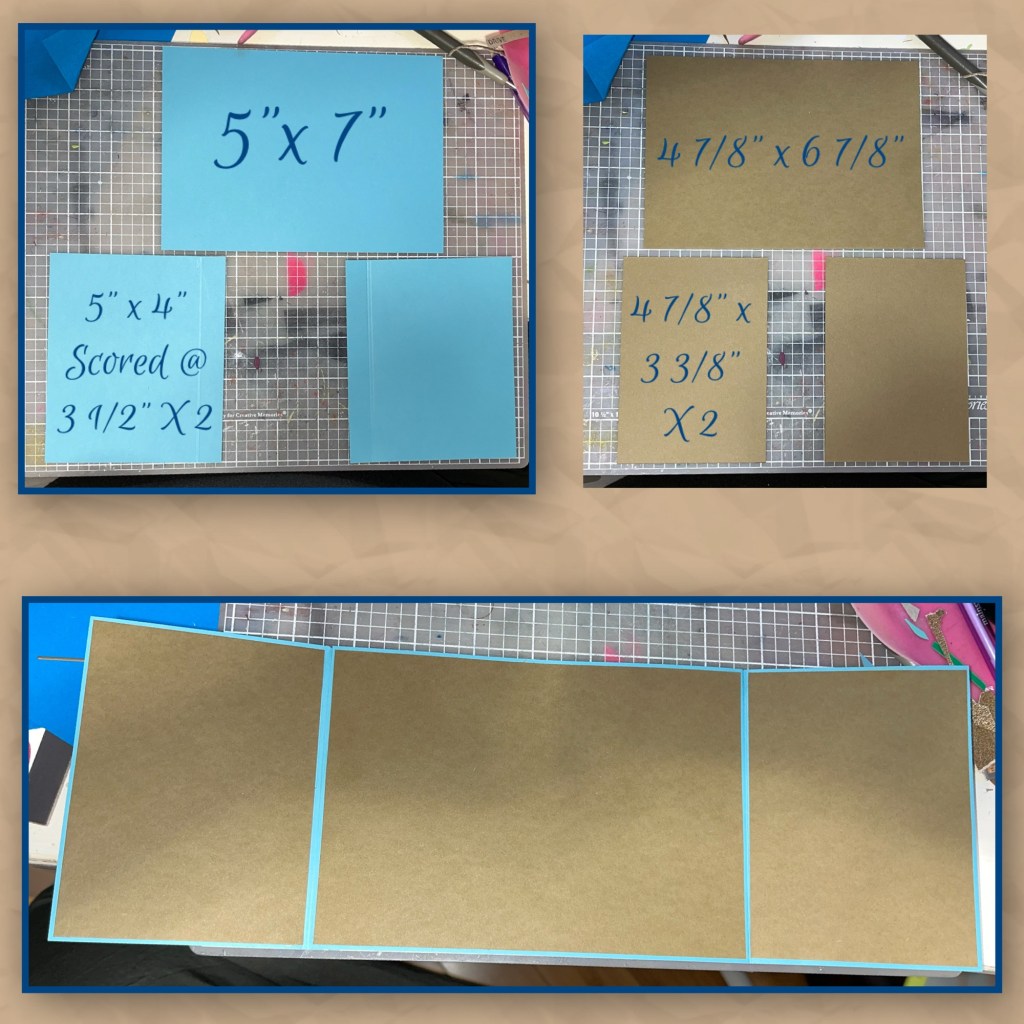
I cut the card base and panels as shown below. And made the card base as shown.
Using the base piece from the Flower Pot Add On I added the sand pail to the card on the left fold. (currently my video tutorial is on the product page at the link ⬆️ it might be switched out to Karen Burniston video at some point)
I added the sand mounds inside the flower pot, adding then back to back so sand can be seen from every angle.
I forgot to add shading to the background so I’m using a post it note to mask off the corners as shown then brushed on brown ink.
I cut some waves using the Ocean Edges from 2 shades of blue. I sponge the lighter blue waves with white ink. I layered the waves and added them to the card.

I added the Boat to the card (Karen has a video tutorial on the product page at the link ⬆️) I added the shovel and the handle BUT the handle twists funny when I close the card so I had to come up with a better solution.
So I carefully peeled off the handle. I used a small hole punch through the handle and the flower pot. And I attached the flower pot with a brad so the handle can move up and down. The card folds better if the handle is down behind the flower pot as opposed to standing straight up.
I needed a few more beach toys, so I decided to add the octopus and crab from the Ocean Animals. I tried to leave the eyes a little flat looking to make them look more toy like as opposed to animals crawling out of the ocean. I cut out another base piece from the Flower Pot add-on from the sand color and then the inside from blue. I added white ink to match the waves, and this is meant to be a place to sign the card. 
Time for the front. I cut 2 of the largest Circles Crosshatch and two sand coloured panels as shown below. I also cut out an assembled two closures from the Flaps and Closures dieset. Add one of the closure pieces to the first circle. And one to a brown panel. The one on the panel should have the string (Karen has a video tutorial on the product page at the link ⬆️)
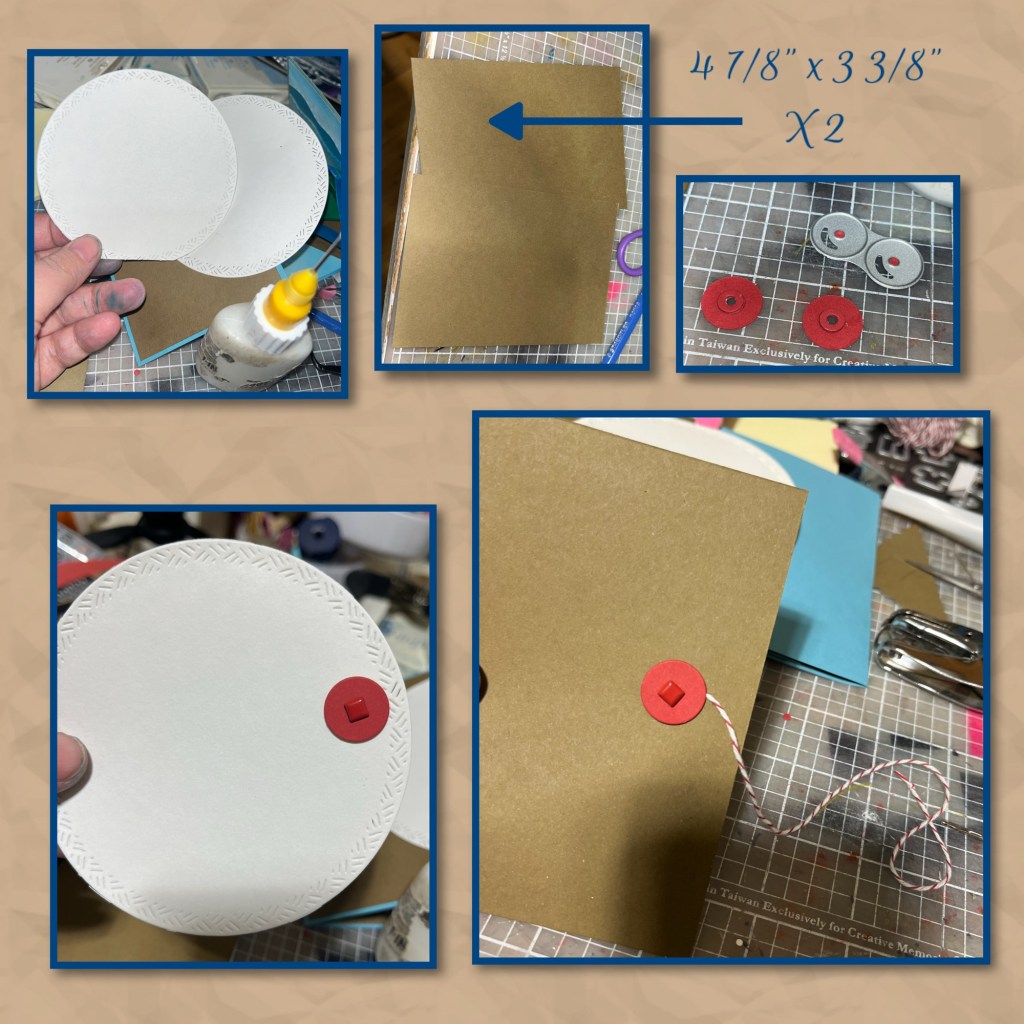
I added the other circle to the back of the first circle so the Brad from the closure is not visible. I added both panels to the card front making sure the one with the closure is on the right side and added the circle as shown only adhering to the left side.
Next, I did a little word surgery. I cut out Happy Birthday from two shades of blue, cut them apart and layered as shown. The word beachy comes from Word set 16 Beach Happy Hour , I cut the “y” off of “happy” and added it to the end of beach. I added all the words to the circle as shown.
I cut out and assembled all of the pieces fromTiny Accessories 4 and the pail and shovel technically come from an older dieset from when Karen was with Elizabeth craft design. But she currently has a pale and shovel with her Adirondack Chair

A quick hint- to make the brown card stock look a little more like beach stand. I swiped quite a bit of Wink of Stella around, but then used a clear alcohol marker to spread it throughout the card stock so it wasn’t super glittery but like gives off shimmery sand vibes.
Other Tools used
