

Hello crafty friends, I finally got my blog post done for my latest Craft Roulette card. I think fit would make a good masculine card. Here are the parameters and this is my card.

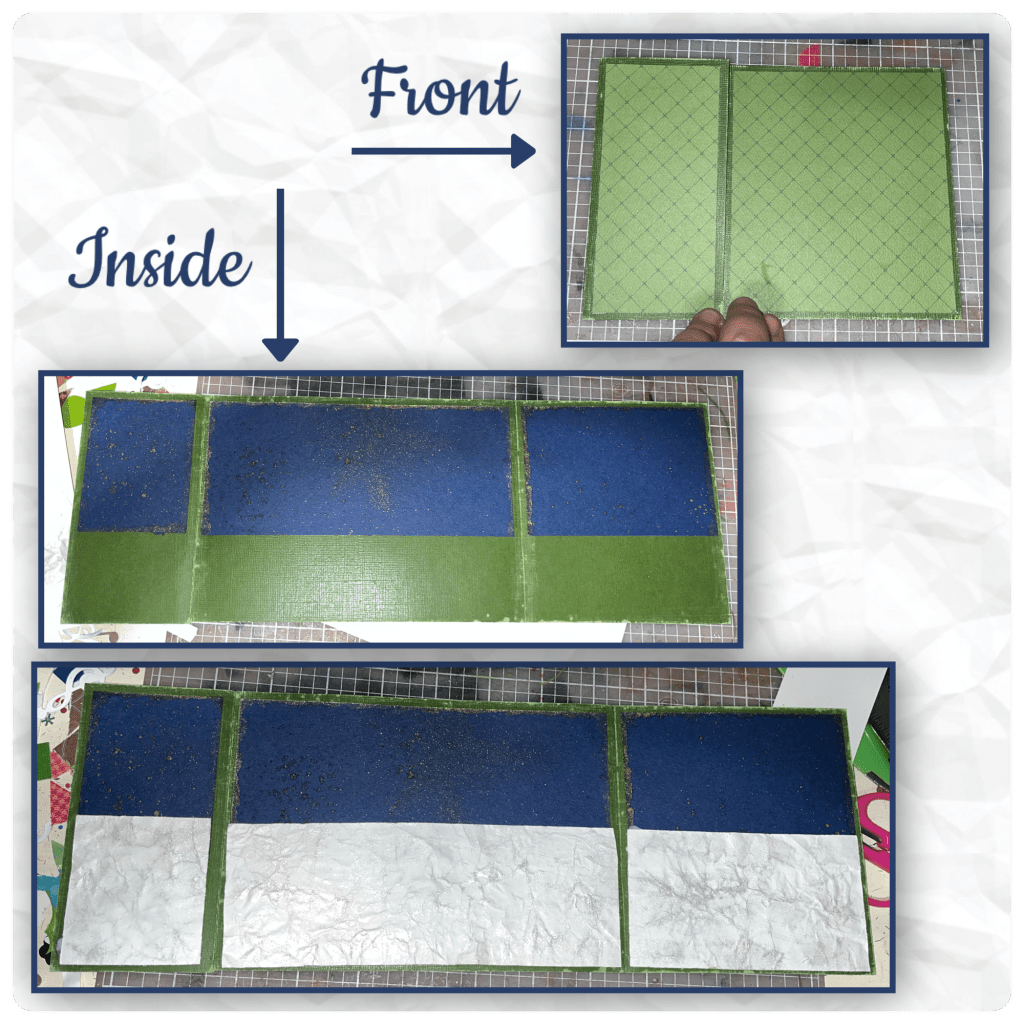
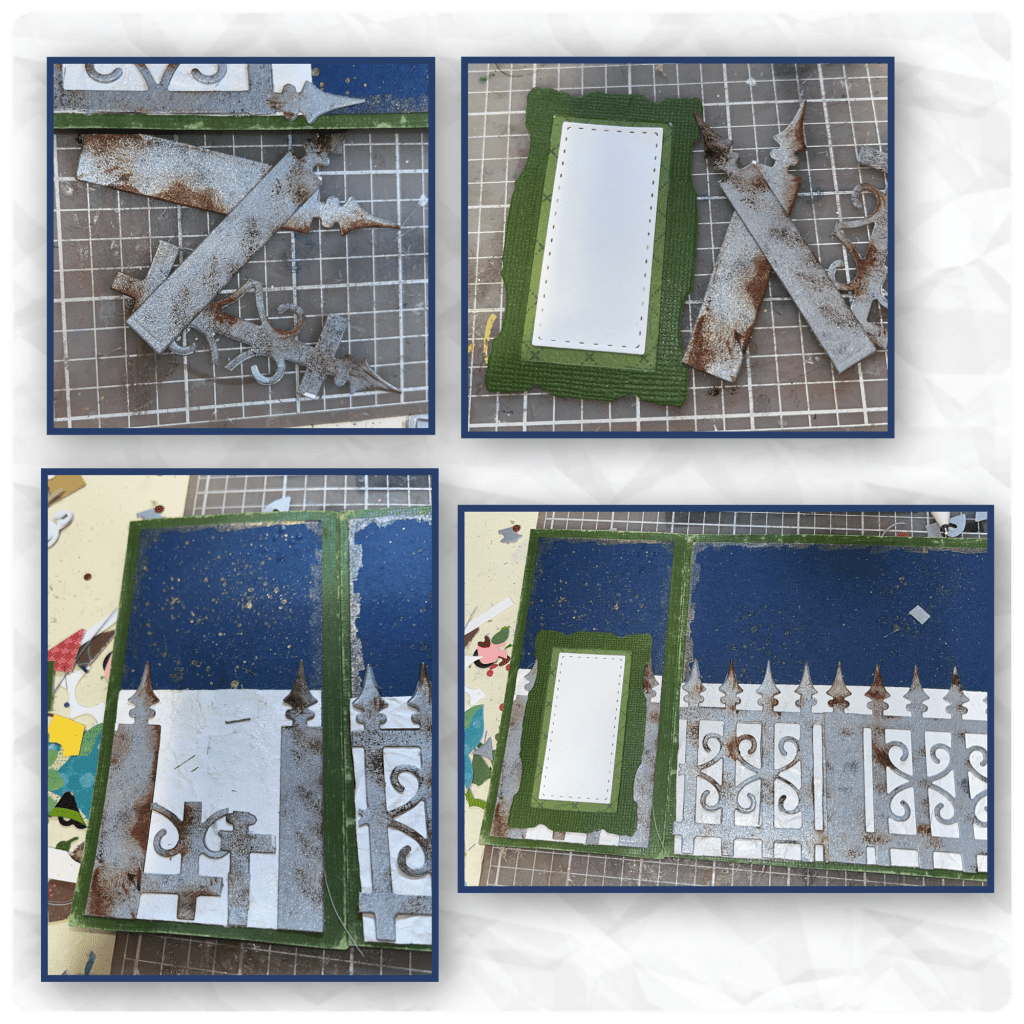
Here is how I met the parameters. It is am asymmetrical gate fold card, produce is,e colours would be green veggies, blueberry’s, strawberries, bananas and the metallic from the grocery carts. I have an iron fence on the inside. It is hard to see ( but it shows better in the directions) the Snow White paper was crumpled before I glued it down.
All the fun is in the reveal, to see this card in action please check out my FACEBOOK page, feel free to join if you would like to share your own crafty creations. You can also see a video of this card on my INSTAGRAM page.
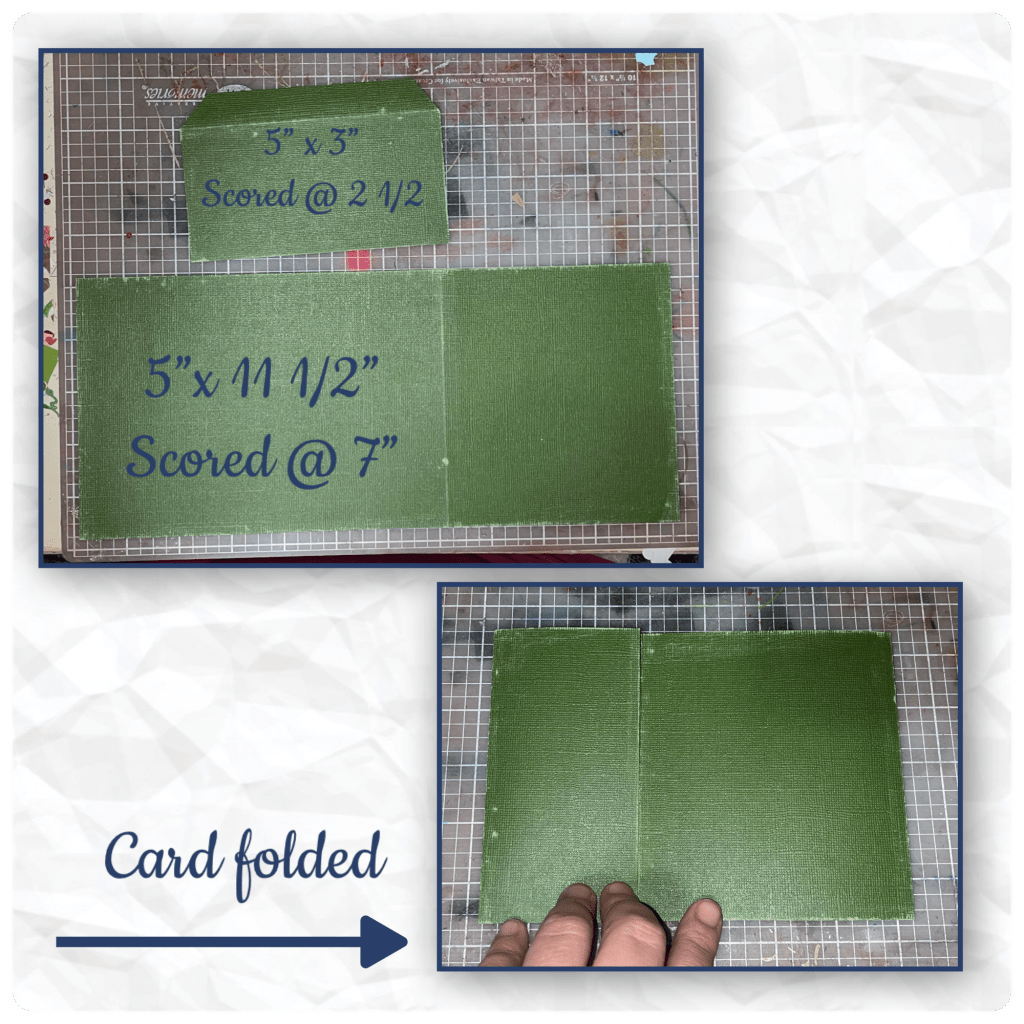
I wanted the gate fold to not be even so I cut the panels as shown below. I used Core Colour cardstock so I roughed up the edges. I glued the small panel to the left side of the card.
I cut the white panels as shown below. I sprayed them with a bit of water. And crumpled them up. Then I used some of my old Smooch Spritz that have that has a broken nozzle, so I poured a bit on my plastic mat and used a paint brush to brush it on the cardstock. It leaves the card stock shimmery.

I cut the blue and green pattered panels as shown. I sprayed gold Smootch Spritz to resemble a starry sky. I used a paint brush to get the edges.

Attached all the panels as shown. The large panelled piece will go on the back.
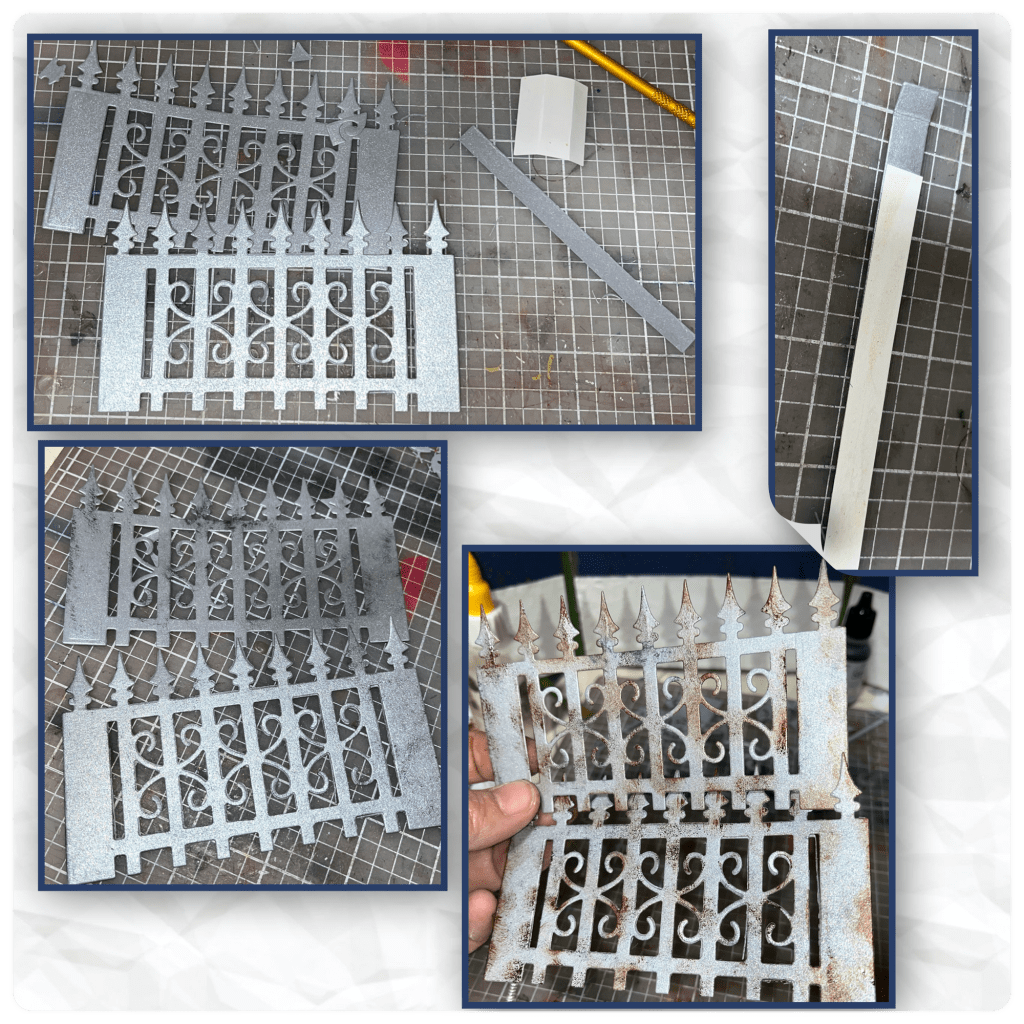
I cut 3 Iron Fences (Karen has a video tutorial on the product page at the link ⬆️ ) I used Black Staz On ink and Brown Smootch Spritz to adage the fence a bit.
I added the pop up part of the fence as per Karen’s directions. I cut a smaller section off of one of the fences and added as shown. I trimmed the rest of the pieces of the fence as shown, and added to the card.
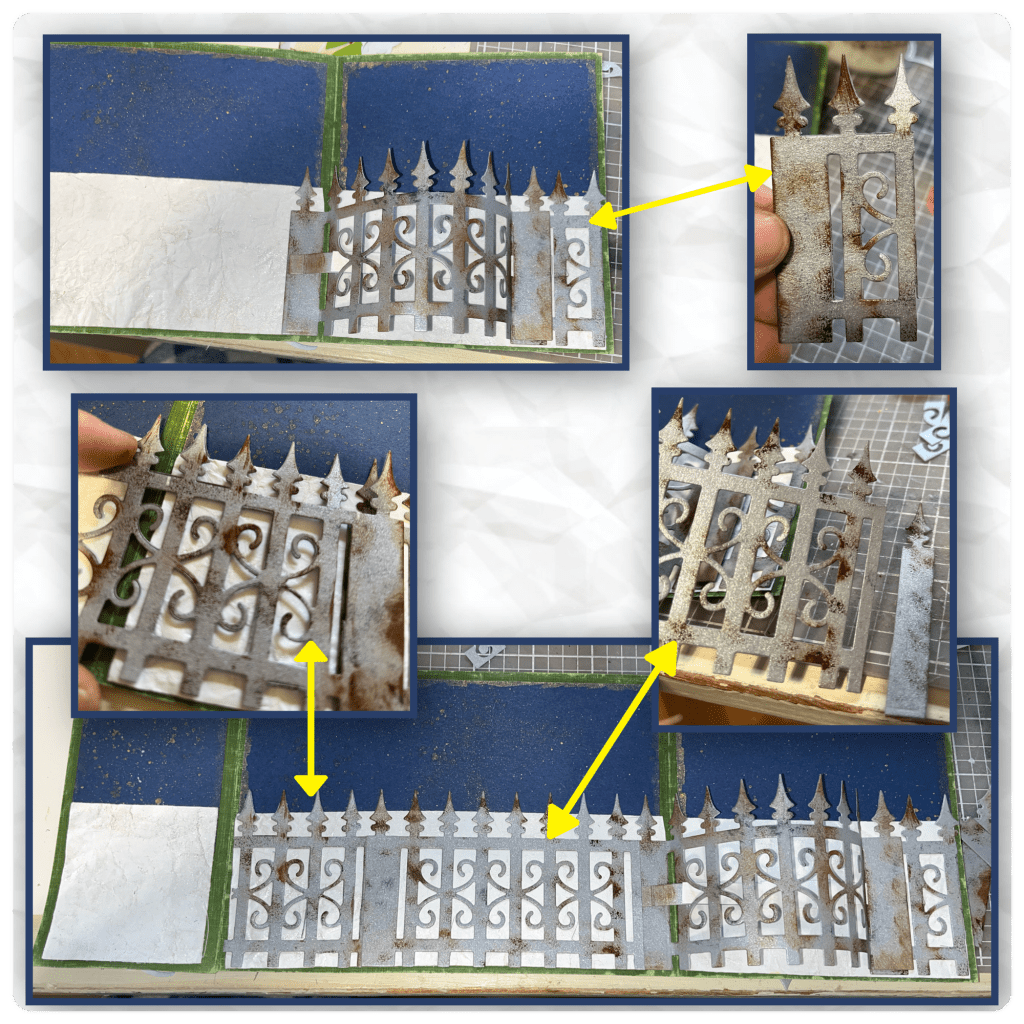
I wanted to give the appearance of the fence going through the last panel but I didn’t want to cut and colour another fence so I used scrap pieces that I had trimmed. I cut and assembled a frame from the Slim Frames and added to the last panel as shown.
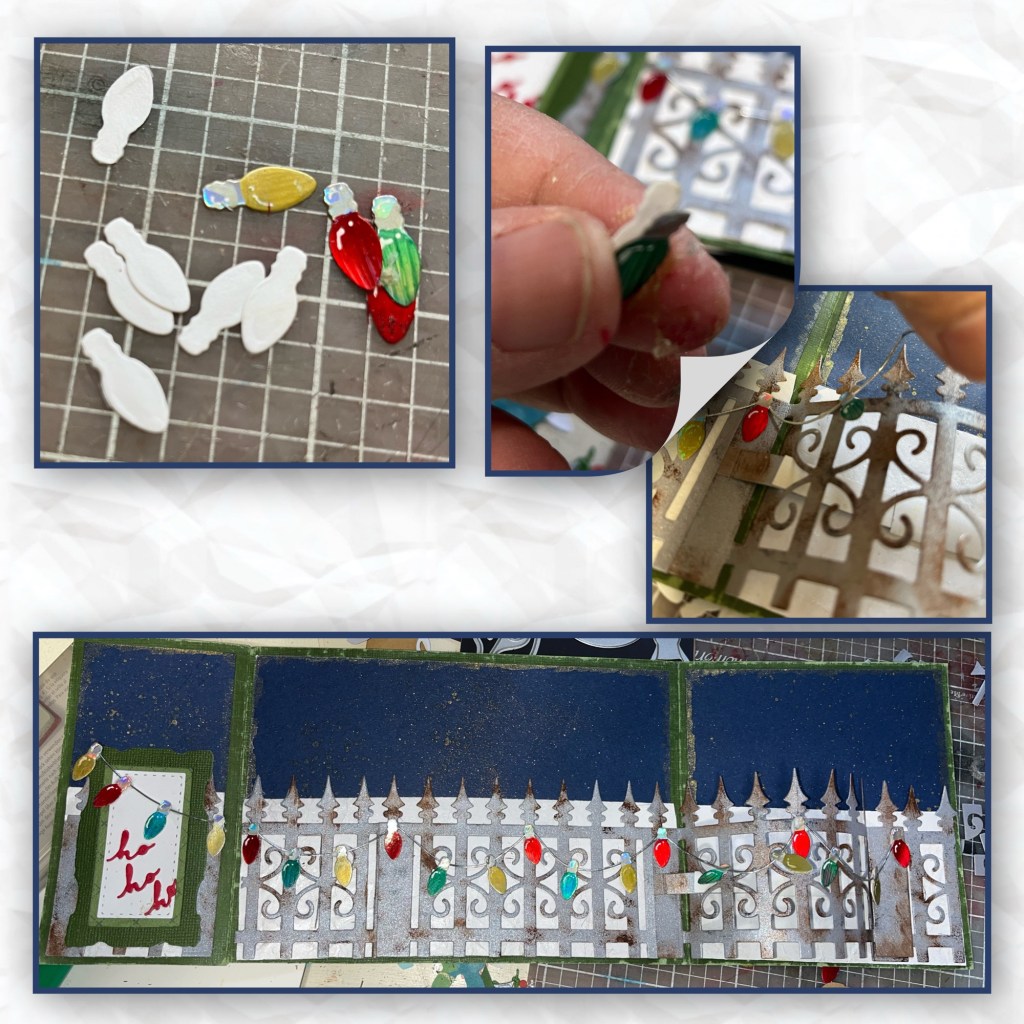
I cut these Christmas lights from the Animals Add ons 3 from holographic paper. And I coloured with red, and green sharpies and a gold marker. I added shading to the silver part with a silver marker and highlights with a White Gelly Roll pen.

I didn’t want to deal with tangled string or having it come loose from one end while working on the other end so I cut the silver string into sections, and glued both ends down, then I glued down where I wanted the other bulbs to be.

I wanted the ornaments to have a little room to move over the section of the fence the pops up so I cut some of the ornaments from white. I sandwiched the silver string between the white and the coloured ornaments then adhered them loosely over that section of the fence.
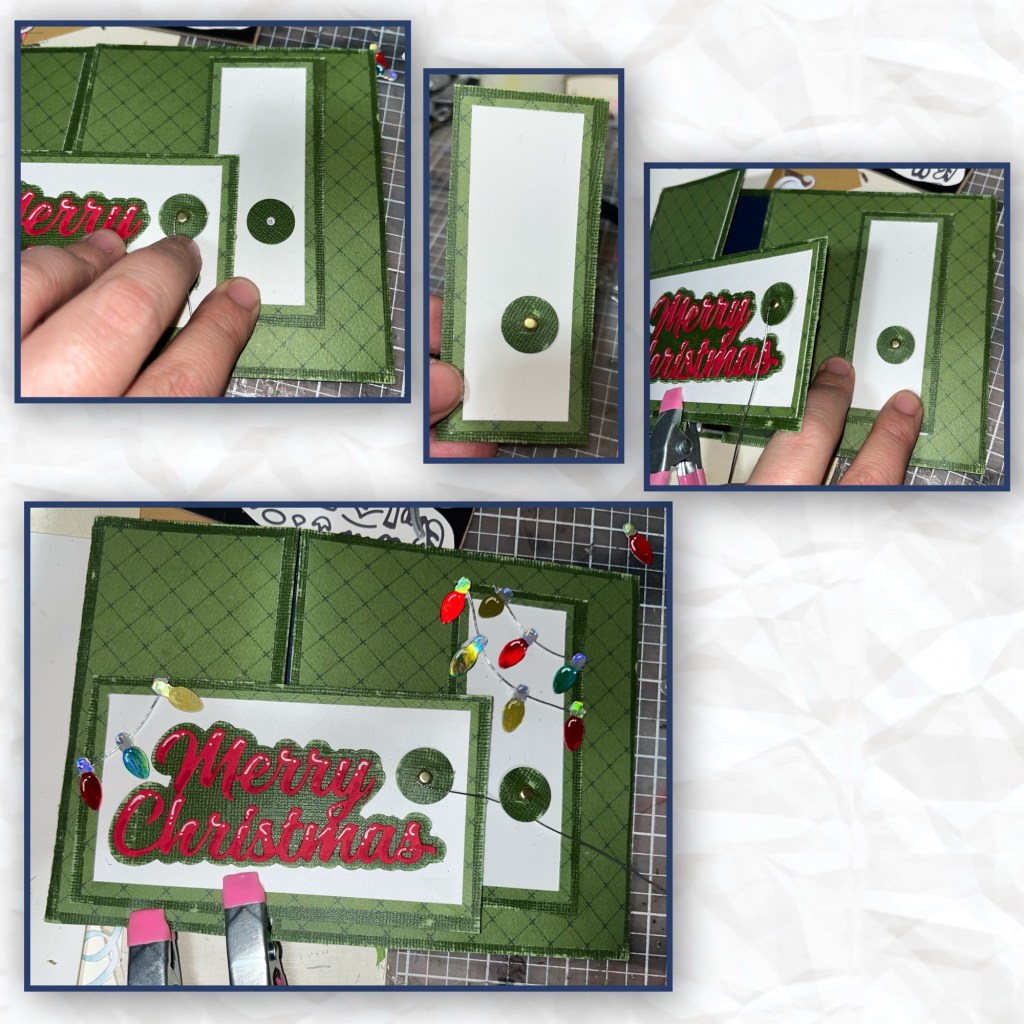
Because everything was so thick the card wouldn’t close right. If I were making this again I could have made more of a gusset between the folds in the gate fold panels. I had to get creative with a closure, so I cut and and assembled the panels as shown.

Again, because the card is thicker on the bottom because of the gate and the lights the bottom of the card doesn’t close as tight as the top. I diecut Merry Christmas , and the Merry Christmas Shadow and added it to the larger panel. I also cut the circles and spacers from the Flaps and Closers set . I added the closure with the string to the to this panel as well. (Karen has a video tutorial on the product page at the link ⬆️ )
Add adhesive to half of the back of the panel and add it to the lower left side of the card.

I lined up where I wanted the other pieces to go, and added them as shown. I added a few Christmas lights to the front as well
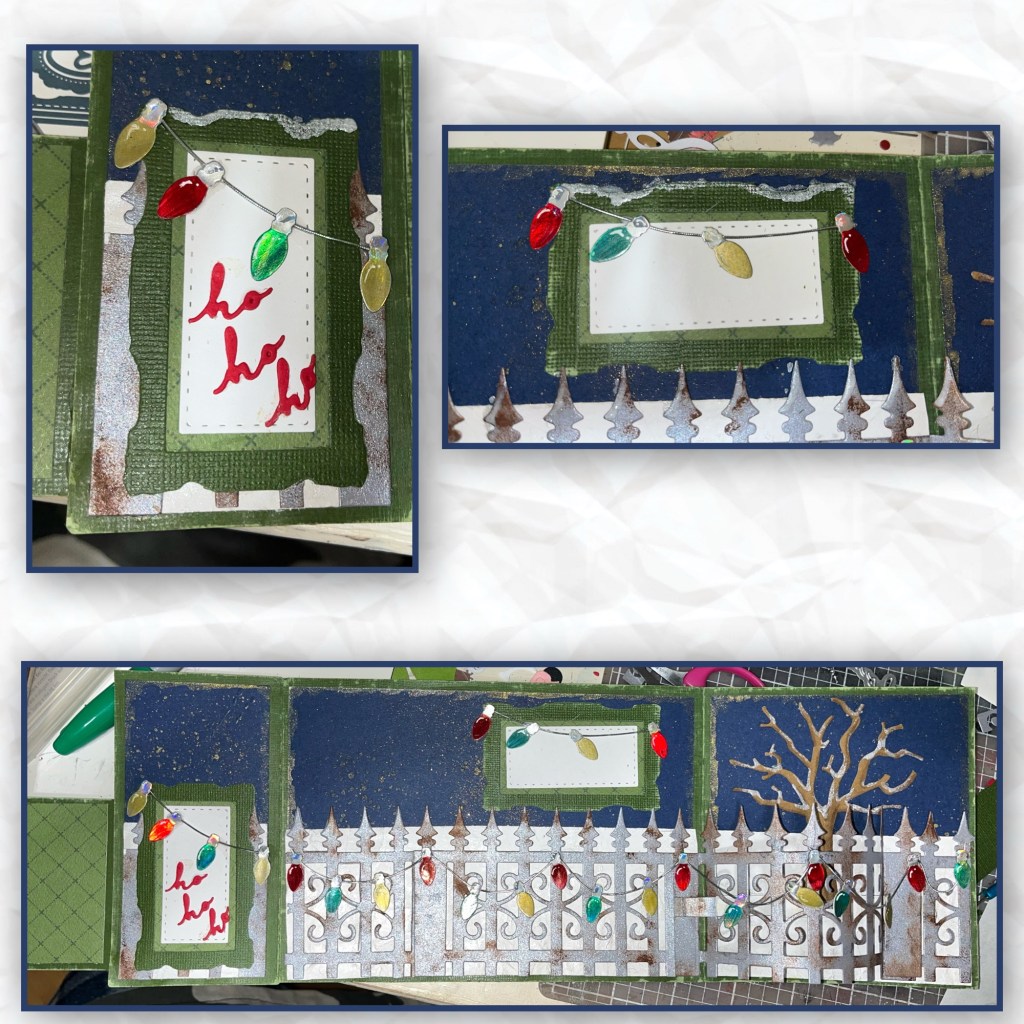
“ho ho ho” is from the Small Script Christmas and I added a few light here as well. I cut one more panel to cover the back of the “Merry Christmas” panel, it also covers the brad that was visible.

I thought it needed a little something so I cut a tree from the Tree Pop Up set and painted it with same Smootch Spritz that I used for the snow back ground and added it behind the pop up section of the fence.

I added a matching Slim Frame to the top for a place to sign. I added Smootch Spritz snow to both frames.

Other Tools used
