

IT’S TIME!!!!!! For Karen Burnistons October release and is it a great one. LOVE the new Postage Pop up, it is such a easy and versatile mechanism, with or without the postage pieces (I used the mechanism on this ⬇️ card)
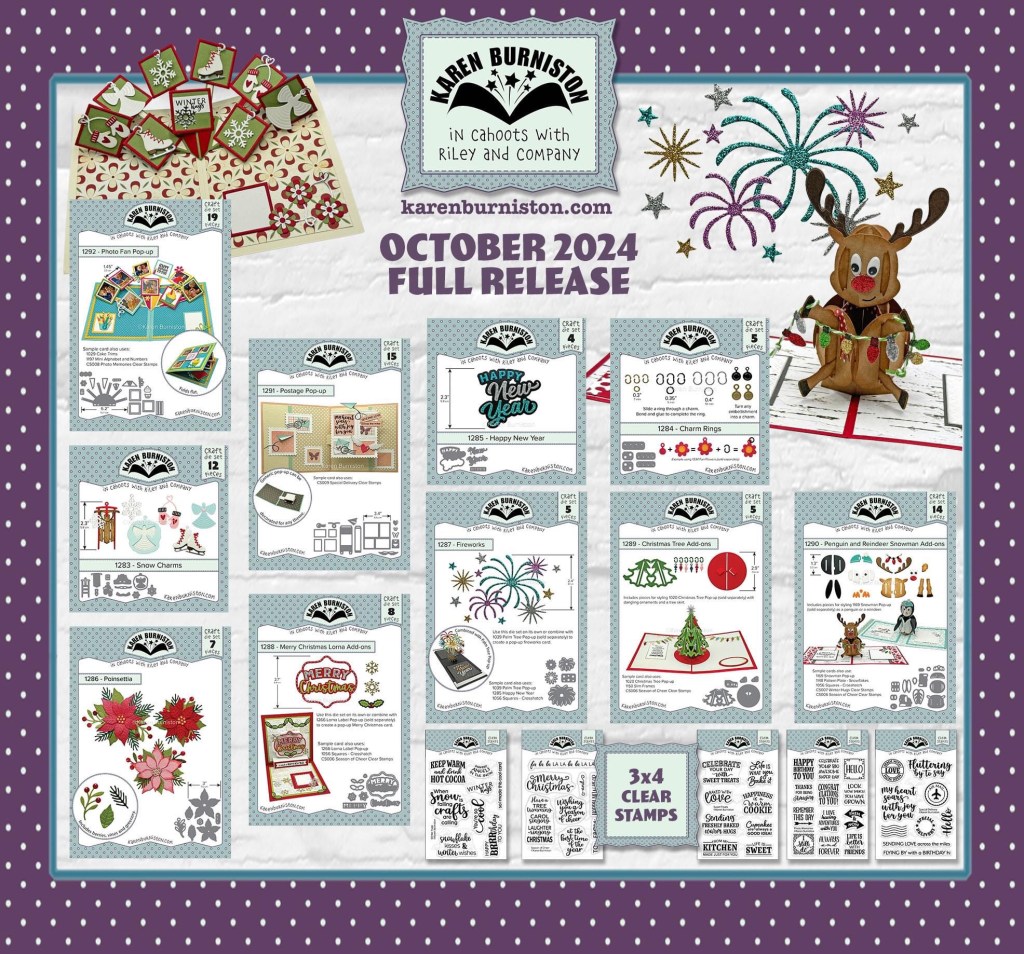
I was so excited when I saw these beautiful poinsettias and berries, and knew right away I was going to use them to fill the wide woven basket

All the fun is in the reveal, to see this card in action please check out my FACEBOOK page, feel free to join if you would like to share your own crafty creations. You can also see a video of this card on my INSTAGRAM page.
I decided to make a 5 1/2” square card so I picked a couple of greens to match the patterned paper from my stash. I cut the centers out of the green layer to keep the bulk down. Add to the front, back and inside as shown. Keeping in mind that the pattern paper is going the correct direction.

Cut out the mechanism pieces from the NEW Postage Pop Up die set. Karen will have a assembly video soon.

Cut out the pieces from the Wide Woven Basket. You just need one side, and the 2 pieces that weave through it. Trim off the flap on the side as we won’t be adding it to another piece. I used a dark ink to darken up the 2 weaving pieces. Assembled as shown then added to the pop up.

I die cut several poinsettias, leaves, sprigs and berries. From white, pink, red and green. I cut the centers from gold. I added shading with matching inks and added highlights with a white gel pen. I decided I didn’t like the gold on gold in the center to I added matching centers with the gold dots. Sorry I have some of the photos out of order.

To give the basket a fuller look I adhered 2 large poinsettias and leaves to the back of the card, then added the medium poinsettias and foliage to the basket. To make the small poinsettias I cut the petals off a medium one and adhered them a little tighter in to make the flower smaller.

I decided to add a faux bow. I adhered a a strip of ribbon across the middle and adhered the ends around the back. Fold a strip as shown, then I made a loop, and wrapped a band around the loop then added to basket. I wanted to add a little bit of gold to the basket by taking a gold elastic and making a loop, glue it to a small card stock circle then glue behind the flowers.

I cut out some labels with their frames from the Rectangles and Labels Crosshatch I stamped a sentiment from the NEW “Season of Cheer” stamp set, and added it, with a frame to the inside right of the card. I added a small poinsettia, leaves, and berries.

I added another label to the front and decorated with matching elements . “Merry Christmas” is from Word set 3 Holiday. I added some itty bitty gems around the labels that are inside and on the front.
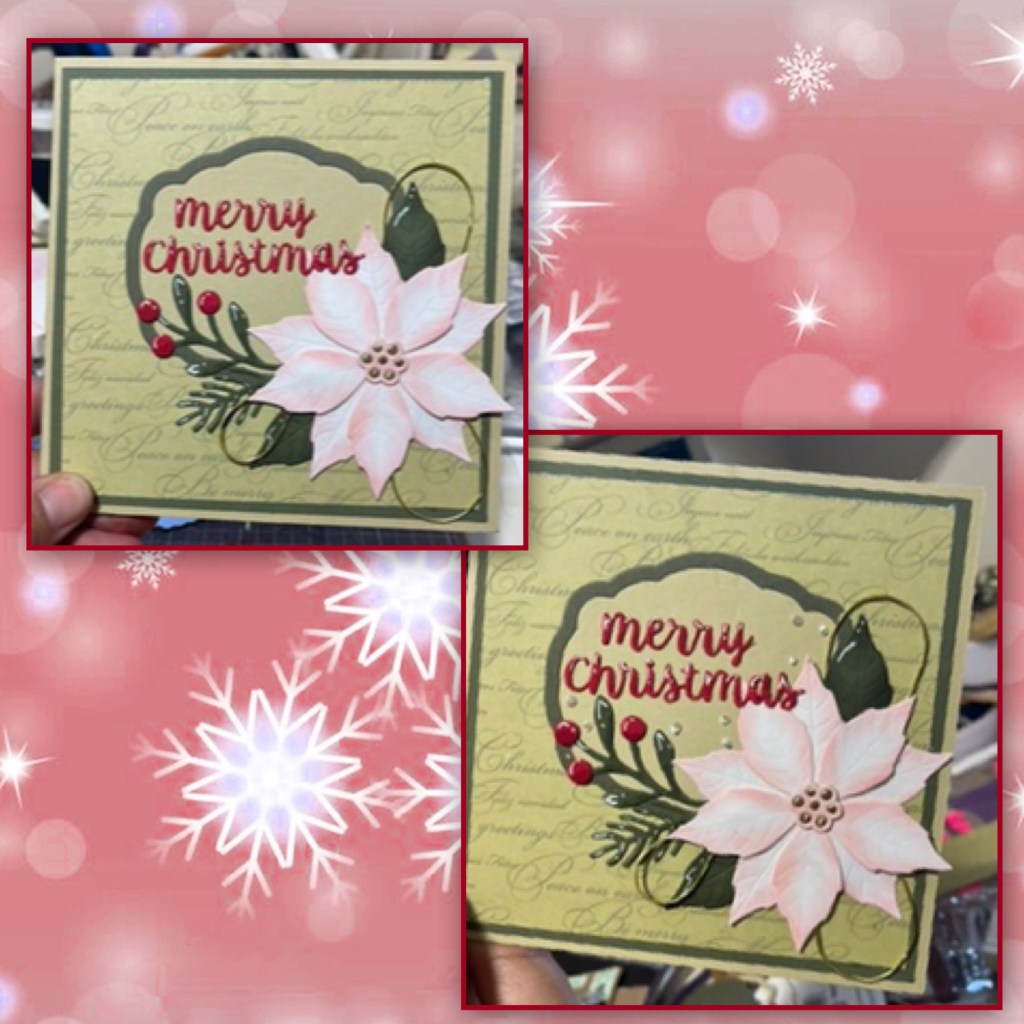
If I were making this card again I would have added some curve to the petals and leaves.

Other Tools used

Beautiful cards, and great instruction!
LikeLiked by 1 person
these r georgeous!!!! where can i pre order them??? thanks jeanmheming@aol.com
LikeLiked by 1 person
The will be available for order starting on Monday in Karen’s website. I will update my links before then, they won’t work until Monday though.
LikeLike
thanks
LikeLiked by 1 person