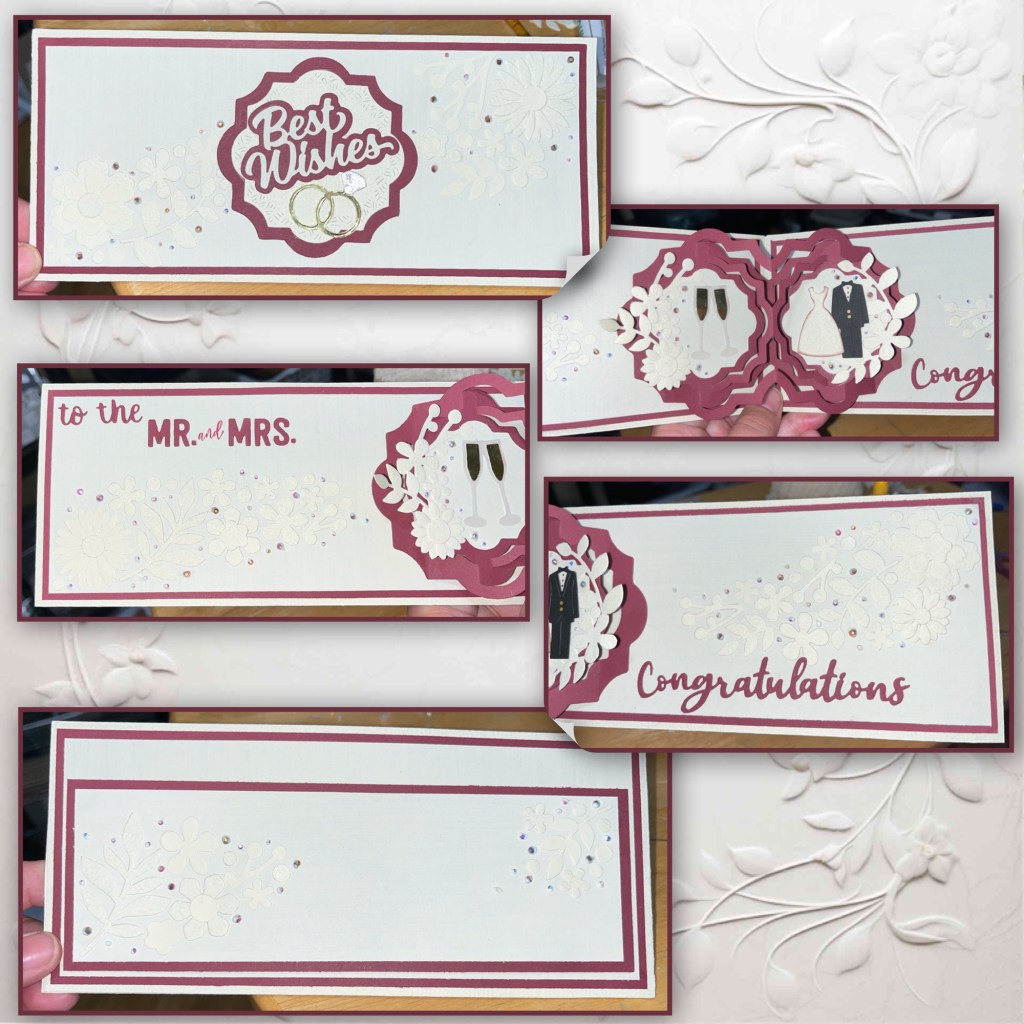
This card was made by request for a friend of mine, I’m kind of her personal card maker lol. She needed a wedding card and just by coincidence the wedding party was wearing burgundy, I didn’t know that when I made the card. There is actually quite a bit of tone on tone details that looks much better in person.
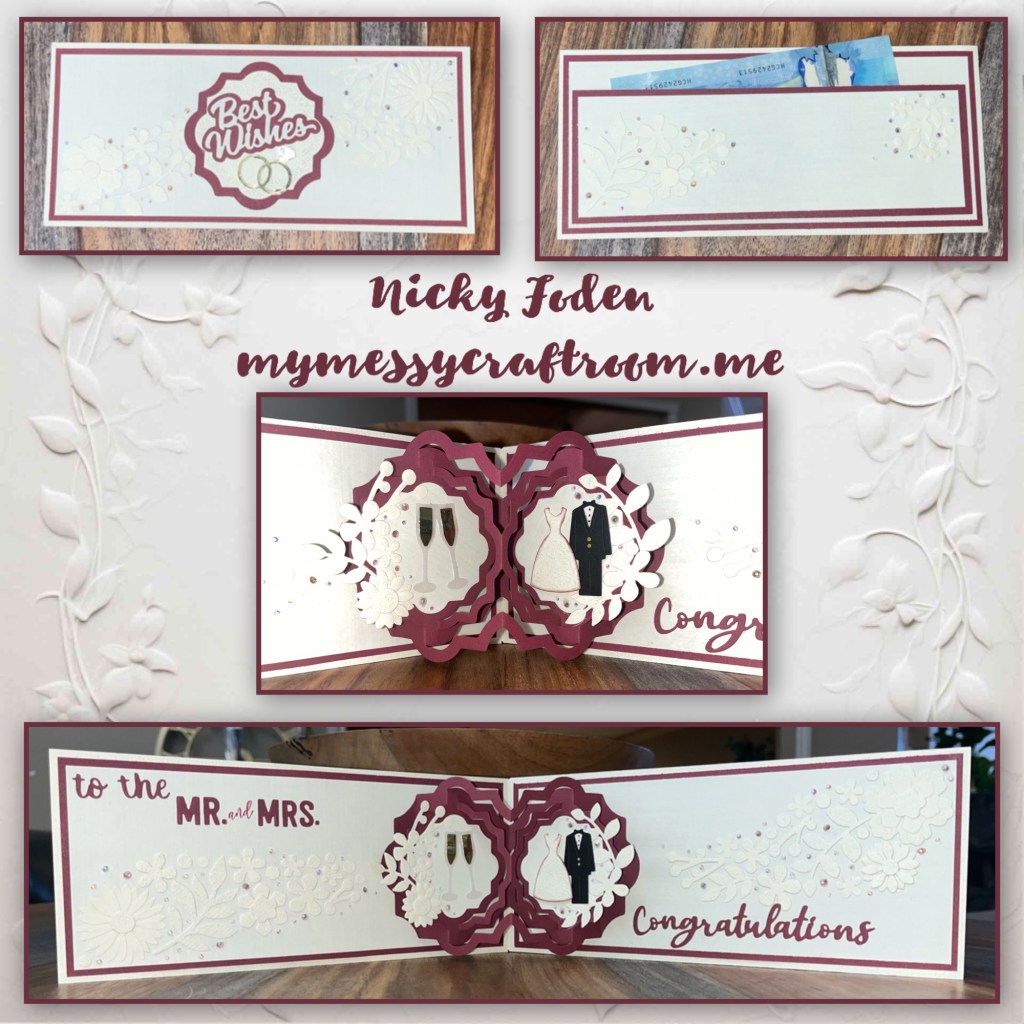
All the fun is in the reveal, to see this card in action please check out my FACEBOOK page, feel free to join if you would like to share your own crafty creations. You can also see a video of this card on my INSTAGRAM page.
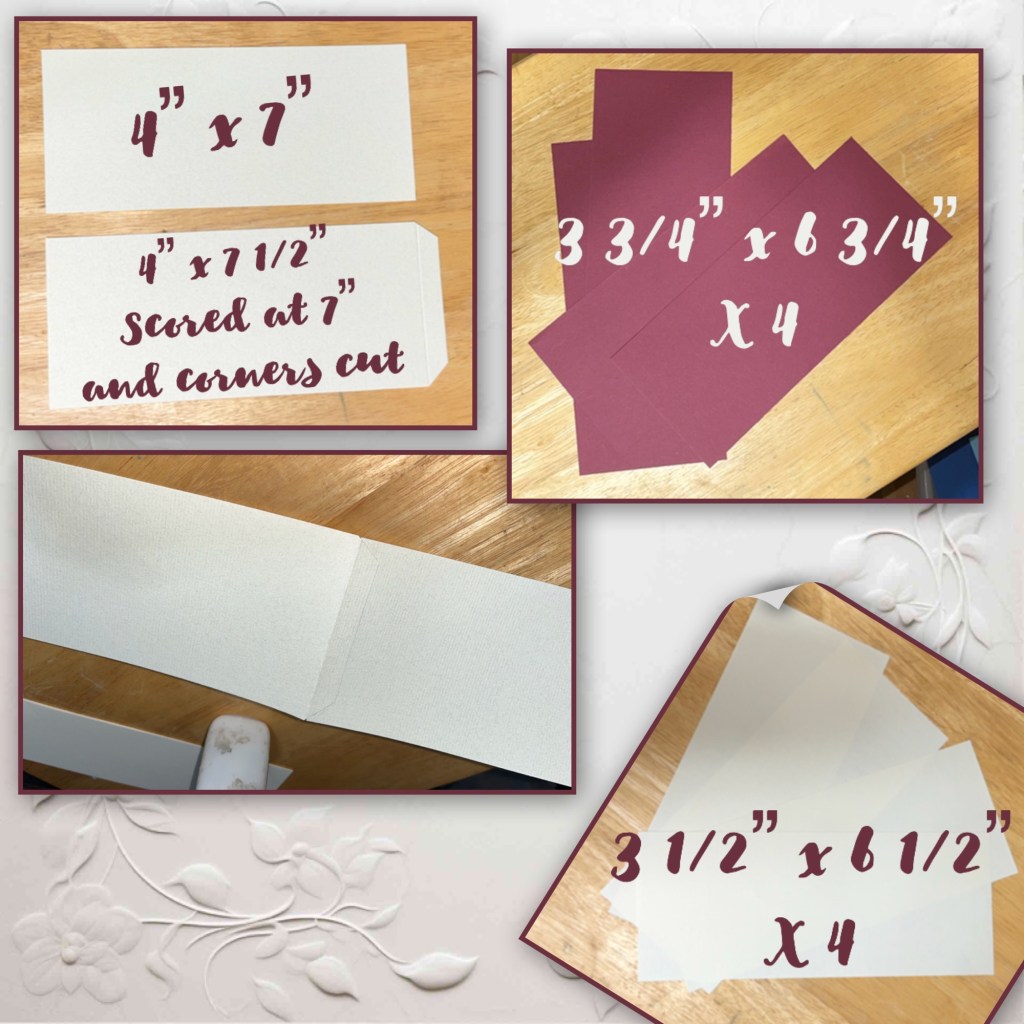
I cut the card base and layers as shown below. The cream coloured layers are actually a thinner textured paper. Connect the two cardbase pieces together.
Add the layers to the front, back , and inside as shown.
I diecut flowers and leaves from the cream cardstock and the cream paper using the following diesets; Flower Pot Pop Up, Woven Basket, Fun Flowers, and Autumn Elements.

Even though it is hard to see, I added these flowers and leaves to the bottom left, and the top right of the front and the inside of the card.

Die cut and assemble the Paper Frames mechanisms and add it to the card (Karen has a video tutorial on the product page at the link ⬆️ ) I added the cream centers and added flowers and leaves as shown.

I diecut and assembled the pieces from the Wedding Charms as shown. I sponged a little bit of burgundy ink around the edges of the card so it stands out against the cream background and added to the card. The inside greeting was created using words from the Word set 18- Connectors, and Mini Alphabet and Numbers, the word “and” is a stamp from the Seasons stamp set.

“Best Wishes” is from the Wedding Charms set, and I layered it on top to 2 labels from the Labels Crosshatch. I wanted to use the rings that I have already assembled on the front but they didn’t line up right so I rediecut the rings but from the backside so they will be in reverse then added it to the card.

I created a pocket for the back using the dimensions below. I added foam tape to the back, making sure that the money will fit. Add the pocket to the back and added some of the flowers to the bottom left and the top right.

I don’t have any burgundy gems so I hand drew some dots with a burgundy marker then covered them with clear gems. I kept the dots in between the flowers and leaves. The gems I used I got from Amazon a while ago, they are meant for manicures.

I added some more gems without the dots in some of the open spaces between the flowers. “Congratulations” is from Word set 17 Congratulations