
So I’ve been trying to get this post done but I’ve been having some technical difficulties but here I am with this past weeks Craft Roulette challenge. When I decided what I was going to do I was pretty excited. I was looking for a reason to use the new Tea and Coffee pop up set with the Coffee Cup Pop up mechanism and this was it. Here are this weeks parameters.

How I met the parameters…. I have a heart on the “Happy Mothers Day” on the front, and on the inside beside “Love you”. I was stuck on vintage colours so I went through my paper stash to see if something jumped out at me and this paper did for several reasons. It has a vintage vibe with the pattern, but it also has a lace pattern right on it which takes care of the “lace on the base”. AND ITS ORANGE AND PURPLE, if you play Craft Roulette you will get the reference. The flowers are for the “plant” element.
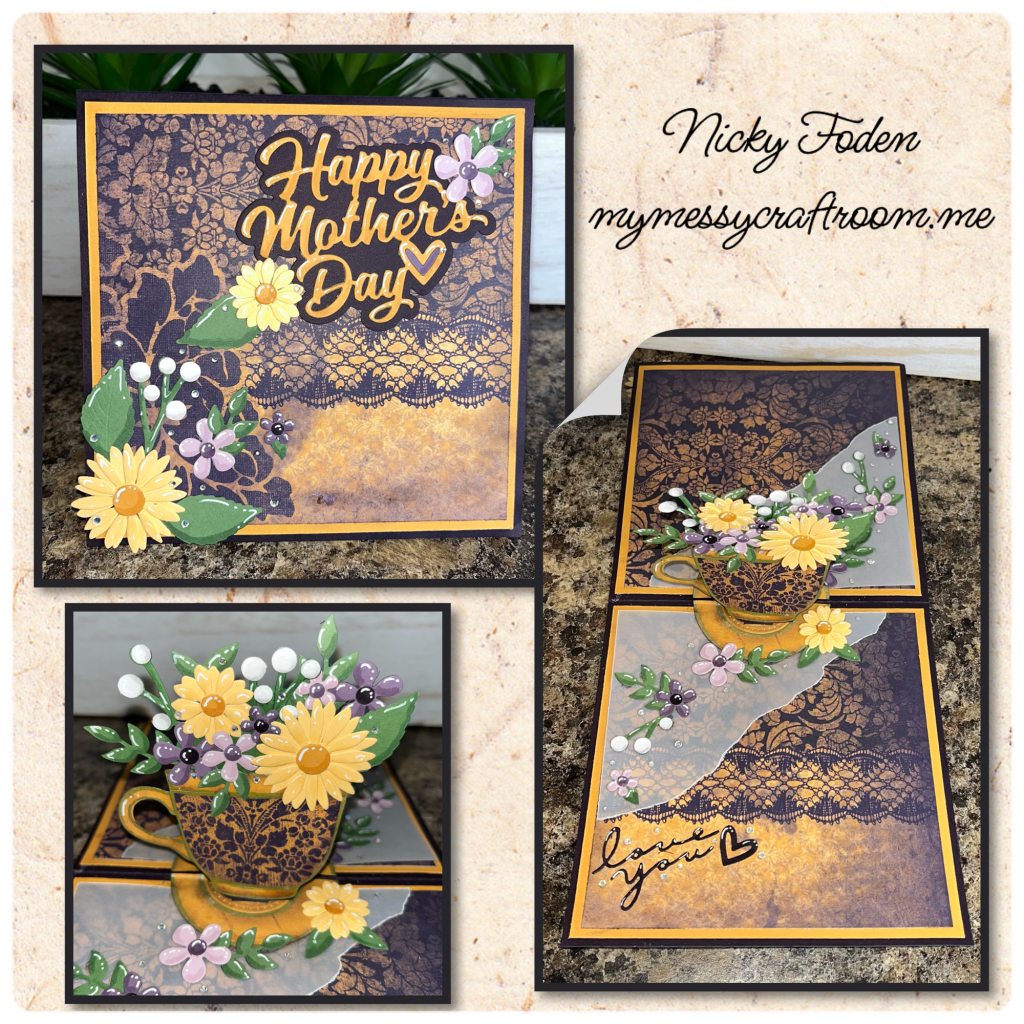
All the fun is in the reveal, to see this card in action please check out my FACEBOOK page, feel free to join if you would like to share your own crafty creations. You can also see a video of this card on my INSTAGRAM page.
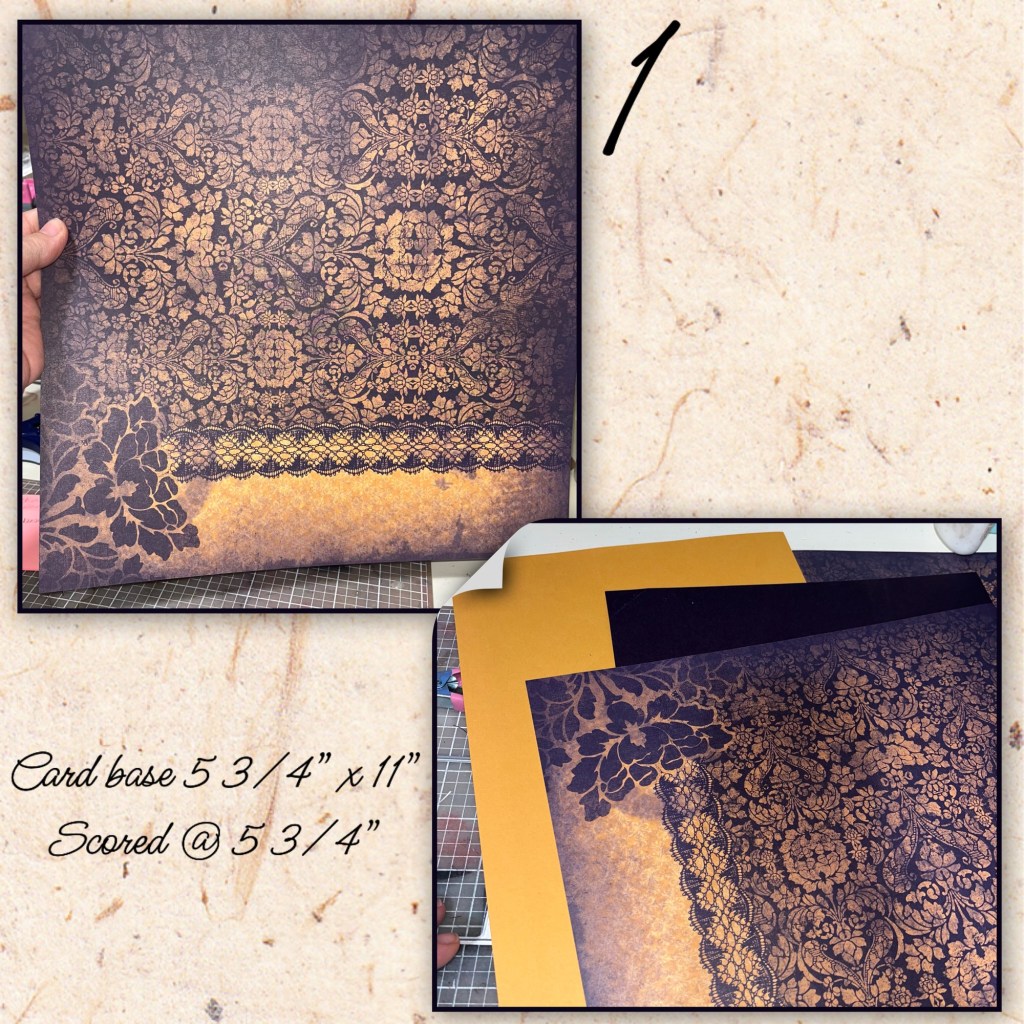
1A- this is the beautiful vintage paper that I found in my stash. (possibly from Costco) there is also a flower in the bottom corner so this paper actually hits 3/4 parameters I found this card stock that I thought would be. Pretty good match. I cut the card base from the deep purple colour to the measurements below.
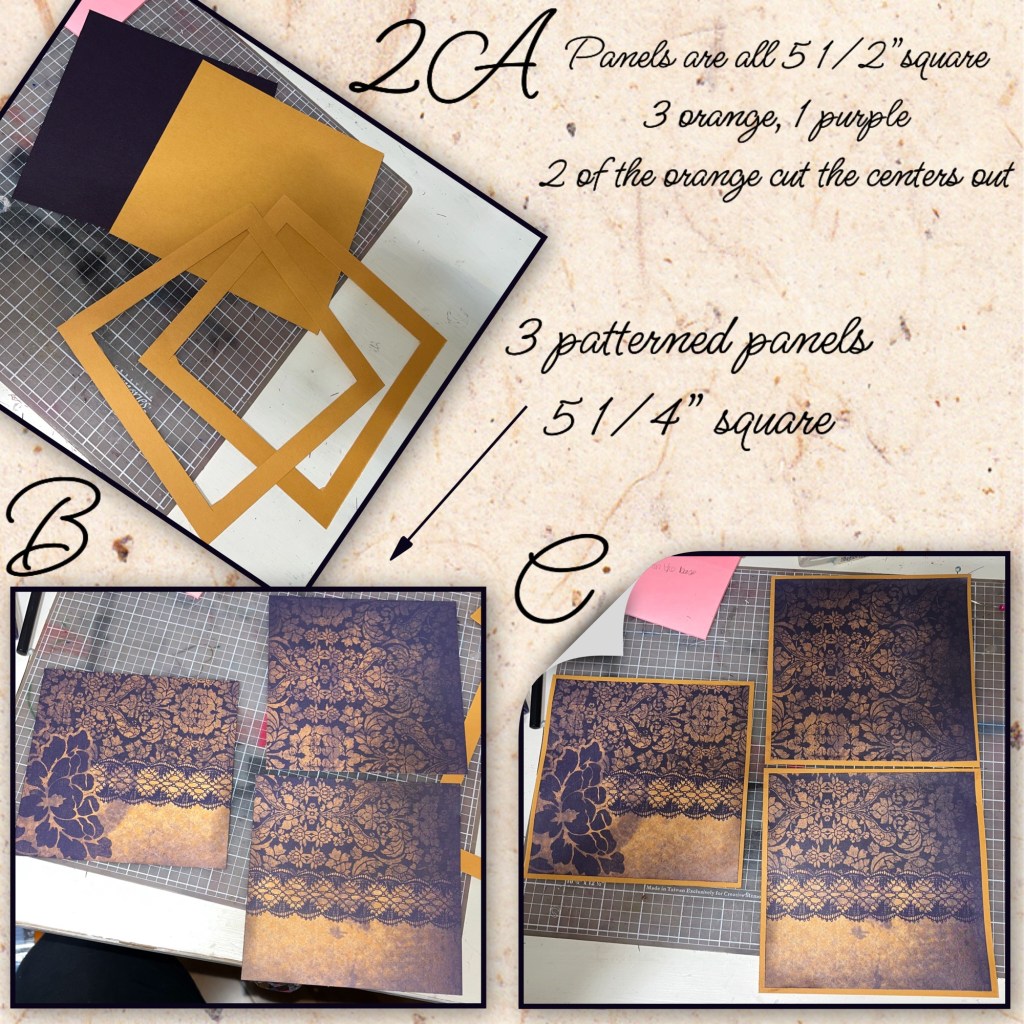
2A- I cut the panels as shown. The purple will be for the back, the solid orange for the front. I cut the orange mats for the inside and I cut out the centers for 2 reasons. 1 keep the bulk down, and 2 I knew I needed some of it to diecut some flowers.
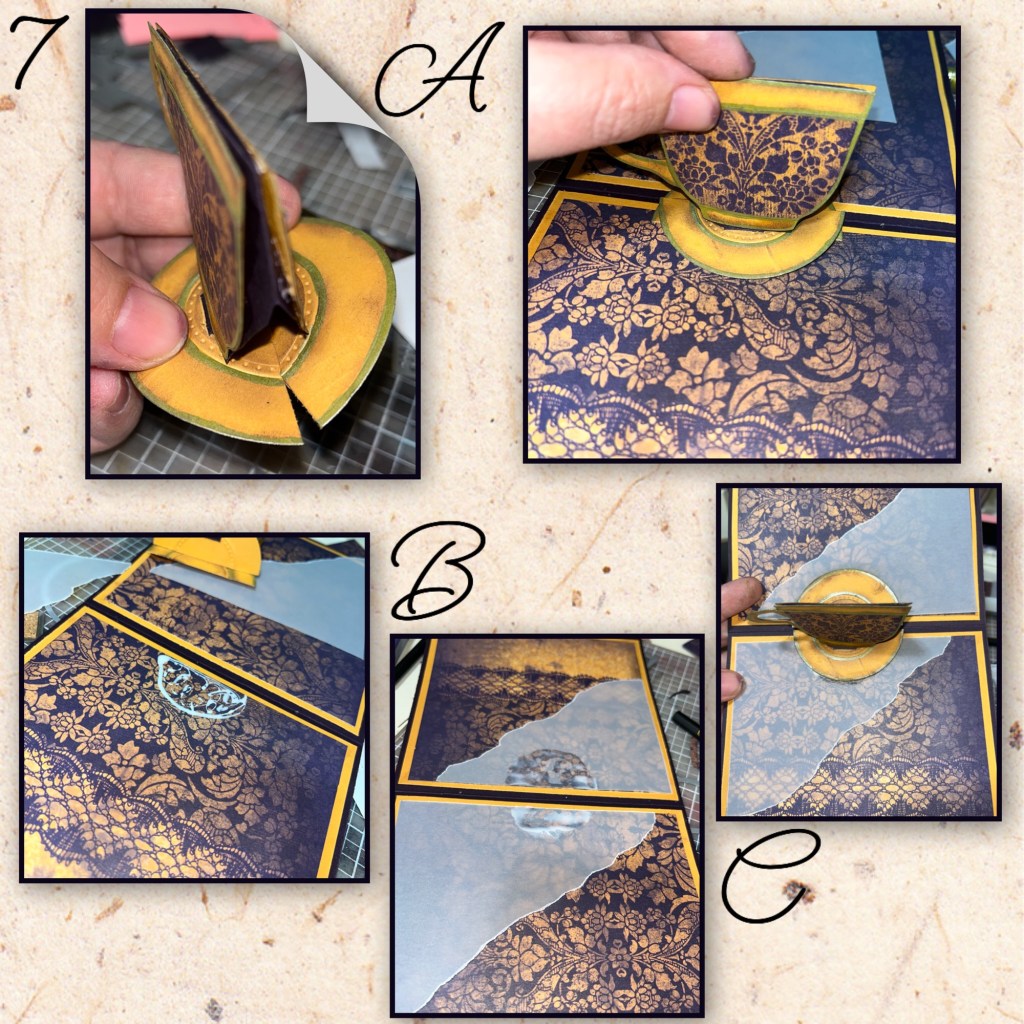
B- this is how I cut the patterned paper.
C- add the paper to the orange panels.
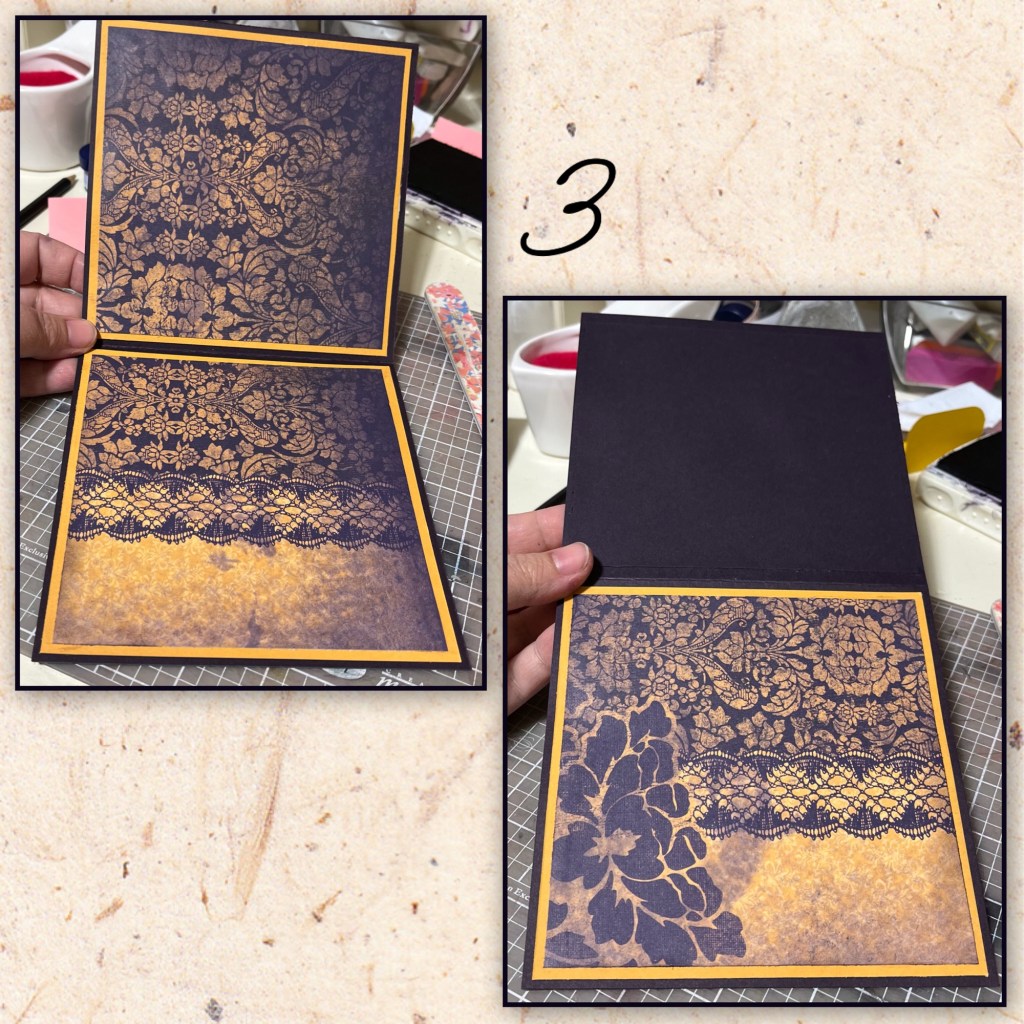
3- add the panels to the cardbase. Left photo shows the inside, right shows the front and back. Be mindful that the pattern is going the same direction.
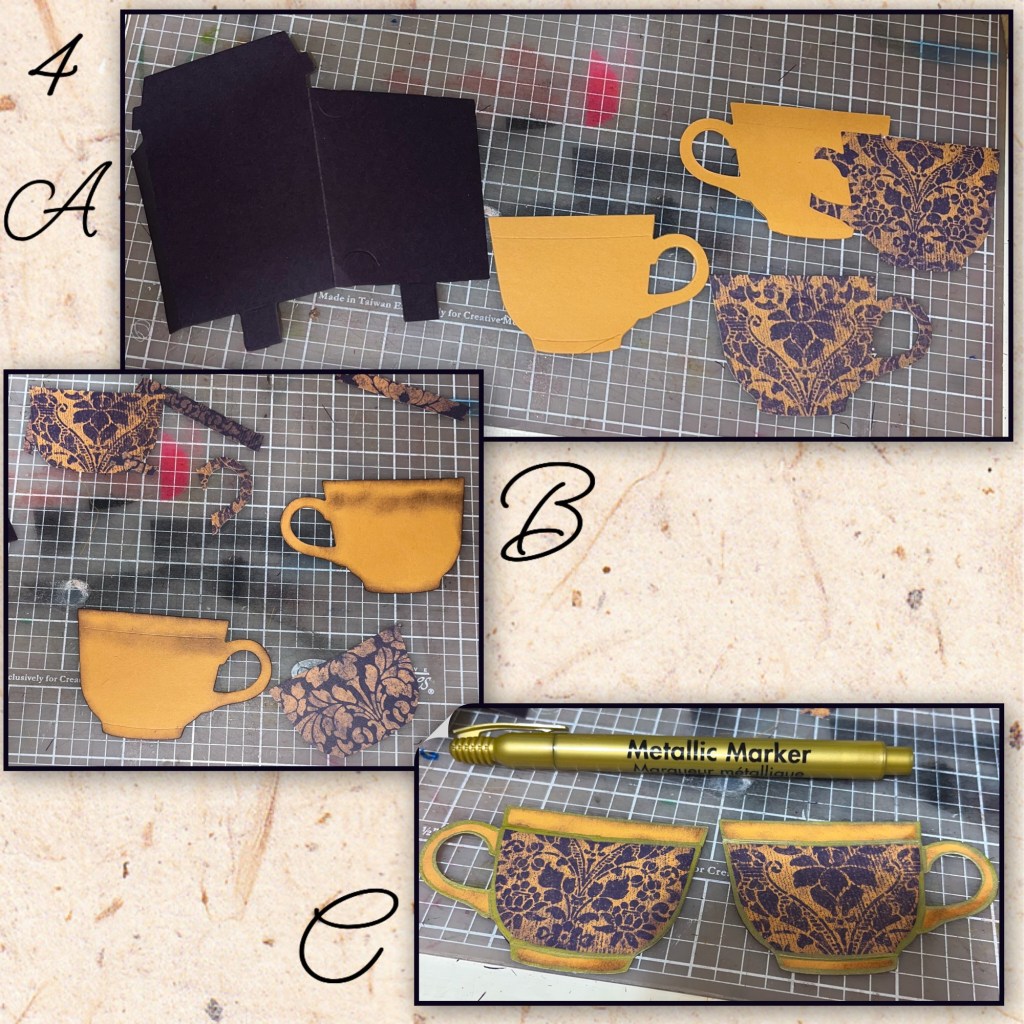
4A- I cut Coffee Cup Pop up from the purple cardstock, I use this piece as the mechanism. I cut 2 orange and 2 patterned teacups from the Tea and Coffee Pop up. ( I recommend watching the Coffee Cup video, Karen has a video tutorial on the product page at the link ⬆️ it will help to understand how the mechanism works)
B- trim the tea cups as shown and I sponged all of the edges with purple ink. Make sure the tea cups are a reverse image of each other. One will be the front and one will be the back.
C-add the patterned pieces as shown, I then took this gold marker and went around all the edges.
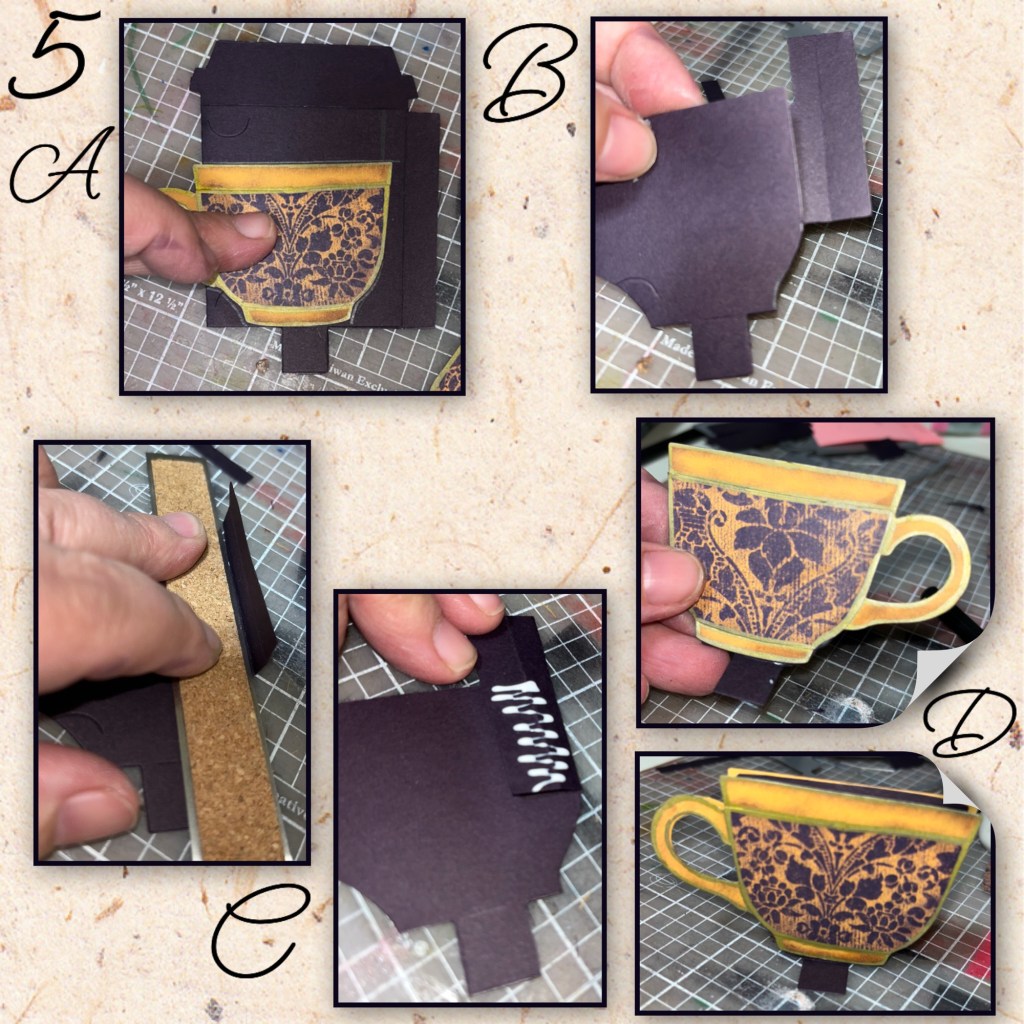
Ok so now I need to alter the Coffee Cup mechanism to work with the tea cup.
5A- trace the teacup around the coffee cup, be mindful of the tab that is on the right side. The teacup has to be centred over the bottom tabs of the coffee cup.
B- trim around the pencil lines. Make sure not to cut entirely up the fold on the left side. Just the bottom corner.
C- the coffee cup is wider than the teacup so I had to move the scoreline for the tab on the right side. Adhere this tab to the front of the coffee cup then trim the excess off the top.
D- this is how the teacup looks on both sides.
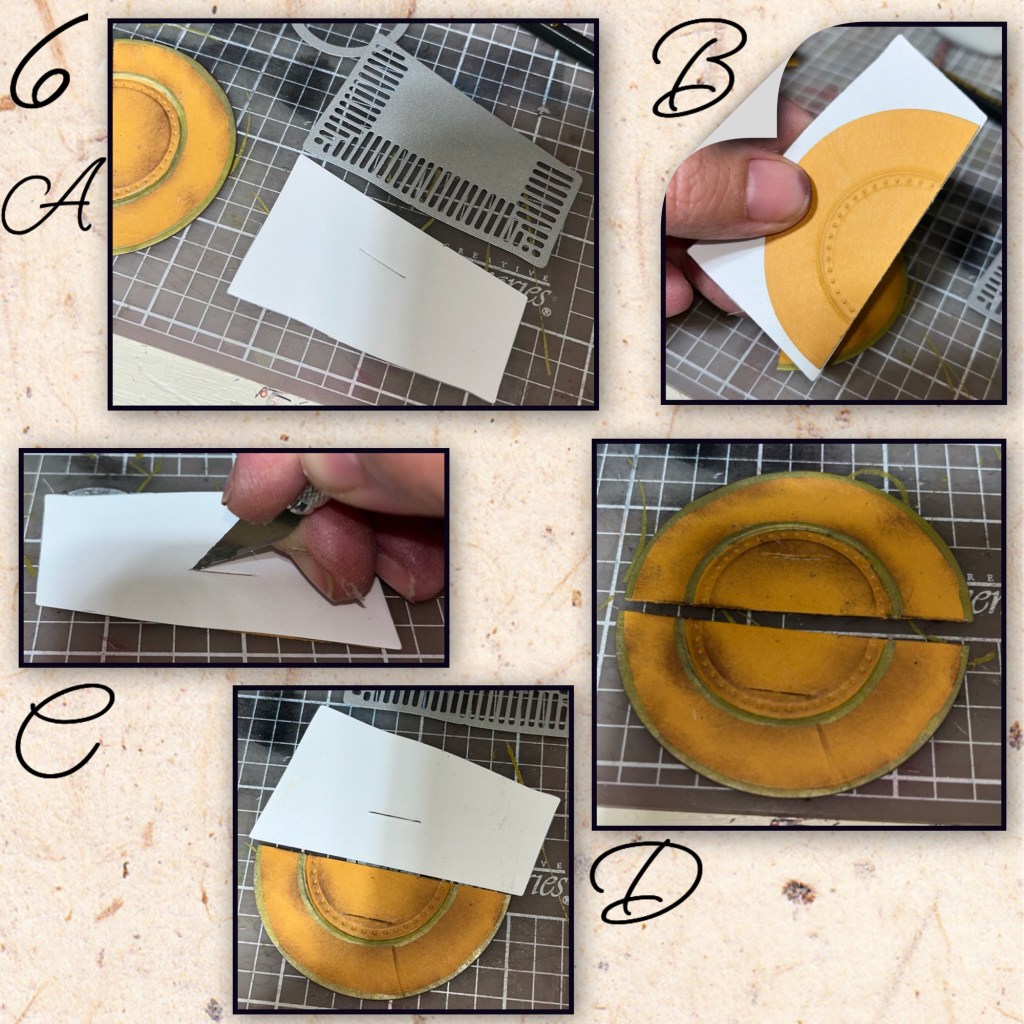
6A- the Coffee Cup dieset uses the napkin (white piece) as part of the mechanism but I wanted a saucer instead so I diecut a medium sized circle from Circles Crosshatch (not a crosshatch circle one of the plain circles) and I embossed the middle with the large dotted circle from the Coffee Cup pop up. I inked the edges and added the gold like I did with the tea cup. Die cut a napkin piece as well.
B- cut the circle in half and lay it against the napkin piece, the front of the saucer to the back of the napkin, make sure the edges are lined up and the 1/2 circle is centred in the napkin.
C- turn the piece over (you won’t be able to see the circle, make sure not to move it) with an exacto knife carefully cut through the slit in the napkin right through the circle.
D- repeat this step with the other half.
7A- put the tabs from the teacup through the slits in the saucer (watch Karen’s Coffee Cup Pop up video if needed) I just put the piece in the centre for reference to where the middle is (for the next step)
I found that having the pattered paper and the pattern on the teacup, quite busy so I decided to add some ripped vellum to tone it down.
B- I added glue under where the teacup will be so the adhesive won’t show through the vellum as it will be covered by the tea cup.
C- add the vellum, then the tea cup, adhered half of the saucer on each side of the fold.
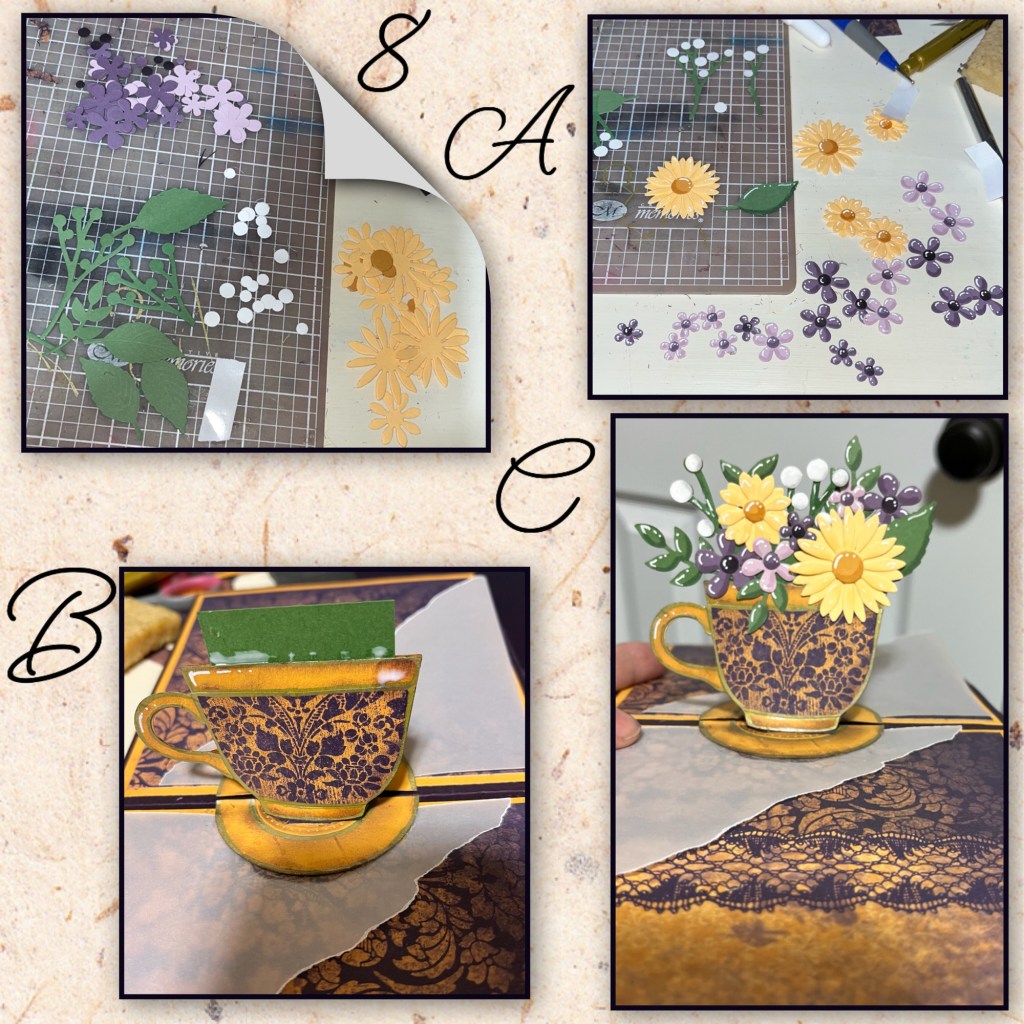
8A- die cut flowers and leaves from the following sets, Flower Pot Pop up, Woven Basket, and Fun Flowers. I added shading with a Versa Mark Marker, and highligts with a white Gelly Roll pen
B- I added a green rectangle slightly narrower than the teacup and slipped it in between the cups.
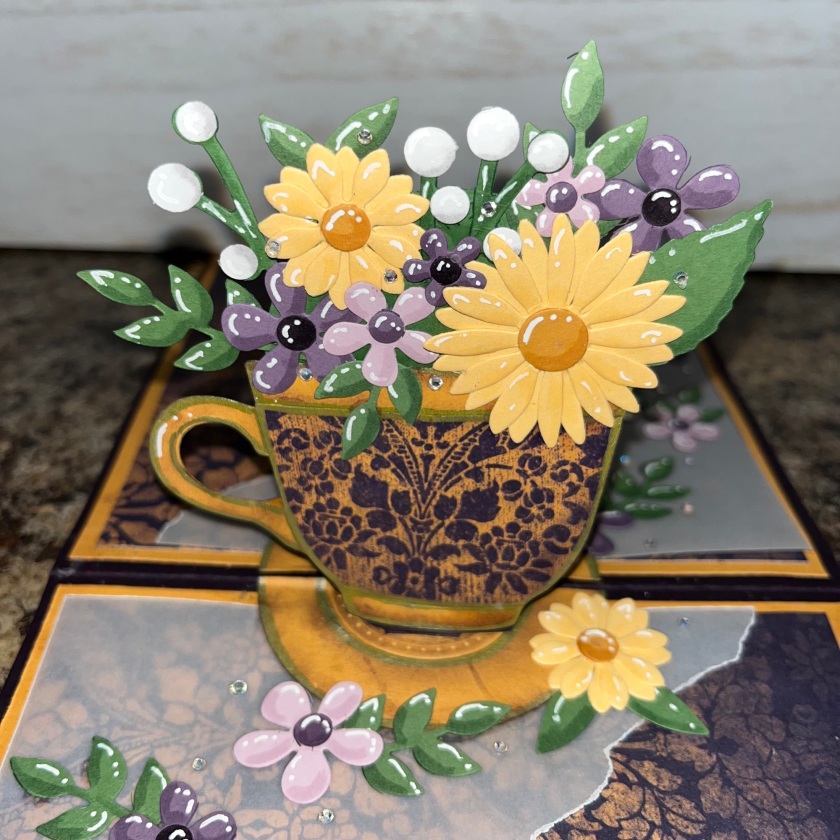
C- add flowers and leaves to the teacup.
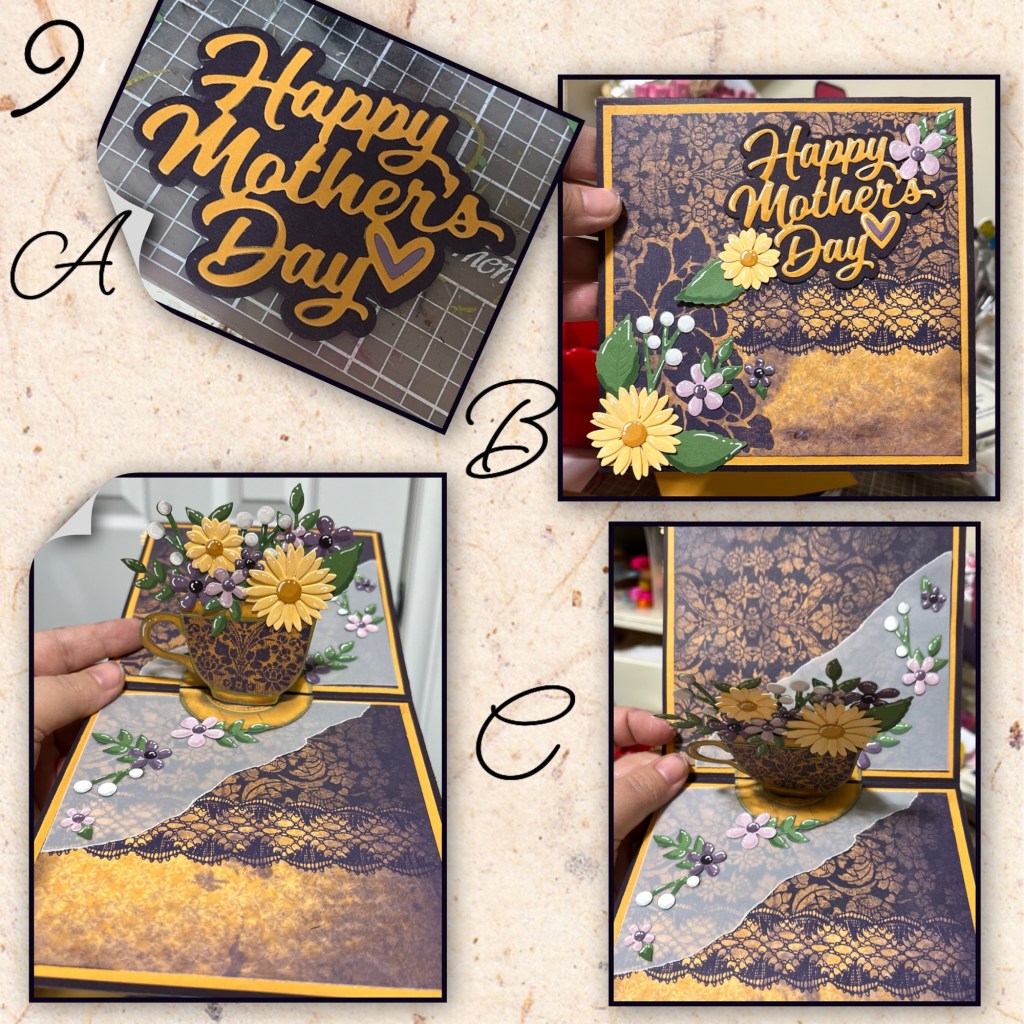
9A- die cut and assemble Happy Mother’s Day
B-I added shading with a Versa Mark Marker, and highlights with a white Gelly Roll pen then add to the card front along with some of the flowers.
C- add more flowers along the vellum. I added adhesive behind the flowers, and under the vellum so it would stick the vellum down better with out the adhesive showing.
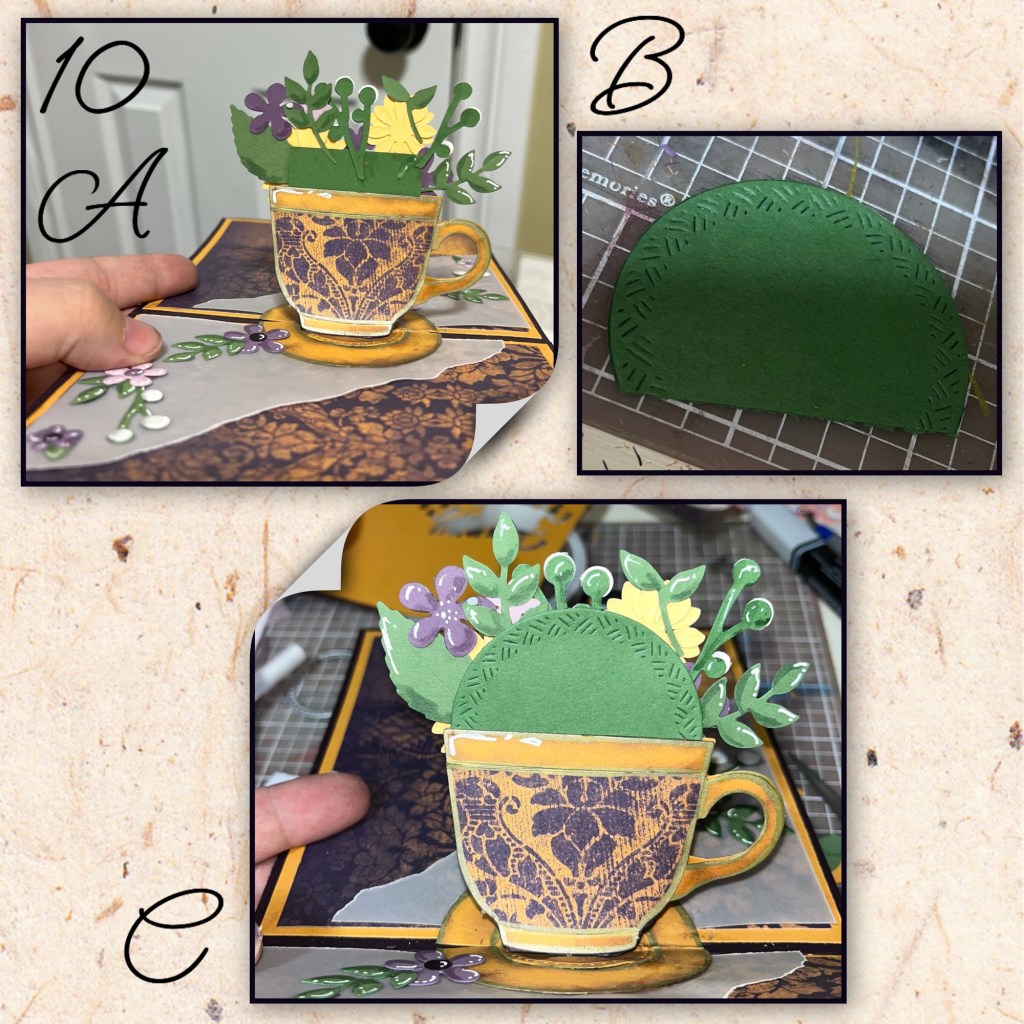
10A- I found the back kind of messy…
B- I cut a half of a Circles Crosshatch (I actually trimmed it a little more)
C- I added the piece behind the flowers, I tried to keep it short enough to not be too noticeable from the front.
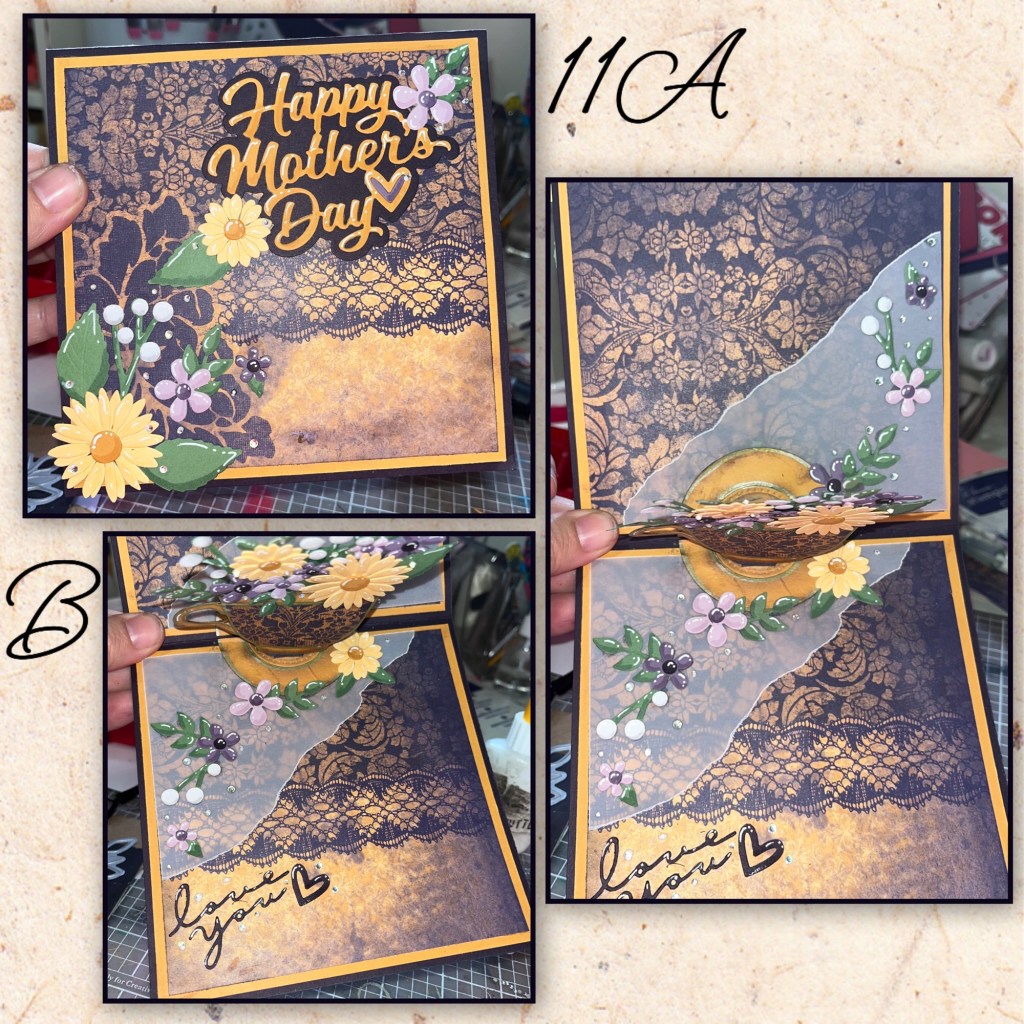
11A- I added some itty bitty gems to the front
B- I added some itty bitty gems and “love you” from the Pop n Swap dieset. The little heart is from the Happy Mother’s Day set.
I’m my own worst critic
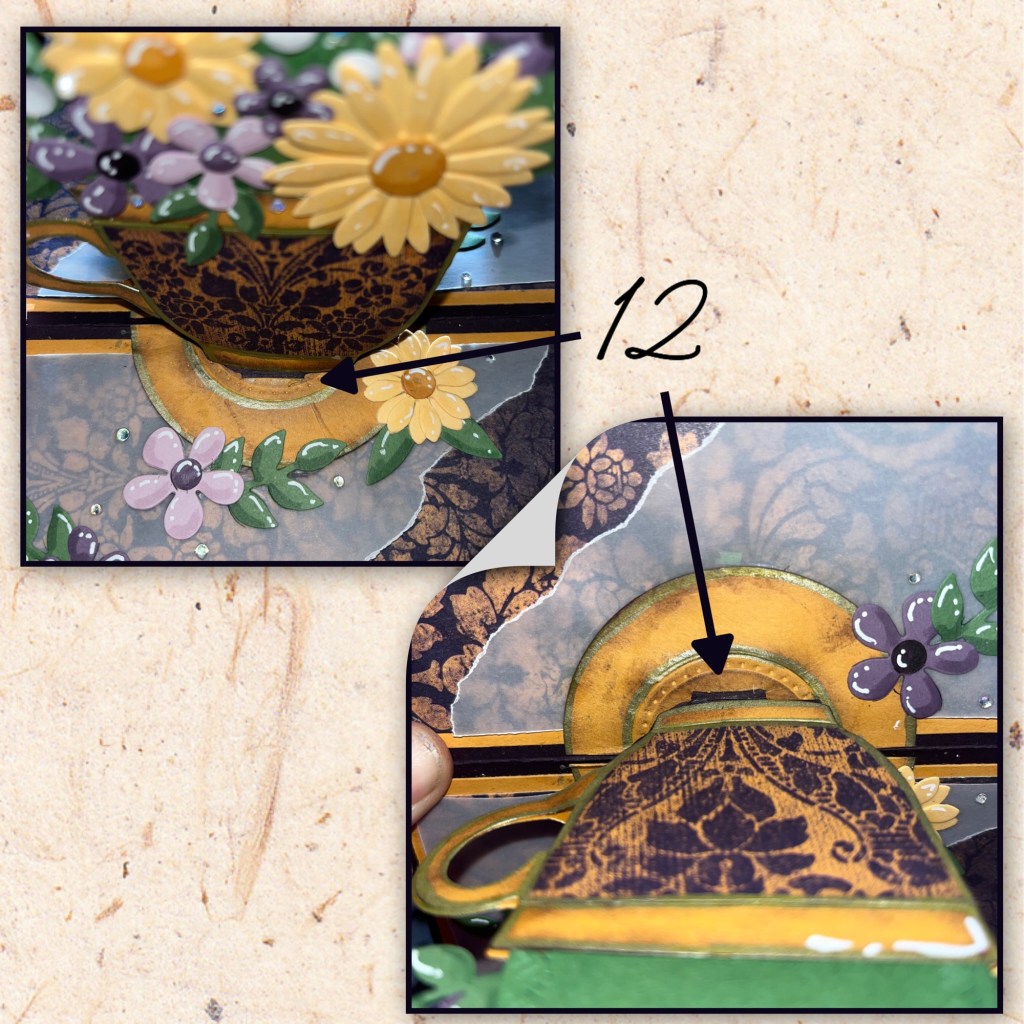
12- the cut in the saucer piece is fairly visible. if I were making this card again I would have cut the Coffee Cup mechanism piece the same colour as the teacup, it would be less visible.

Other Tools used

Thanks for always sharing your step by steps and a brilliant card result xx
LikeLiked by 1 person