
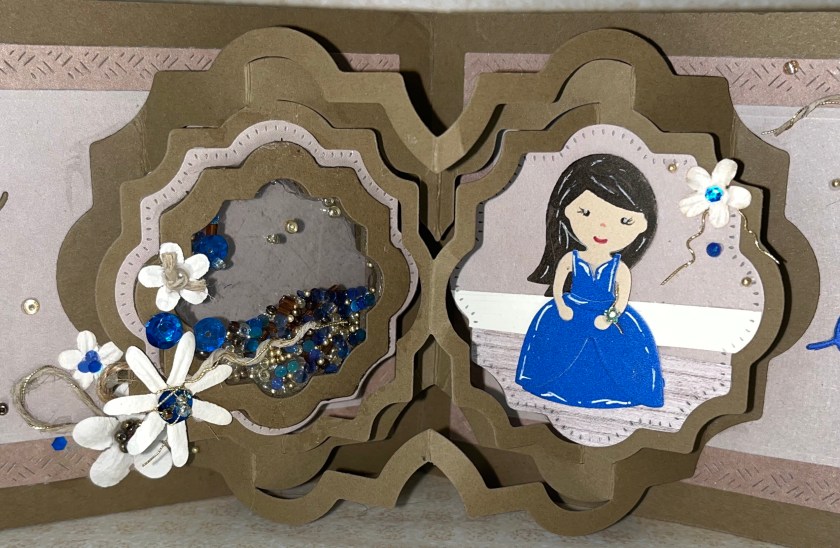
Sometimes I get special requests, and this card was a very special request. It is a graduation card from a mother to her daughter. I asked if there were colours or a style and she asked for a Boho style and sent me a photo of her daughters dress, which was a beautiful shade of blue. I chose to go with mostly neutral colours so the blue pieces would pop. I wanted to make it extra special so I have a borderless shaker card on the inside which is also visible from the peek a boo window on the front, and I added another see through shaker on the pop up mechanism on the inside. This is what I came up with.

All the fun is in the reveal, to see this card in action please check out my FACEBOOK page, feel free to join if you would like to share your own crafty creations. You can also see a video of this card on my INSTAGRAM page.
I made this card a few months ago and I am going from memory. I’m pretty sure I got the dimensions right, they will be pretty close if I’m off.
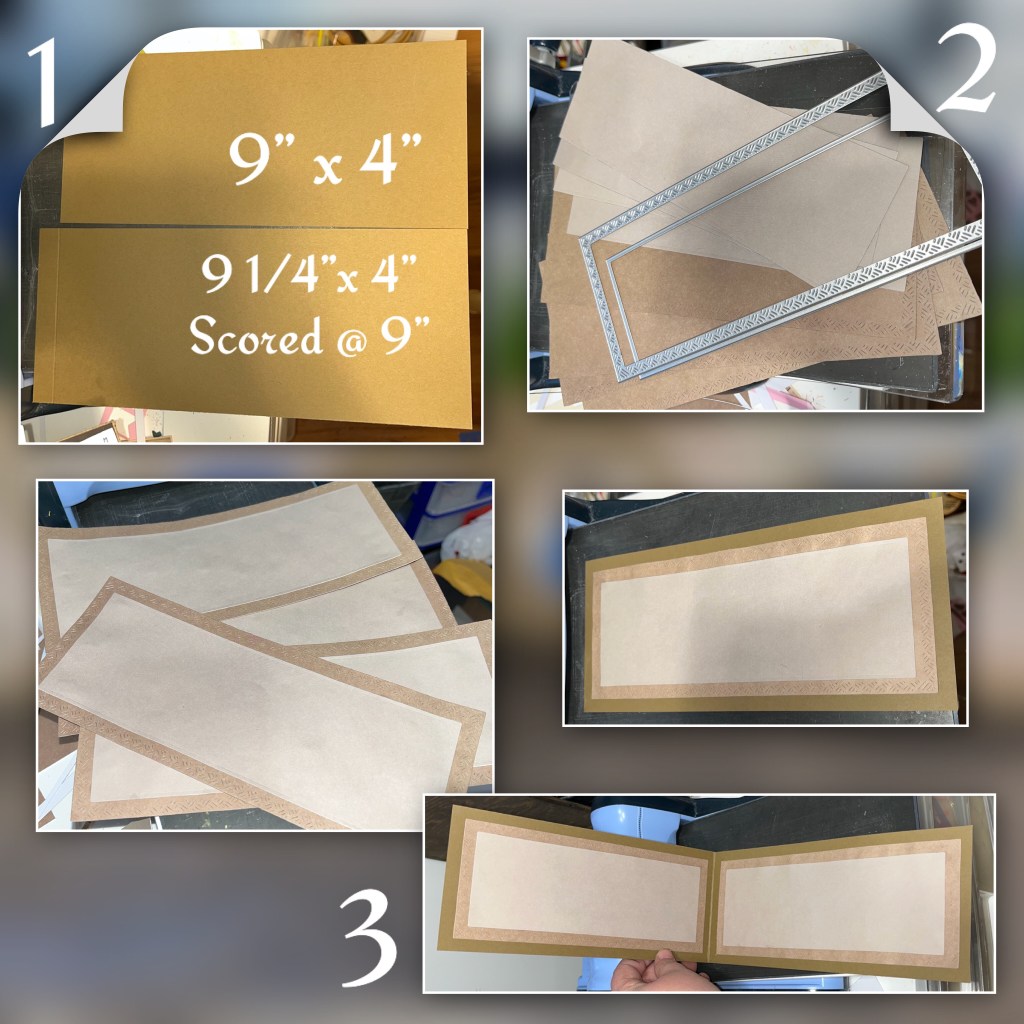
1-cut 2 panels as shown. Do not attach yet. (The colours are off in the photo)
2- using the 2 largest rectangles from the Long Rectangles Crosshatch cut 4 of each in 2 colours. The bigger one is darker the smaller one is lighter.
3- layer them together and add to the front, back and inside of the panels. then connect the 2 panels together.
This is how I made my borderless shaker. The plastic I used I found in my stash and I really don’t know where it came from. It is thicker than acetate but will bend and hold its shape without cracking. I have used acetate in the past but it was a smaller window
4a- I drew on the plastic liner of the plastic sheet. I used black sharpie and drew the space I wanted that would be the outside wall then I used the largest Label Crosshatch and drew the shape I wanted which was half the label, I traced the outside of the die. Then I drew the mirror image opposite, exactly as the photo.
B- I used a red sharpie to draw the shape between the black lines.
C- cut out the shape on the red line. make sure you don’t cut off the tabs along the piece that will be the side wall.
D- fold the plastic piece, I used a steel ruler and ran it along the fold to help keep the straight edge from bending wrong. It will look like a skinny taco with tabs on the bottom ends. Also remove the plastic liner.

5a- I used the same die that I traced for the plastic piece and traced it onto the back page of the card, this time I traced the inside of the die. I had to use a pair of scissors that can could through many layers as there are 5 with all the panels.
B- I added sticky strip around the opening on the backside of the card, and stick one side of the plastic piece to it.
C- I nested the 2 largest Label Crosshatch dies and cut two frames , and added one over the piece I just attached.

6a- I needed a foam frame but didn’t have strips thin enough to bend to the shape so I added double sided adhesive to both sides of white fun foam.
B- use the same Label dies to cut. It didn’t go all the way through so I used scissors to finish.
C- add to the inside of the card and stick the other side of the plastic piece to it. I left a little gap between the foam adhesive and the plastic to add the shaker bits.

7A- I used a rolled up piece of paper to make a funnel and added the shaker bits which are a mix of blue sequins in multiple sizes, micro beads, seed beads, and some wooden beads that came from a broken bracelet.
B- I cut a thin strip of matching cardstock that is the same depth as the shaker piece. After adding the other frame piece to cover the adhesive on the top, I used the thin strip to cover the gap between the card and the frame, covering the white adhesive on the sides.

8a- I wanted the shaker on the back to be visible through the peek a boo window on the front , I tuck the smaller die to a piece of post it note, and layer it on the shaker, adhesive side up making sure to place it how you want it to look. Carefully close the card and stick it to the other side and trace it there.
B- I used a hole punch to punch through all the layers as I was hoping to not cross over the out side edge, but I ended up doing anyway when I cut out the shape.
C- nest 2 dies together, the one used to trace and the next smaller and cut 2 frame, add them over the hole, one on the front one in the inside.

9a- I diecut the Paper Frames Pop up and used some of the other dies in the set to decorate. On the right side I used a wood grain paper to make a floor and I white strip of paper to make baseboard.
B- because this shaker is smaller I thought I’d try a different technique to make the shaker. I diecut a small window in the middle of the right Paper frame panel. Then I layered cardstock and double sided adhesive together and stacked them, (if I remember 3 cardstock high )and cut out 2 frames. I also cut 2 windows from acetate and 2 more frames to finish.
C- on the back side of the panel add a stack of frames, then a clear window, then frame. I added the same shaker bits as before, minus the wooden beads as they were too big
D-now on the front side, add the second stack of frames, a clear window, and the last frame to complete the shaker.
Side note; the stacks didn’t hold as well as I thought they would so I had to go around all the edges with glue to adhere it properly. If I were to make this again, I would use glue to adhere the stacks together

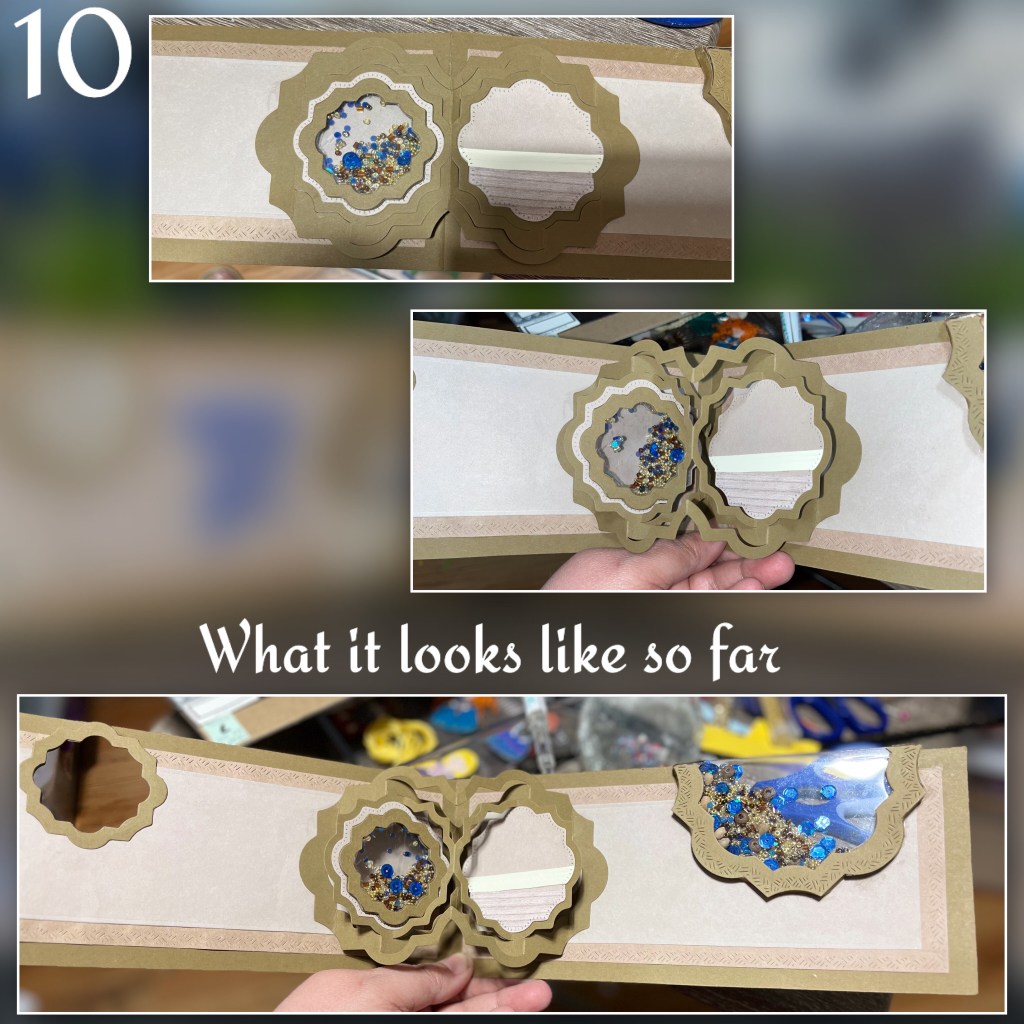
10- add the Paper Frames pop up to the card (Karen has a video tutorial on the product page at the link ⬆️ )
11- so these flowers look soooo much better in person. I believe the petals are retired Stampin’ Up, they are a thick textured paper.and I made each one differed. I added different beads, sequins, twine as centres. I used a lot of glue to hold the beads in place. They took overnight to dry. I used a couple different thickness of twine and a gold thread to make the leaves and twirls. I soaked the twine in glue and wrapped it around a long pick tool to make the twirls and also let them dry overnight.
12- I personalized the Princess from the Princess and Mermaid set to look like the graduate in her dress, I even gave her a corsage. I die cut “grad 2023” from the Tiny Alphabet and numbers set, I diecut the “way to go!” And “you did it” from Word set 17-congratulations and the “love you” from the Pop n Swap set
13-I made a small square out of a strip of paper to make a space filler to put beside the large shaker, and started adding flowers to it.

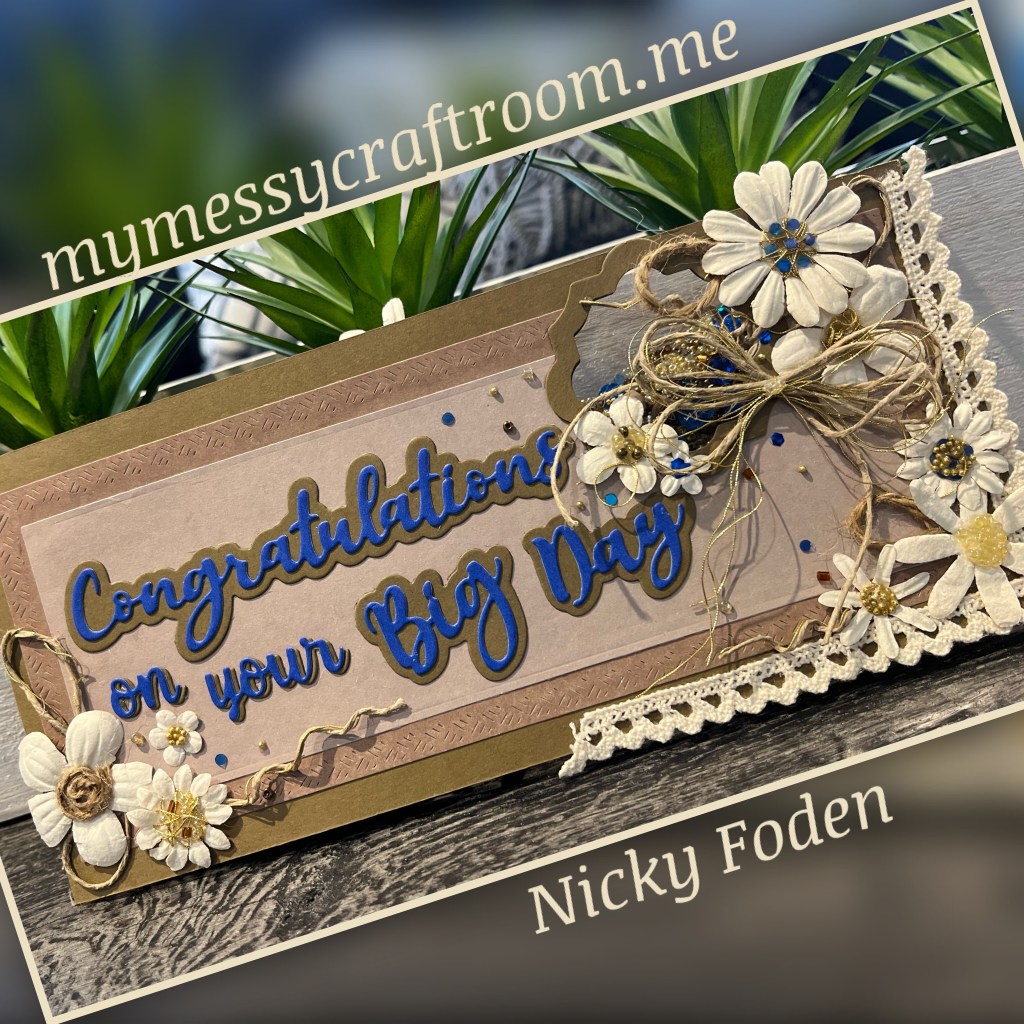
14- the greeting on the front is fromWordset 17- Congratulations , and I added all the pieces that I made randomly around the card. I also added some little beads randomly around and some ribbon to go along with the Boho theme.

Close up of some of the flowers

Other Tools used

Nicky your work is amazing. I enjoy looking at your work. Great job!
👍🏼🌻😉
https://facebook.com/groups/inthisroomwithivy/
LikeLiked by 1 person
Wowwwww Nicky, this is really awesome!!
hank you for the tutorial
LikeLiked by 1 person