
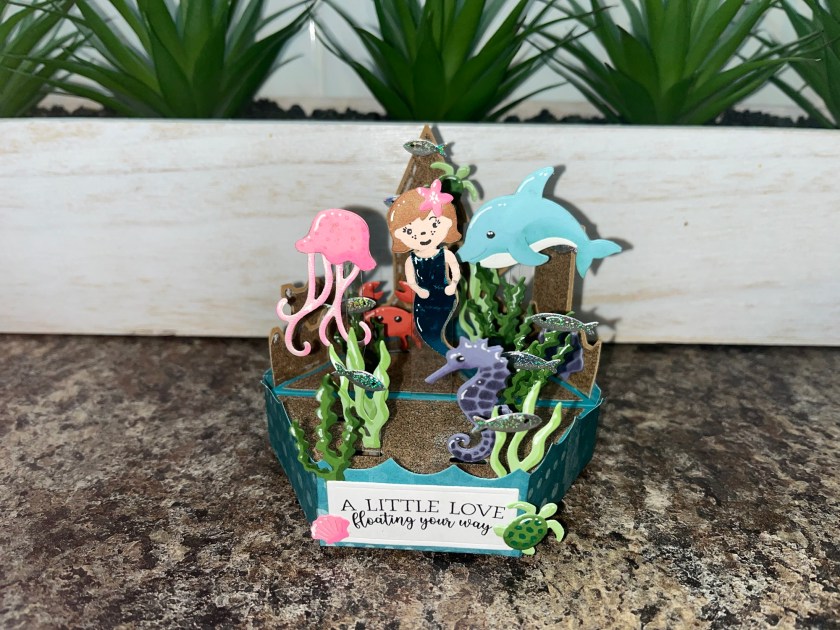
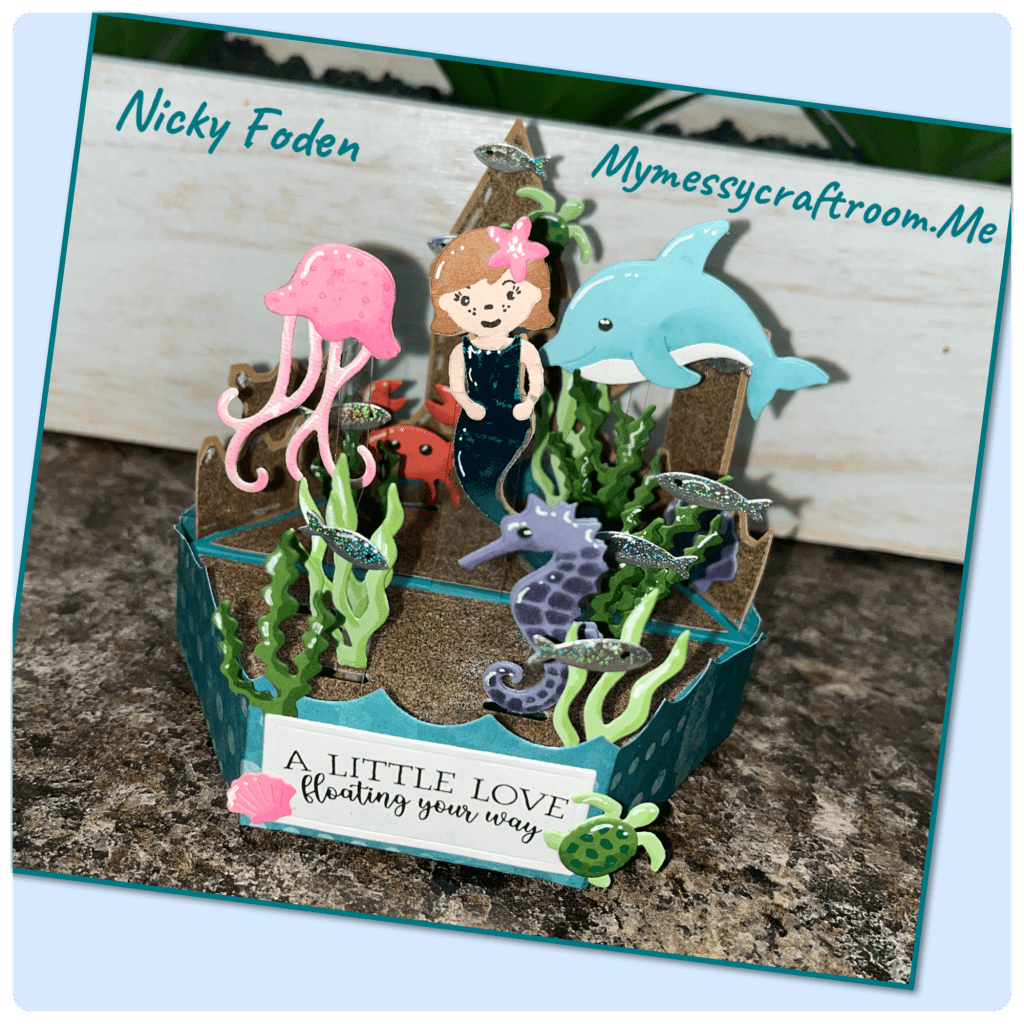
This new Stage platform dies set is so fun and versatile. I thought I would try to make a little under the sea scene. I had a thought in mind that didn’t originally go as planned, so a I had to pivot a bit but in the end I think it turned out pretty cute.

All the fun is in the reveal, to see this card in action please check out my FACEBOOK page, feel free to join if you would like to share your own crafty creations. You can also see a video of this card on my INSTAGRAM page.
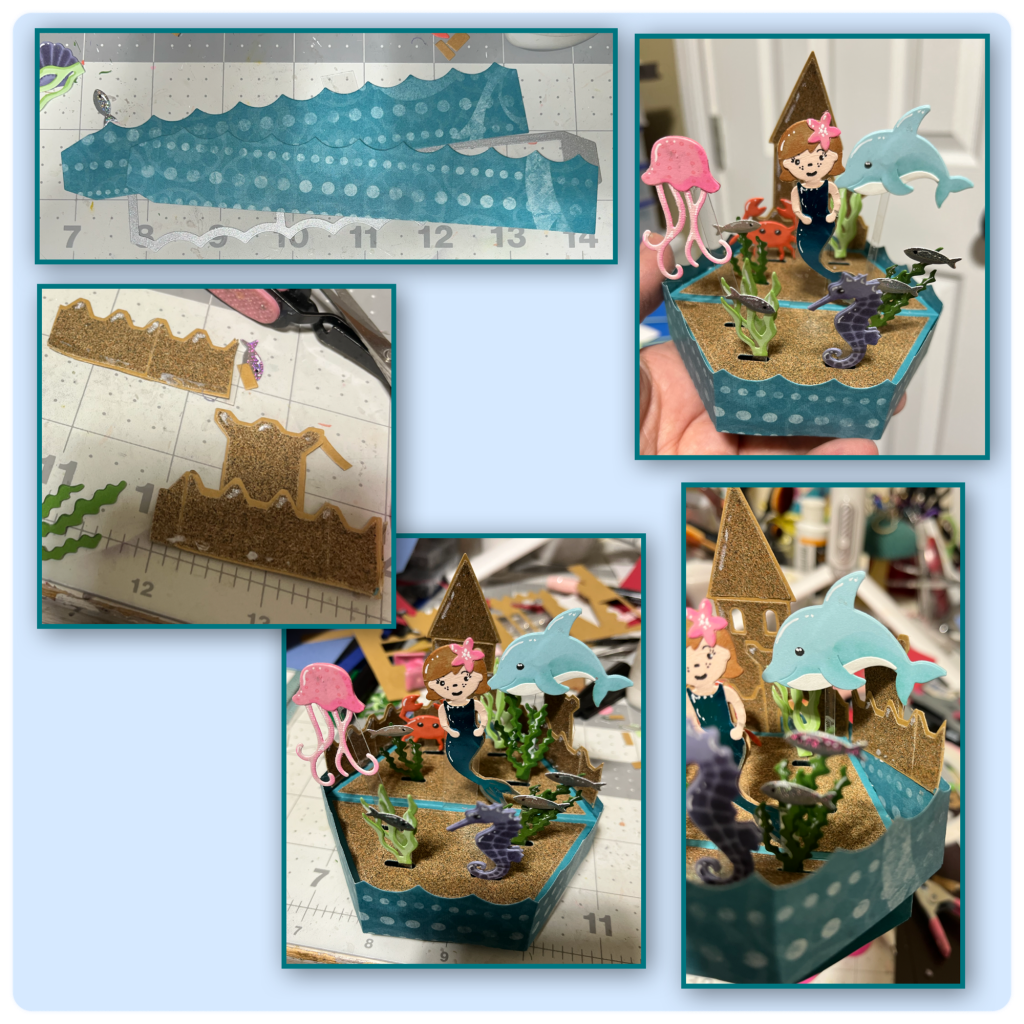
I started by making the Stage Pop Up (Karen has a video tutorial on the product page at the link ⬆️ ) I thought I would use sandpaper to make t look a little more sandy.
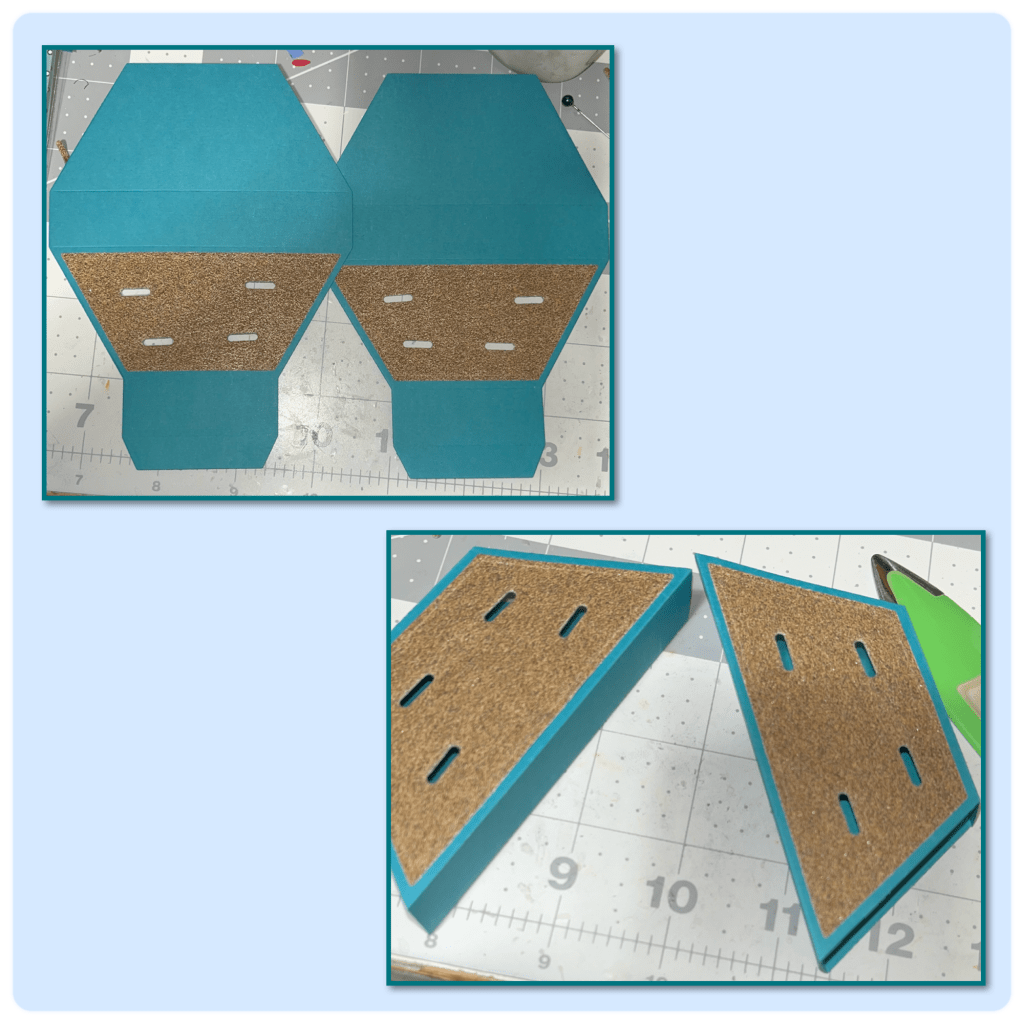
I wanted to use clear sticks (cut up plastic packaging) to mount my elements so I had to come up with a way yo attached them to the stage pieces. I took the pieces that are meant to use and folded them as shown. I cut a little notch in then top and glued the stick inside the hole, use a dry adhesive like glue dots. I added one strip in between the stage pieces and adhered together then added all the little tab pieces.

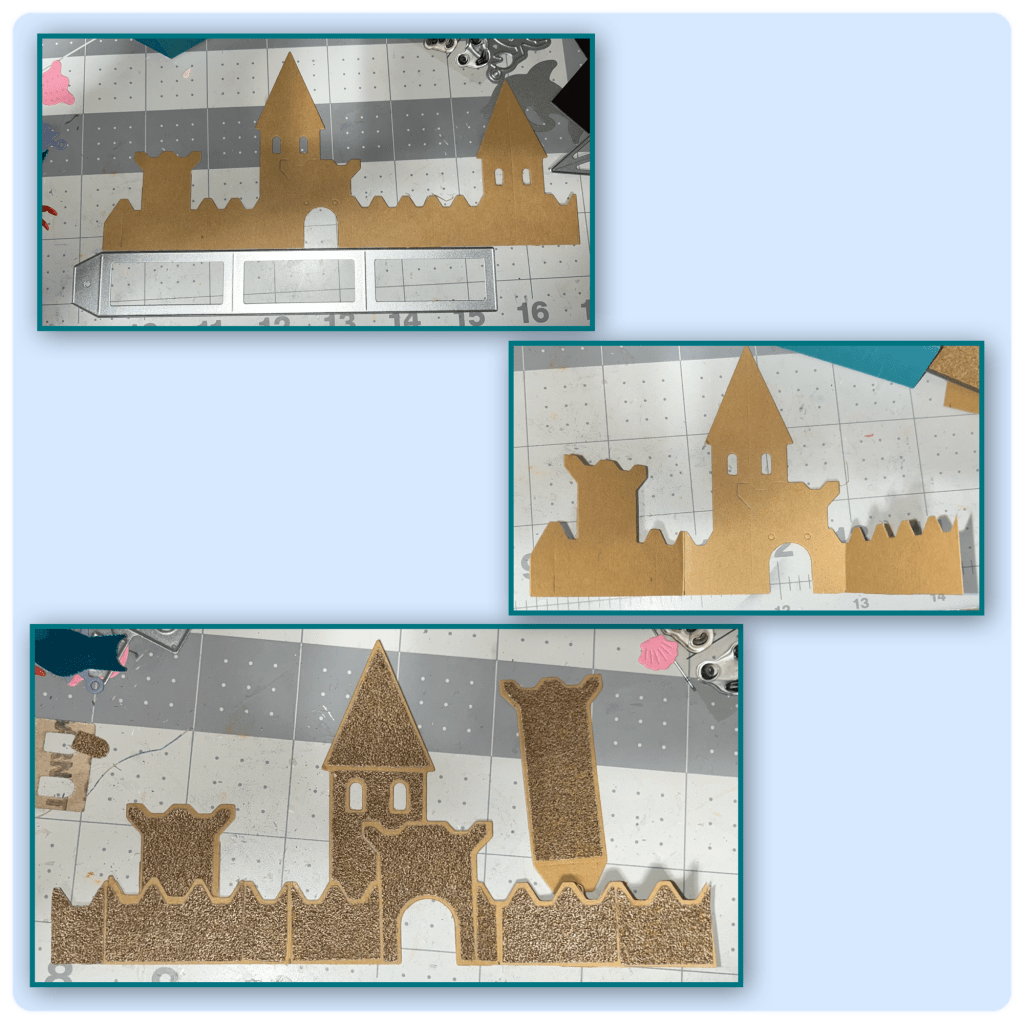
I cut out and assembled these pieces of the Castle Pop up. I used the sand paper to add the sandy detail.
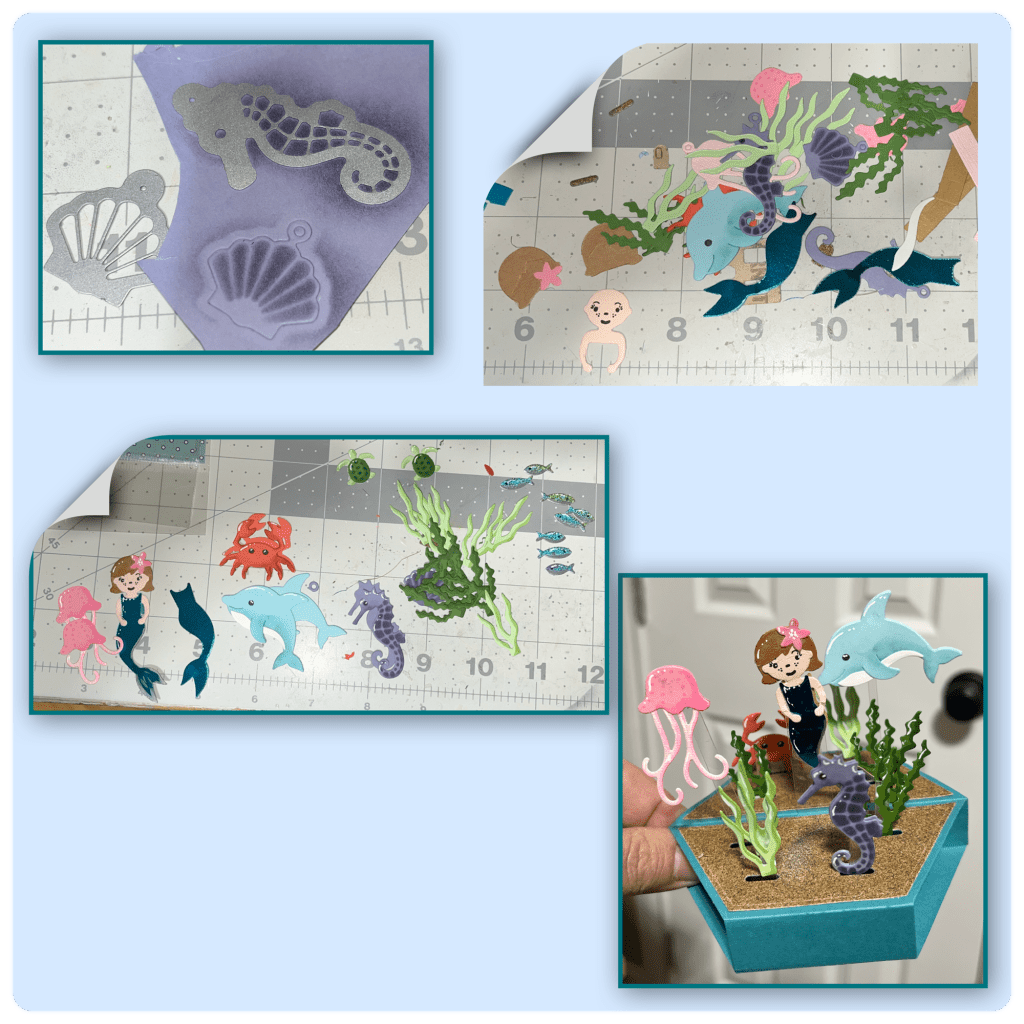
I assembled these pieces from the Princess and Mermaid, Leaping Animals, Sea Charms, and Sea Stage Add ons. I made duplicates so I could sandwhich the plastic sticks between them. I stamped the mermaid face using the Fun Faces 1 clear stamps. On the purple pieces I brushed on ink, on the rest I added shading with alcohol markers and highlights with a white Gelly Roll pen.
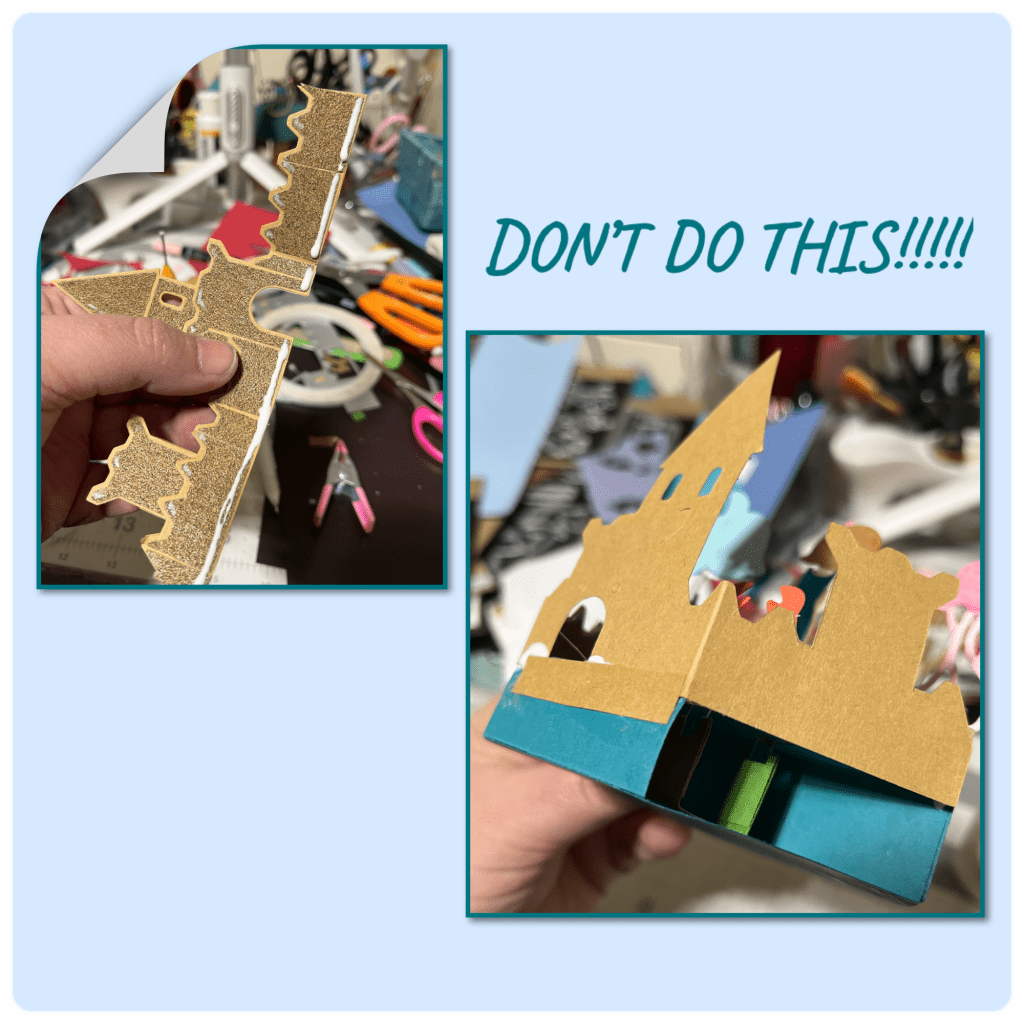
So this is where I made the mistake, I don’t know what I was thinking but I glued the castle to the actual stage, glued this way it does not fold anymore. I noticed right away and removed it before the glue set up too much.
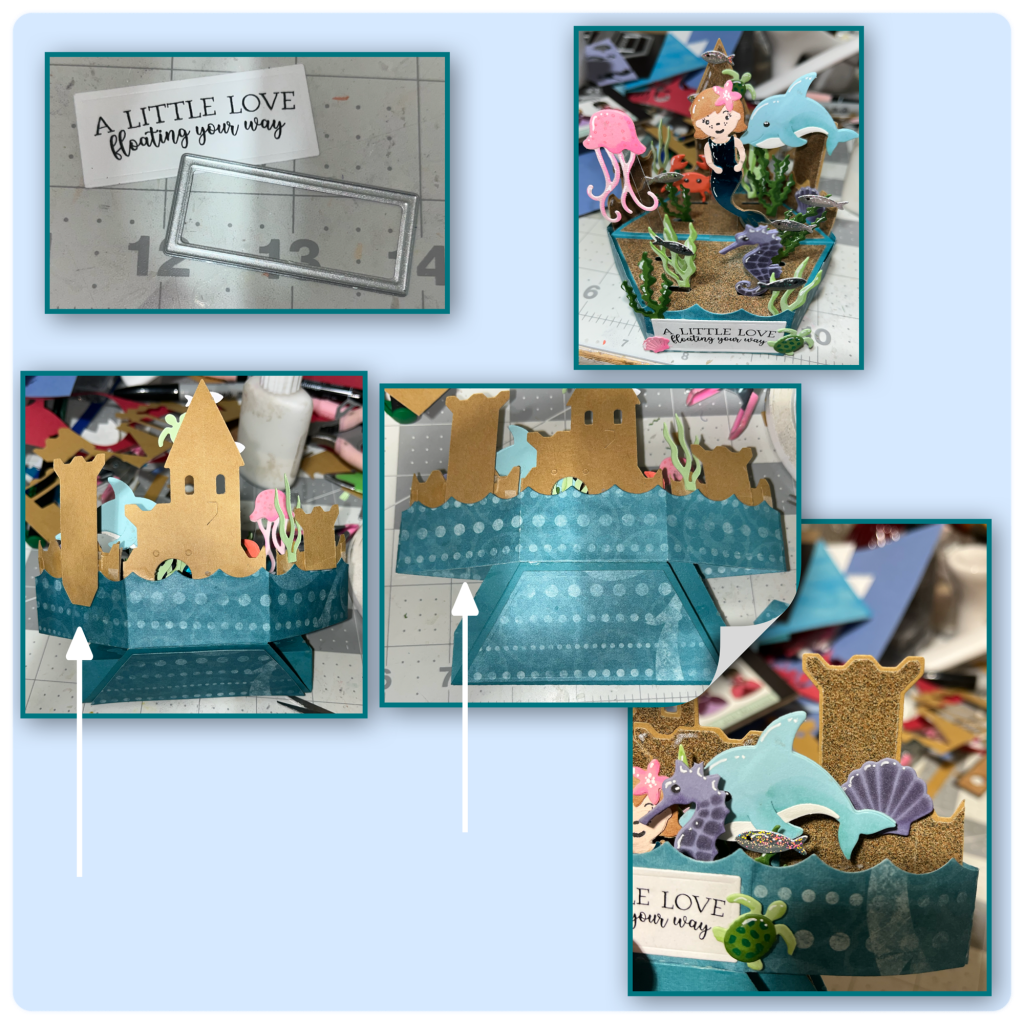
I cut the border pieces from a blue patterned paper. I attached it to the stage pieces as per Karens video. And I glued the pieces of the castle to the inside of frame instead. I thought it would be best to cut the castle into sections , I thought a fold in a fold would make closing the card more difficult.
I stamped a greeting from Stage Scenes Clear Stamps and added it to the front. When I glue the tower to the card I didn’t like how it looks so I cut out another sections of the frame and covered it.
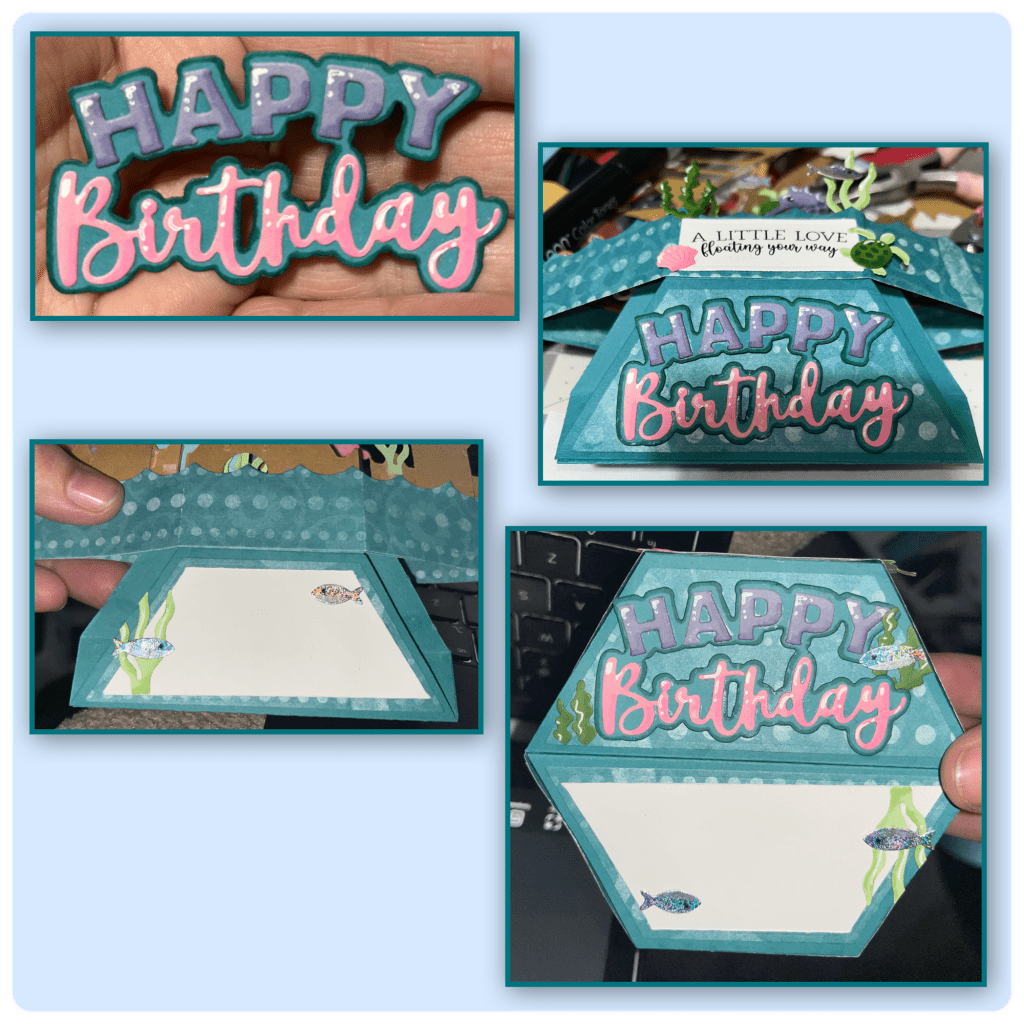
I really like the mixed fonts in the Happy Birthday Lorna Add On. The teal background didn’t pop against the background so I coloured the edges with a darker teal. I added it to the bottom and decorated. I needed a place to signs so I cut out another trapezoid from white. Added it to the bottom and decorated.
Other Tools used
