

So crafty friends, what do you think of the new release so far. Isn’t it a fun release, there are so many cute and fun dies, but today I am sharing a pretty card using the new Pine Cone die set. I just love making paper floral arrangements on my cards and I have really been wanting a pine cone and pine branches to add to my Christmas bouquets.

I wanted the floral arrangement to be the star of the show so instead of making a Popup card I decided to make an easel card.
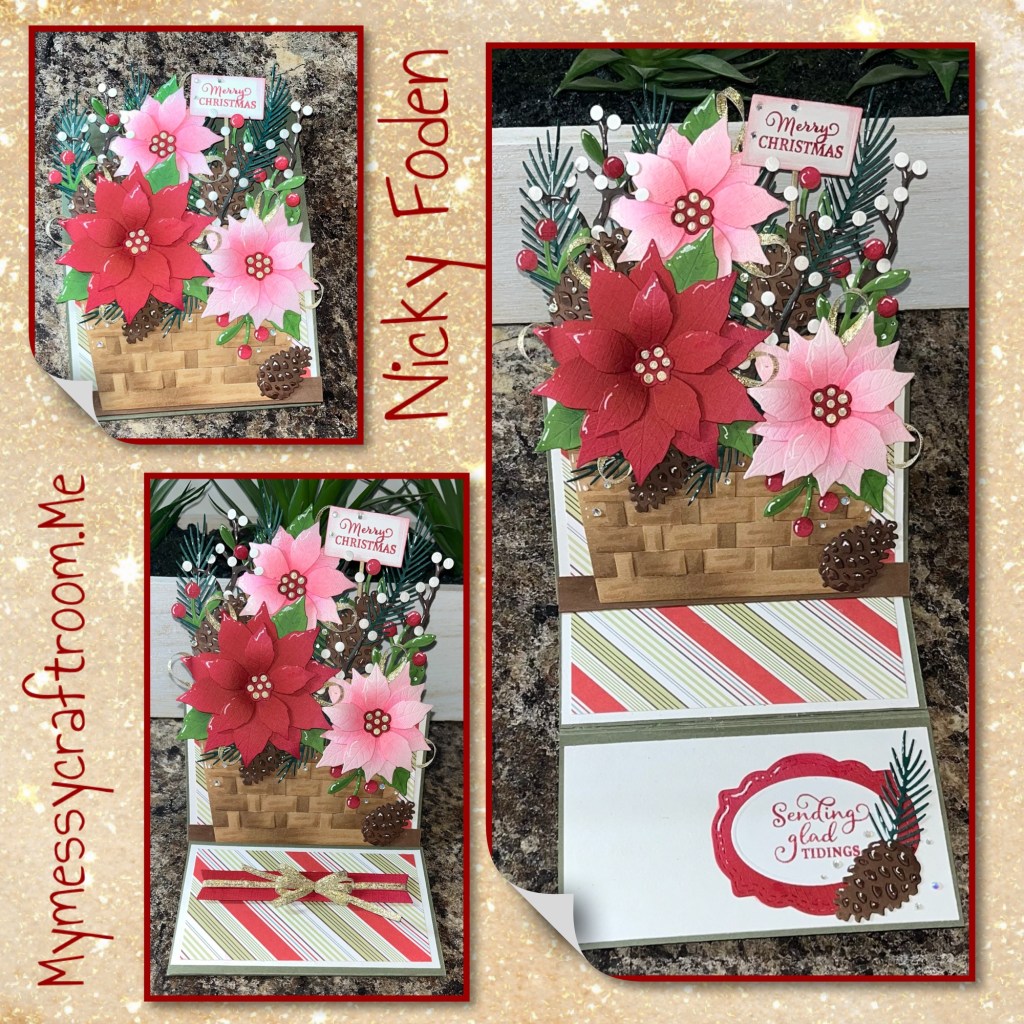
All the fun is in the reveal, to see this card in action please check out my FACEBOOK page, feel free to join if you would like to share your own crafty creations. You can also see a video of this card on my INSTAGRAM page.
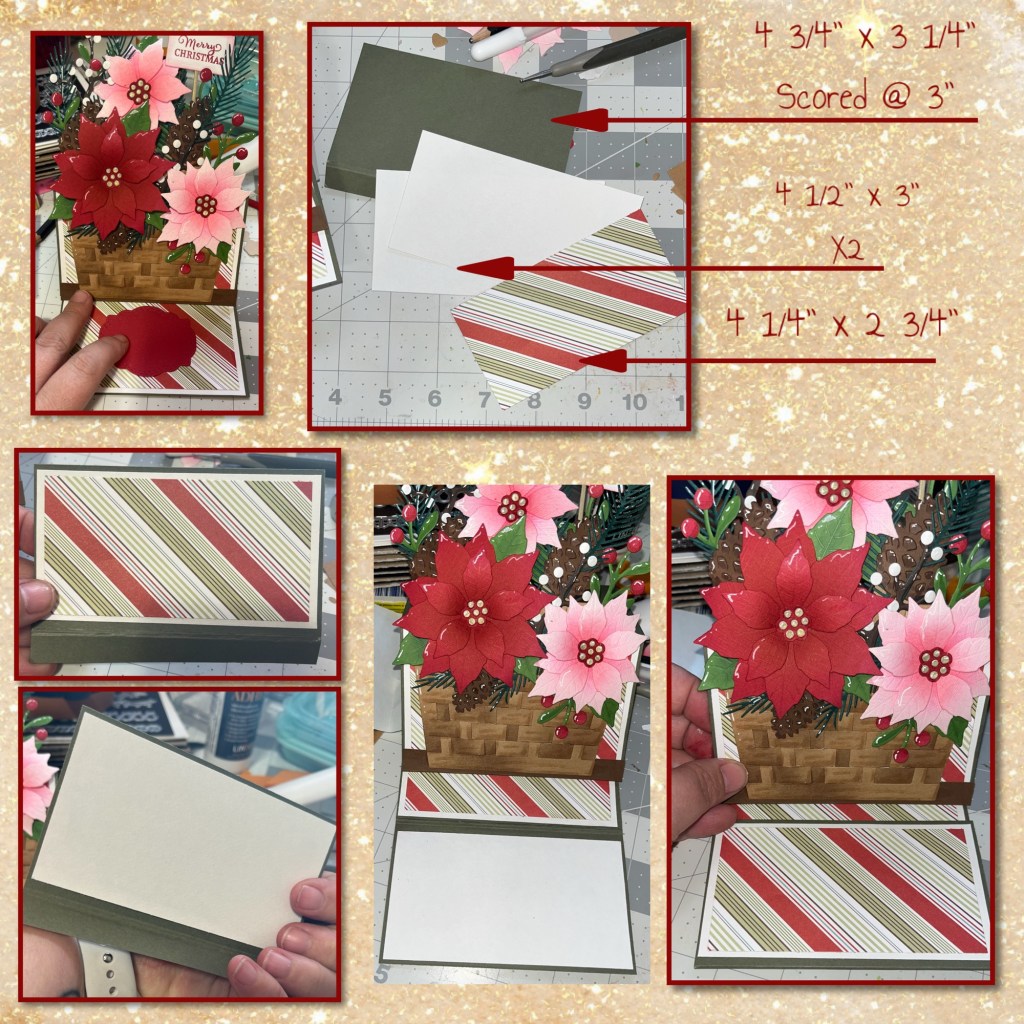
I knew I wanted to fill out my Christmas basket so I die cut the pieces from the Pine Cone set as shown, and the pieces from the Poinsettia as shown. On the pine cones, the leaves and the branches I added shading with alcohol markers. On the poinsettias I added shading with a brush and ink. I held off on adding the white highlights until I found where I was going place them. I also added some curves to the flower petals.

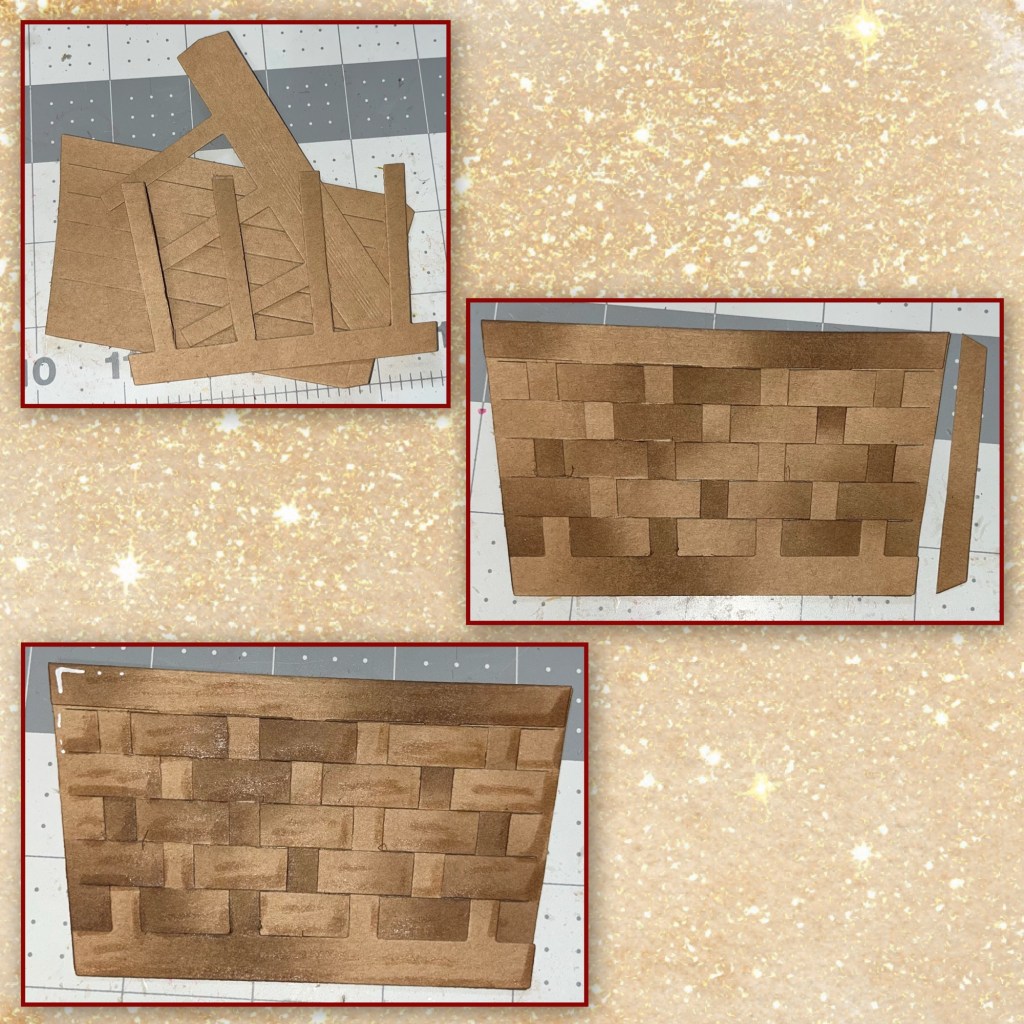
I cut the pieces from the Wide Woven Basket, I only needed one set as I am adding them flat to the card as apposed to making them into a 4 sided basket. I used a brush and ink to add shading to the pieces BEFORE I weaved them together. I cut the tab off the right side off as it also won’t be needed. I used Versa Mark marker to add lines to give it some detail and a few white highlights.
I wanted the card to fit inside a 5”x7” envelope, so I cut the card base as shown below. At this point I thought I only needed the 2 striped panels so I cut and layered as shown.
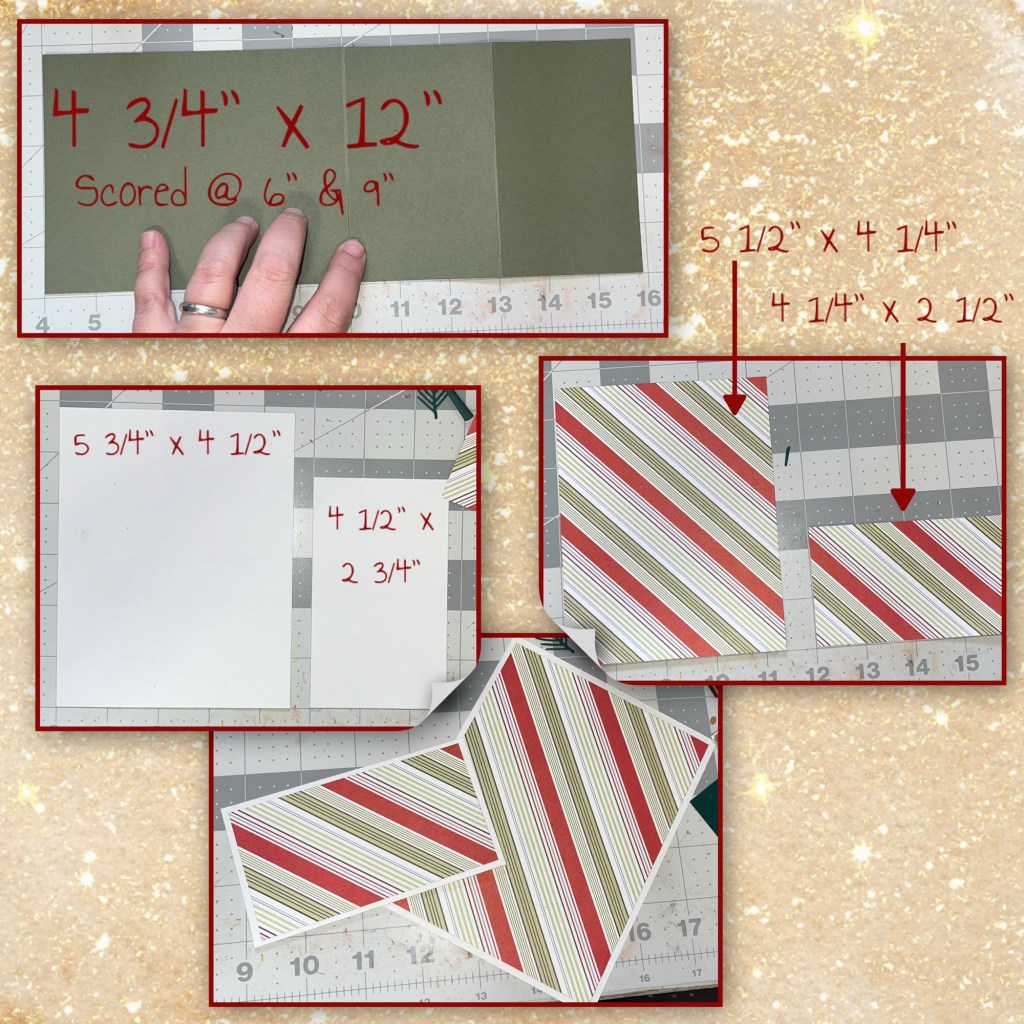
I added the larger panel to the inside and the small panel to the front below the score line. I realized that somehow I had a bit of a shorter edge on the front so I made a brown piece to fold over the edge to fill in the gap. I decide to pull out a 5”x7” envelope and lay it behind the card as I was making it to make sure all the pieces stay within the envelope when I need to put it in.

I cut long skinny strips to add to the back of the flowers when adding them to the basket. And when I added the basket to the card I only added the glue to the bottom and sides so I would have room to add the foliage. I started adding the piece and adding the white highlight.
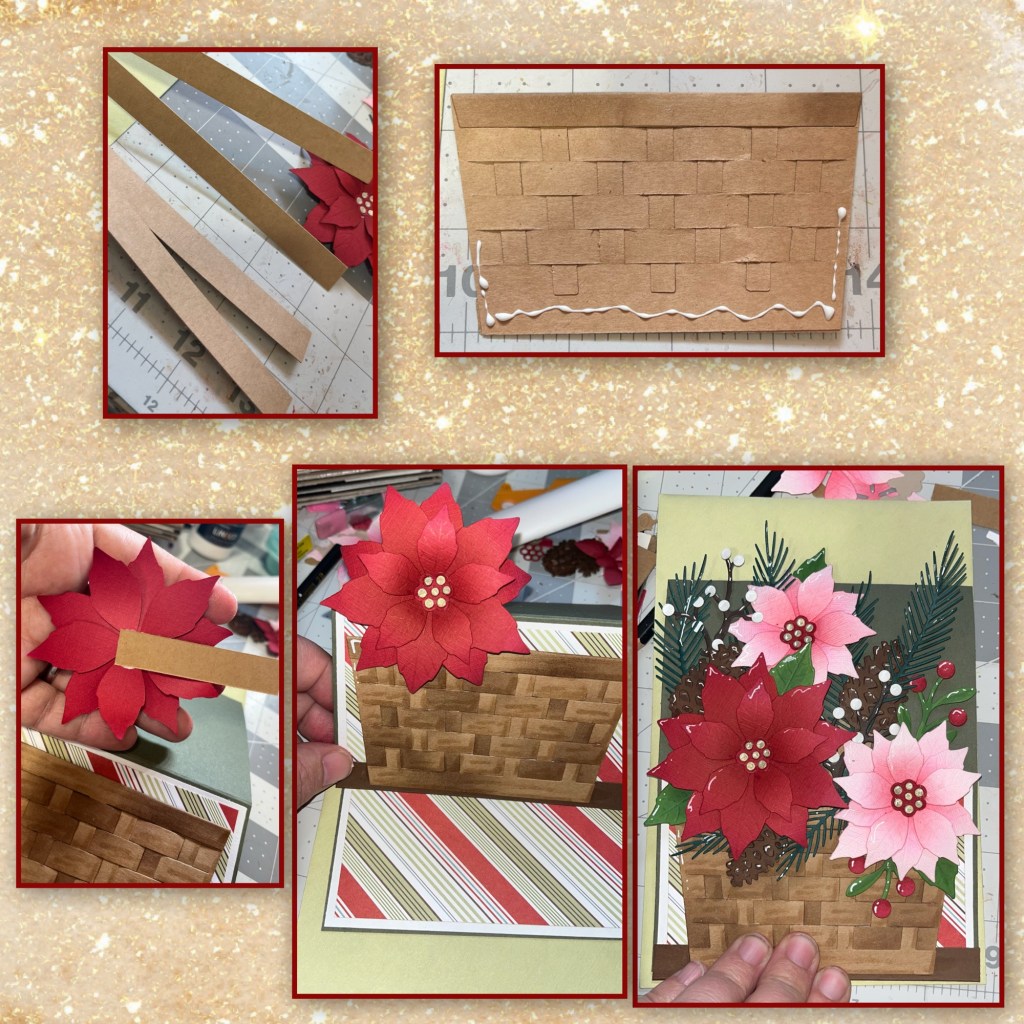
I stamped the message from the Christmas Wishes stamp set then cut the tag and the sticks from the Bouquet Bits, I needed a bit of length for the stick so I glued 2 slightly overlapped and added to the basket. To fill in the little spaces I cut up some the branches. The back is a little messier than I thought it would be so if i were making this again I might not have left it open, but I really do like the look from the front

So typically with an easel card there is raised piece on the inside that will help hold the card in position when opened. I wanted to use one of the new labels but because of the shape of the label it wasn’t really holding it open, and I would still need a place to sign so I decided to add an extra flap that would fold down from the bottom. So I cut the pieces as shown below. The piece with the stripes will be visible when the flap is up (closed position) and the white side will be visible when the flap is down (open position)
I cut the pieces below using the new Greetings Labels, then I stamped the message using a stamp from the Christmas Wishes stamp set. I thought the card needed a bit of gold so I wrapped a thin gold ribbon around the banner then added foam added adhesive to the back and added to the top of the flap that I just made. I added the stamped greeting with a few of my elements to the inside of the flap.
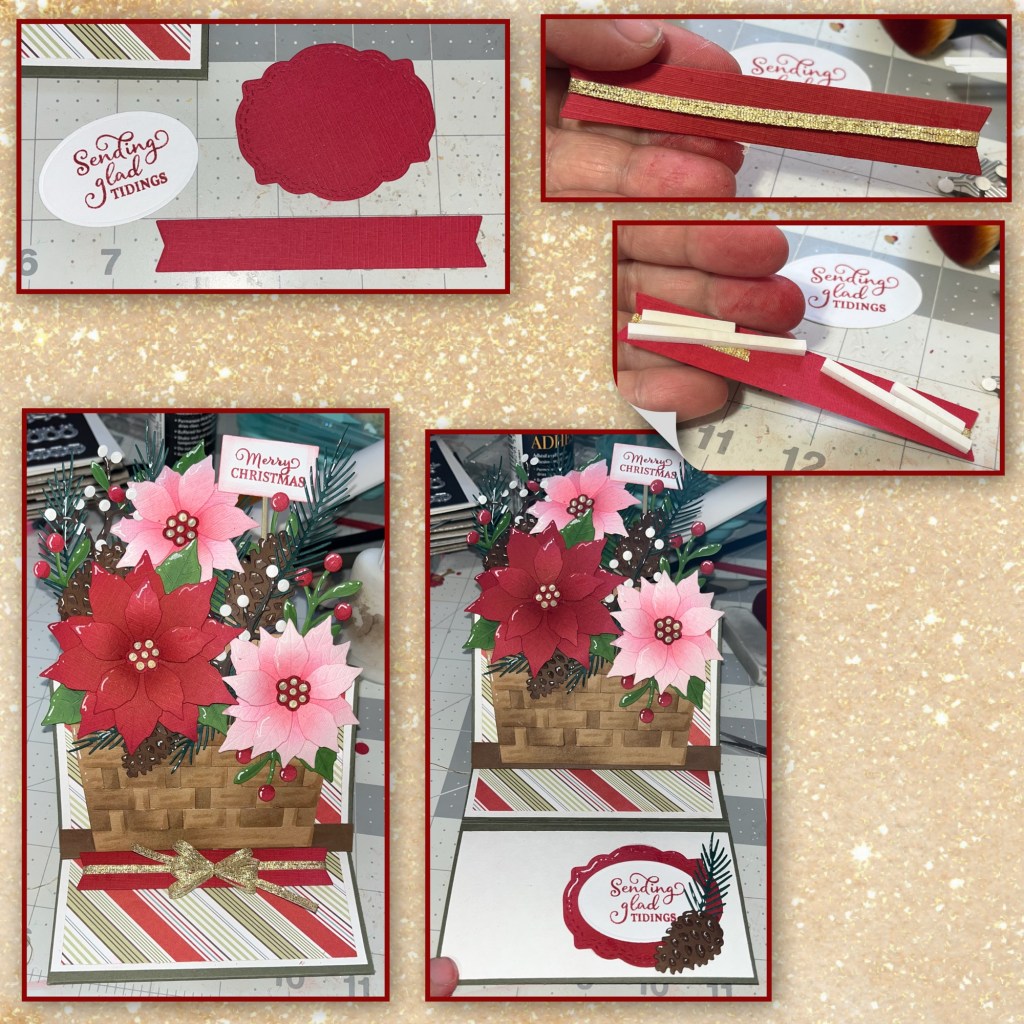
To add a little more gold to the card I cut a bunch of pieces to about 2” and glued the ends together to make a flat loop. I clipped them for a bit to let the glue dry then added them randomly around the card. They are hard to see but I also added a few itty bitty gems randomly around.

And yes….. it still fits in the 5” x 7” envelope.
Other Tools used

Maybe next year’s x-mas cards
LikeLiked by 1 person