
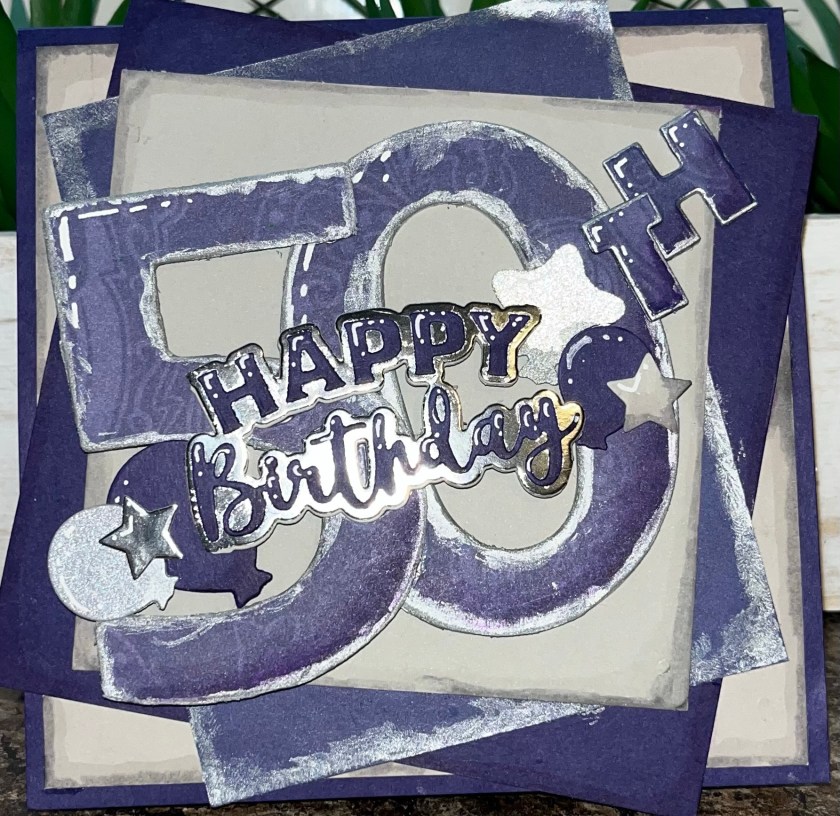
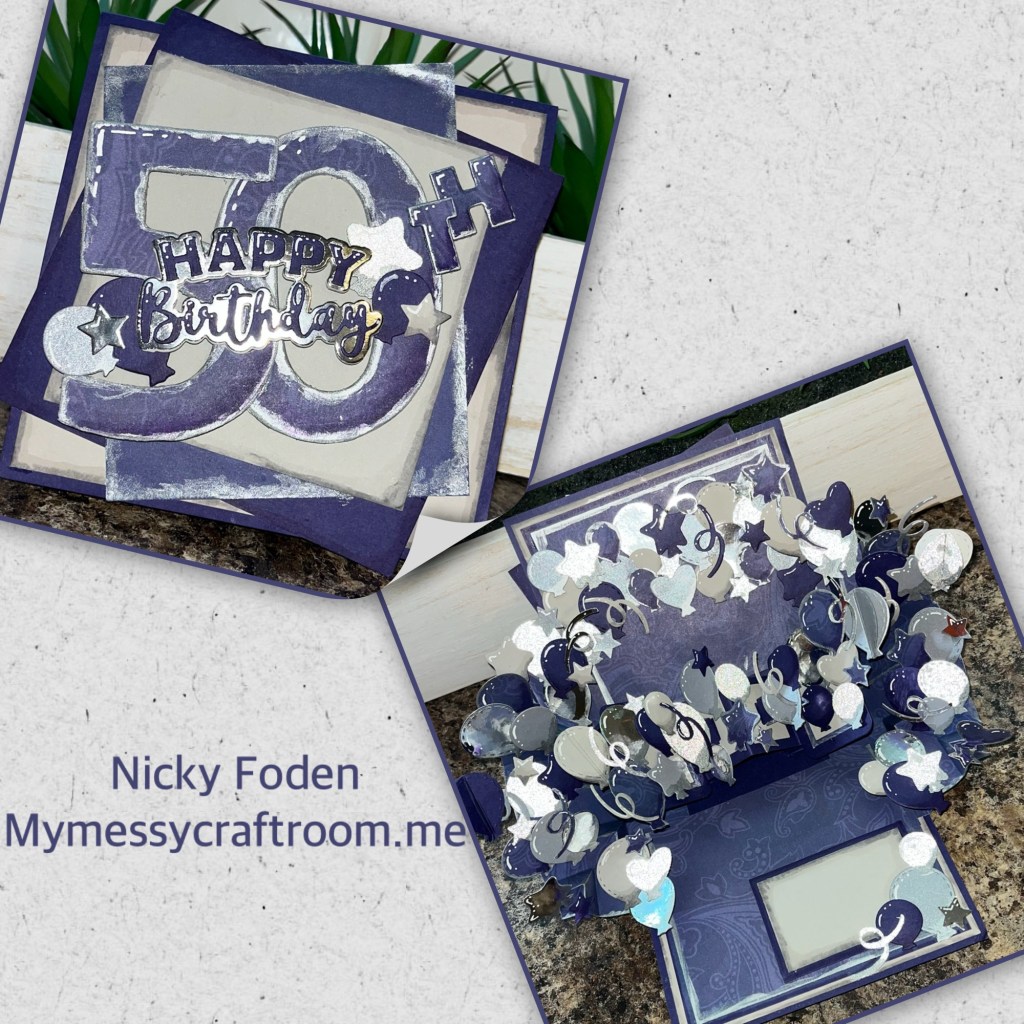
I was a little stumped when making this card for my darling husband. He is the one person who gets to see ALL my cards in person, no matter who they are for and he is my biggest supporter in all that I create so I wanted this card to be extra special. I actually spent about 3 hours just cutting and colouring the balloons. It’s actually shinier in person as well.

All the fun is in the reveal, to see this card in action please check out my FACEBOOK page, feel free to join if you would like to share your own crafty creations. You can also see a video of this card on my INSTAGRAM page.
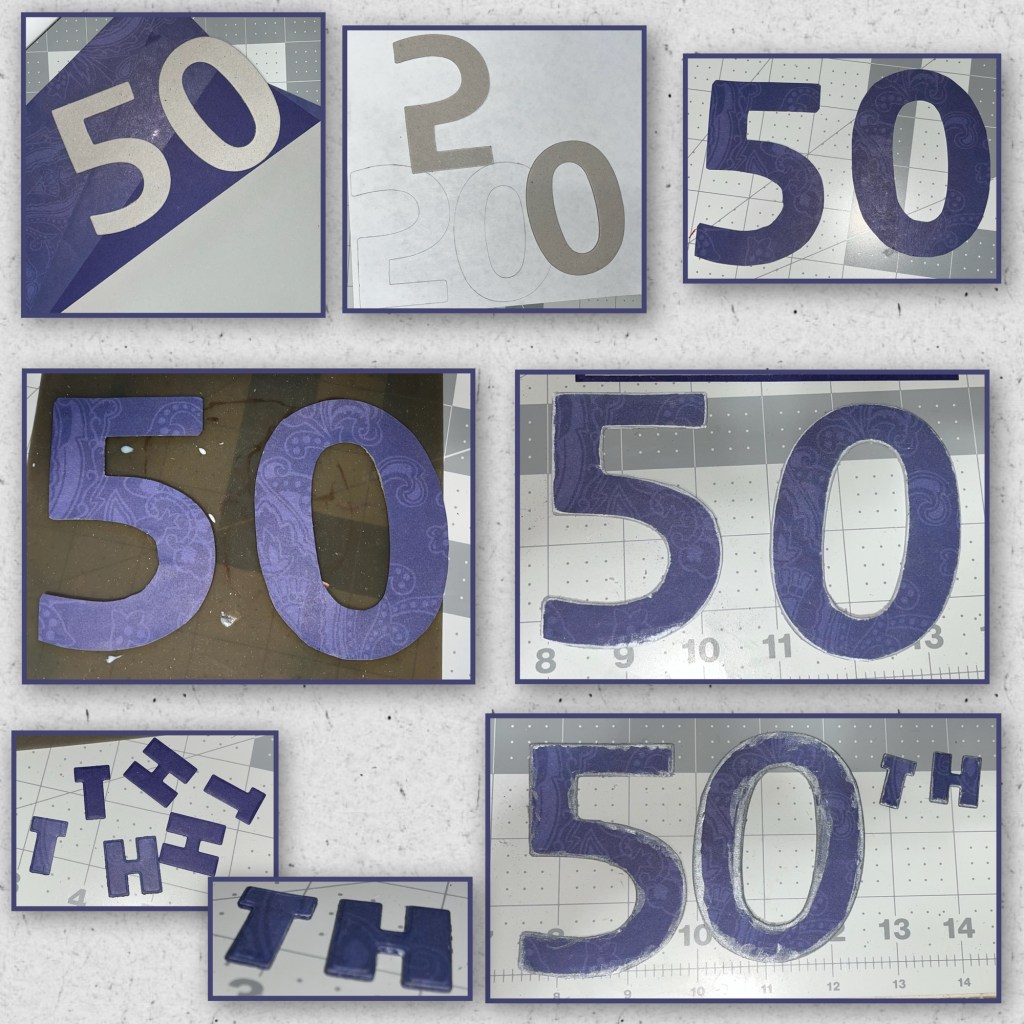
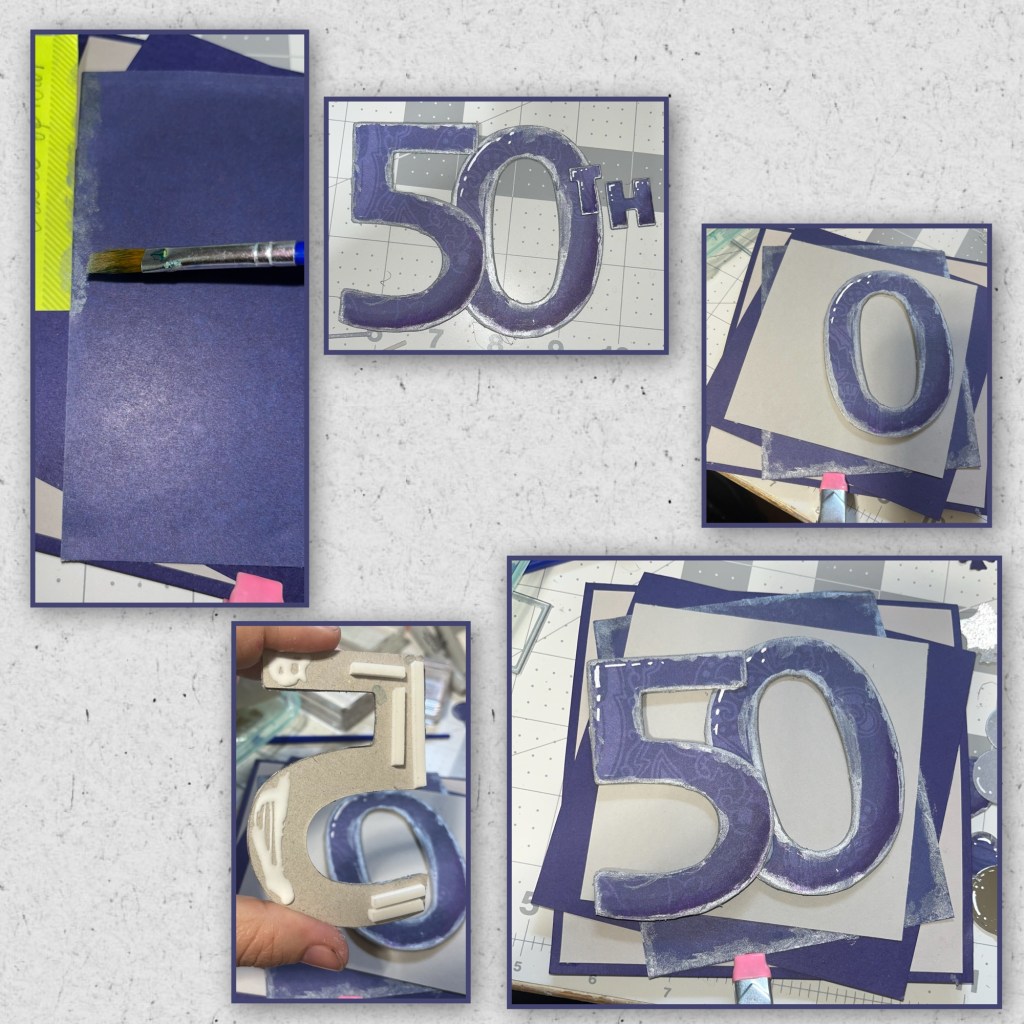
I figured this card out as I was making it and I wanted to have a lot of dimension. I went through my stash of things and found some chip board numbers that I’ve had forever and decided I wanted to have a big 50th on the front. I traced the 50 on to the back of the patterned paper on the reverse side then cut ad glued it to the front. I pressed it in between some books to get the paper to glue flat to the front of the chipboard. I used an emmory board (or a sanding block) to sand the edges of the 50. I diecut the “TH” using the Alphabet set. I cut them twice from the purple cardstock and once from the patterned paper then layered them all together. I used some silver acrylic paint along all the edges.
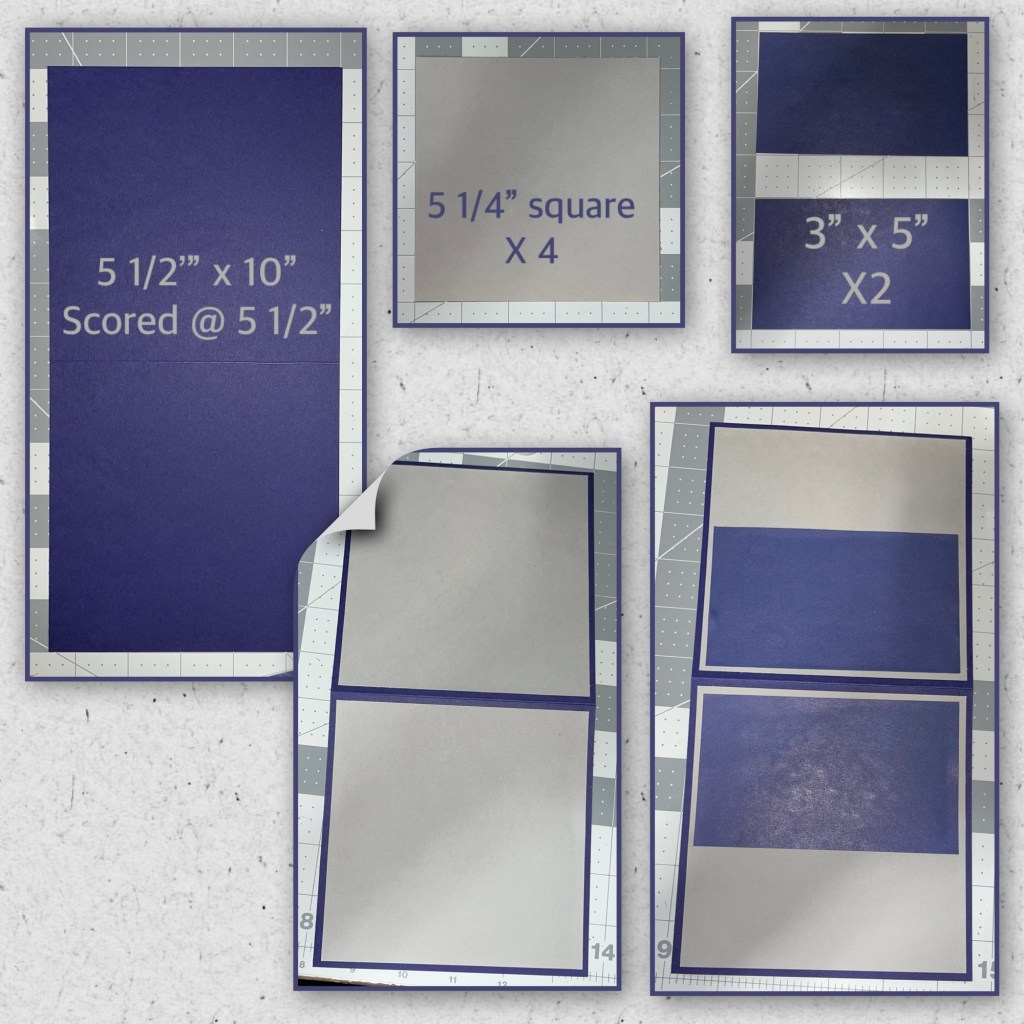
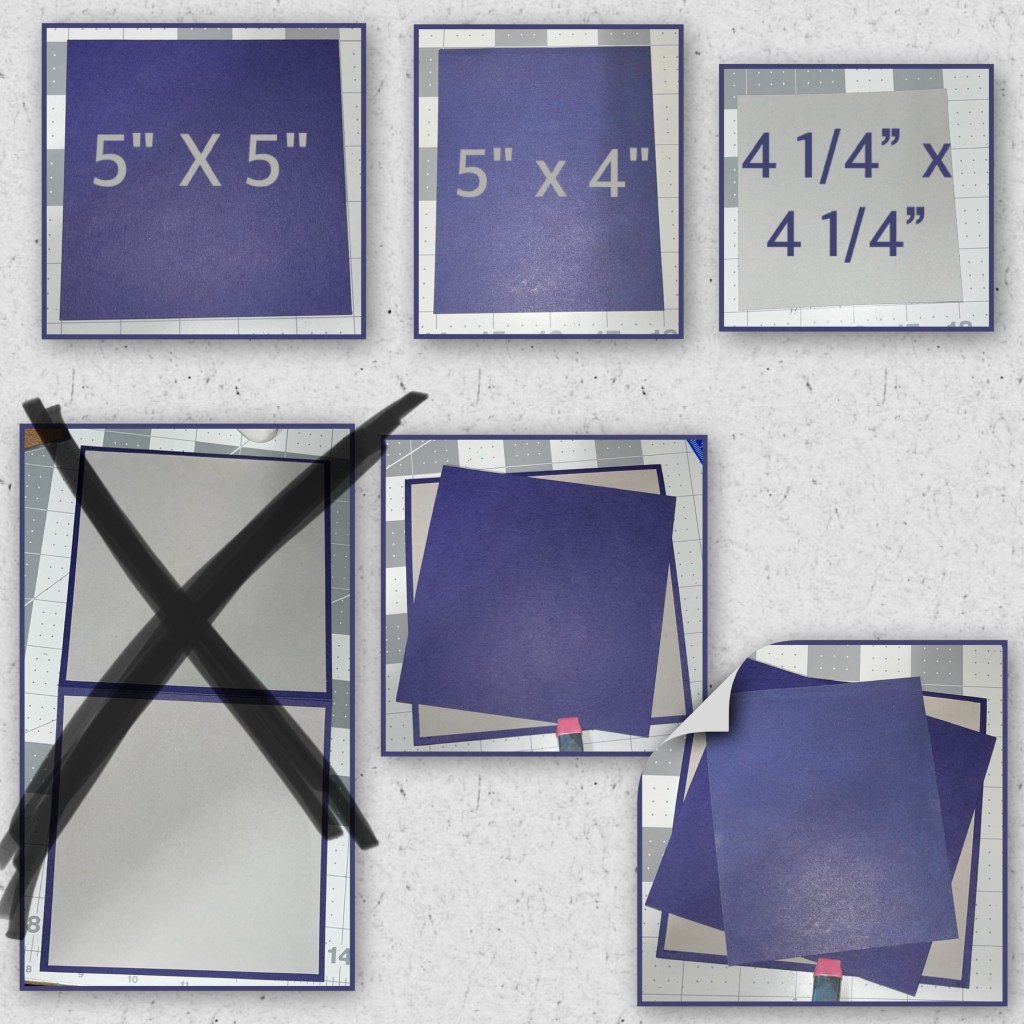
I love square cards ( I really don’t know why but I do) I cut the card base and the panels to the dimensions below. I knew by this part which mechanism sets I was going to use so I knew that the purple on the inside would have to get adhered in sections as shown below.
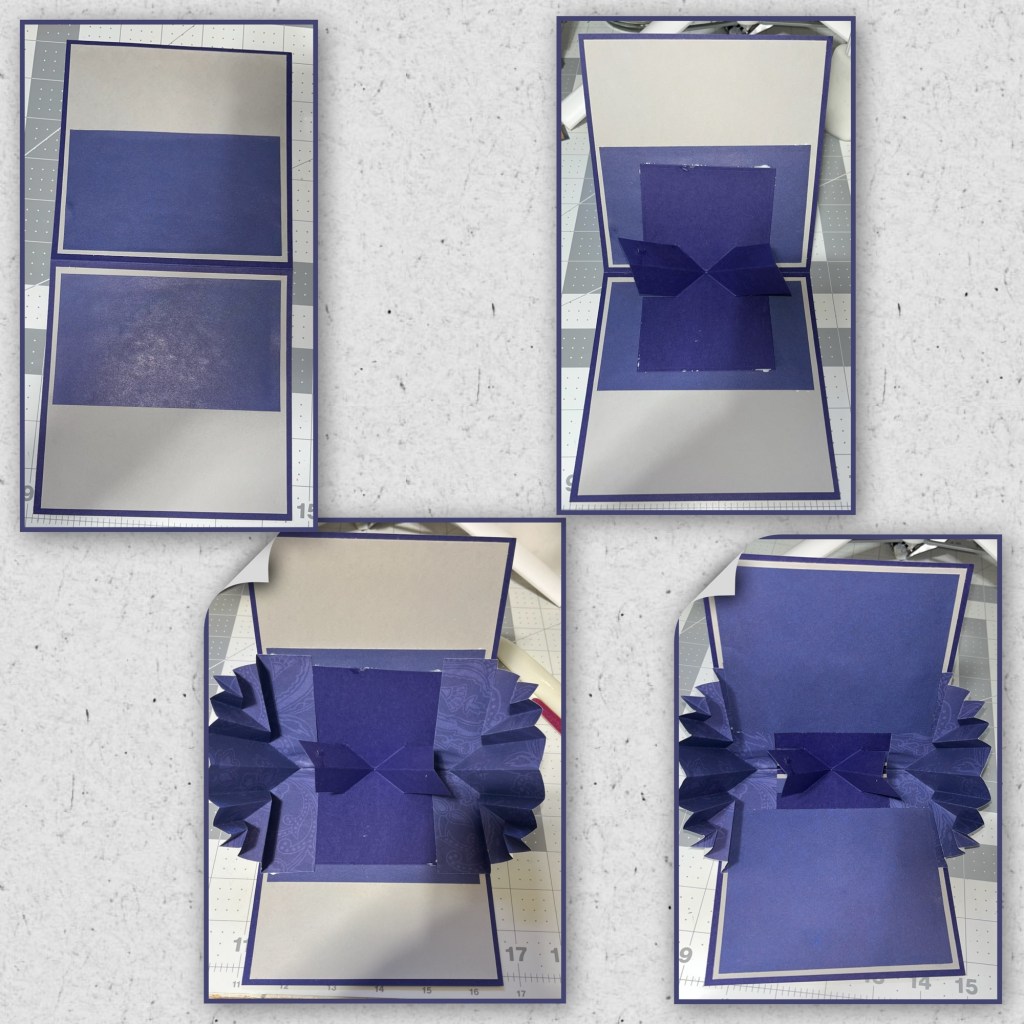
I decided that I wanted to have a lot of WOW so I cut out and assembled the pieces for the Explosion card from the same patterned paper as the 50, and the Little Twist Label die set (Karen has a video tutorials on the product page at the links ⬆️ )

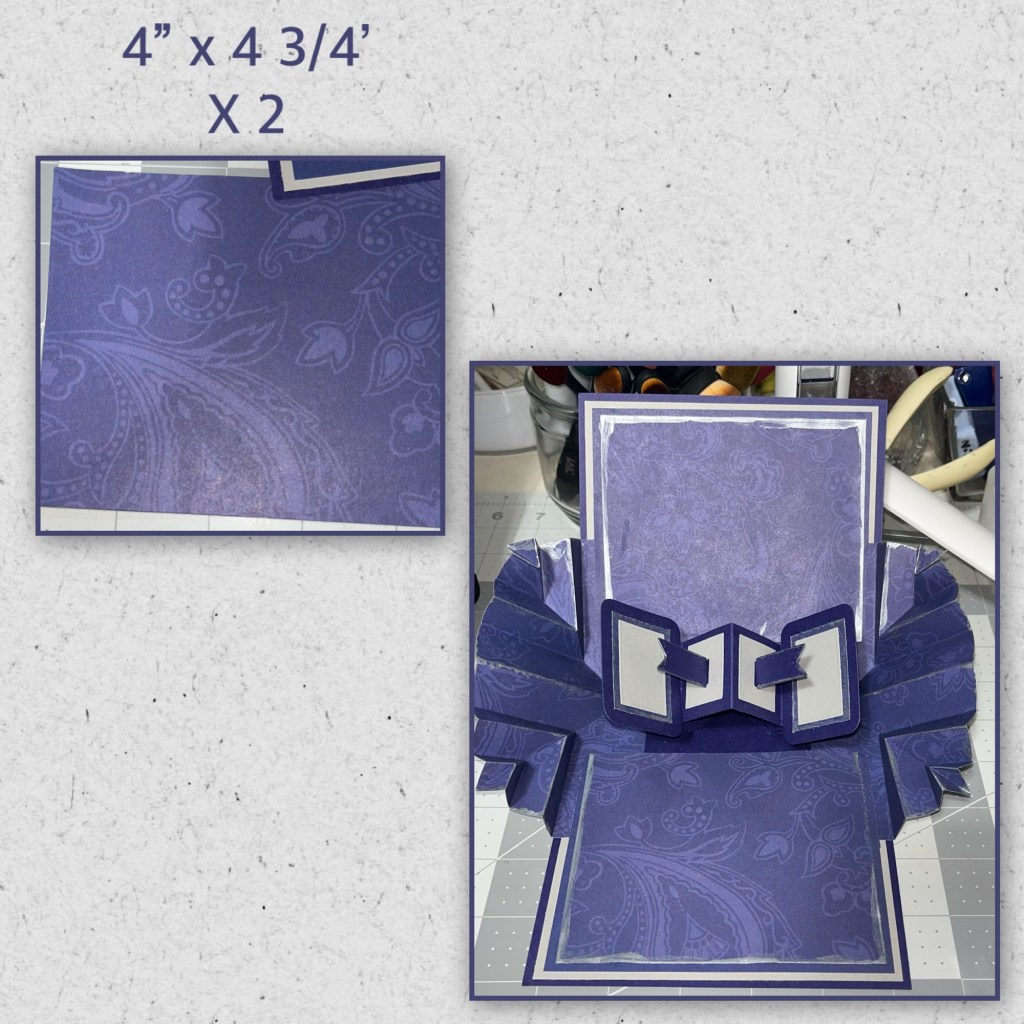
After I adhere the purple sections on the inside I added the Little Twist panel mechanism in the middle, then the two explosions side pieces. I cut 2 purple squares to 5” by 4 1/2” and added as shown.
I die cut the other pieces for the Little Twist panel as shown. There is an another die piece that I decided not to use as it is scalloped and I didn’t think that was the look I wanted so I cut two patterned paper rectangles to the dimensions shown below. I added the silver paint to the these rectangles, then layered as shown. I decided to also add some of the paint to the edges of the explosion pieces.
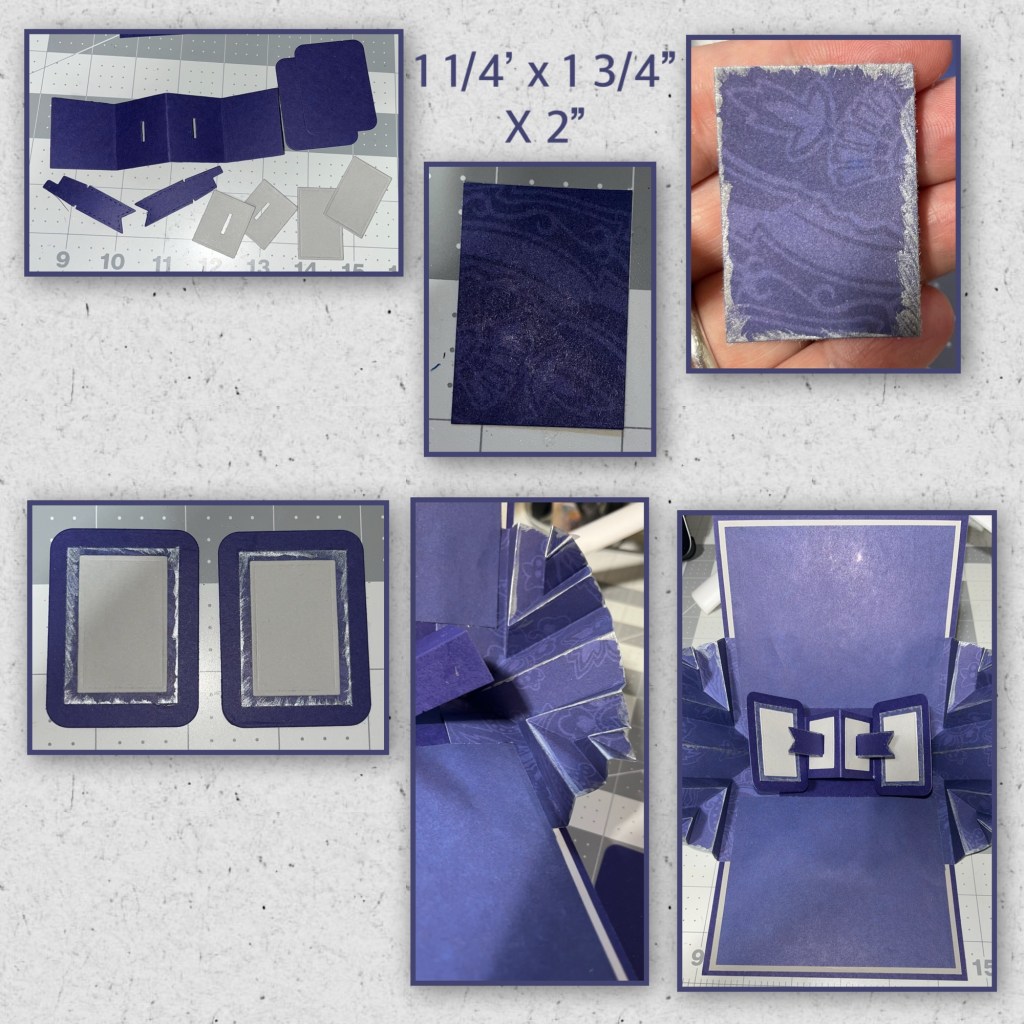
I cut 2 more rectangles from the patterned paper, added paint to the edges and added to the card as shown below.
I wanted to cut a lot of balloons (Streamers and stars) at the same time so I used balloons from 3 sets, the Explosion Pop up, Balloon Collage add on, and the Party Balloons. To keep them organized I put a different colour sharpie dot on the back of each die, 1 colour per set. I cut balloons from the different card stocks shown below. I used the silver paint to add shadows to all the silver balloons, and I used alcohol markers to add shading to the other balloons. I also added silver paint to the edges of the patterned paper balloons. I added white Gelly Roll pen to all of the balloons for highlights.
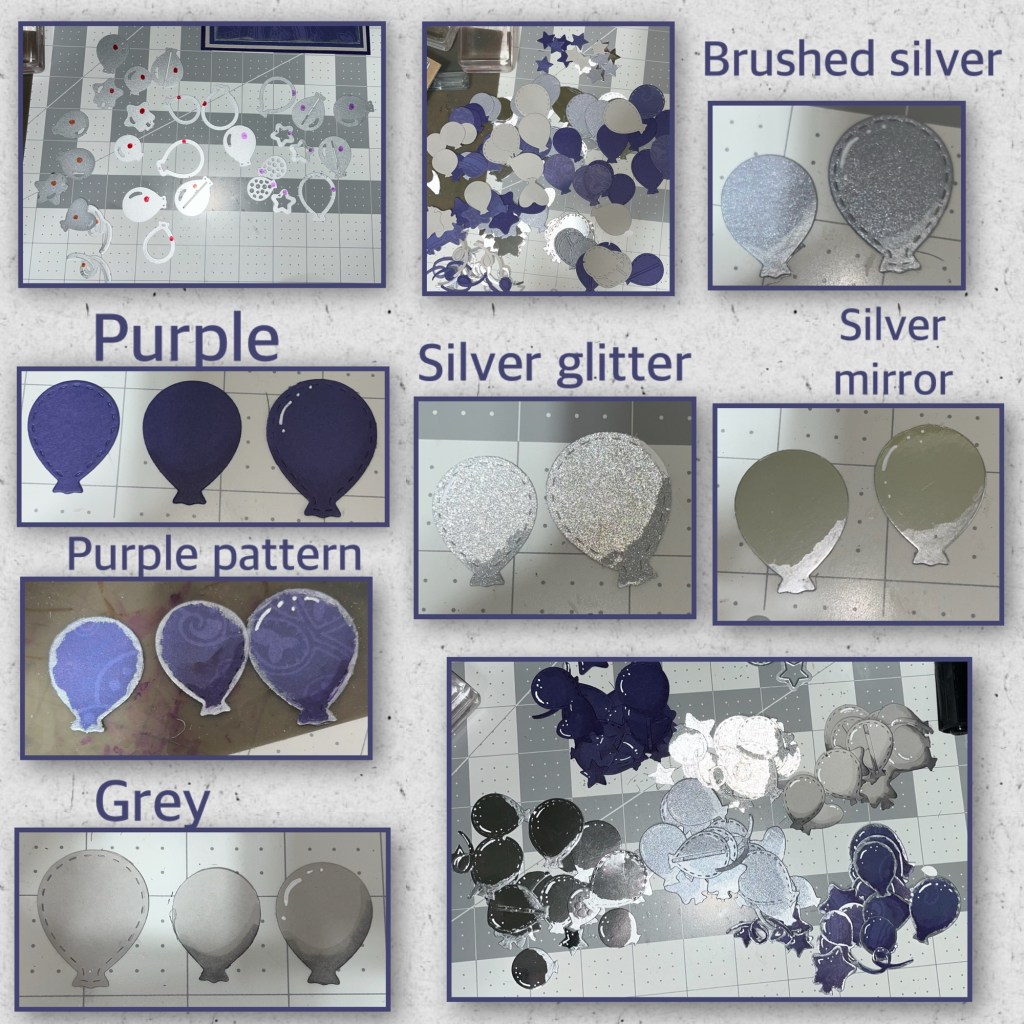
At first I was going to add the balloons in a swirling formation but then decided to cover all the mechanisms.

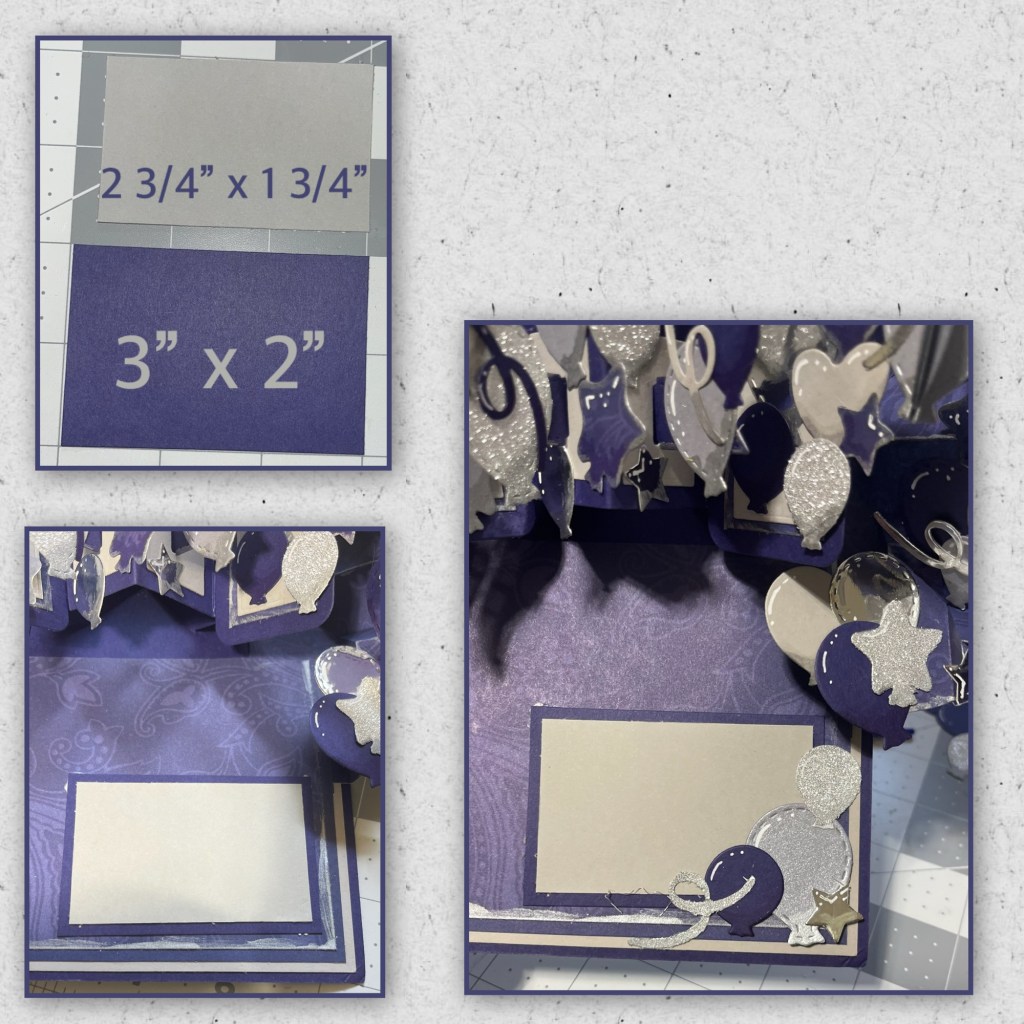
I cut 2 layers as shown below and added them to the inside with a few of the balloon elements.
Now on to the front. I wanted a staggered layer on the front so I cut the panels as shown below. and added to the card front.
I decided after I adhered the layers that I want to add silver paint to the edges of the purple paper, using a sticky note as a mask. I also decided to use a purple alcohol markers to add shading to the 50th. I glued the 0 down first, then added liquid glue to the part of the 5 that will over lap the 0 and foam adhesive to the side of the 5 that will adhere to the card.
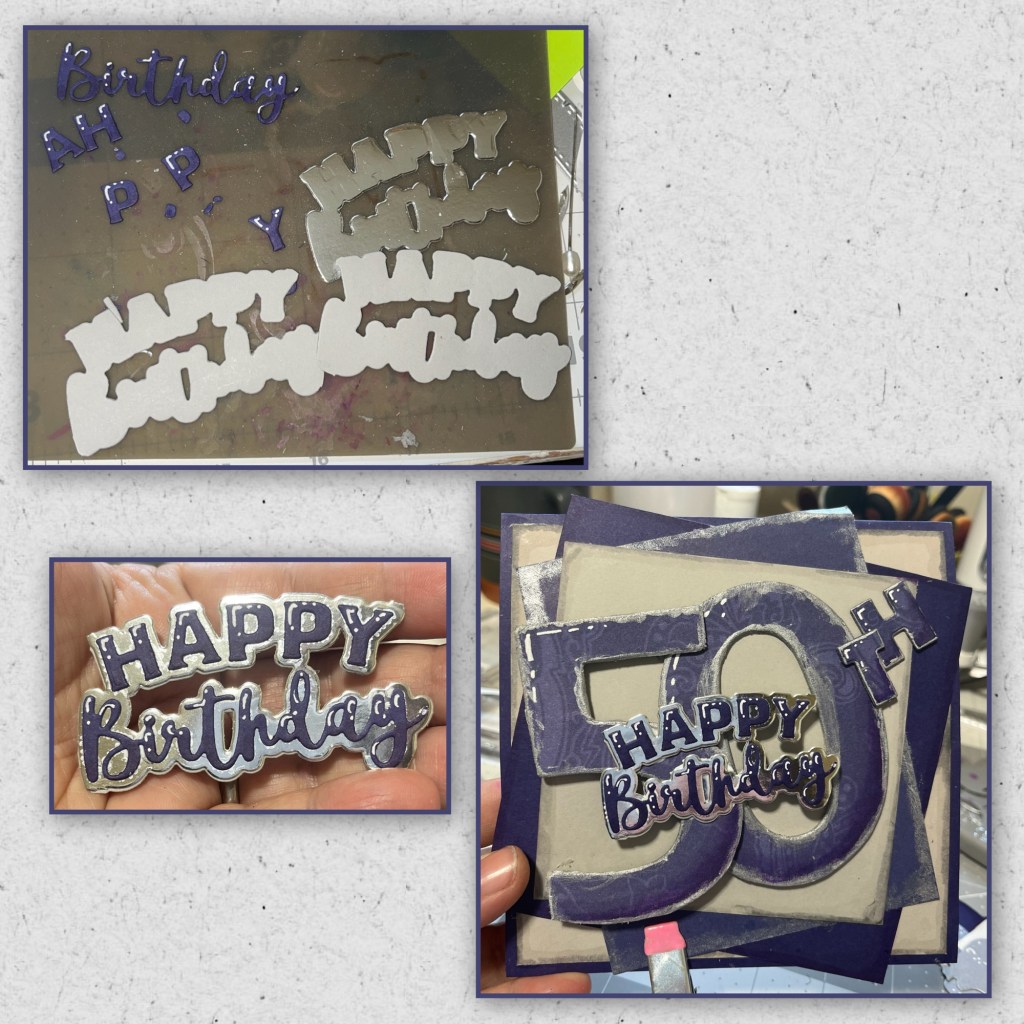
I thought the front still needed a little something so I used the same alcohol markers that I used on the balloons to edge around the layers on the front. I think it adds a bit of dimensions. I add the TH by adding the H to the card and the T overlapping the 0 and the H

Using the Happy Birthday from the Happy Birthday Lorna Label add on I cut the top layer from the purple cardstock and the shadow from silver and white x3. I layered all the shadow pieces with the silver on the top. I used the purple alcohol markers to add shading and white Gelly roll pen to the purple pieces. I layered the pieces and added to the front of the card. I also added some balloons, sorry not shown here but look at the last slide.
Diesets used
Happy Birthday Lorna Label add on
Other Tools used

Touch of class, brilliance and expertise in the making of this and thanks for the details on your blog xx
LikeLiked by 1 person