

Hello crafty friends, today is design team challenge day and this months challenge was to make a bottom fold card. At first I was a little stumped and then I remembered a card that Karen made a few years ago (Red Christmas card) and thought that this technique would be perfect to make a box of crayons and have the crayons slide out of the box. This is what I came up with…..

I cheated a bit as it is also a gate fold card with a bottom fold that activated the mechanism. I also made a lot of mistakes and had some tech problems along the way with this one and had to change things on the fly, I will explain as I go along.
All the fun is in the reveal, to see this card in action please check out my FACEBOOK page, feel free to join if you would like to share your own crafty creations. You can also see a video of this card on my INSTAGRAM page.
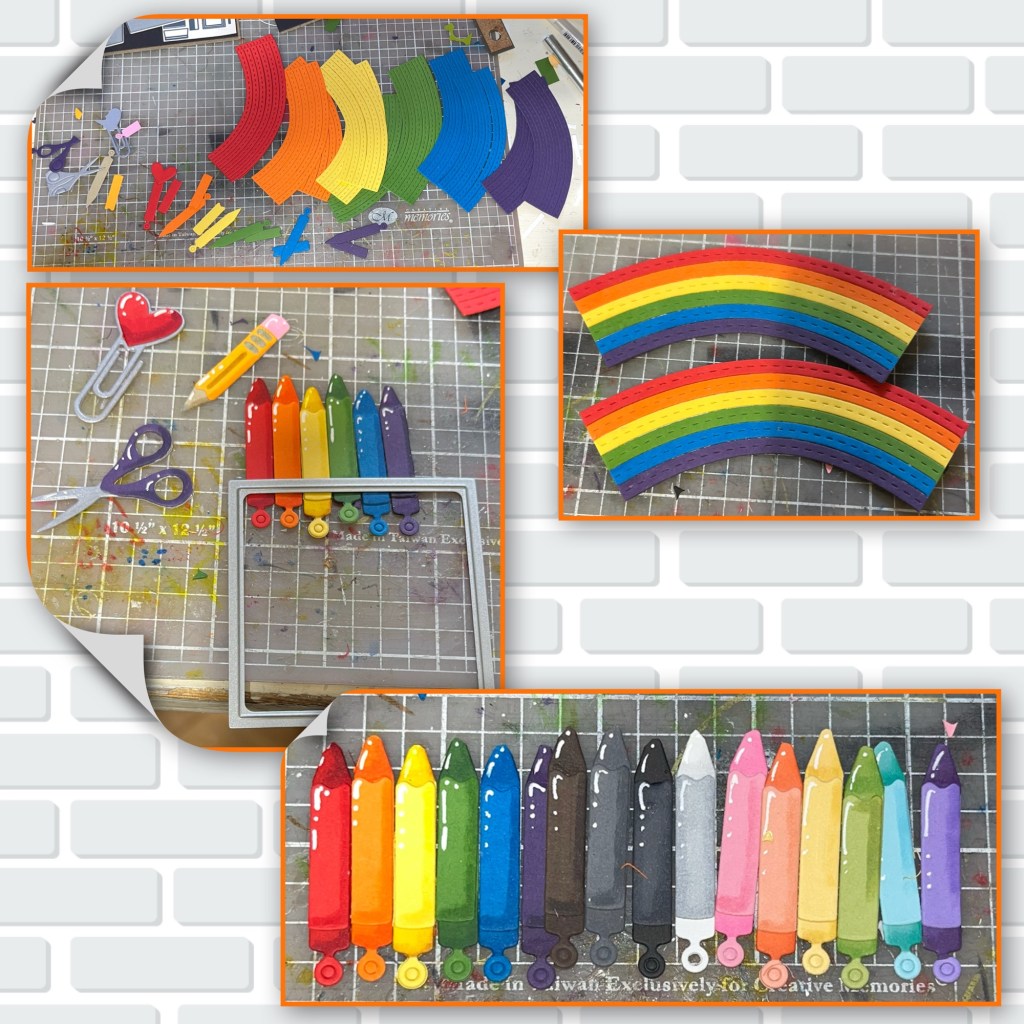
This will be a card for my granddaughter who LOVES rainbows, so I knew that I wanted to add RAINBOWS to the card, but I wasn’t quite sure how. So I made 2 and started making crayons in the rainbow colours. I realized that I needed more colours to fill the box so made more in the colours shown. I also made a few pieces from the Office Charms. The crayons were made using the pencil die, I added shading with a Versa Mark Marker, and highlights with a white Gelly Roll pen.
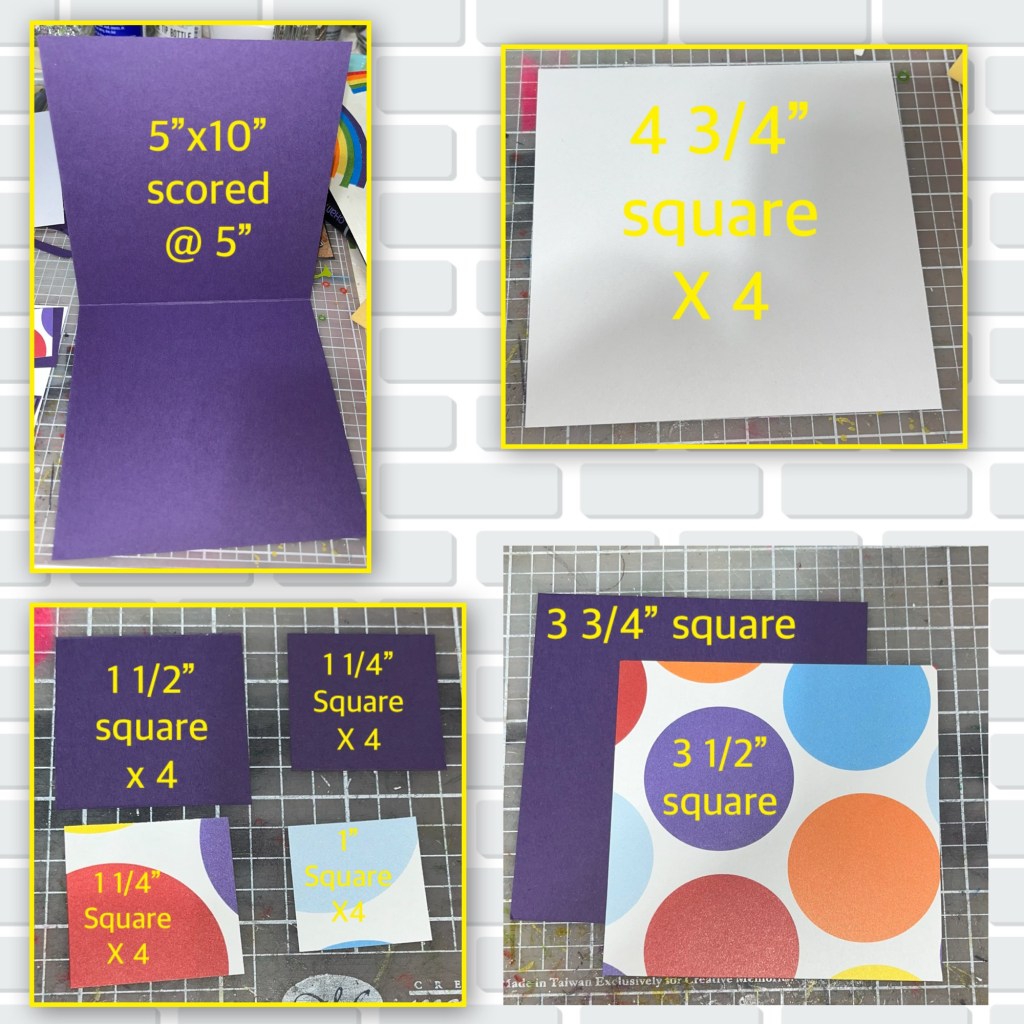
Sooo I’m about to make the card base, but then completely change my mind because I realized it wasn’t going to fold the way I needed it to.
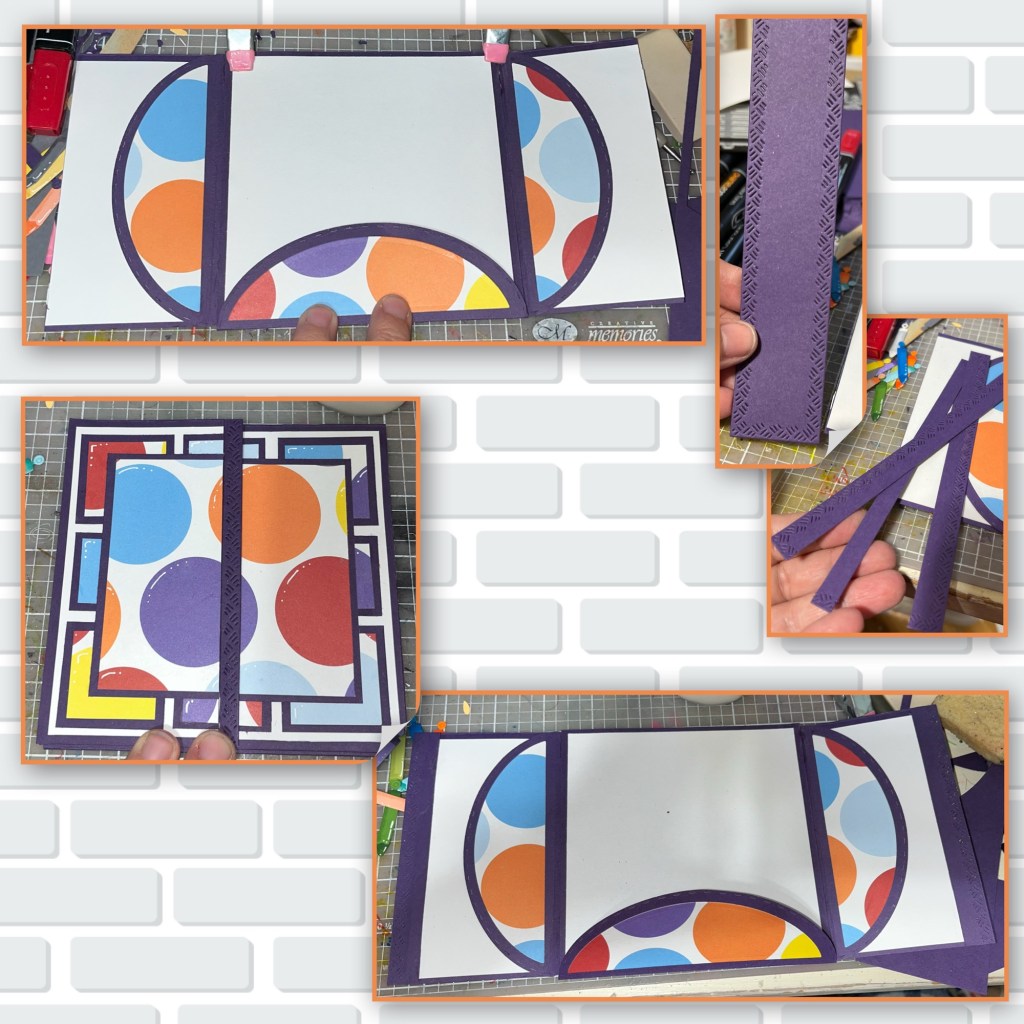
I assembled all the squares as shown, and added to one of the large white squares. I originally had the smaller squares laid out a bit different, I pulled them off and repositioned them, then covered with the large square.
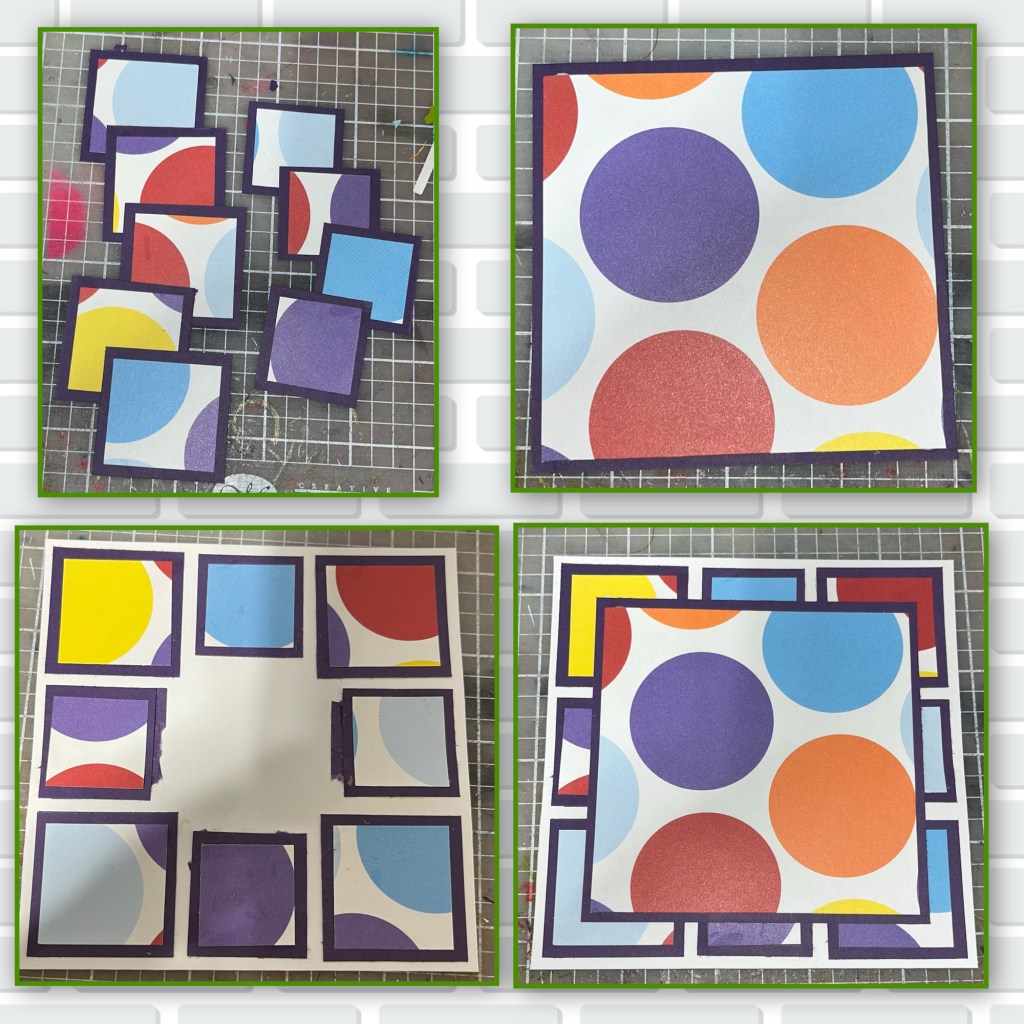
I added all the panels to the card base as shown, because I hadn’t realized I needed to change it yet. I added white highlights with a Jelly Roll pen the circles in the patterned paper.

Ok, now I realized I needed to make some changes, and went for it. I cut the card base in half removing the whole card front, then cut the card front in half. I die cut 3 purple FLAPS and added score lines about half way between the edge and the original score lines.
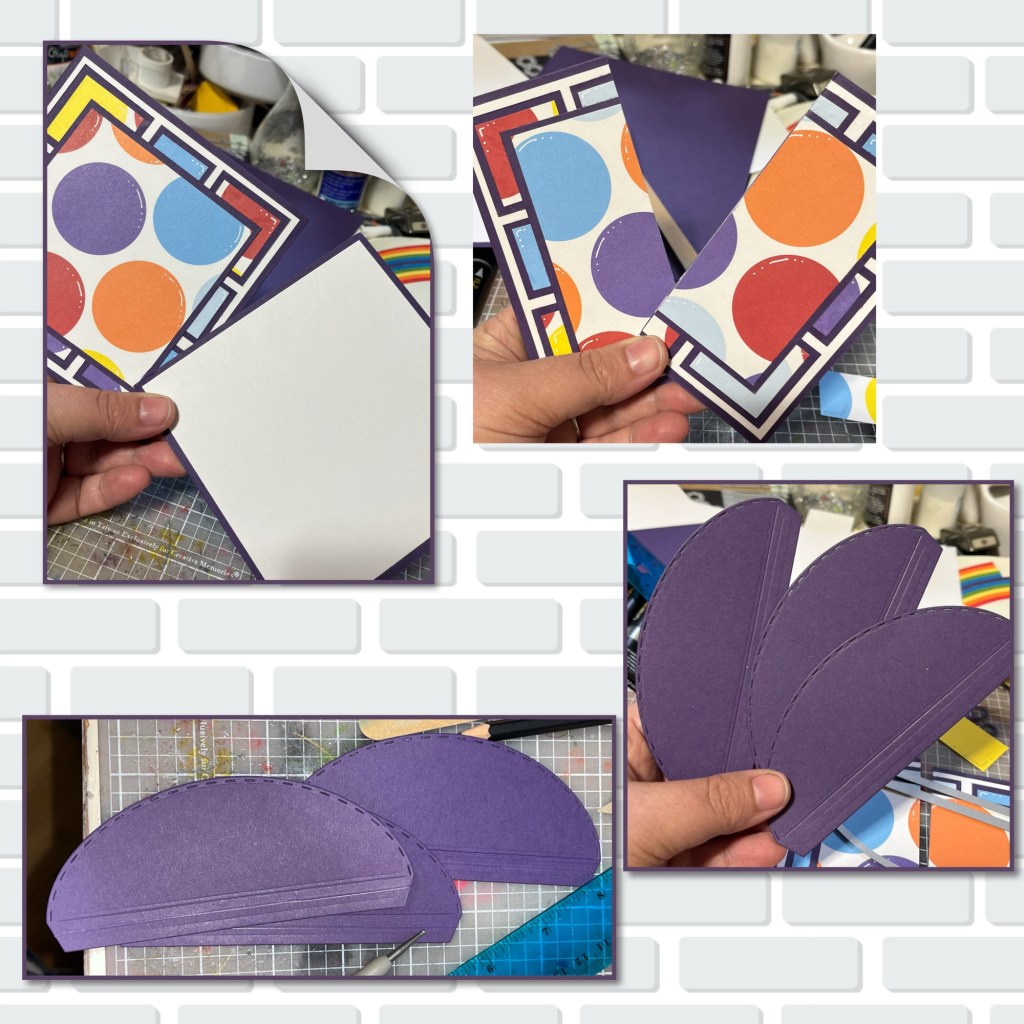
I glued 2 of the flaps, one each to the 2 halves of the card front. Then attached the 2 sides back on to the card base by the edges of the flaps. I added the third flap to the bottom. The edges of the flaps are attached to the backside of the card base so I added a second white square to cover the edges. If I were doing this again I would have only added the white square after the flaps were attached.

I added some of the patterned paper to the flaps as shown. I didn’t like the edges, they didn’t quite meet in the middle, so I cut the LONG RECTANGLE, I cut them in 1/2’ strips, making sure to keep the crosshatch edges the same, then added them to the edges as shown.
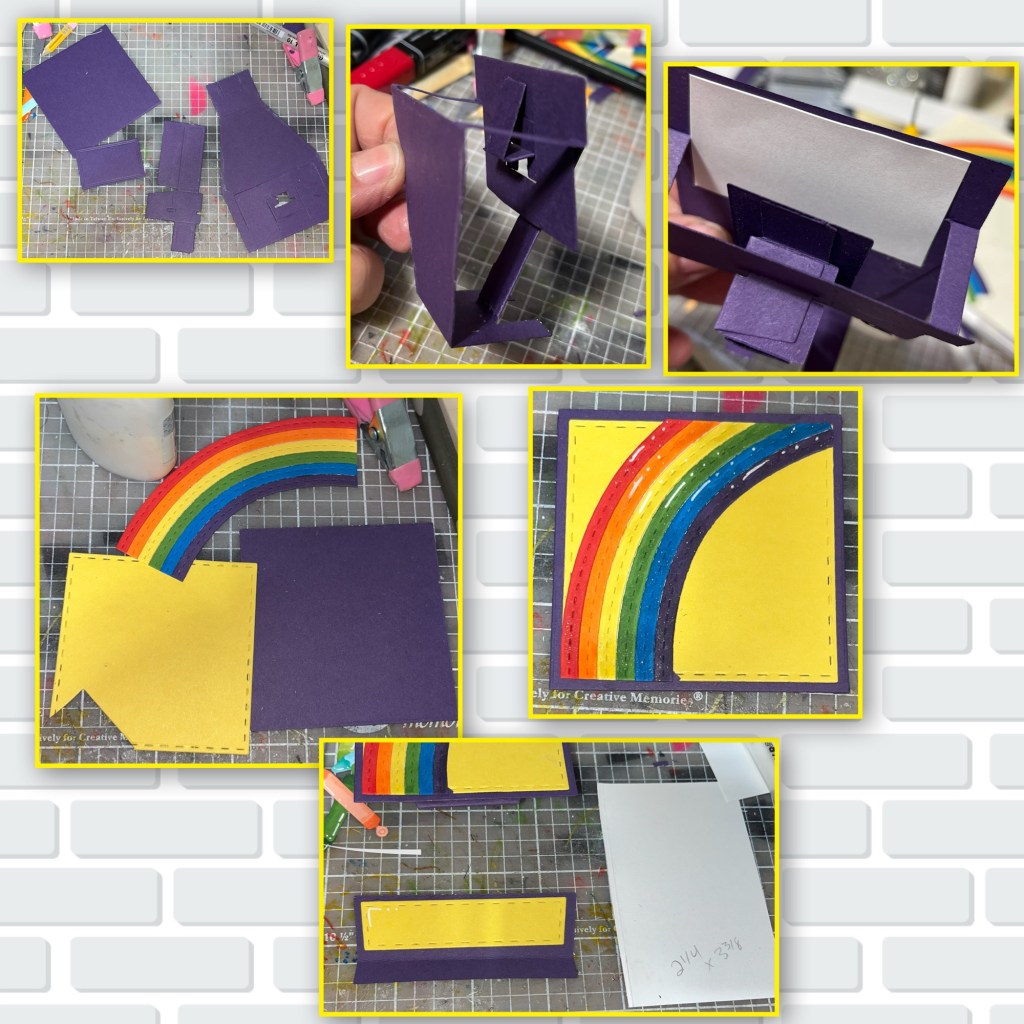
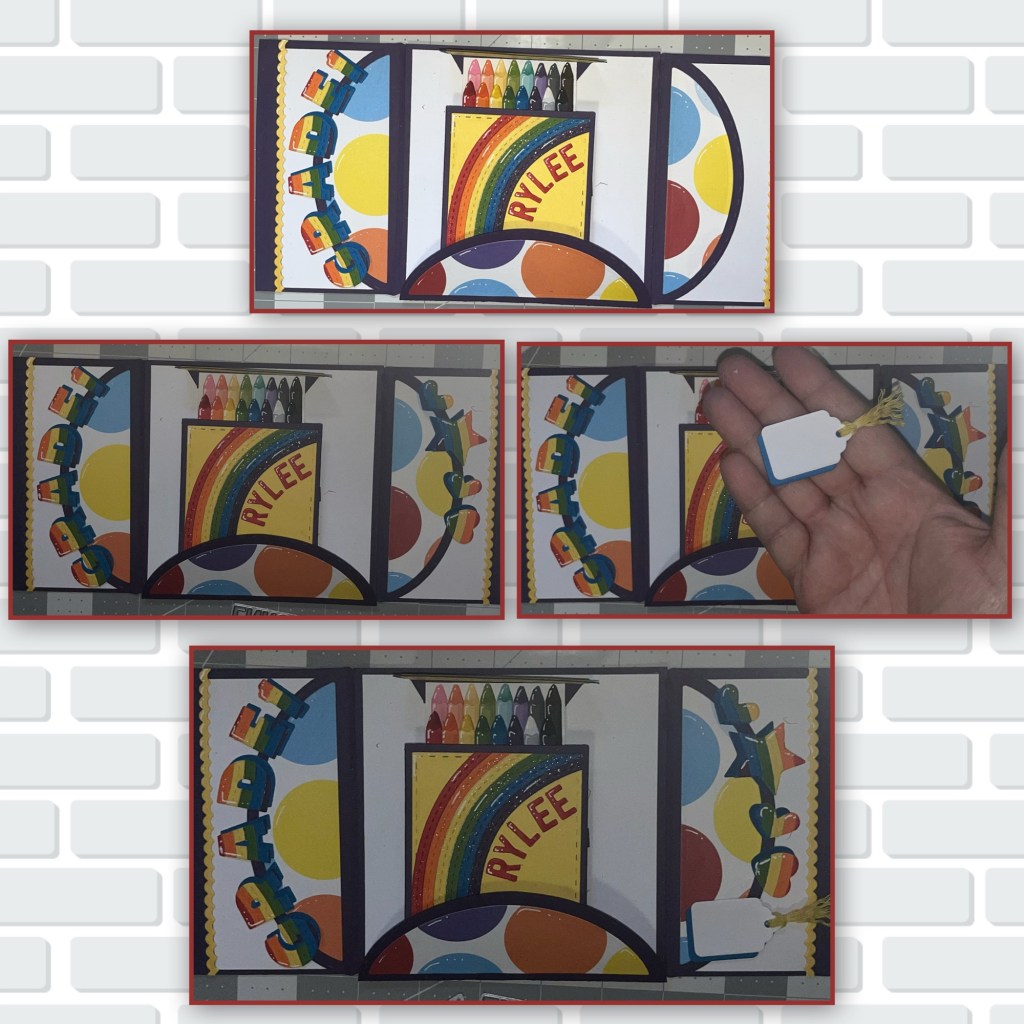
I wanted to make the crayon box interactive so I cut out the pieces to the Parcel Pop Up (Karen has a video tutorial on the product page at the link ⬆️ ) and assembled. I made the front yellow and added one of the rainbows to the front, I was running out of the yellow cardstock so as you can see it is missing a corner, but that’s ok because it is covered but he rainbow. I also added Wink of Stella to the rainbow to give a bit of sparkle. In Karens directions she adds a piece of tape to the inside of the mechanism to avoid creating a catch point. I couldn’t find my tape so I cut a thin piece of White cardstock and added to the inside and it did the same job.
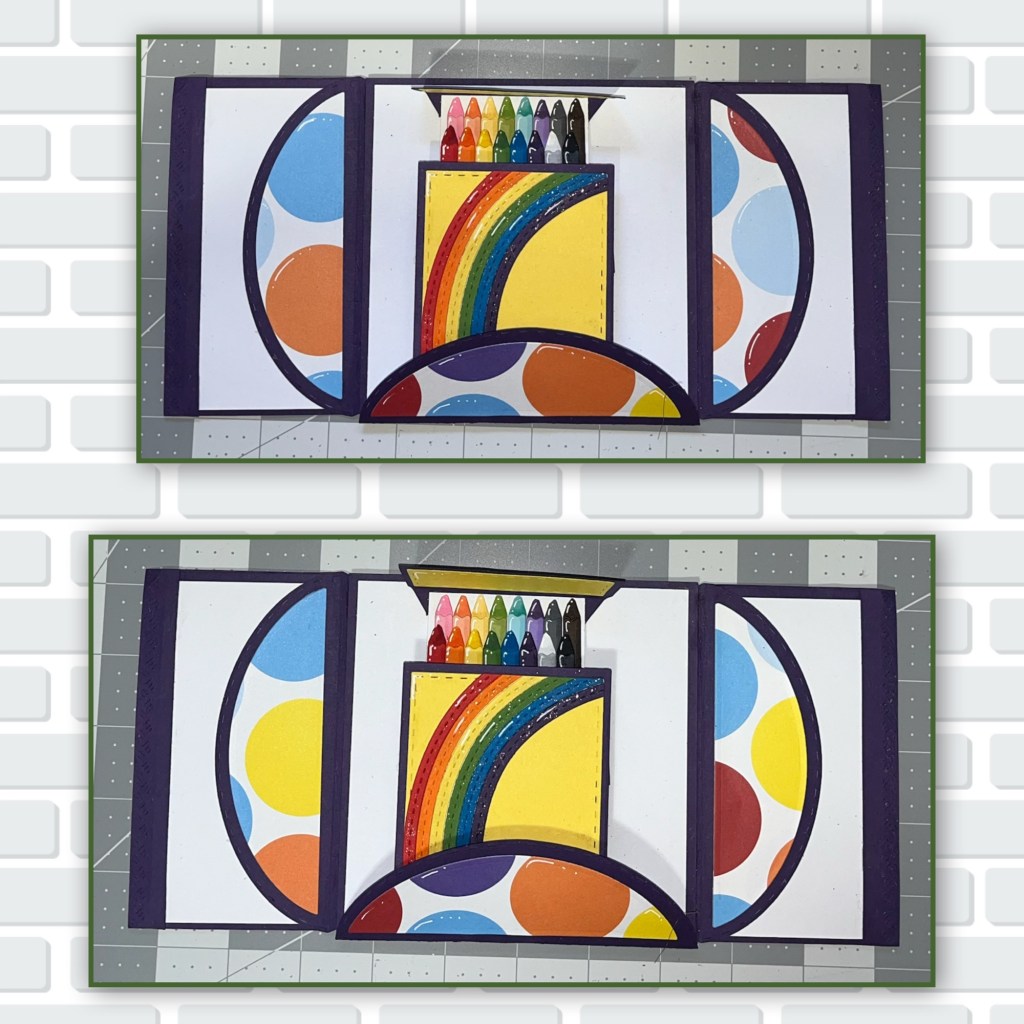
I wasn’t happy with the look, because the yellow of the box was so bright and I only had a little bit of a yellow dot in the pattern paper so I cut 2 more pieces of the patterned paper to add to the flaps making sure to have yellow dots visible. Then I covered the original flaps.
In the middle of creating the card I got a new cutting mat, much cleaner for taking photos on, and easier to see the dimensions:)
I wanted a bit more yellow so I cut 2 pieces of TRIM and added it over where the purple trim was added to the white on the flaps.

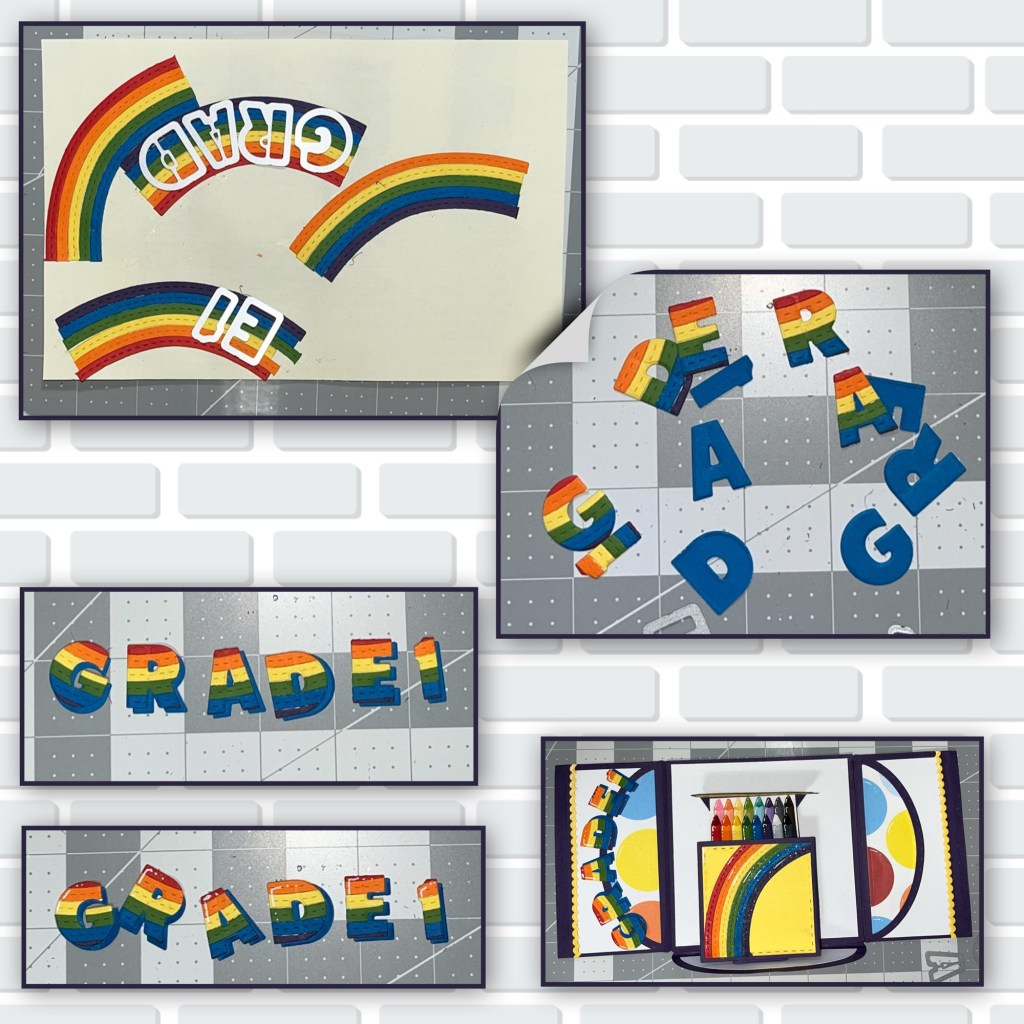
I glued some of the rainbow extras to a thin piece of paper to use to cut out the letters “GRADE 1”, I also cut extra letters in blue to addd as shadows. I was being mindful to try to keep the rainbow letters in an order so that when they were cut the stripes will line up when added to the flaps.
I thought it would be cute to add her name to the front. I apologize for the dark photos I didn’t realize that my phone/camera wasn’t set up in the tripod properly. I added some hearts and stars the same way that I added the letters, and a small tag to sign.
So my tech skills are kind of embarrassing, I went to straighten my phone in the tripod and accidentally changed the camera from looking down to looking up……. So I got about 10 shots of my ceiling
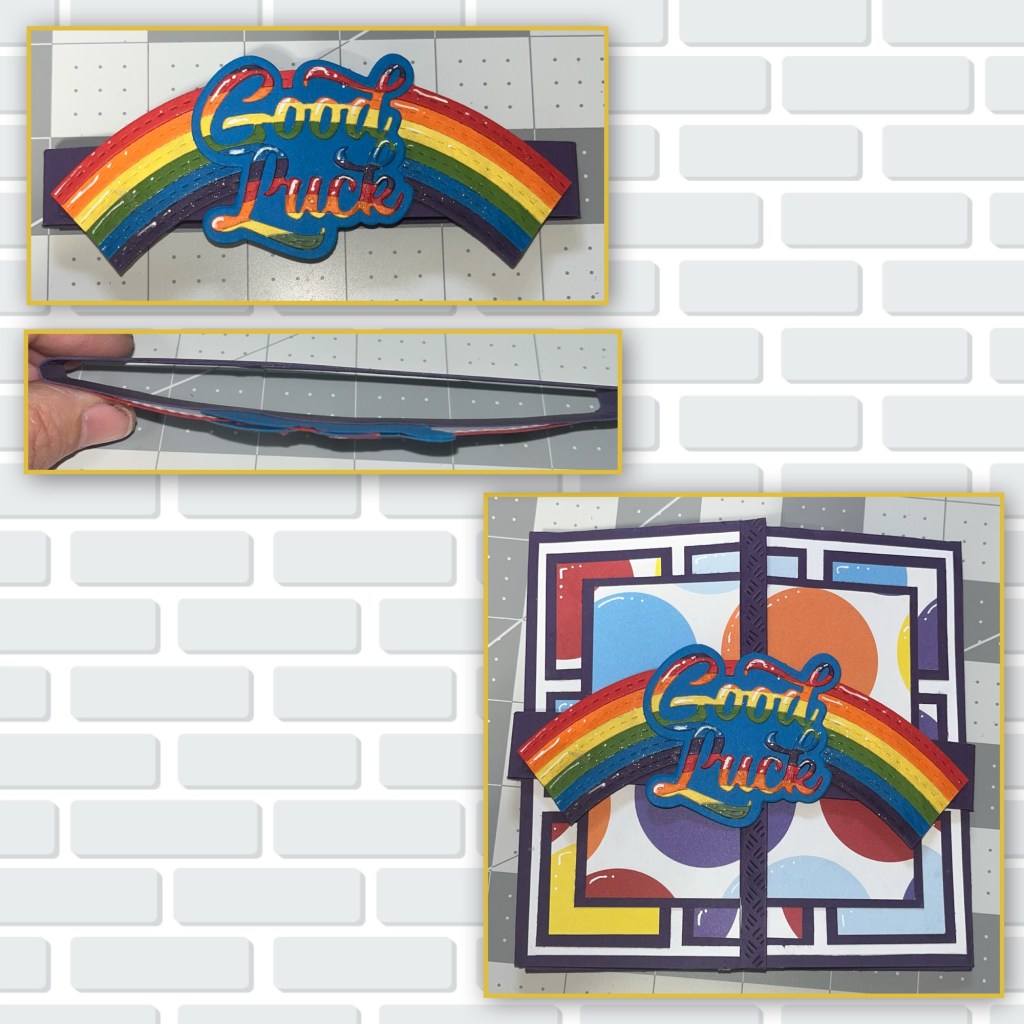
The card wasn’t keeping closed so I decided to make a belly band, but I didn’t actually get the photos so I will explain the best I can. The card is 5” wide so I made the band slightly longer so it would be easy for a child to slide it off and on. I added a double piece of cardstock to the front and back to thicken it up, again so it’s easy to side up and down. I added the second rainbow. I wanted to make the rainbow longer so I actually cut it in half and glued it to the back of the Good luck shadow making sure to leave a gap, I added another shadow to the back to cover the gap in the rainbow. I also added some Wink of Stella to add some shimmer.

DIES USED
Office Charms – crayons, scissors, paper clip, pencil
Flaps and Closures – 3 flaps
Long Rectangle Crosshatch – long skinny rectangle
Border Blends- Argyle – yellow trim
Alphabet -GRADE
Numbers – 1
Mini Alphabet & Numbers– Name
Good luck and shadow.
Candy Heart Box- heart
Surprise Ball Pop Up – heart and star
Good Luck – Good Luck and Shadow
Other Tools used

You sure spend a lot of time doing step by steps on your blog to encourage people/members to learn and this is appreciated. Great result xx
LikeLiked by 1 person
Great card, so colorful. I like that you shared your changes as you went. I I thought you would have an idea and executed it perfectly, it’s refreshing to hear that’s not the case. And the end result is still amazing.
LikeLiked by 1 person