
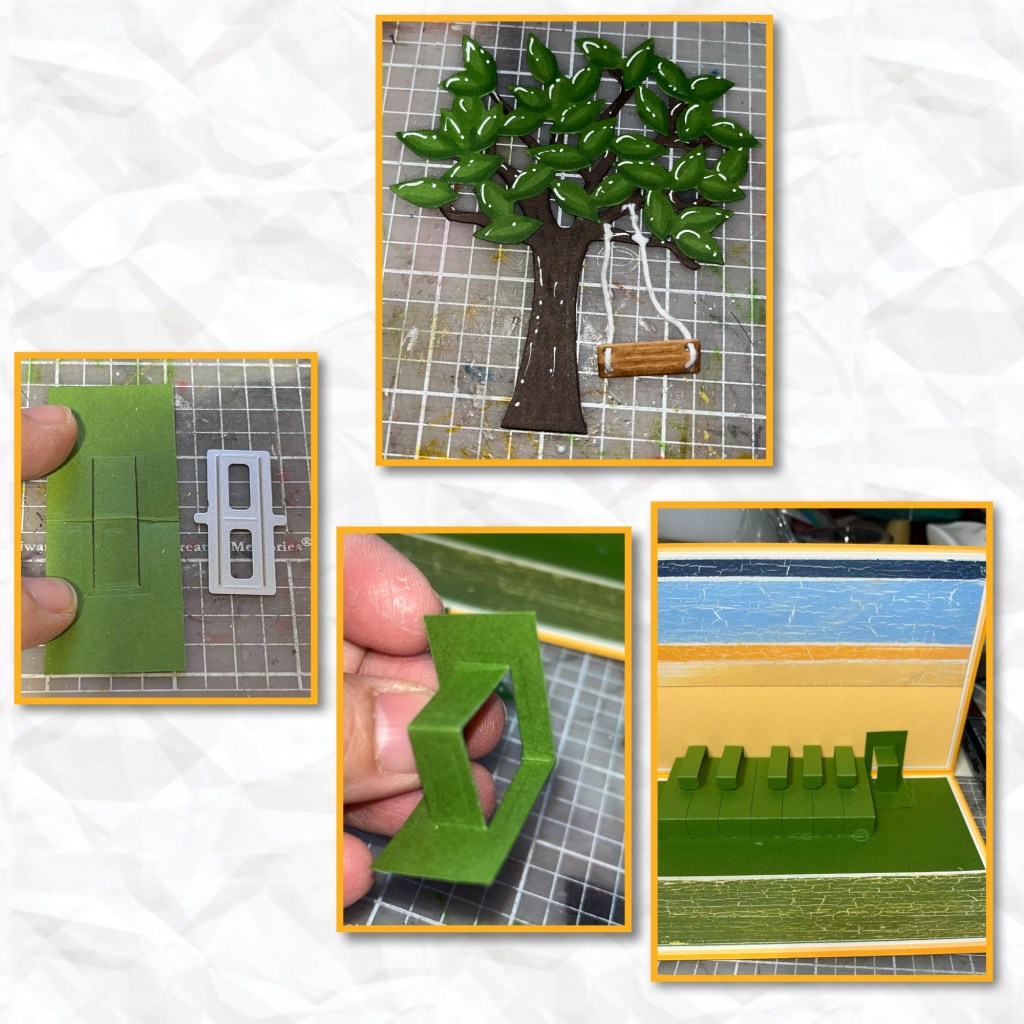
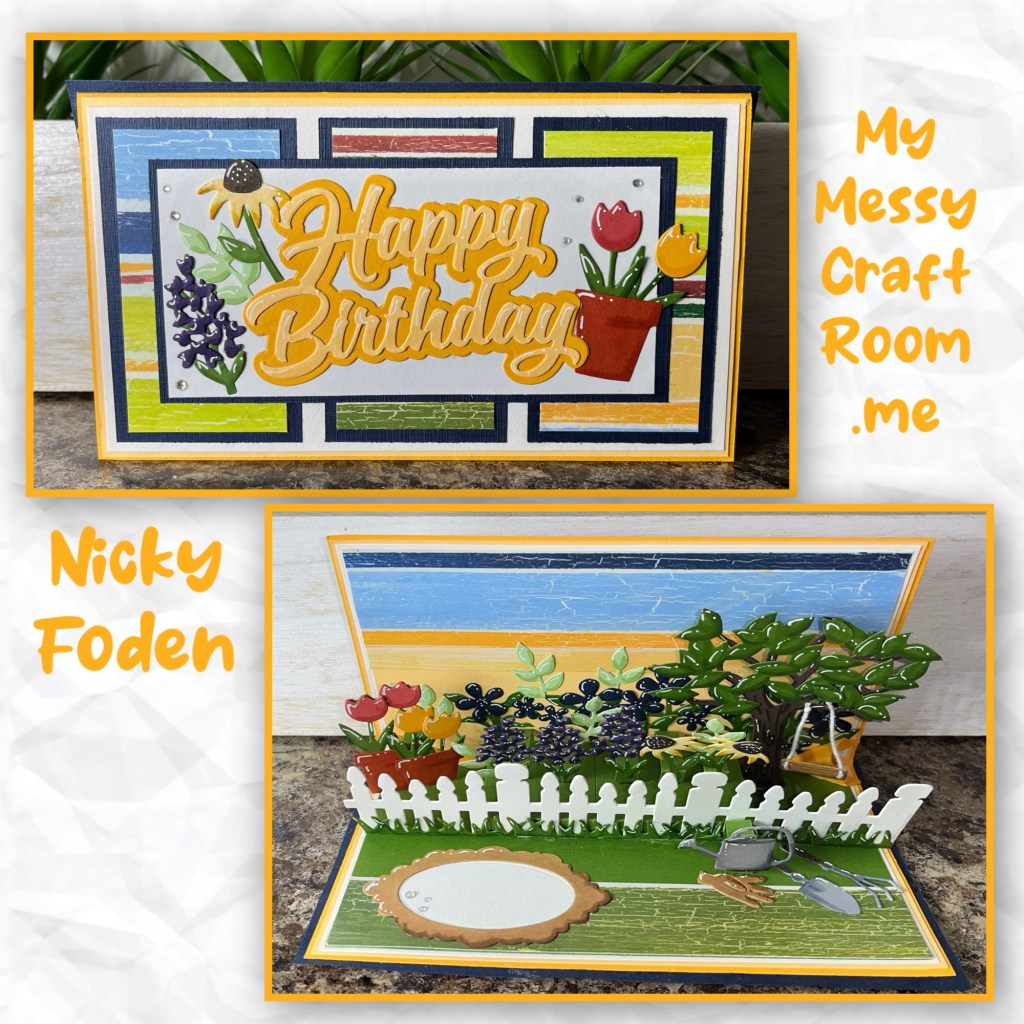
I really get excited when I am able to design a card using a dieset that has a completely different purpose. And that’s what I was able to pull off with this card. Believe it or not the main mechanism that I used to support the fence and some of the flowers is 🥁🥁🥁🥁….. the Piano Keys Pop Up 🎹🎹🎹

All the fun is in the reveal, to see this card in action please check out my FACEBOOK page, feel free to join if you would like to share your own crafty creations. You can also see a video of this card on my INSTAGRAM page.
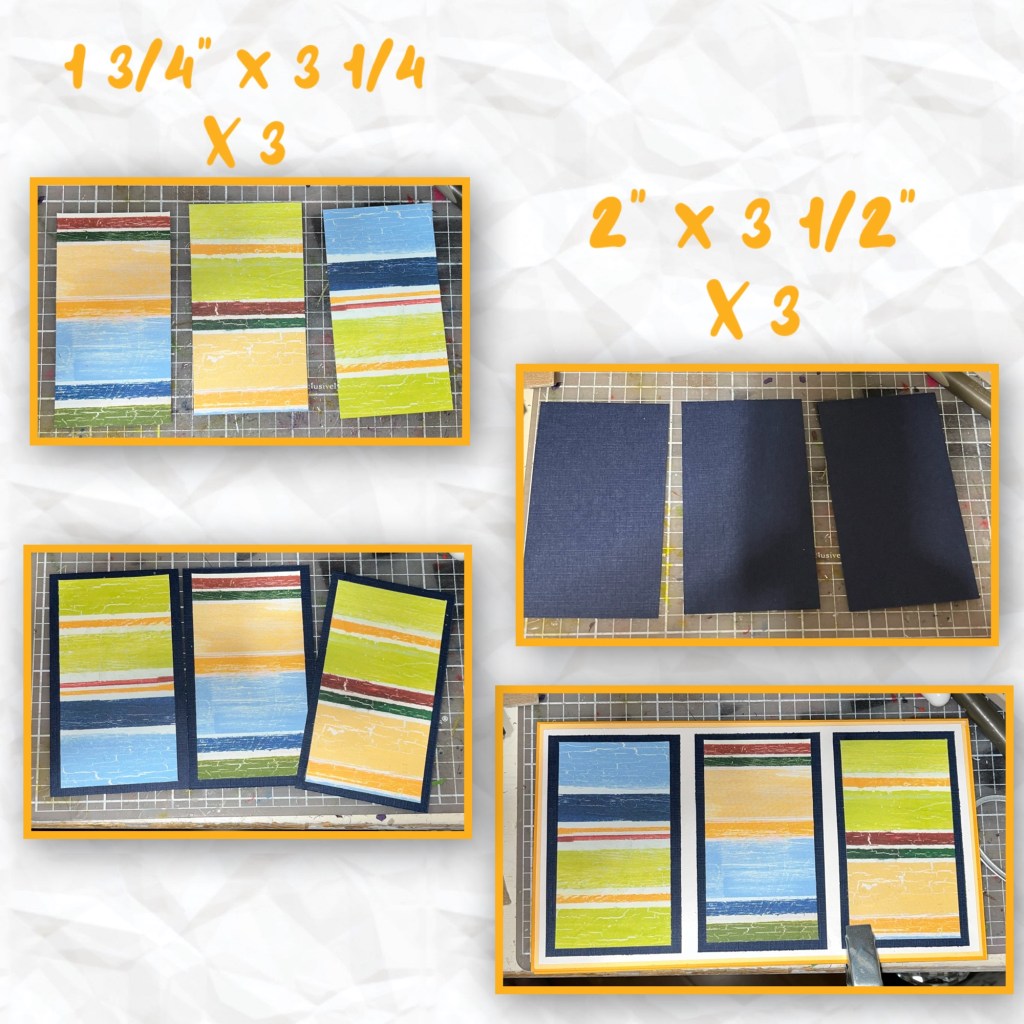
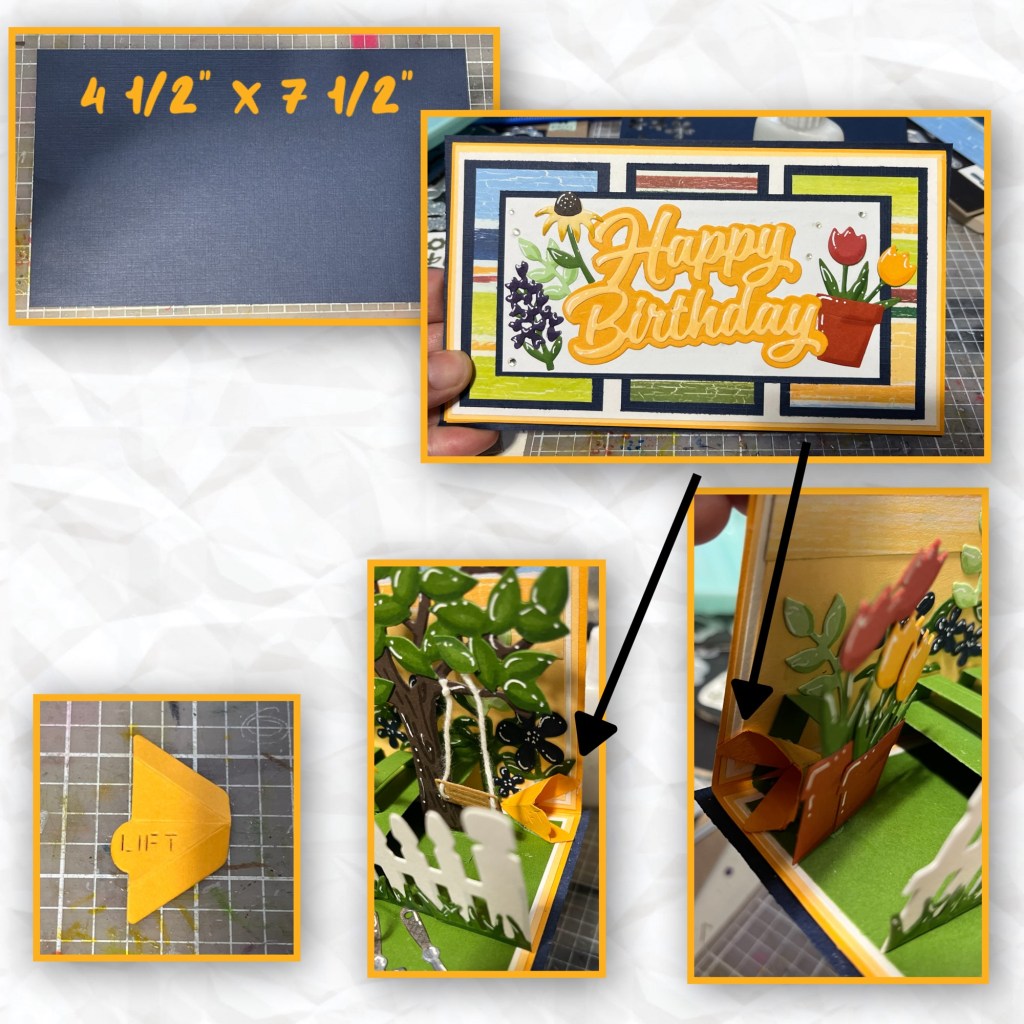
I made a smaller slimline card using the dimensions below. I thought the colours in stripes looked like a sunrise so I cut the green off the stripe and added the green stripe to green cardstock and the sky colours to a matching yellow cardstock cut to the dimensions below. Layer as shown.
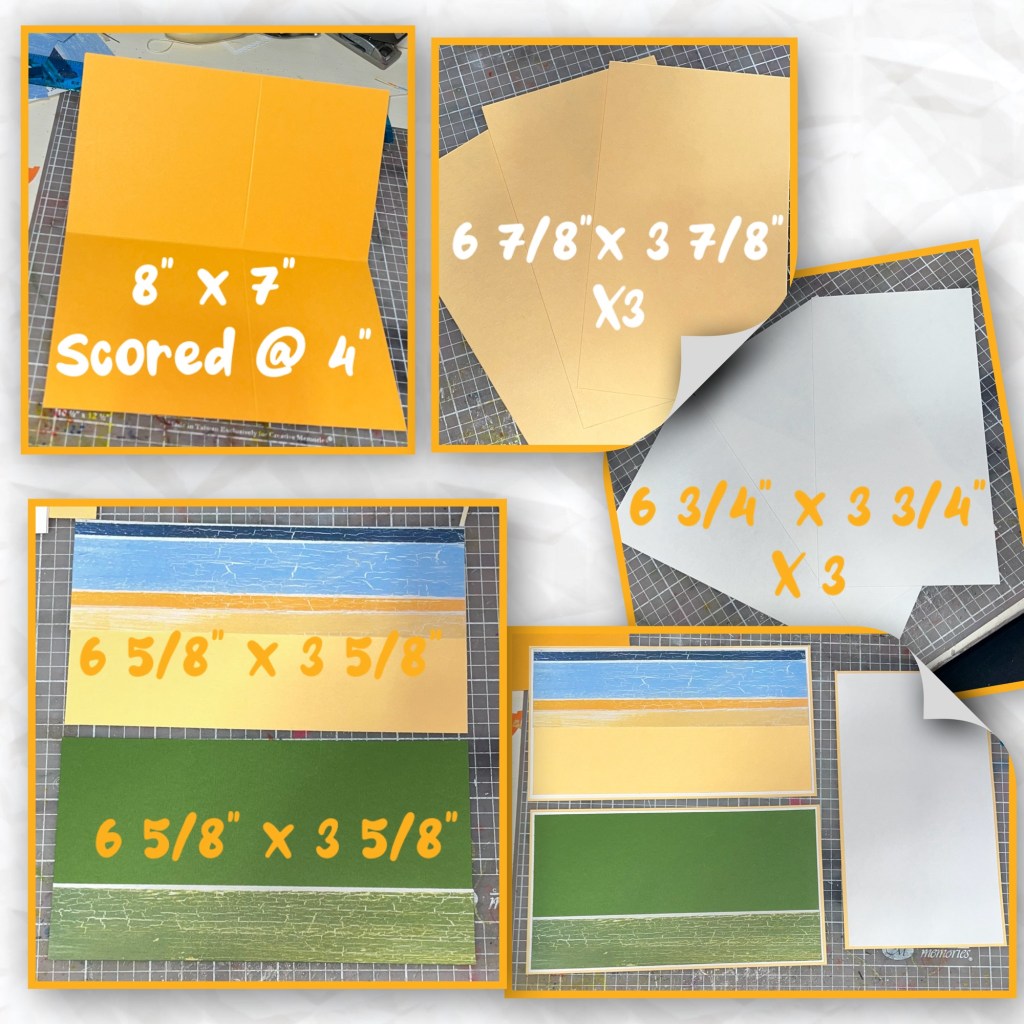
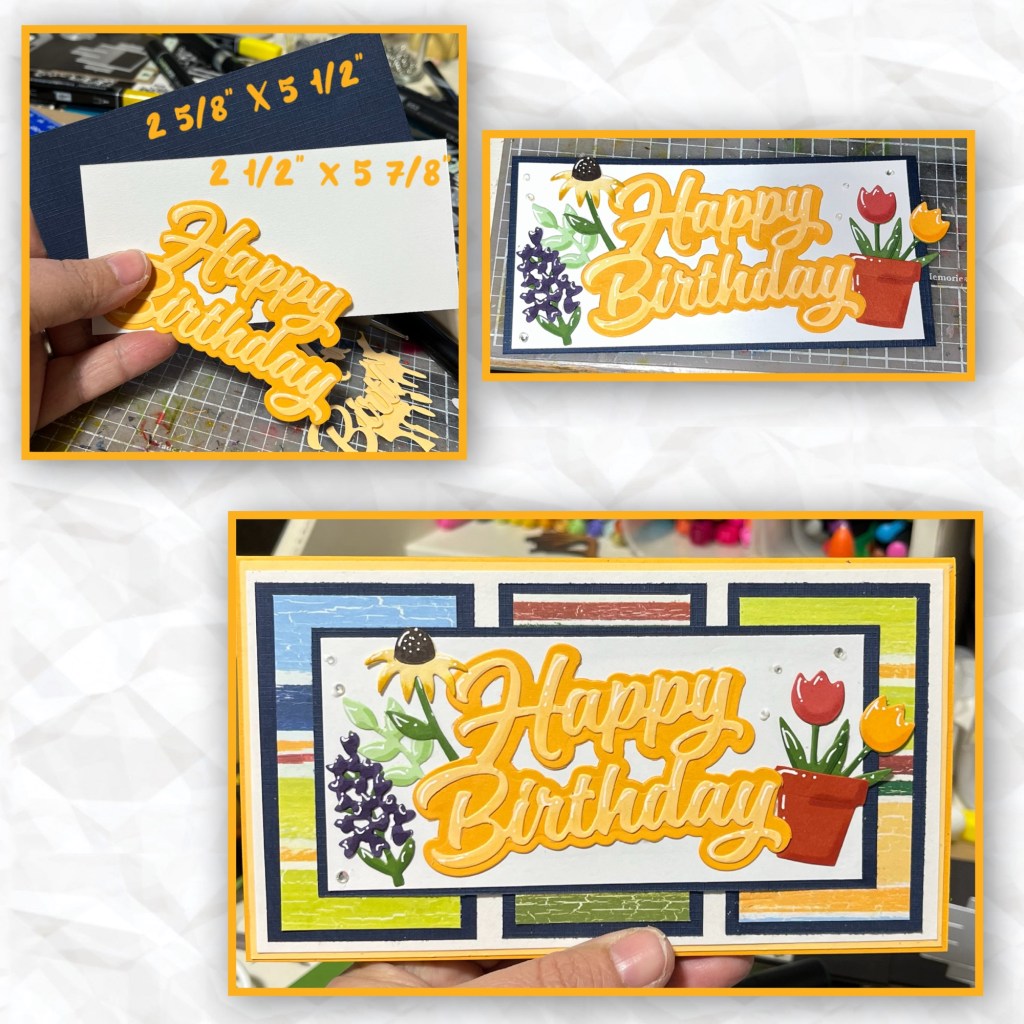
The card should look as shown.

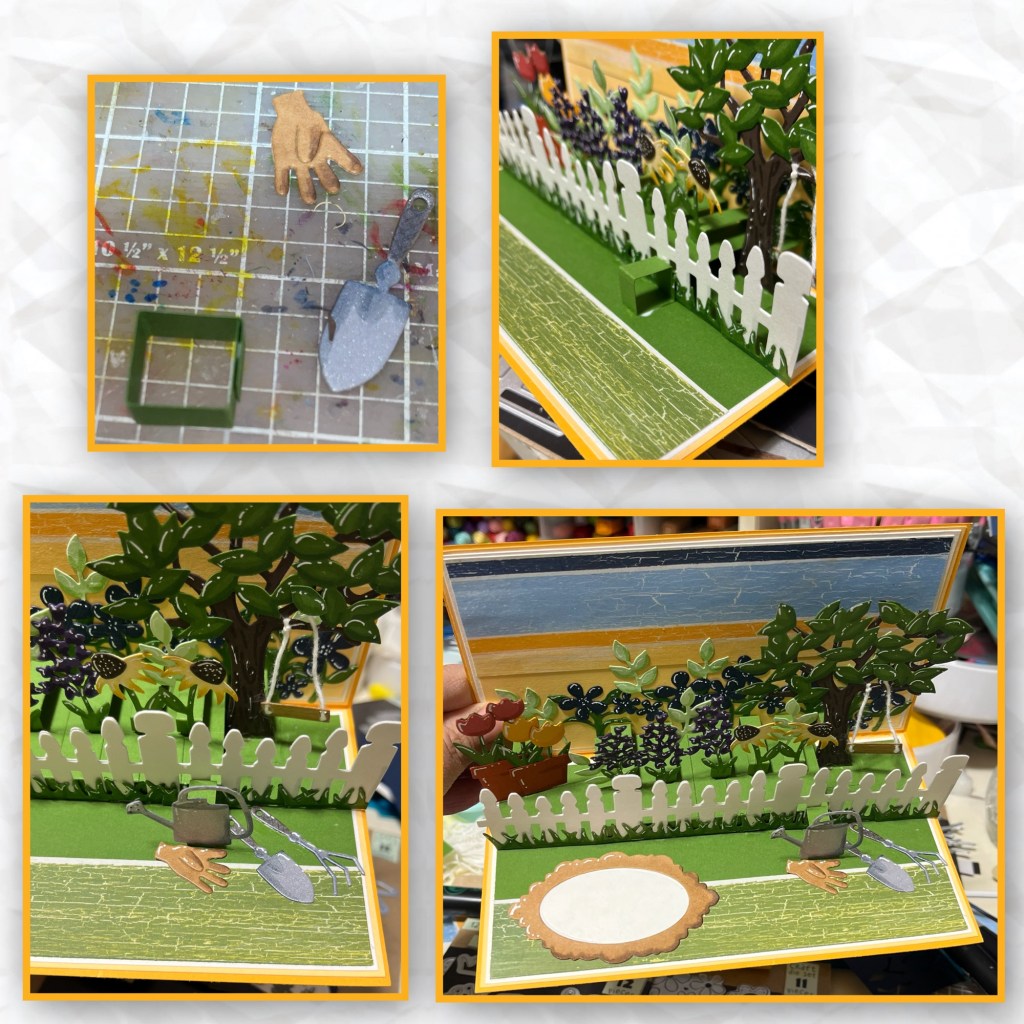
I cut the pieces from the Piano Keys Pop up out of green cardstock and assembled (Karen has a video tutorial on the product page at the link ⬆️ )

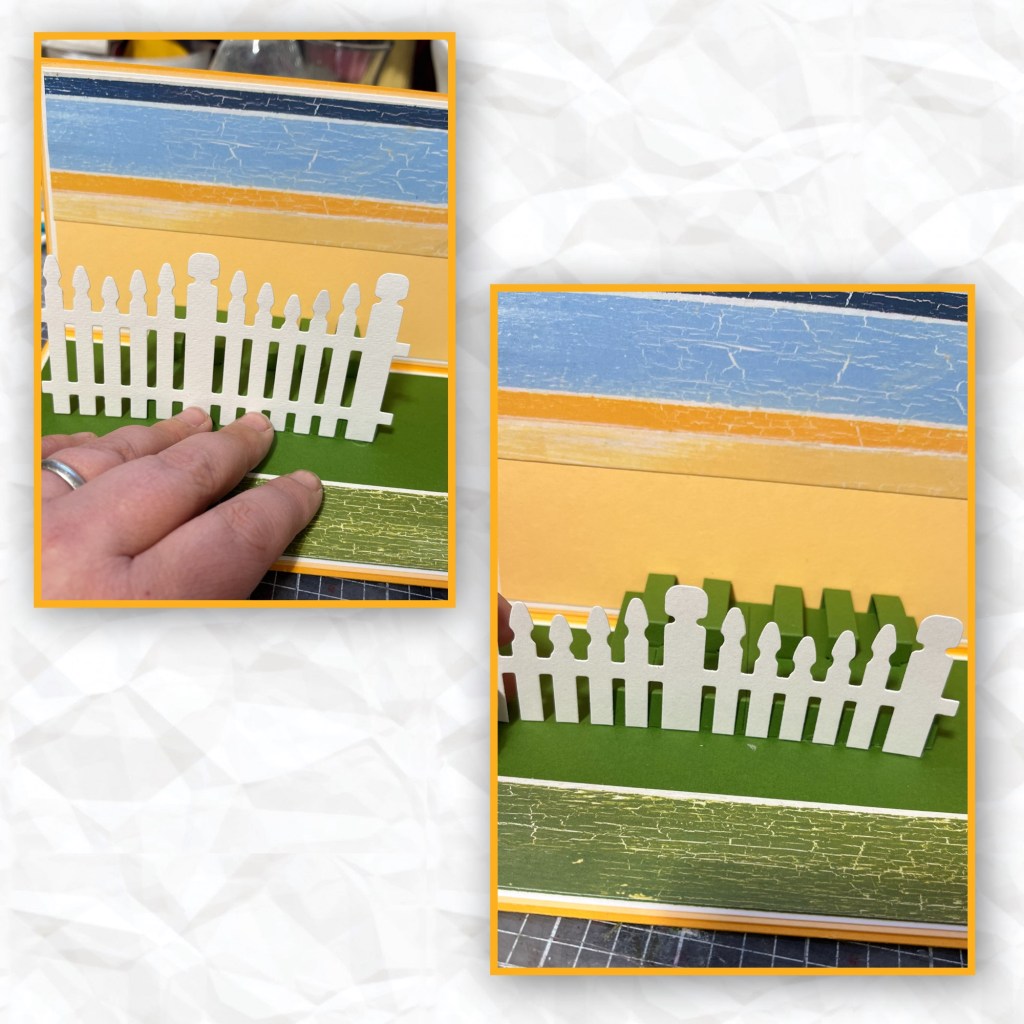
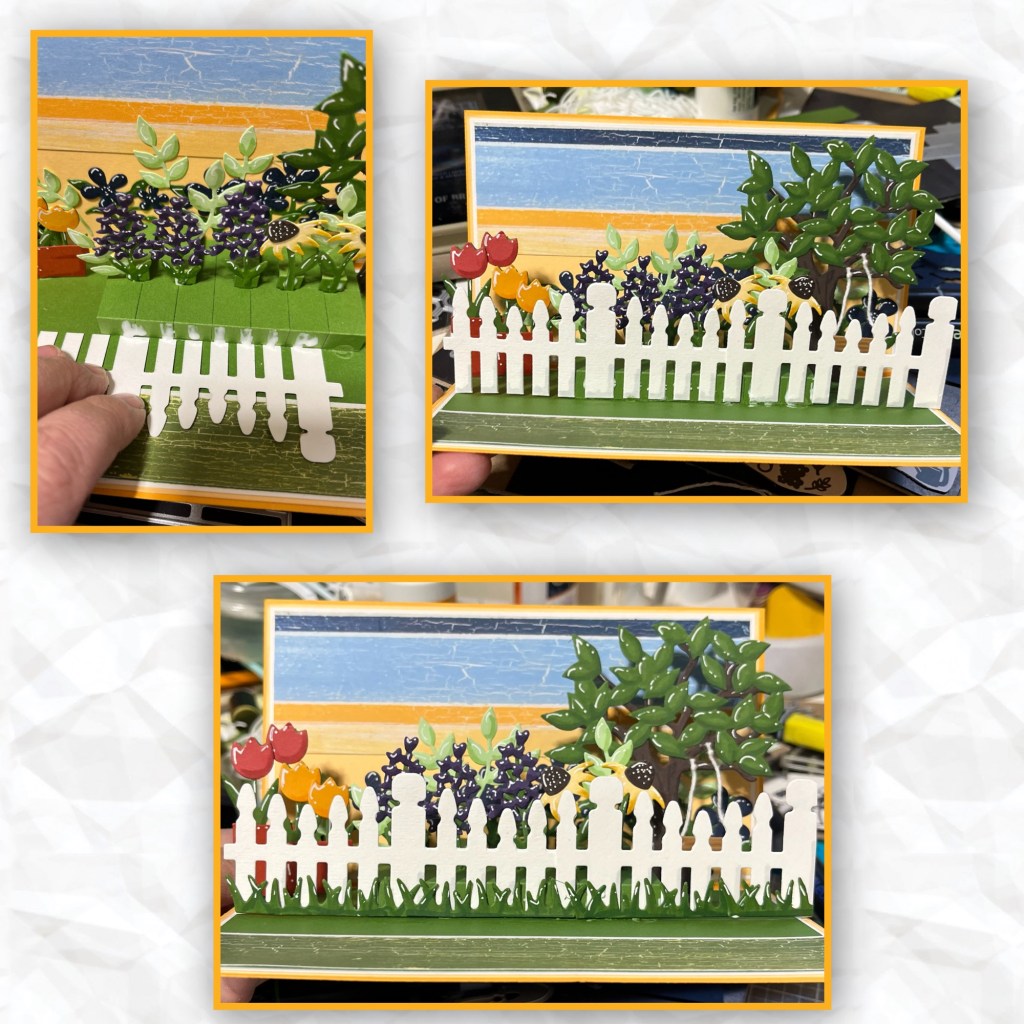
I cut 4 pieces of fence from the Fence Add on and doubled them to stiffen them up. I laid them against the pop up to figure out the height them trimmed as shown. I trimmed them to fit end to end to span the length of the card, then put them aside.
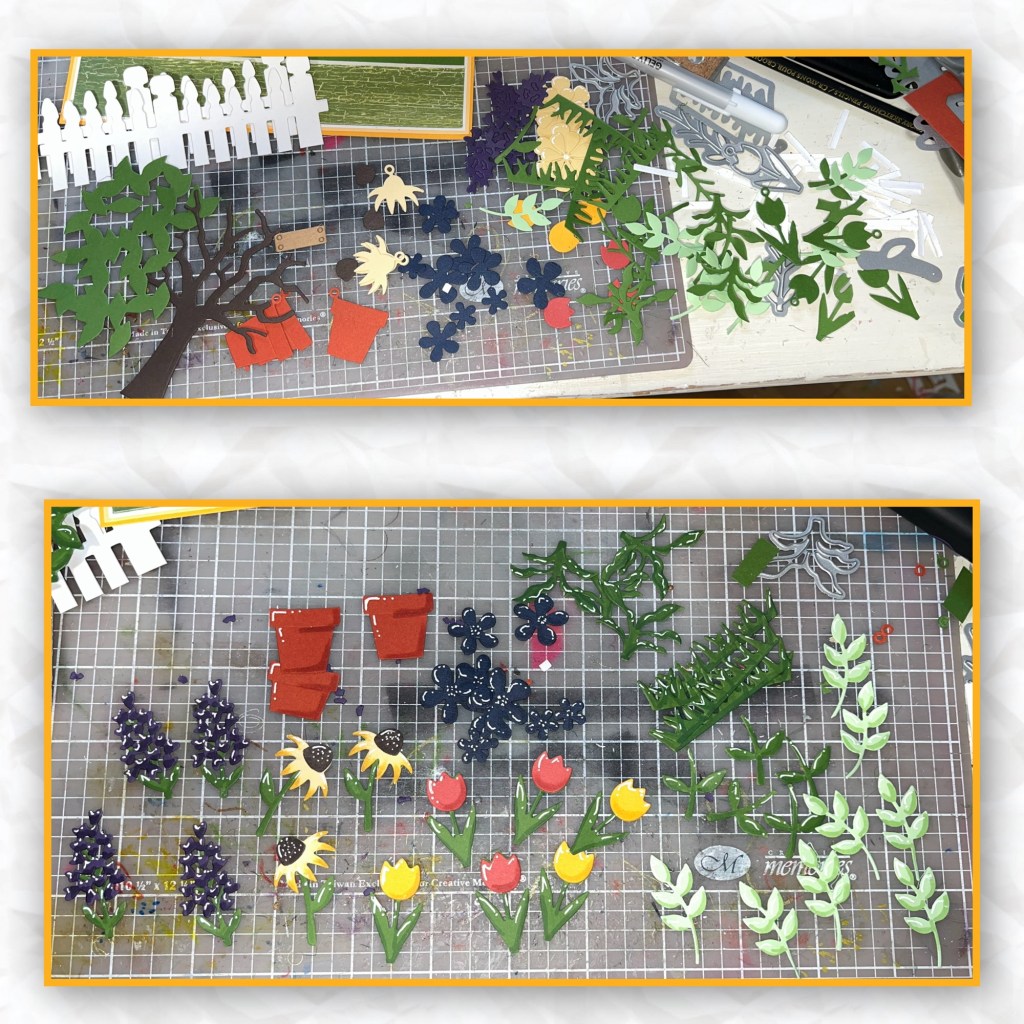
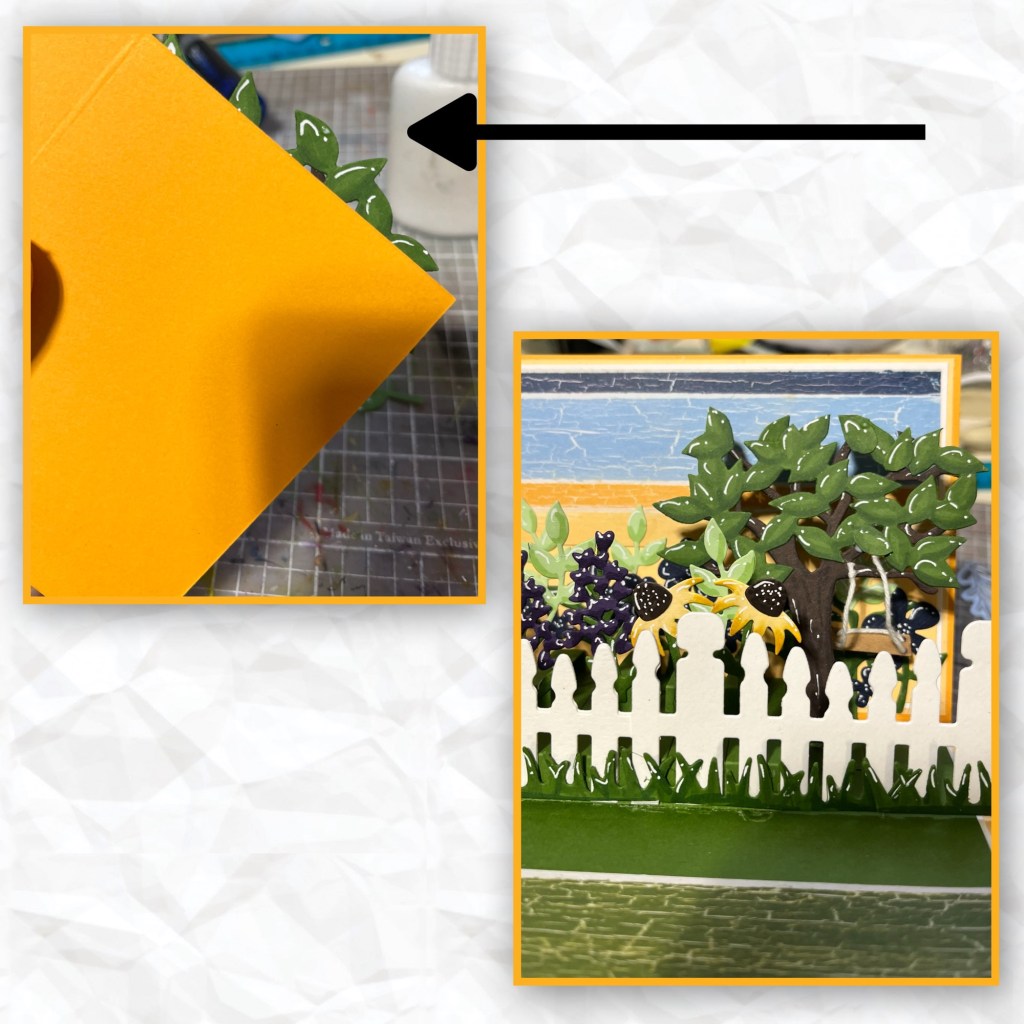
To decorate I cut out pieces from the following sets. Tree Pop up, Garden Charms, Backyard Charms, and Fun Flowers. I added shading with a variety of alcohol markers, and highlights with a white Gelly Roll pen.
To make the tree pop up I cut a rectangle slightly larger than the pop up cut out which will turn the “cut in” mechanism to a “glue in” mechanism and glued it in beside the piano keys.
I started adding flowers to the back wall and decided to use a Mini Pops Pop up which I will add the flower pots to.
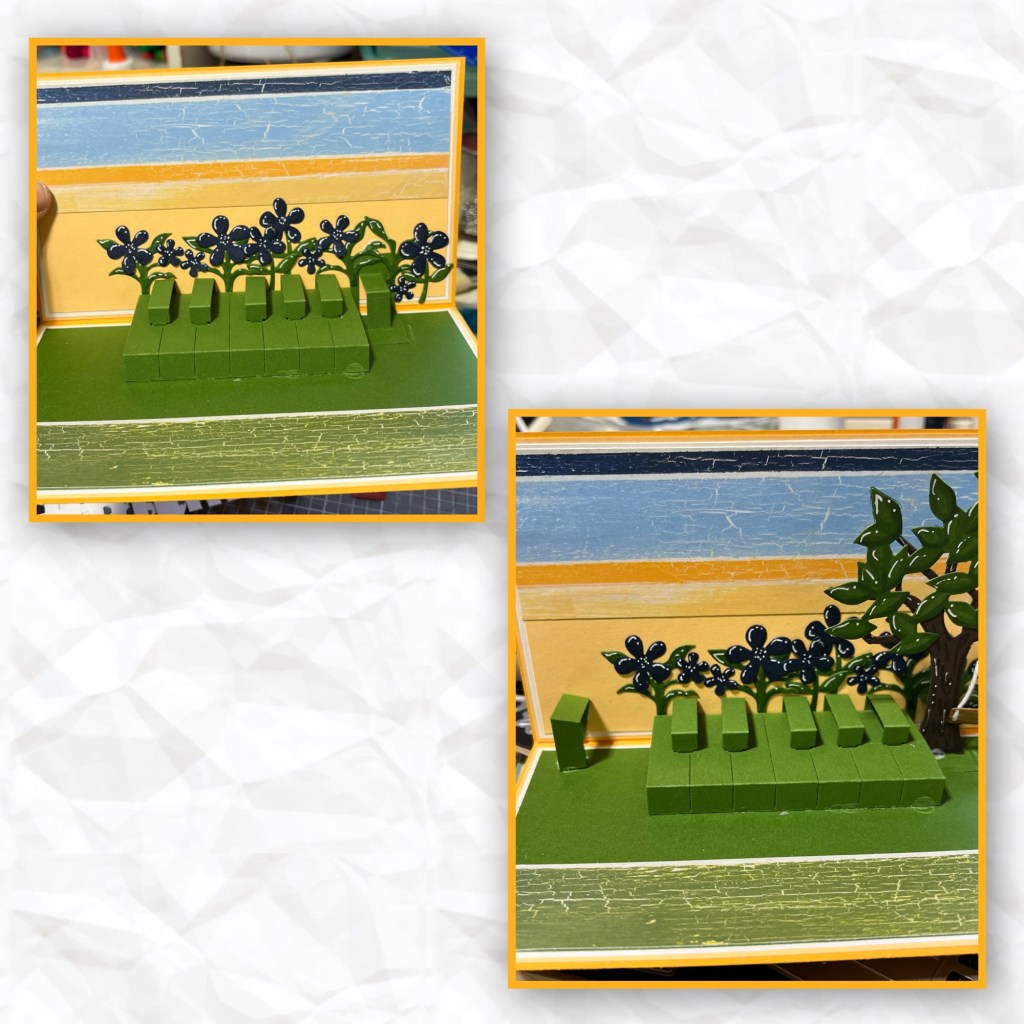
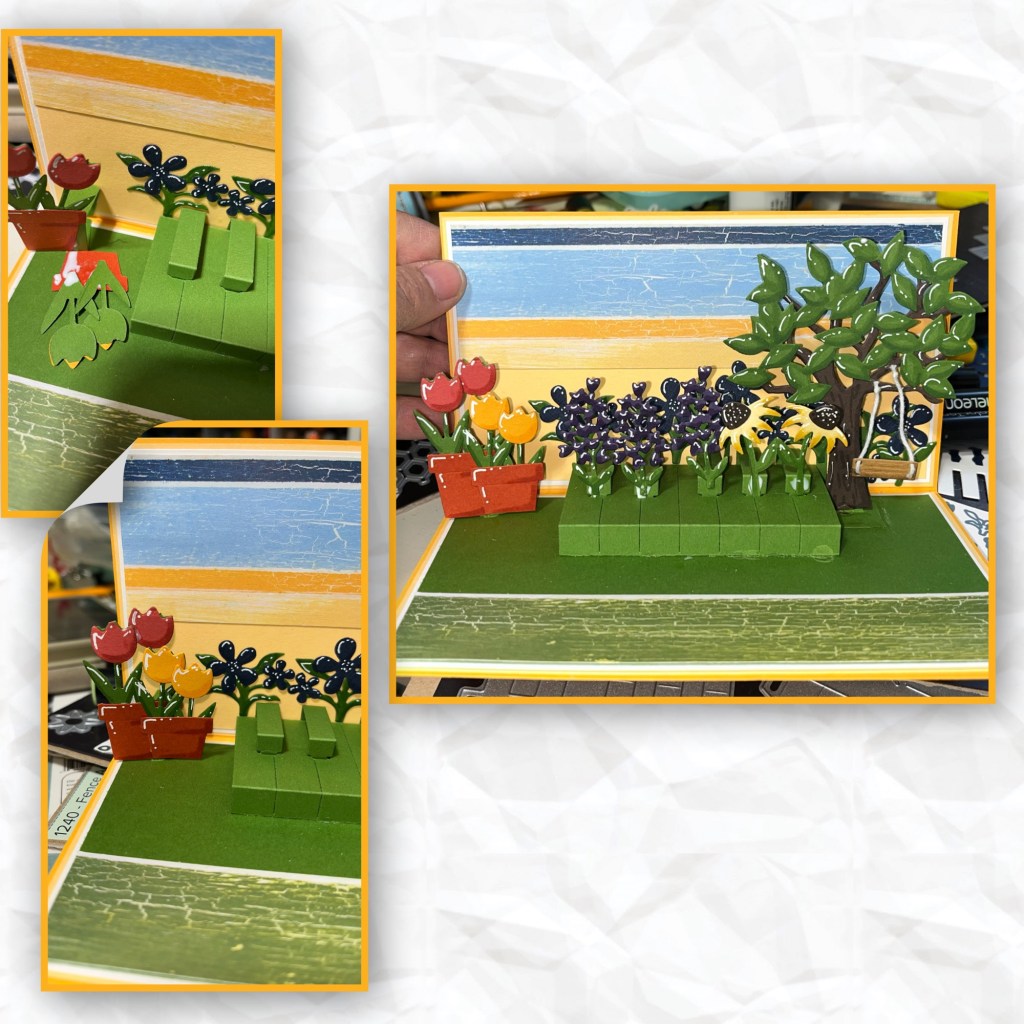
I continued to add flowers, and the pots and the trees to their mechanisms.
I added the fence and the grass that I previously cut out.
When closing the card I noticed that the leaves on the tree was sticking out the top so I trimmed them and added them to some of the lower branches.
I cut out a strip of paper and made it into a 1/2” square. I added it to the front of the fence and added the watering can to it. I added a frame from the Slim Frames and added highlights and shading.
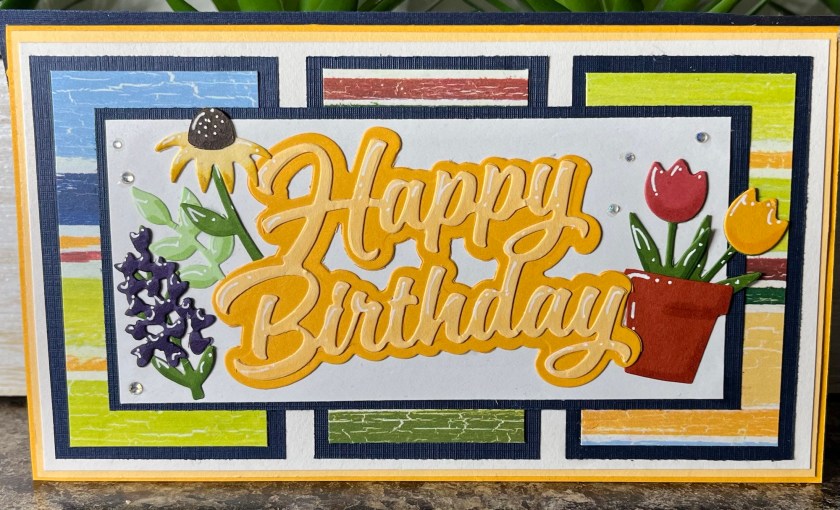
I cut layers as shown below from navy and the rest of the striped paper, and added to the cardfront.
I cut 2 more layers as shown and Happy Birthday, and the Happy Birthday Shadow. I added a few extra flowers and added to the card base. I also added a few itty bitty gems.
When I thought the card was finished I decided it was missing something so I cut out a navy panel and added it to the back of the card. The card needed a little help staying open so I added 2 Display Helpers to the inside.
Other Tools used

One thought on “Fenced in Garden”