

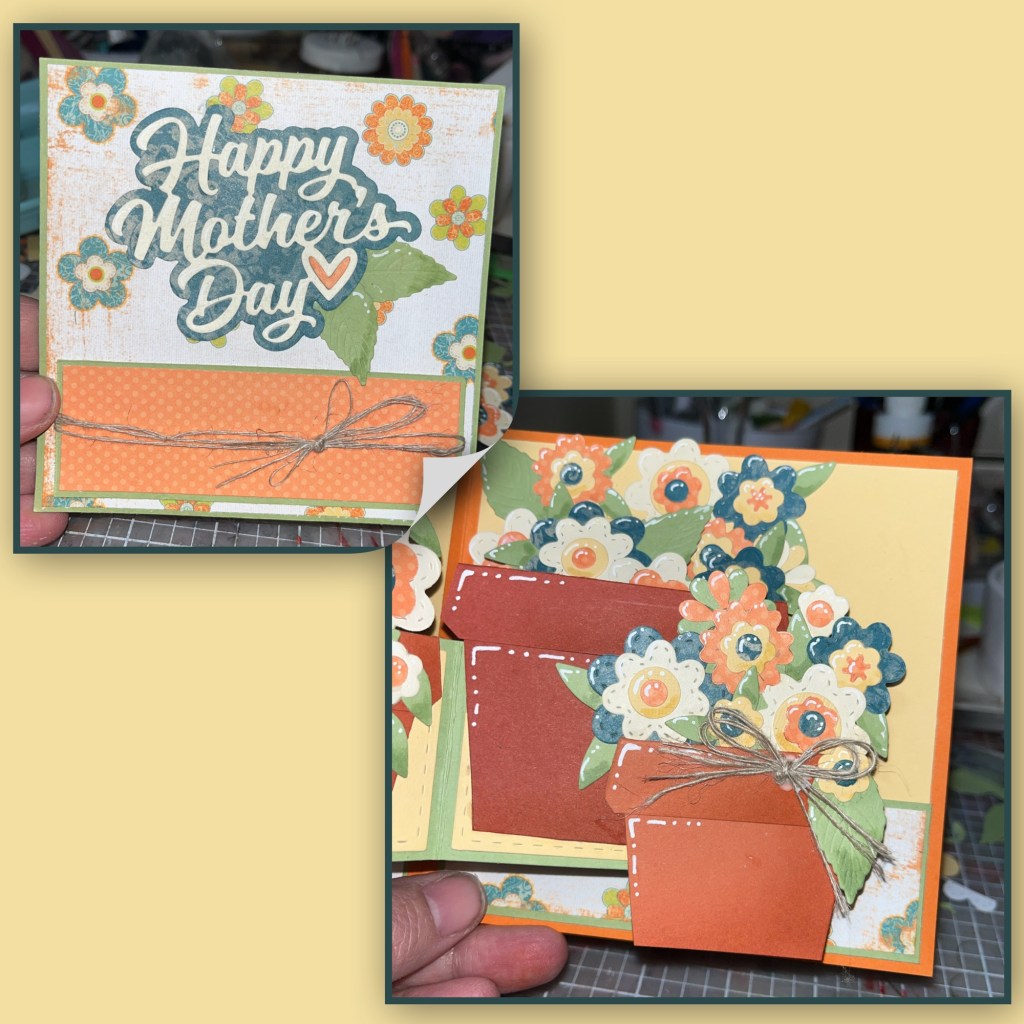
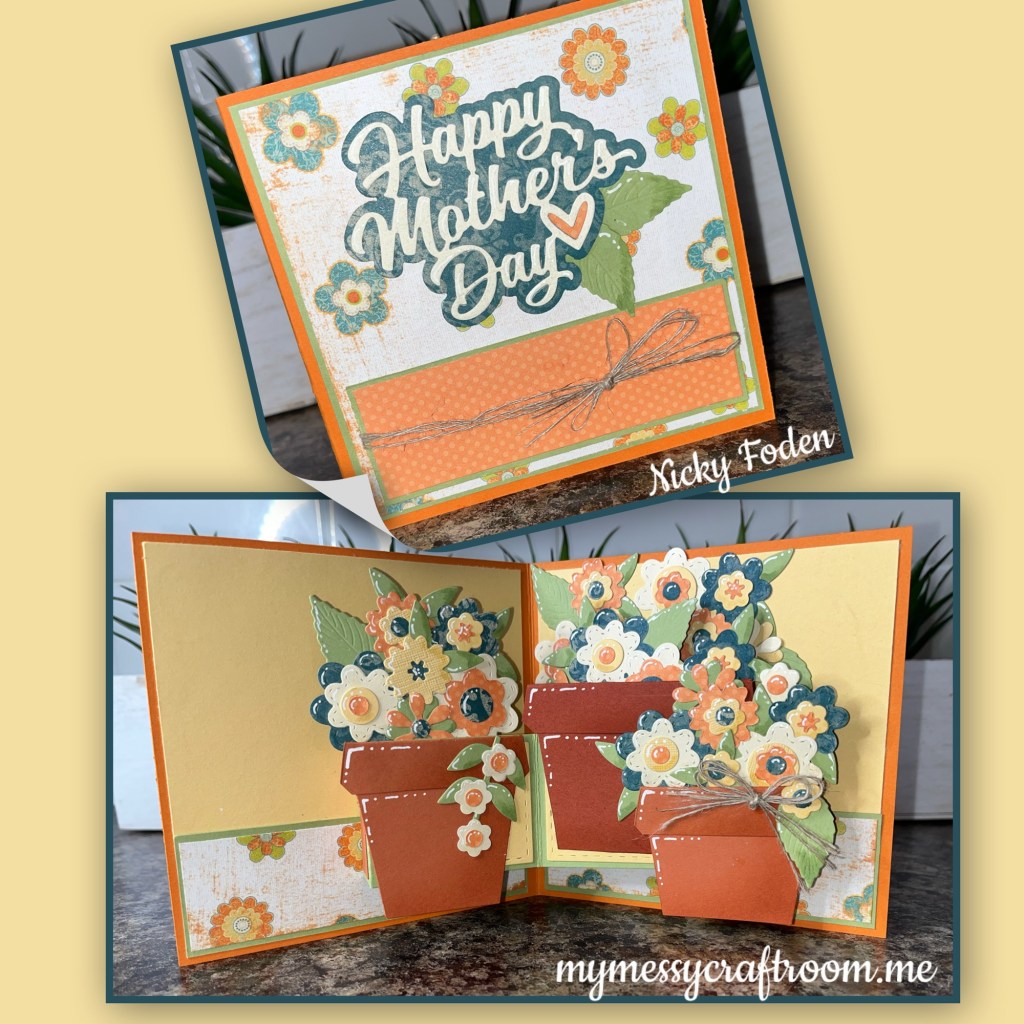
Good morning crafty friends, today is the first Tuesday of the month and if you’ve been following you know it’s the Karen Burniston Design team challenge day. This month’s challenge was to have a card that incorporates a bouquet. Is it still a bouquet if it’s in a pot 🤔. How about 3 pots 🤷🏻♀️. Well I think so. I’m not typically a team orange person (iykyk) but when I was looking through my paper bin when I was making Christmas cards I came across this orange and teal pattern paper and knew I just had to use it.

All the fun is in the reveal, to see this card in action please check out my FACEBOOK page, feel free to join if you would like to share your own crafty creations. You can also see a video of this card on my INSTAGRAM page.
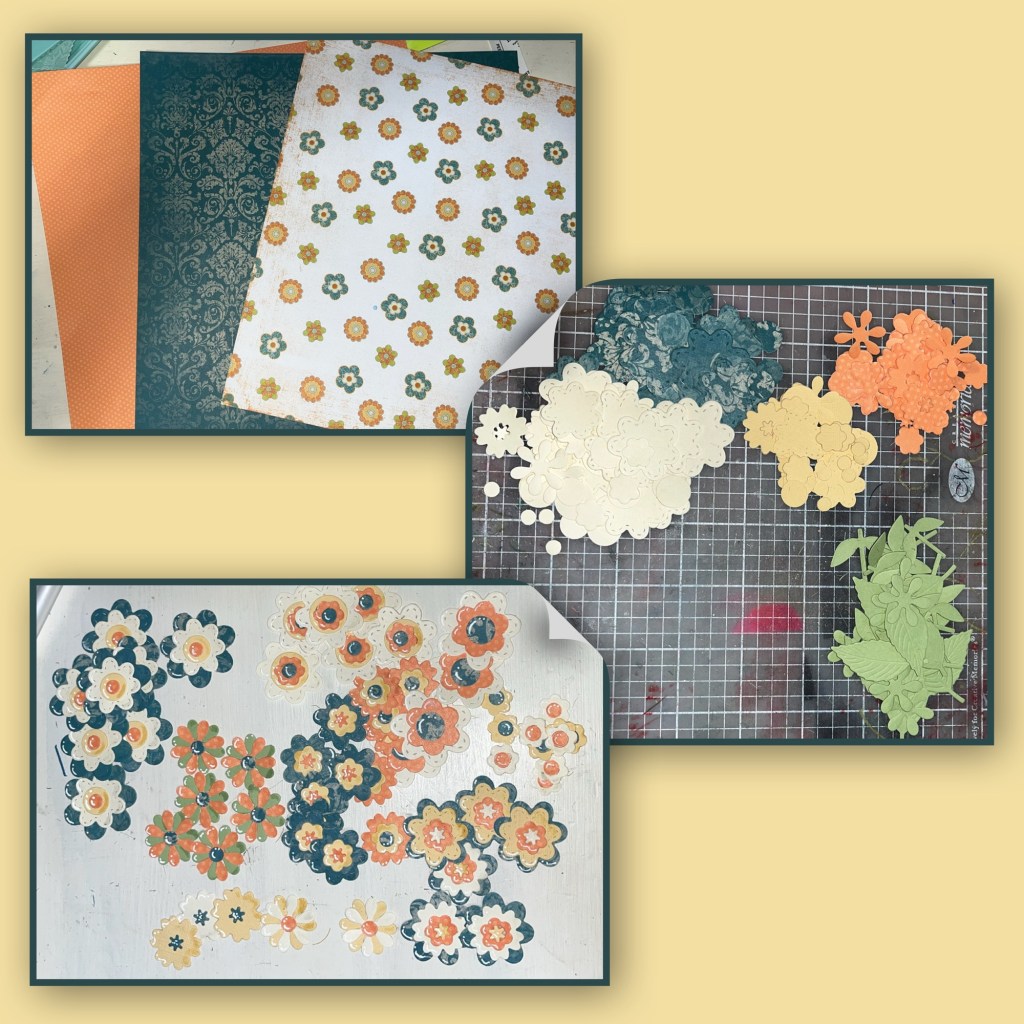
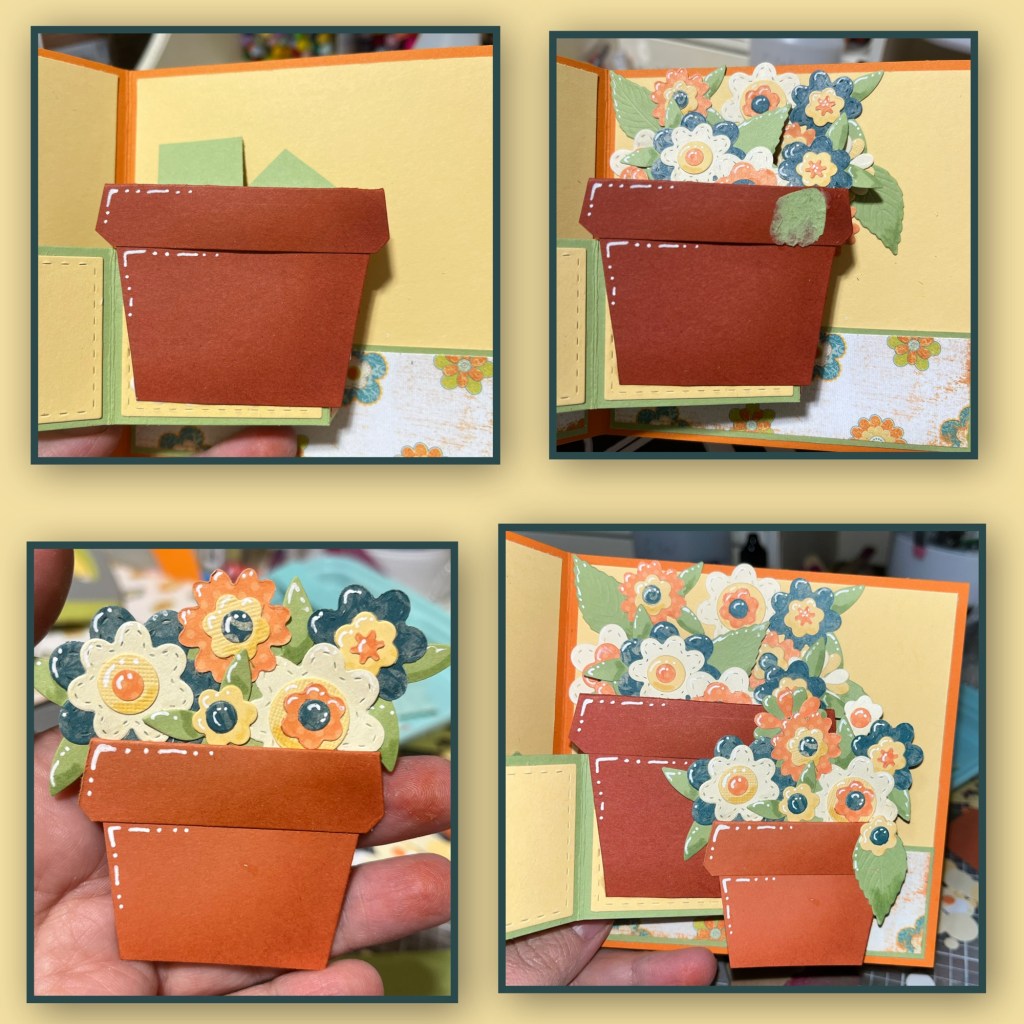
I really liked the flower paper and if you look close at the flowers you will see that there are patterns inside. So I choose this teal paper and the orange polka dot paper. Using flowers from the Fun Flowers and the Flower Pivot Panels I cut from the 2 pattern papers, yellow, cream, and green. I layered them and added shading with a Versa Mark Marker, and highlights with a white Gelly Roll pen. I was attempting to have them resemble the flowers in the paper.
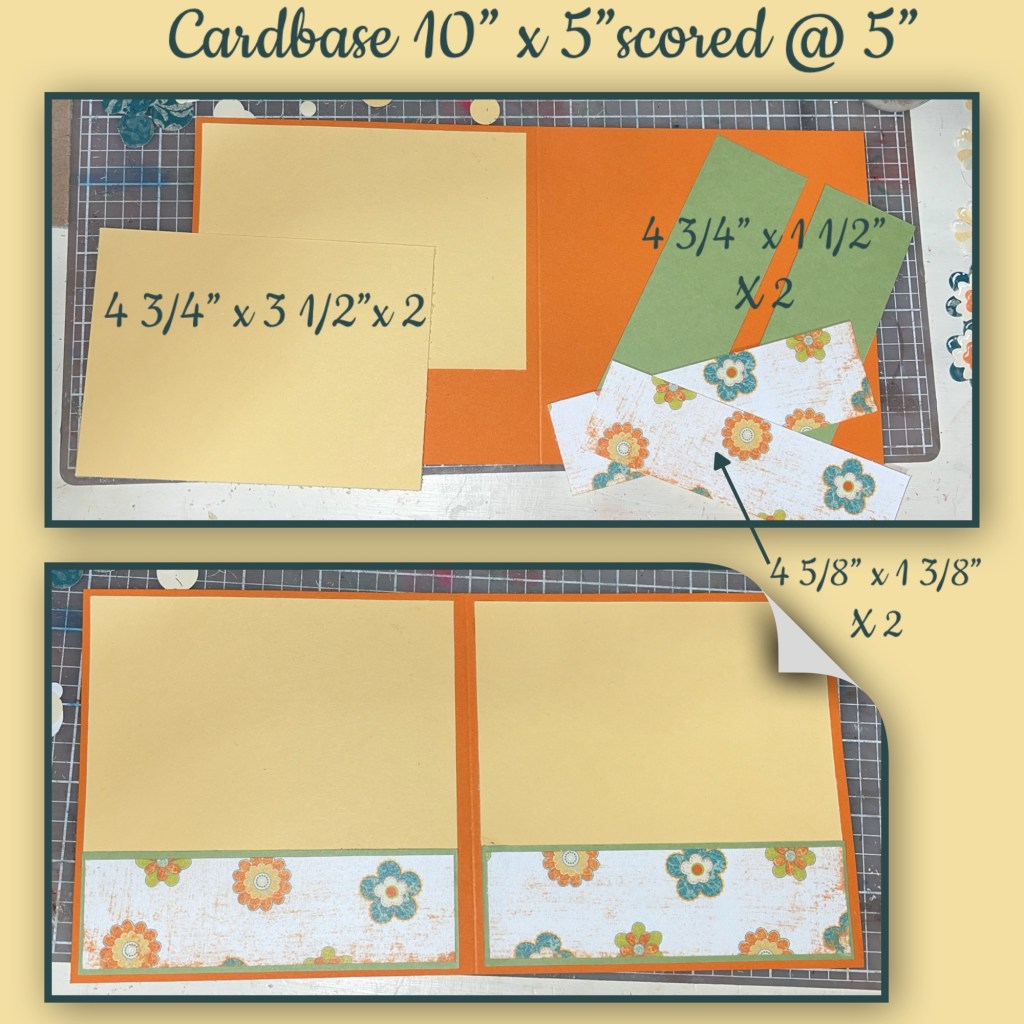
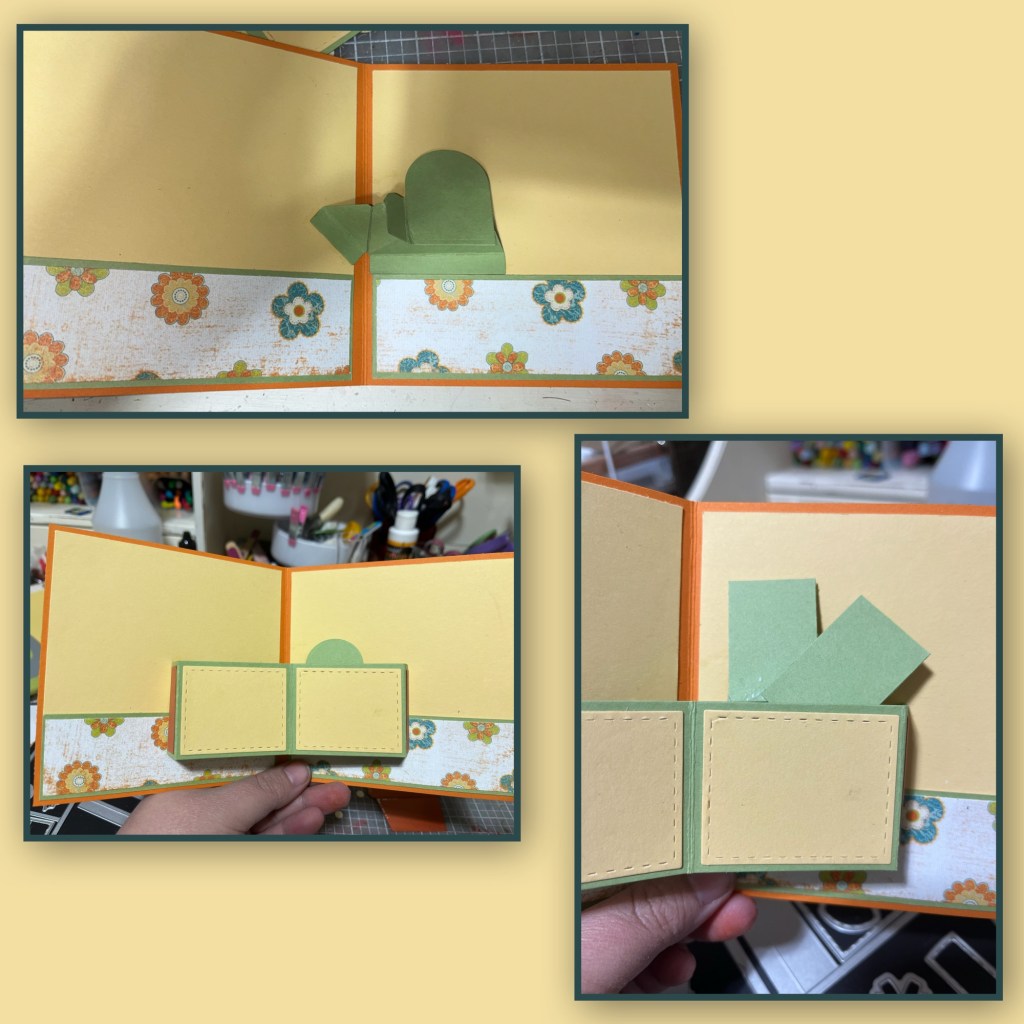
Cut the cardbase and panels as shown and assemble the inside of the card.
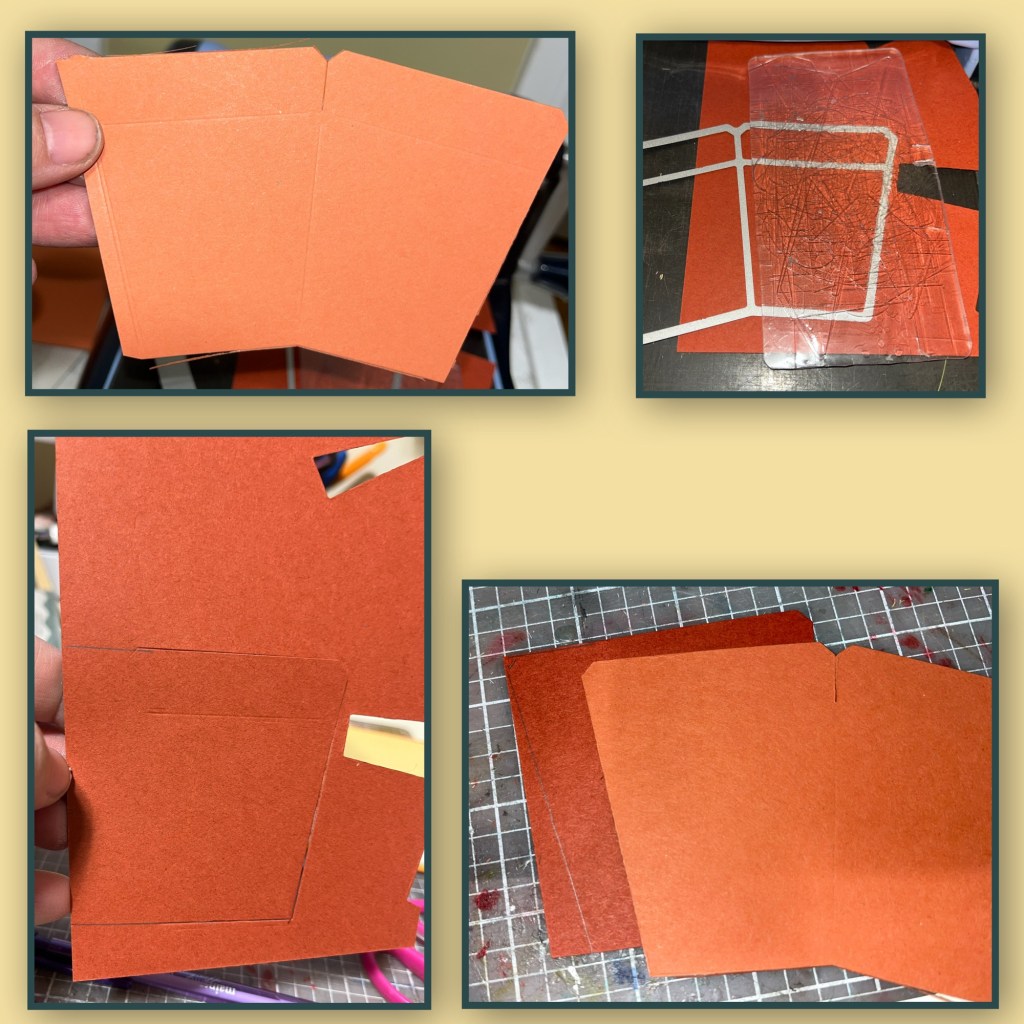
I diecut 2 panels from the Flower Pot Pop up from a lighter terra cotta colour.
I wanted a wider pot from the darker colour. I only laid the cutting plate as shown so it would only cut the section under the plastic plate. I drew lines to extend the top and bottom of the pot. I used the lighter cut out as a stencil to draw the left edge of the pot. I carefully cut with scissors.
I cut apart the panels of the lighter pots to make 2, and I cut the bottom off of one to make a shorter pot. I added shading with a brush and matching ink to the bottom right of the pot and the trim, and highlights with a white Gelly Roll pen to the top left. I also decorated the large section of the Stocking Pop Up as shown. I didn’t have enough of the yellow or I would have just cut it from that.
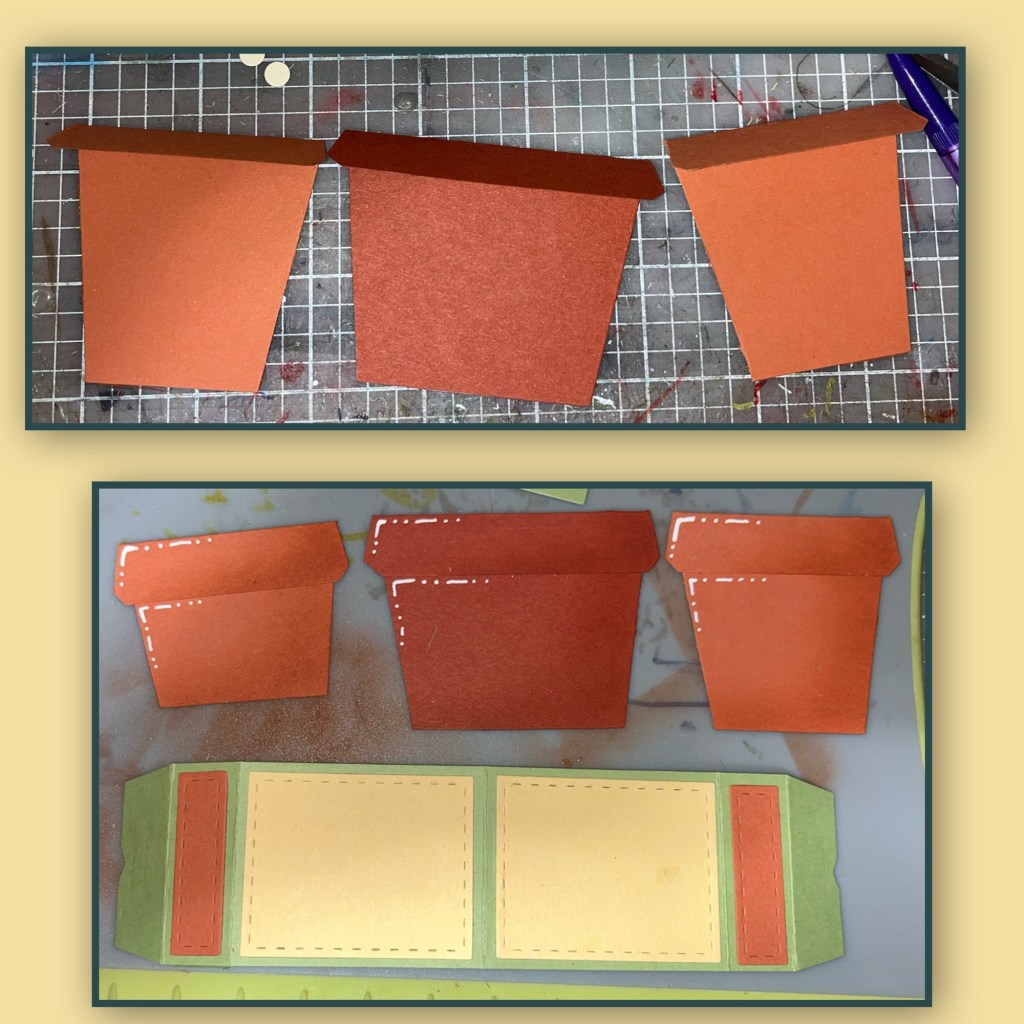
Following Karen’s VIDEO I assembled the mechanism. I added 2 rectangles to the mechanism as shown. I needed a place to add the flowers.
I attached the large pot to the left side l and added flowers to the mechanism and the back wall of the card. I originally had a flower and a leaf to the top right of the actual pot. But changed my mind.
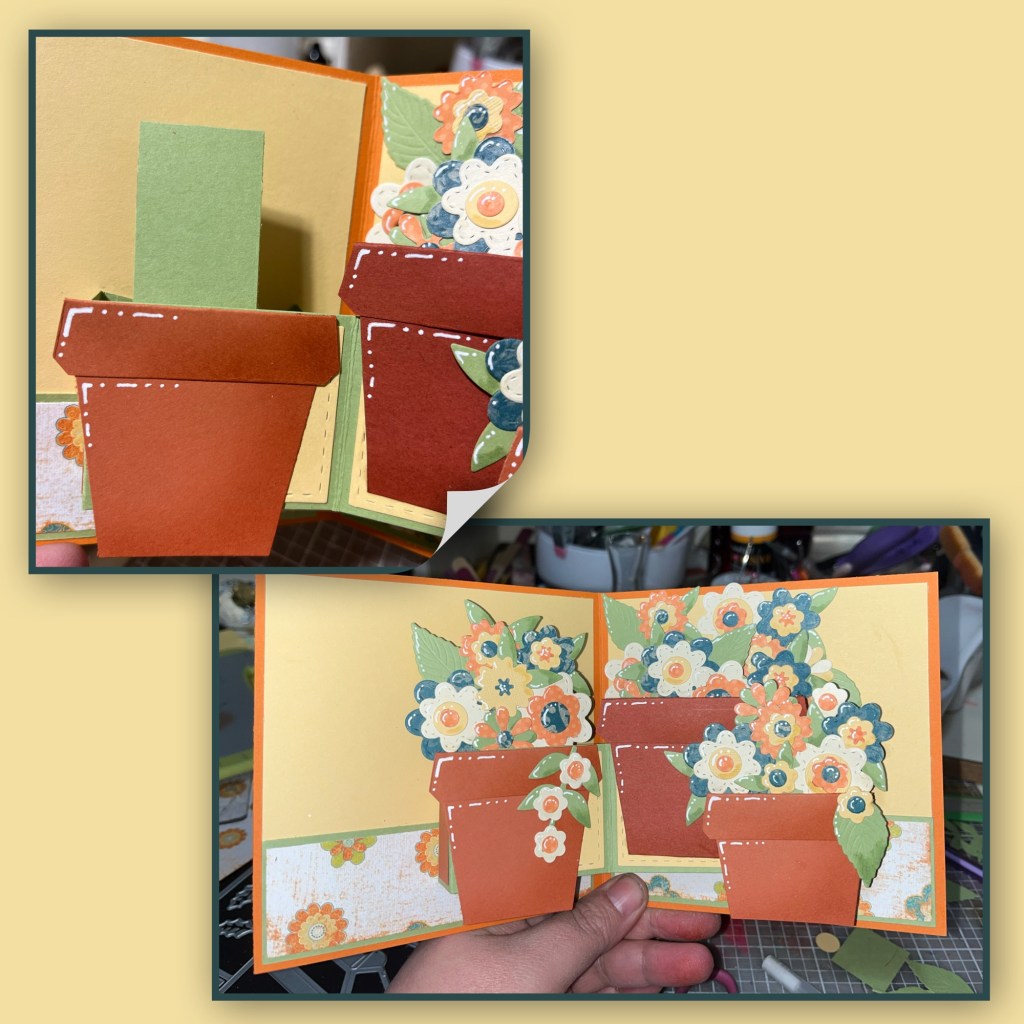
I decorated the smaller pot, and added it to the bottom right of the larger pot. It easily cover up my green boo-boo.
I attached the last pot to the left side. And added flowers as shown.
For the front I cut the panels as shown. I also cut a piece of twine to wrap around the border.
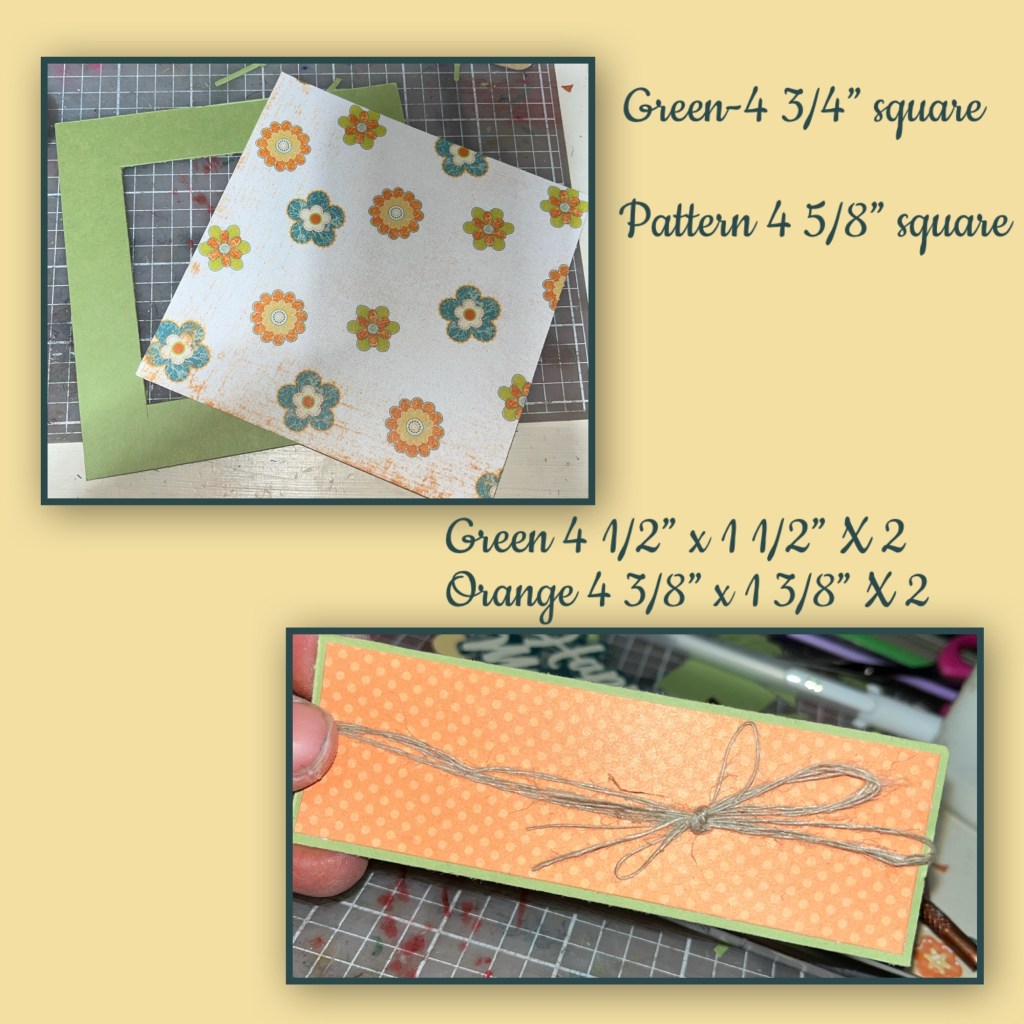
I completed the outside and added Mother’s Day to the front. I also added a piece of twine to the far left pot on the inside.
Other Tools used

OH MY GOSH!! Tha’s a LOT of flowers! Beautifully done! Thanks for the picture instructions, very helpful. I’ve been craftinf for 15 years but always appreciate clear instructions.
LikeLiked by 1 person
How cute! I love the colors!
LikeLiked by 1 person
Thank you for all of the Great instructions. I really like your flower pots. Even though I’ve doing paper crafts since the mid 1990’s there is so much more to learn.
LikeLiked by 1 person
Nicky I love the color combination you chose and the details you added with you white gel pen❤️
LikeLiked by 1 person
Love you card! It is beautiful.
nadine_wiley@yahoo.com
LikeLiked by 1 person