
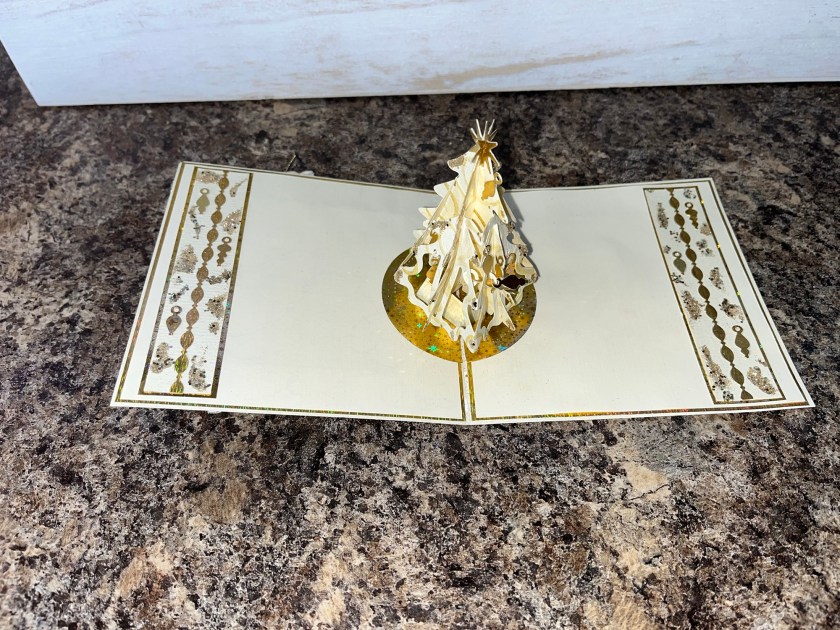
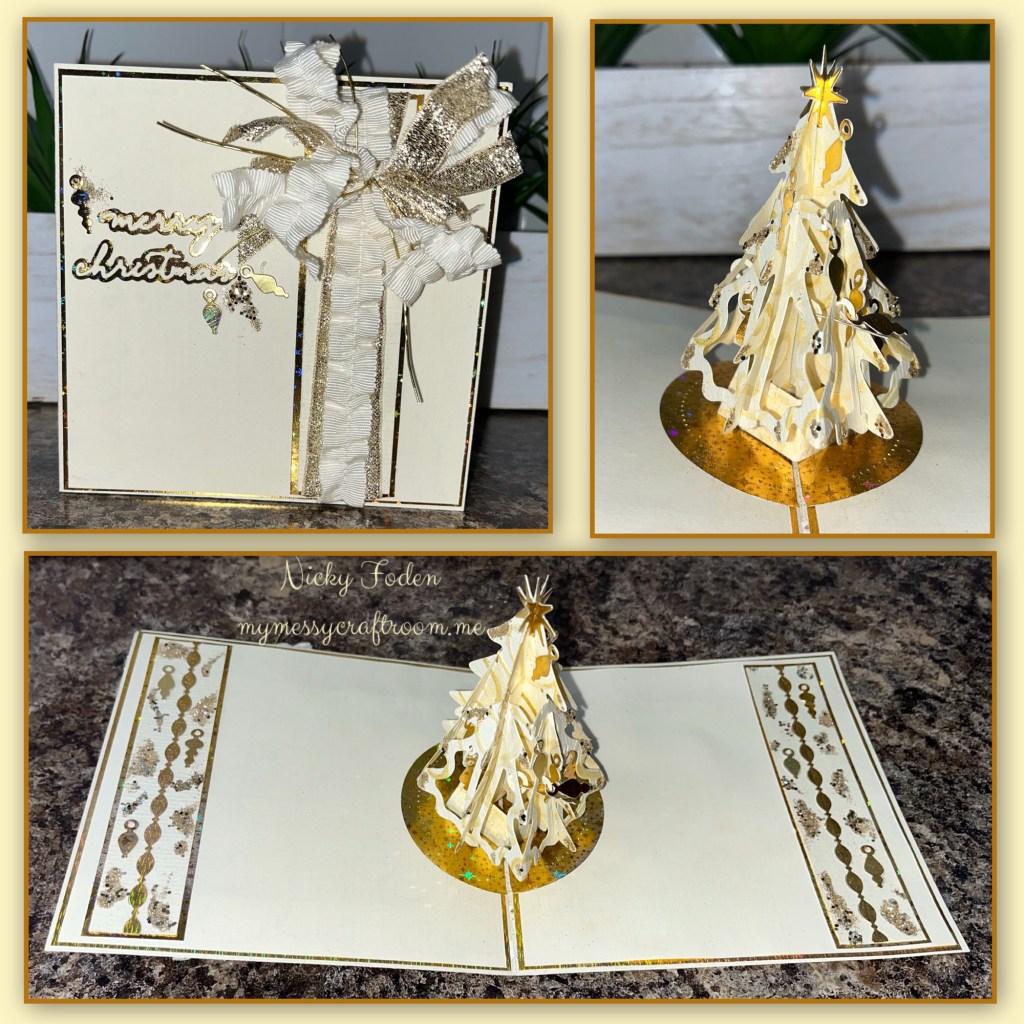
There is something so elegant about a cream and gold Christmas card that I can’t help but make at least one a year. I thought gold ornaments would look pretty on a cream coloured tree, and this is what I came up with.

All the fun is in the reveal, to see this card in action please check out my FACEBOOK page, feel free to join if you would like to share your own crafty creations. You can also see a video of this card on my INSTAGRAM page.
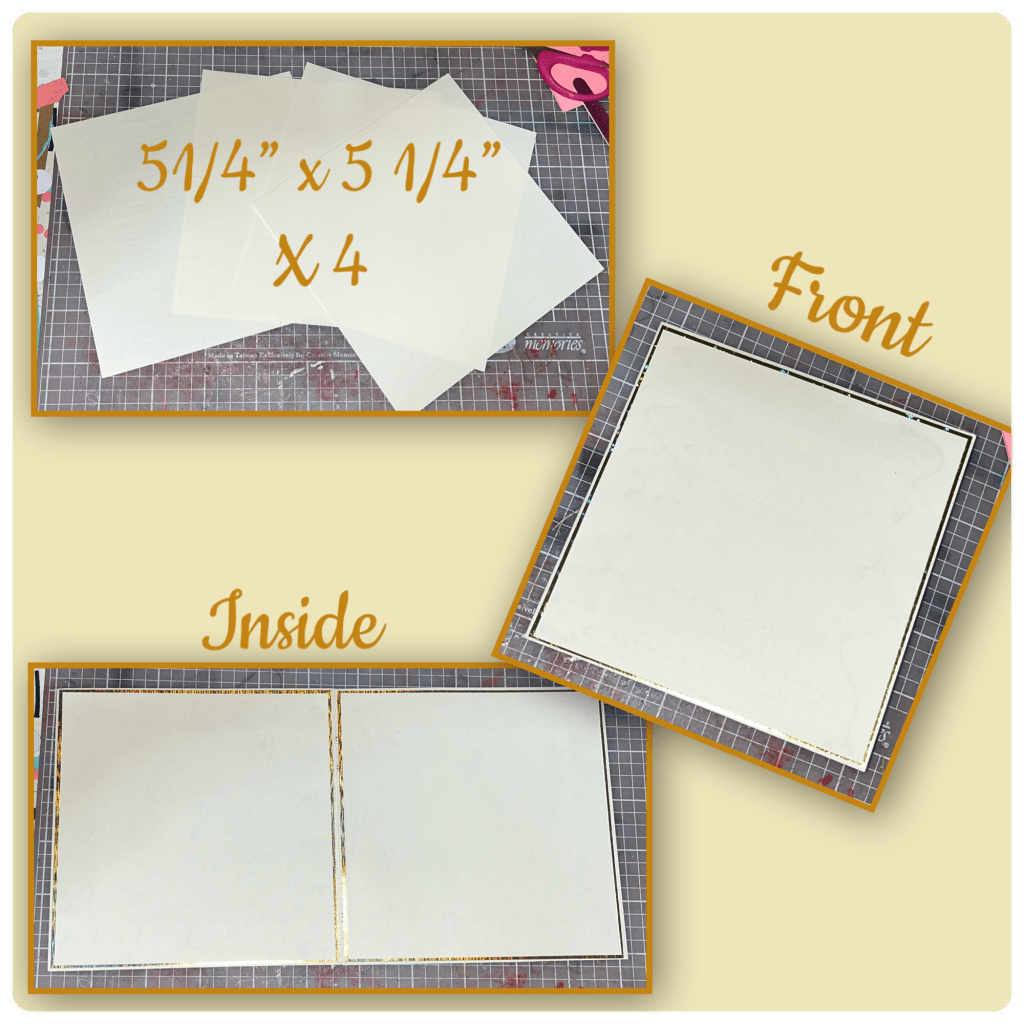
I’ve to have a thing for square cards so I decided to make it 5 1/2” square. Dimensions below. I cut a gold layer and I cut the middle out to conserve cardstock but…………

…….the vanilla layer that I was going to put on top was thinner than I thought and I could see the that I cut the centre out of the gold layer through the top layer. So I put the gold centre back in. The centre pic shows the inside of the card and the bottom pic shows the front and back.

I cut the top layer to the dimensions below, and added them to the front and the inside.
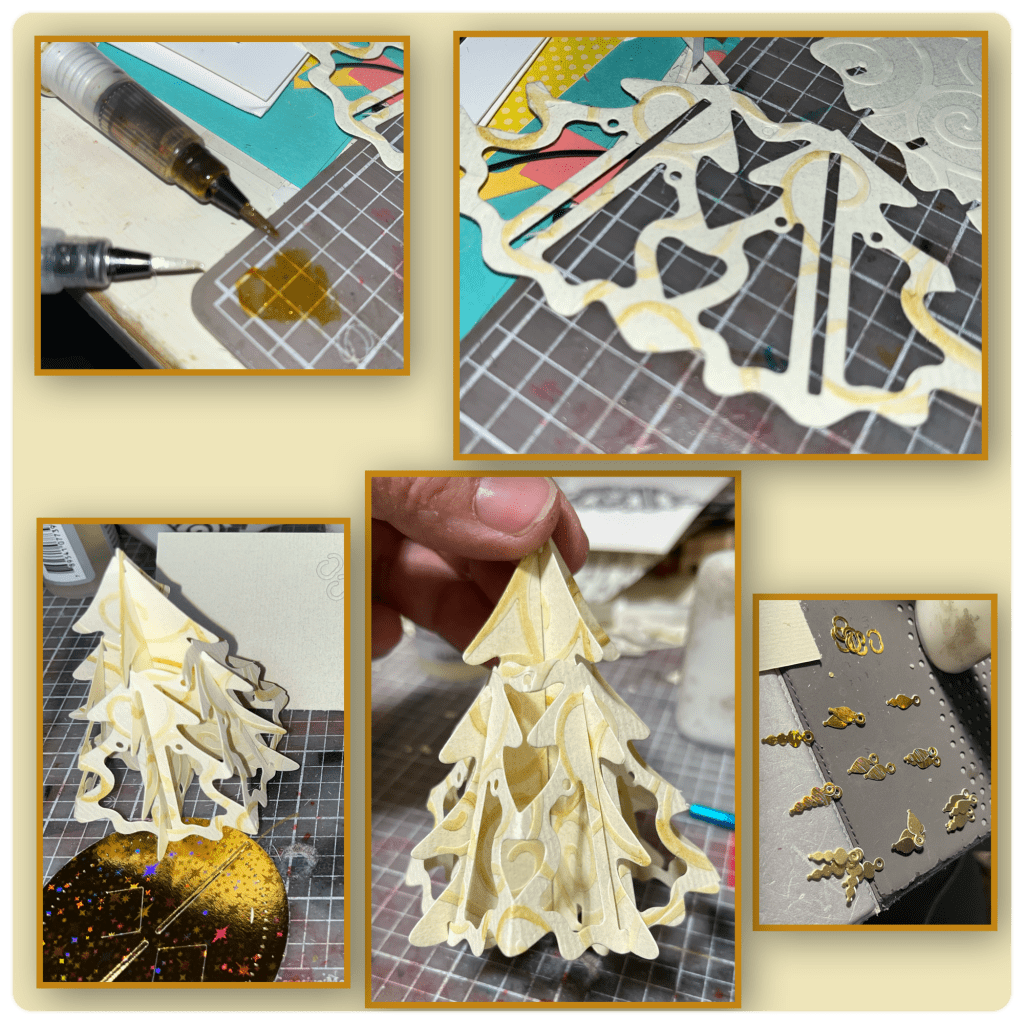
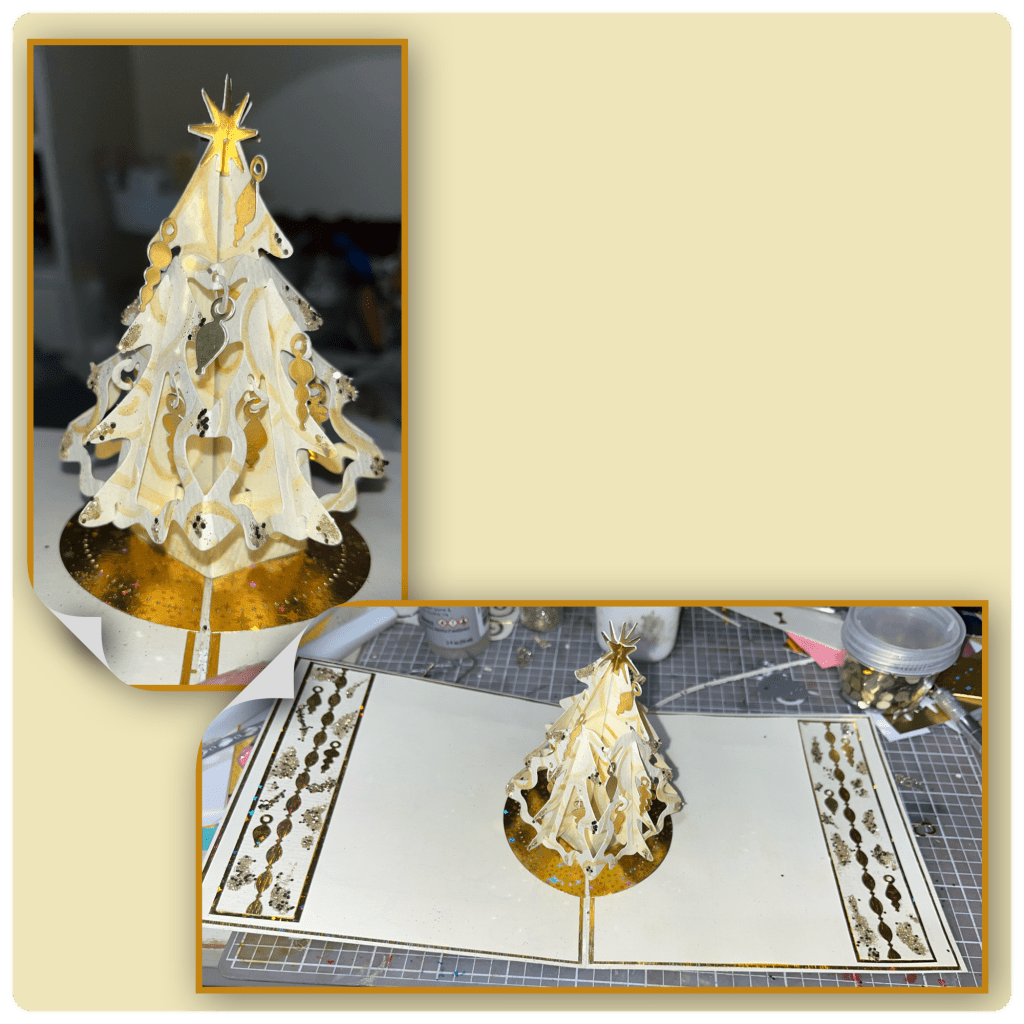
I thought I would fancy up the tree a bit so I added Sizzix double sided adhesive to the back of the cream cardstock and then diecut some swirls using the Pattern Plate Swirls. I adhered the swirls onto another piece of cream cardstock. I cut the large trees from the Christmas Tree Pop up and the small tree from the Christmas tree add on, (Karen has a video tutorial on the product page at the link ⬆️ follow the Christmas tree Add on video)

I wanted to add a hint of gold to the swirls so I squeezed out a bit of Wink of Stella Gold, and then used the clear Wink of Stella to pick up the gold to dilute it a bit then coloured the swirls. When I made my card it was before Karen made her video. So I assembled mine in a bit of a different order. I would have had an easier time with the assembly had I done it he order that she shows in her video. I cut the ornaments from different gold card stocks, and the tree skirt from the same gold as the layers used on the front and inside.
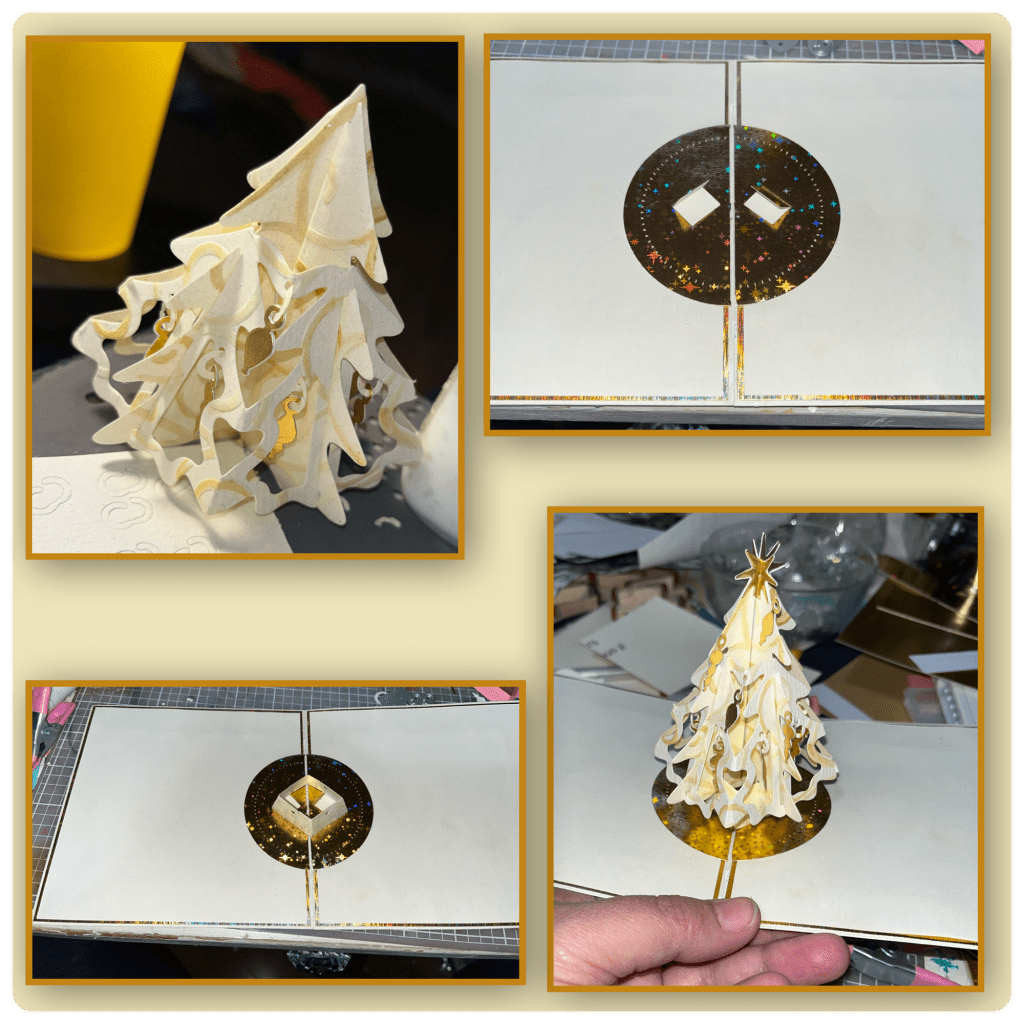
I had centered the tree skirt but I should have it a little bit lower, the tree looks great when the card is opened but…..
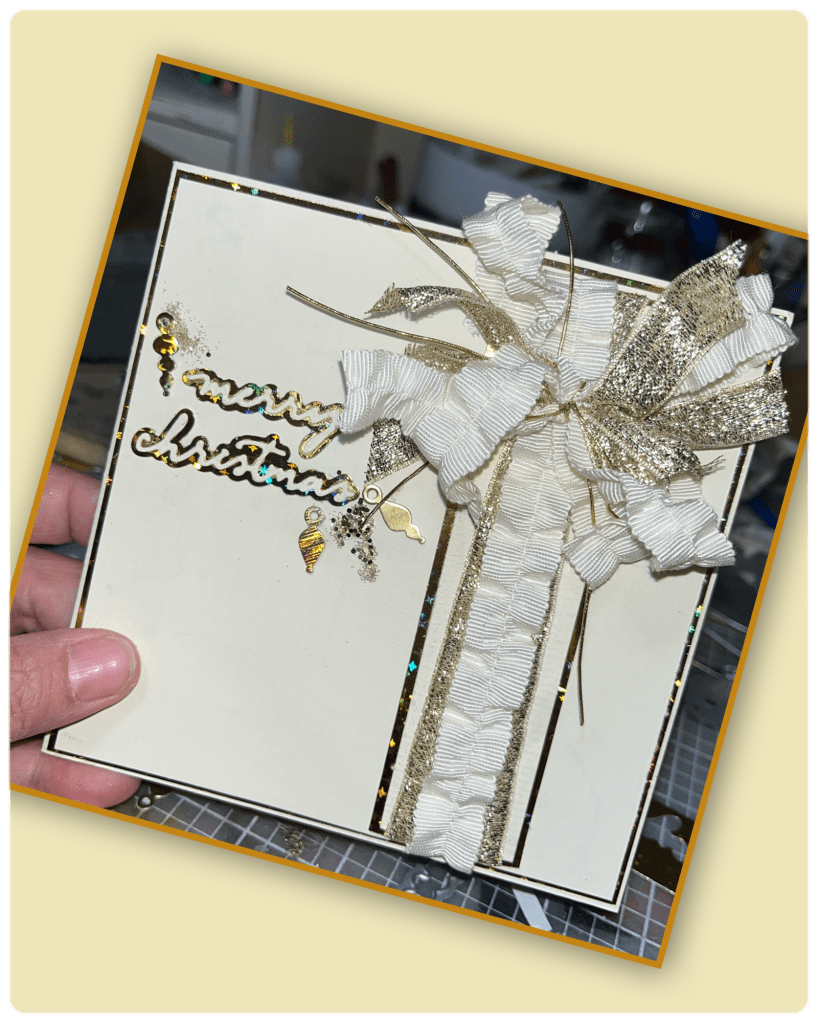
….. when the card is closed the star peeks out from the top of the card. Instead of cutting the star I thought I would try to hide it with a large bow. I cut several pieces of ribbon and gold string and layer them as shown. And tied a piece of string around the middle to make a rag bow. I created a a border as shown with the same cardstocks and ribbons already used above. I added the border and the bow as shown.
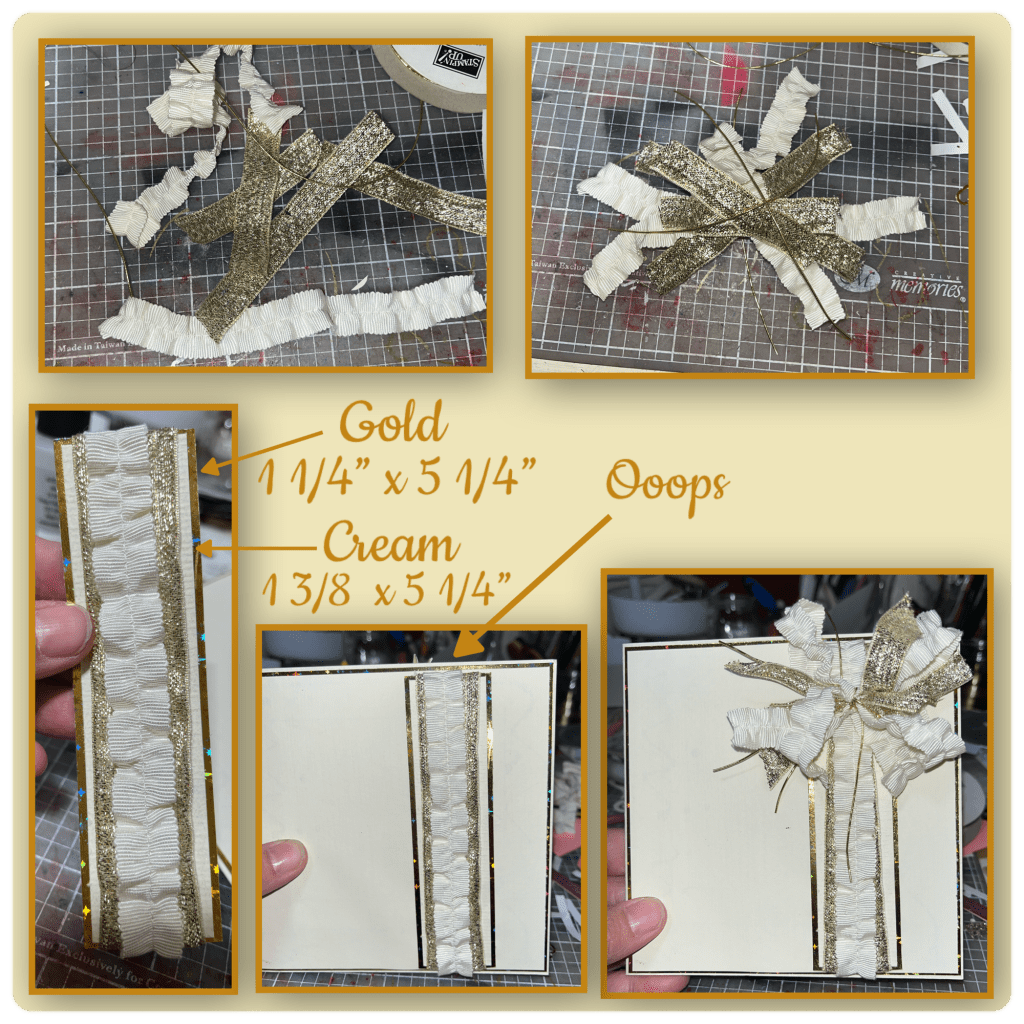
I decided to make a couple of borders for the inside. Dimensions below. I cut a border using a border die from the Border Blends Party from gold and added them and a few of the extra ornaments. I wanted to fill in the extra space so I rubbed adhesive on the borders with my fingers and added some chunky glitter.

I added glue to the tree in the same way and added some glitter to the tree as well
I added the greeting on the front using the Small Script Christmas , I also added some of the small ornaments and glitter the same way I did on the inside.
Other Tools used

Stunningly designed and presented on your blog, A most beautiful card for any lucky recipient x
LikeLiked by 1 person