

Even though sneak peek was last week I have another card to share. This is actually the first card I made using the new release. I just had to make a tea card because I’m a tea gal.

All the fun is in the reveal, to see this card in action please check out my FACEBOOK page, feel free to join if you would like to share your own crafty creations. You can also see a video of this card on my INSTAGRAM page.
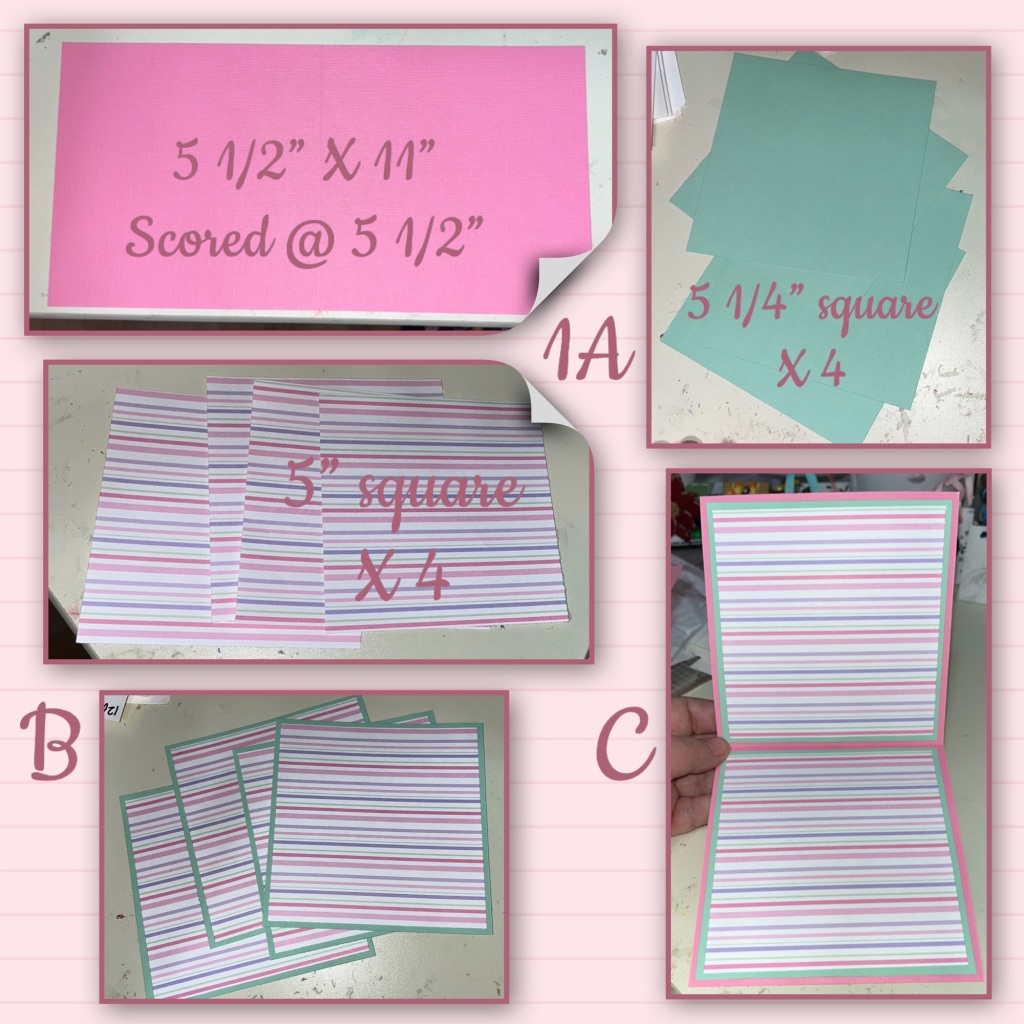
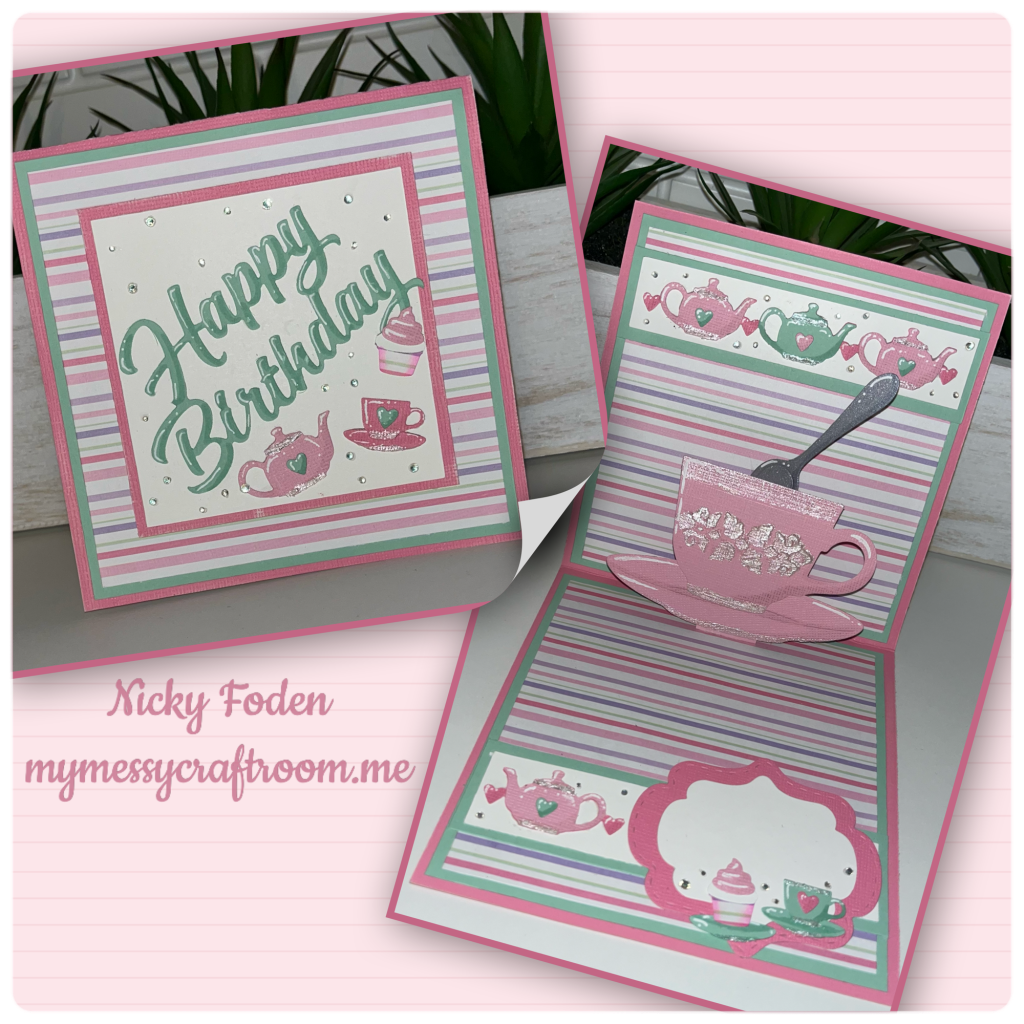
I started by picking the patterned paper, I liked the bright stripes so I chose the cardstock colours from the stripes.
1A- cut the cards base and panels as shown. The card base is a darker pink than what the teacup will be.
B- I made 4 panels
C- I added the panels to the front, back, and inside.
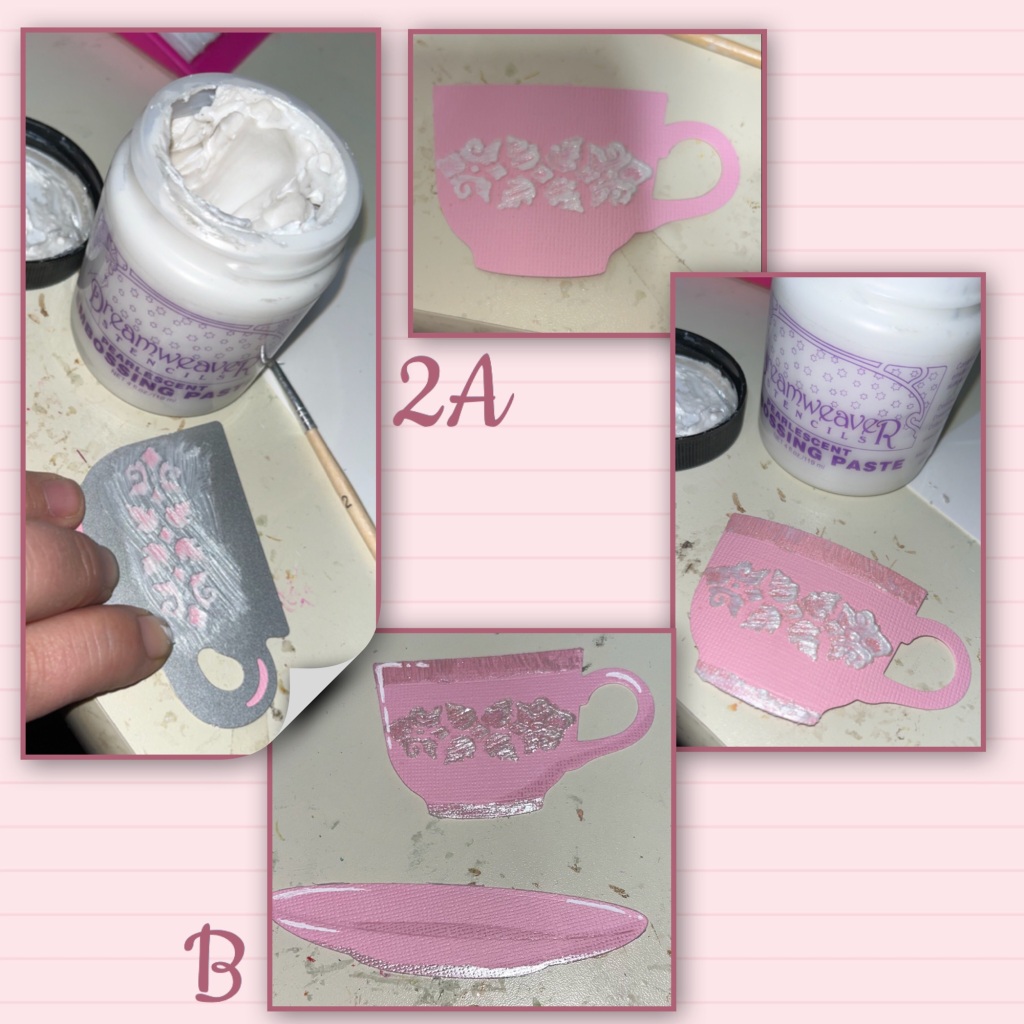
2A- I diecut the tea cup from the Tea and Coffee Pop up and I used embossing paste through the stencil feature.
B- I added the embossing paste around the top and bottom of the cup and the saucer. I added shading with a Versa Mark Marker, and highlights with a white Gelly Roll pen
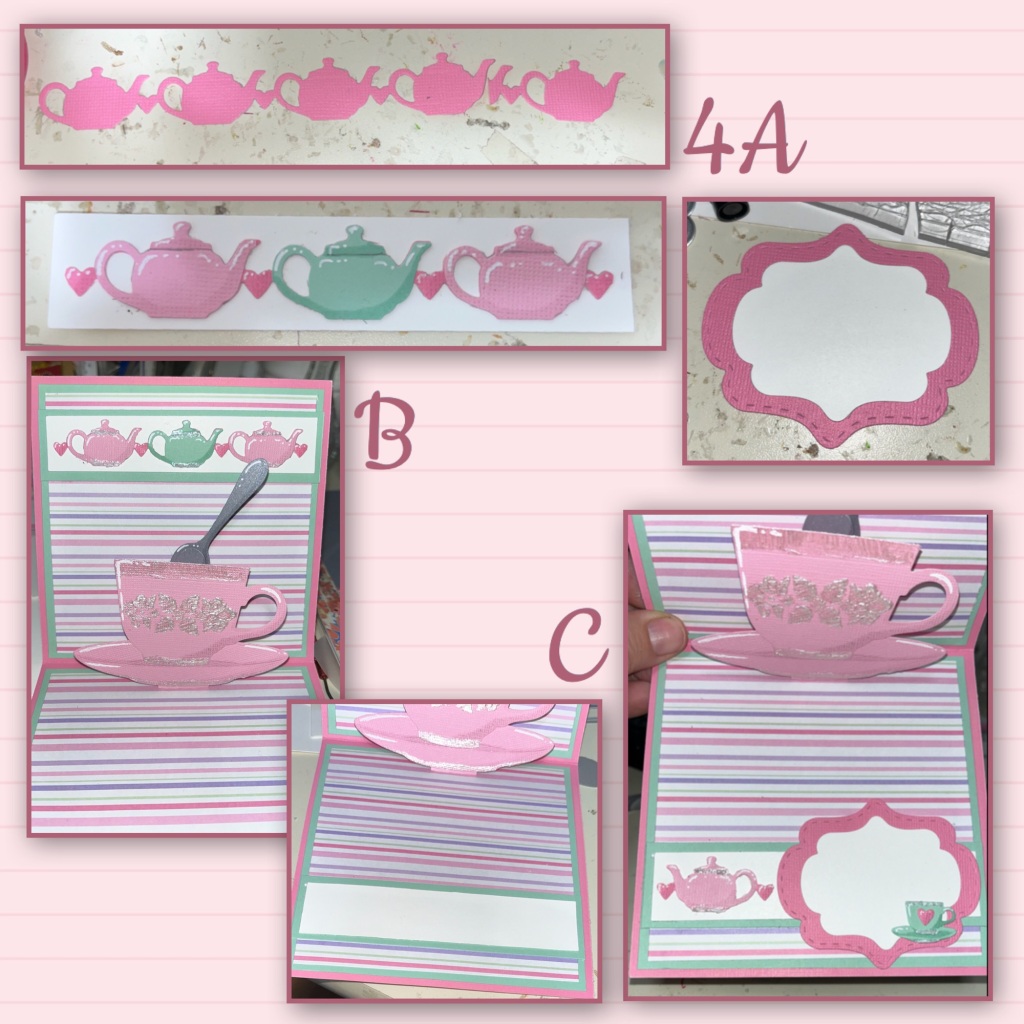
3A- I cut and started assembling the mechanism. I also cut the teaspoon from the same set.
B- add the mechanism and the cup, saucer and spoon. (Karen will have a video tutorial on the product page at the link ⬆️ in step 2A)

4A- I cut the teapot border from Tea and Coffee borders in the darker pink, green and lighter pink. I used the darker pink as the base and trimmed the lighter pink, and the green to create the border as shown. I added a little bit of the embossing paste, and I added shading with a Versa Mark Marker and highlights with a white Gelly Roll pen. I also cut a layered 2 Lorna labels as shown.
B- I added the tea pots to a border, green pieces are 5 1/4” x 1 1/4” the white piecescarec5” x 1”
C- using more of the pieces I created a border along the bottom as well, as shown.
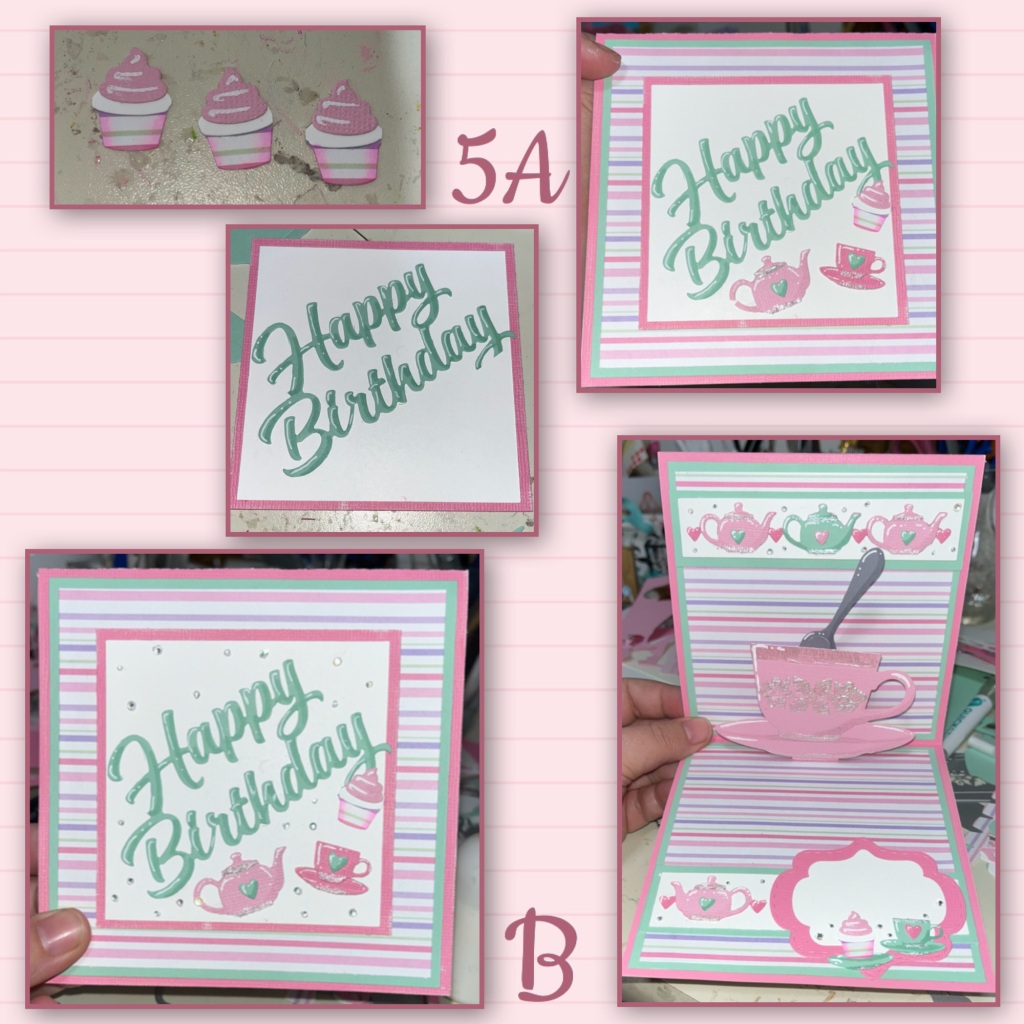
5A- I created some little cupcakes by using the new Baking Borders, I also die cut Happy Birthday and added them to a large square. The pink square is 3 3/4” square, and the white is 3 1/2” square. I added a leftover teacup and tea pot.
B- I added some itty bitty gems to the front and inside as well.
Other Tools used
