

It’s been a minute but I finally have a Craft Roulette inspired card. I had a lot of fun with this card, I made quite a few boo boos, but I continued through and I love how it turned out.
This week’s parameters are ⬇️⬇️⬇️ and I gave myself a couple other challenges as well. 1- besides the card base all of the other card stock had to come from my scrap bin. I have so much scrap paper I did not allow myself to cut from a full sheet. 2- use a die set that I have not used before, this is the first time I have used Karen Burnistons Family room Pop up , and 3- Mixed Media was a topic that was discussed on this weeks episode of Craft Roulette so I thought that I would give it a try.

The circles are little clear dots on the front, and the message space on the inside. The vegetable garden colours – orange pumpkin, red tomatoes, yellow corn, beans, green beans, peas, leaves, brown potatoes, blue sky. The screen element was tricky but the red fabric has a “screen” like weave to it, the ribbon has a bigger “screen” weave to it. The fluff is all over the trees, I used Flower soft to create this look.

All the fun is in the reveal, to see this card in action please check out my FACEBOOK page, feel free to join if you would like to share your own crafty creations. You can also see a video of this card on my INSTAGRAM page.
I am a pack rat, a lot of the mixed media products I used are from my stash and are years old.
1A- I cut the card base and panels to the dimensions below. My red cardstock had some of the edge cut out from a previous die cut but I knew it would be covered in the end.
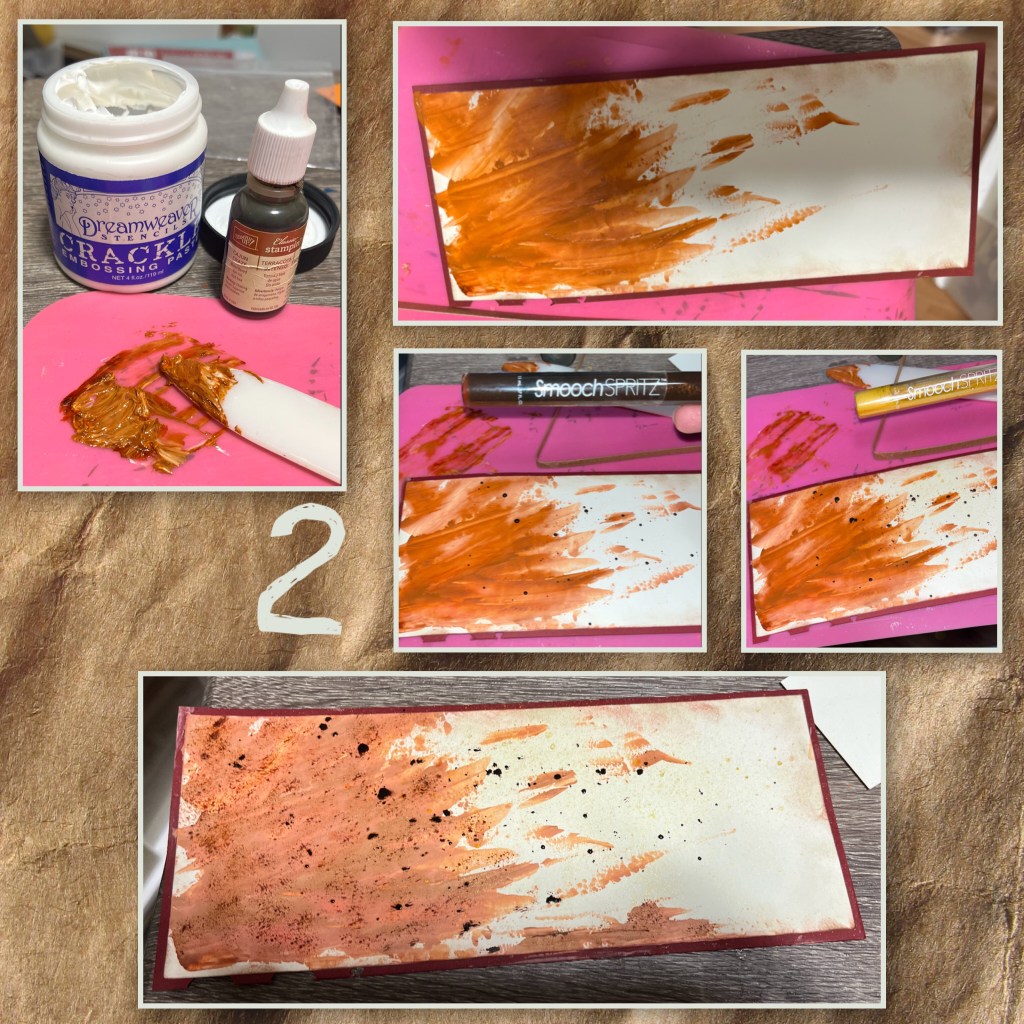
B- I sponged some brown ink around the edges of the vanilla piece.

2- I mixed some Cajun Craze ink with Crackle embossing paste and then spread it across the vanilla panel as shown. I spritzed some brown and gold Smooch Sptitz on the panel. I was hoping the embossing paste would crackle but I think because I added the ink it changed the consistency so when it dried it did not crackle. I still like the look. I added it to the red panel before adding the paste and spritz, If I were making this card again I would have finished the vanilla panel before adding it to the red panel.
3A- I die cut 2 Tiny Trees and their mechanism. I added shading with Versa Mark Marker and highlights with a White Gel pen.
B- I assembled the trees and added the Flower Soft to the branches.

4A- I diecut the pieces for the Family Room pop up, it was meant to pop up a couch and chair, I wanted two chairs.
B- I trimmed the sofa side as shown then glued the piece I cut off over the other half as shown.
C- assemble the chairs (Karen has a video tutorial on the product page at the link ⬆️ )

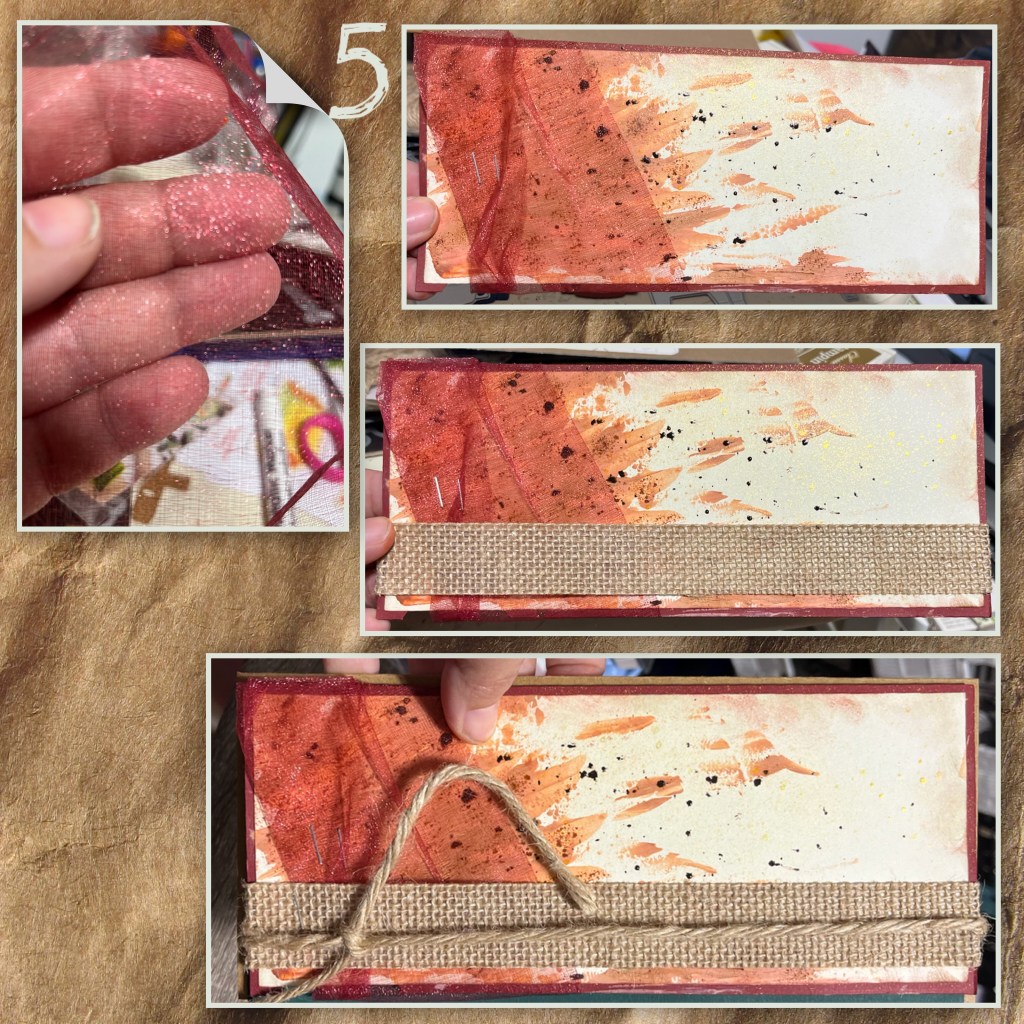
5- if you look close at the red fabric it has a screen like weave. I had to wrap it and staple it to the panel. Making sure it covers the red corner with the missing pieces. I added the fabric ribbon, then wrapped the thick twine around as well.
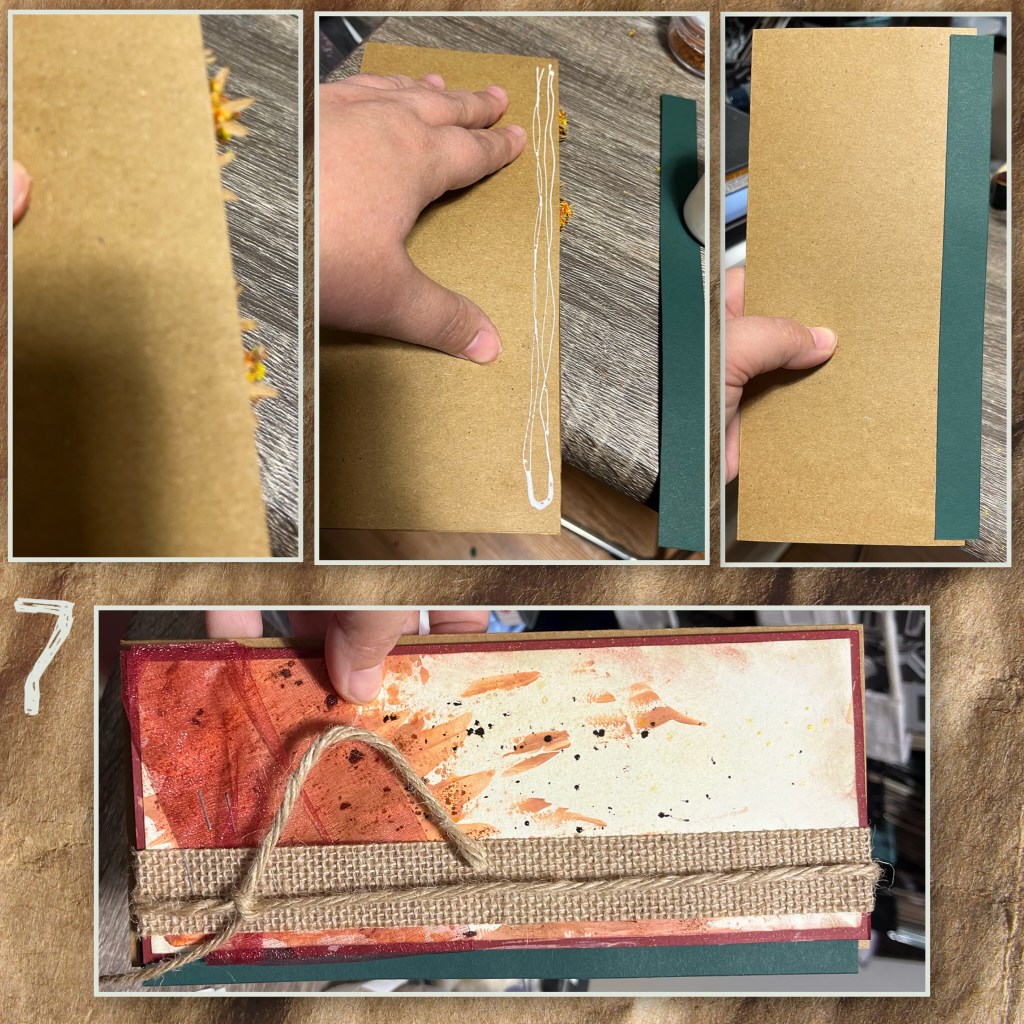
6A- I didn’t have enough of either of the green cardstocks to make 2 panels, I used both of them, the darker green is wider
B- I cut the ribbon in half to make it thinner and used it to cover the seams

And ooopppps, I tried to add the trees and they stick out the sides of the card soooooo
7- I added a green strip along the edge of the card to cover the trees, then added the panel over the front.
If I were doing this again I would have made the card wider to begin with. (Note this card won’t fit in an envelope now.)
8A- I originally added the chairs to the wrong side of the card. So I decided to put the trees here.
B- I used the Tiny Trees pop up fold splitter to add the trees (Karen has a video tutorial on the product page at the link ⬆️ )
C- I covered the damaged cardstock with glue, then added more Flower Soft
D- add the chairs.

9A- I cut an extra Tiny Tree mechanism from grey cardstock and drew some stones around it. I cut the fire from the Fireplace Pop up and trimmed as shown, then added to the ring.
B- this cute dog is diecut from the Dog house Tiny House add on added to the chair.
C- I had a glue issue where the fire ring glued to the card when it was closed and left a mark. I decided to cut some stones from the Tiny House set and added them around the ring as shown.

10A- I diecut the leaves from the Autumn Elements from all these fall colours, added shading and highlights, then added to the front making sure to cover the staples and the last few spaces on the red cardstock. I also cut “Happy Anniversary” from Word set 12- Anniversary . I added a couple of clear bubbles around the leaves.
B- I added 2 layered circles from the Circles Crosshatch


Other Tools used

Fabulous way your always do your step by step on your blog and this is amazing, the card is gorgeous.. xx
LikeLiked by 1 person
Goodness! That is quite a tutorial, but then I guess that would be expected because this is quite the card! KYB!
LikeLiked by 1 person
I really enjoyed you explaining your oops and how you kept going! Next time I want to throw out a project I’m gonna remember this and keep going 😂
Your cards are such an inspiration. I love this one and Thank you for taking the time to share it with us.
LikeLiked by 1 person