

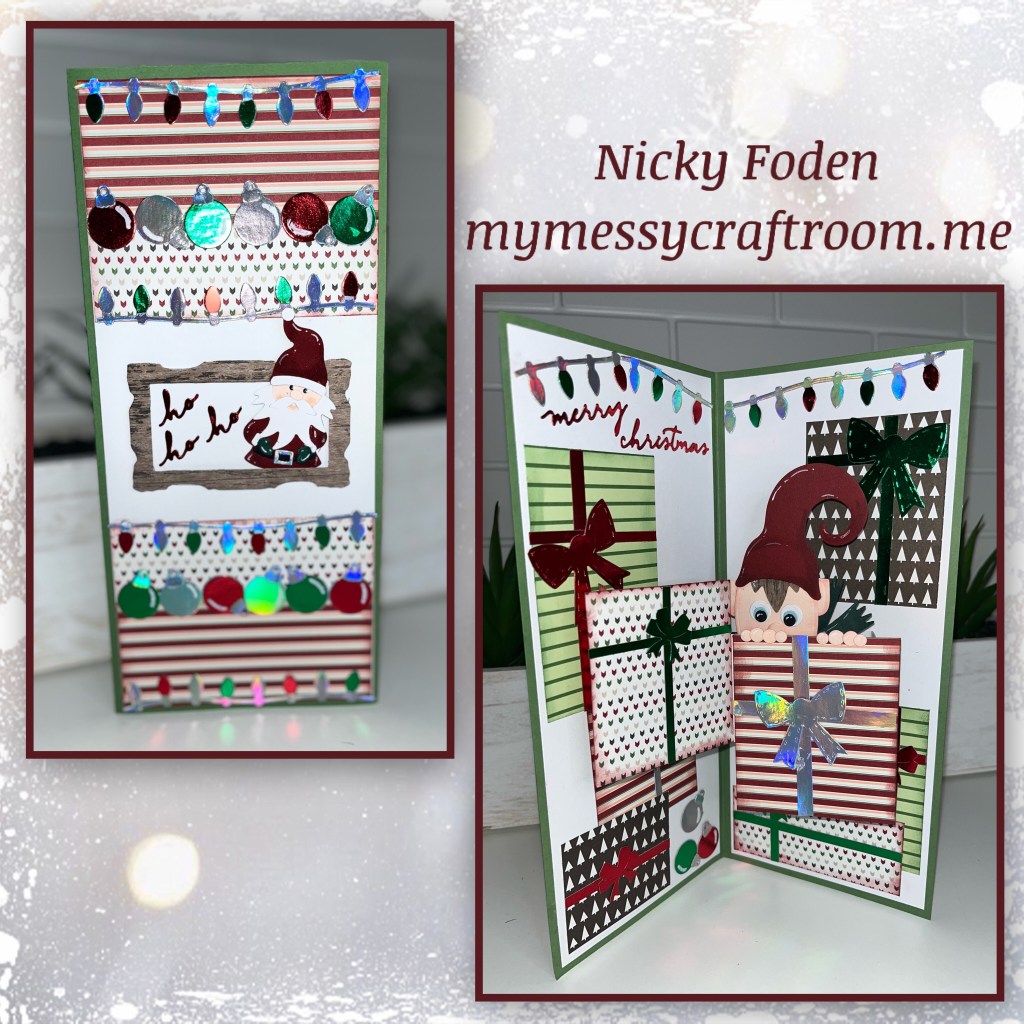
Still having so much fun with the Stocking Pop Up die set. This time I used the mechanism to pop up this adorable elf playing peek-a-boo in the stack of Santas presents. As you open and close the card the elf peeks up over the present he is behind.

All the fun is in the reveal, to see this card in action please check out my FACEBOOK page, feel free to join if you would like to share your own crafty creations. You can also see a video of this card on my INSTAGRAM page.
1- cut and score the card base
2- cut 4 white panels and add to the front back and inside of the card

3- I cut strips of pattern paper (retired Stampin Up paper pack)
4- add to card base as shown
5- using Christmas Borders 1 I cut out ornaments and Christmas lights from silver, green and red metallic mirror carstock, cardstock is from Michaels.
6- 1added the borders to the card as shownm using the silver die cuts for the border and adding red and green pieces to it

7- I die-cut a frame from the Slim Frames set from wood grain paper (retired Stampin Up). Santa is from the Gnomes and Santa set and “Ho ho ho” is from the new Small Script Cnristmas set.

8- cut and assemble the Stocking Pop up mechanism, don’t put the outer piece on yet. (Karen will have a video tutorial on the product page at the link ⬆️ )

9- I cut random sized Rectangles from the same paper pack as the strips on the front, and inked the edges. Add to the card. I then added outside piece of the mechanism. (I did not measure the rectangles)
10- cut the pieces that will fit over the outer mechanism, again I didn’t measure them, I wanted them slightly wider and taller than the mechanism, make sure when the card closes the rectangles stay within the limit of the card. The skinny strips to have to be slightly thinner than 3/4” and the same height as it’s matching piece.
11- add to the mechanisms. The gift on the left I lined up the bottom edge of the gift with the bottom edge of the mechanism. Add the slim piece on to the side of the mechanism to match. On the right side the top edge of the gift lines up with the top edge of the mechanism. Add the slim piece on to the side of the mechanism to match.

This brings me back to my punch art days
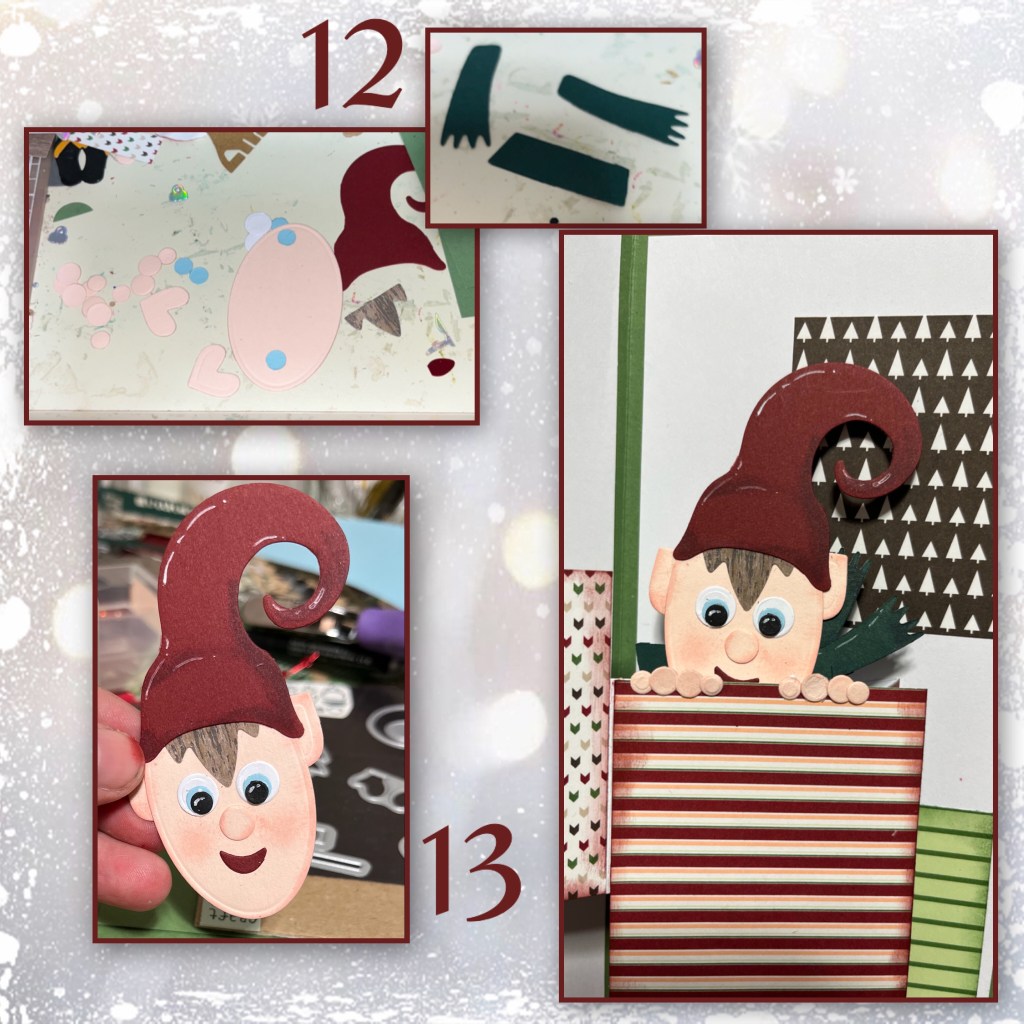
12- die cut the second smallest oval from Crosshatch Ovals, hat and hair from Mini Ball Add on Gnomes, scarf and all the little circles shown Snow Man Add one, the black circles are from the Mini Ball add on – Monkey and Lion.
13- I used a sponge dauber and added rosie cheeks, I’m used a Versa Marker for shading and white gel pen for highlights. Add add him to the mechanism.
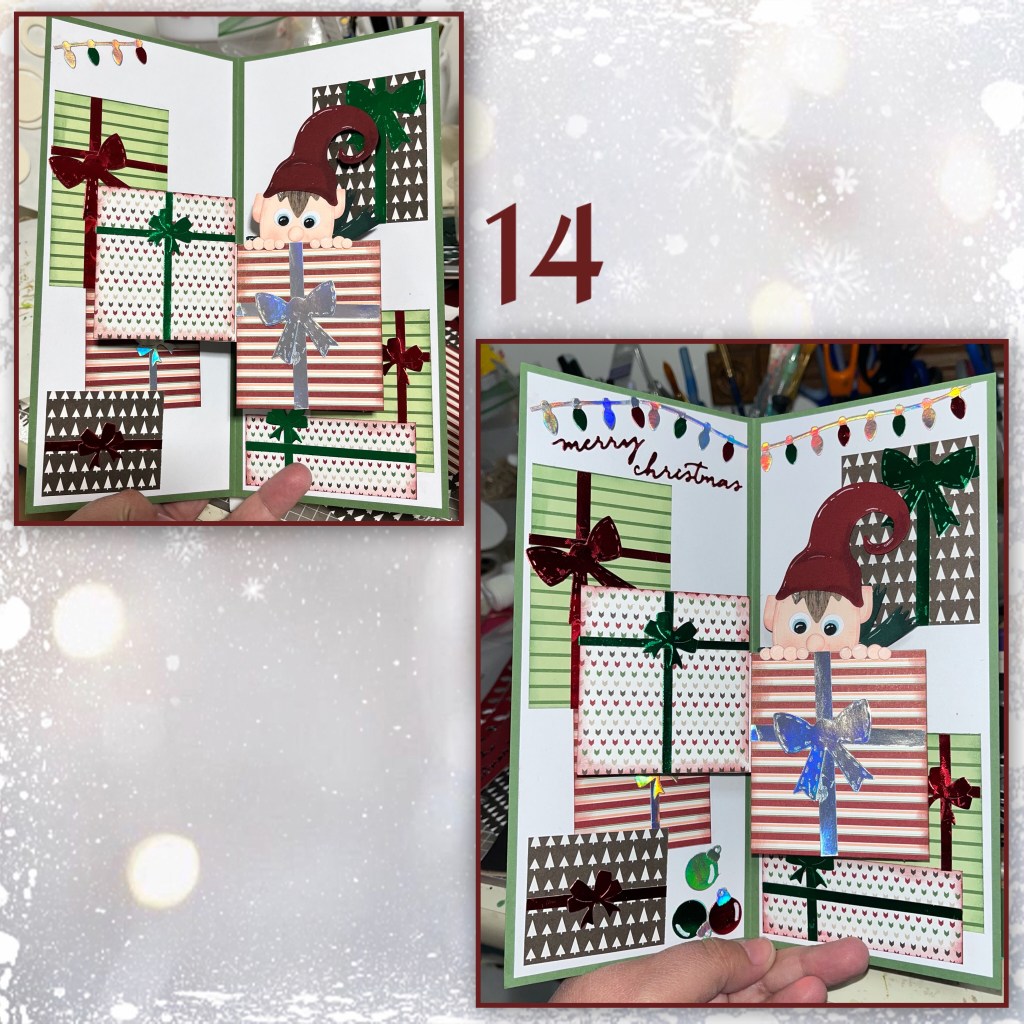
14- cut strips of the metallic cardstock for the ribbon, and the smaller bow is from the Stocking pop up, the large bow is from the Parcel Pop up. I added more lights and ornament borders to the inside. Merry Christmas is from the Small Script Christmas dieset
Other Tools used
