

What’s a birthday without a cupcake, or 2, or 6? I thought it would be fun to mix and match a couple of diesets while playing Craft Roulette and yes (as the title describes) the cupcakes on the front really float well they look like they float.
This weeks parameters are

So it’s obviously a birthday card, picnic colours (sky blue, green grass, red and orange for fruit that would be had at a picnic and of course CUPCAKES, I have a collection of cupcakes, and spots lol. For the black dots there are black circles in the patterned paper, there is a… on the inside message and I drew a couple of dots on the signature space.

All the fun is in the reveal, to see this card in action please check out my FACEBOOK page, feel free to join if you would like to share your own crafty creations. You can also see a video of this card on my INSTAGRAM page.
1- I dug out an old Creative Memories scrapbooking kit.
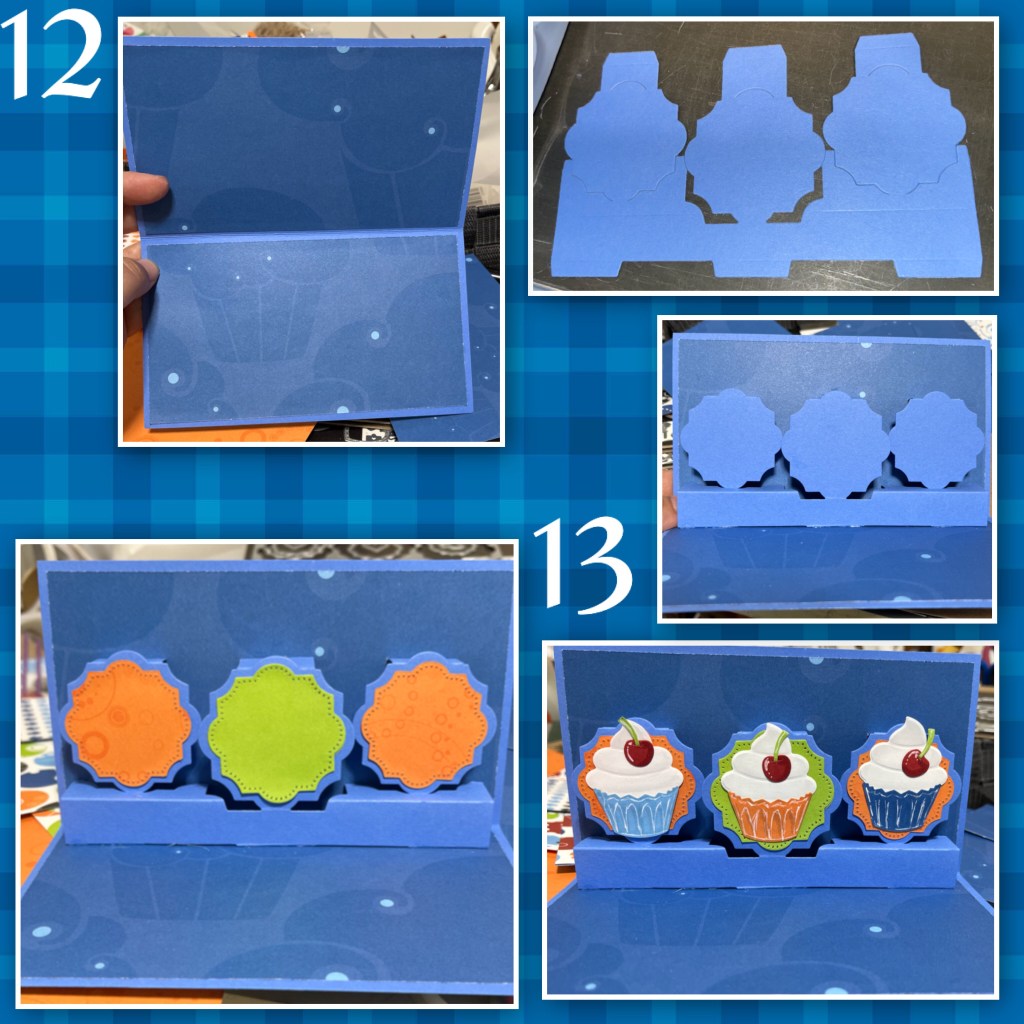
2- cut the card base as shown, cardstock is retired Stampin up

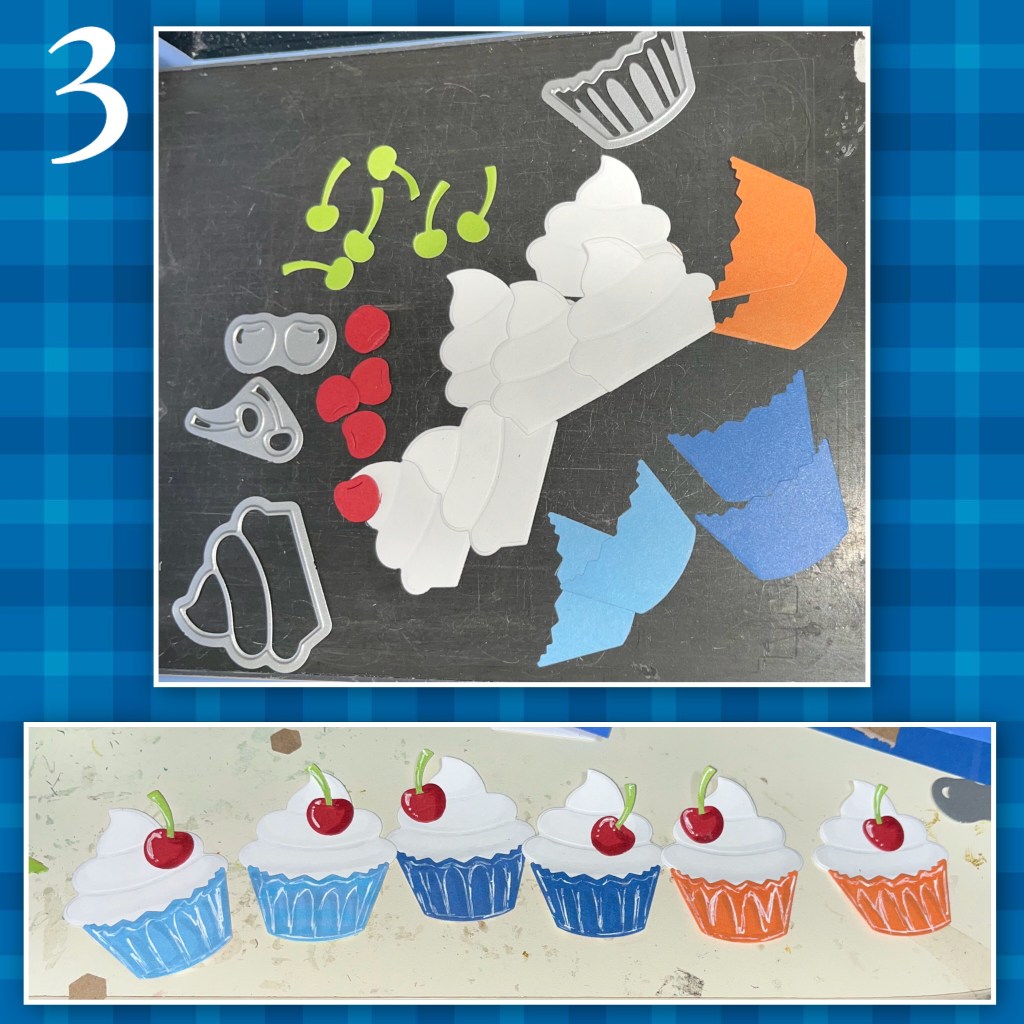
3- I cut out all the pieces below using the Cupcake Add on I added White gel pen and a Versamarker for most of the highlights and shading. I used a grey Chameleon marker for the shading on the icing.
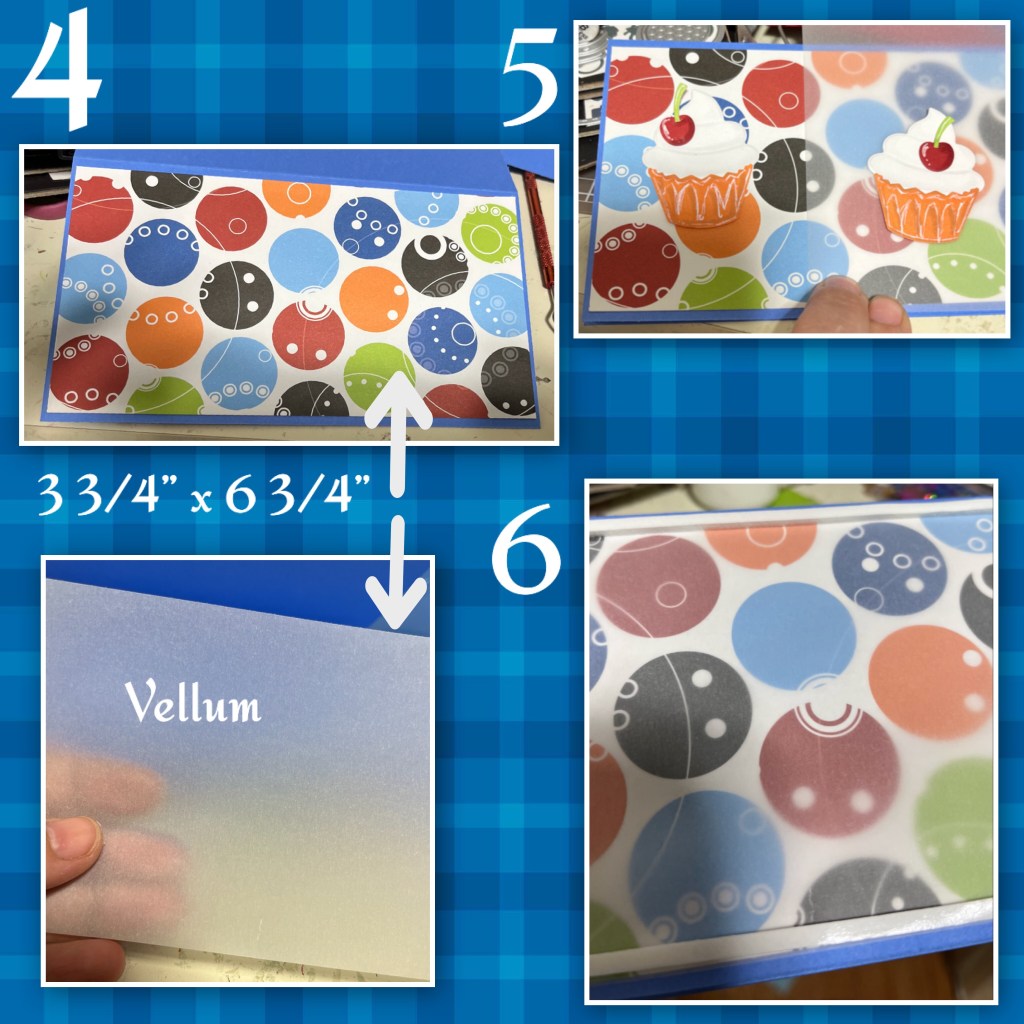
4- I cut the poka dot patterned paper for the front (dimensions below)
5- I thought the cupcakes didn’t pop enough against patterned paper so I decided to add a layer of vellum.
6- I added a thin foam adhesive around the outside of the patterned paper.
I got the original idea for the floating element in a shaker card from Jennifer McGuire , I made mine a little different. So the cupcakes have movement, but they will never flip upside down.
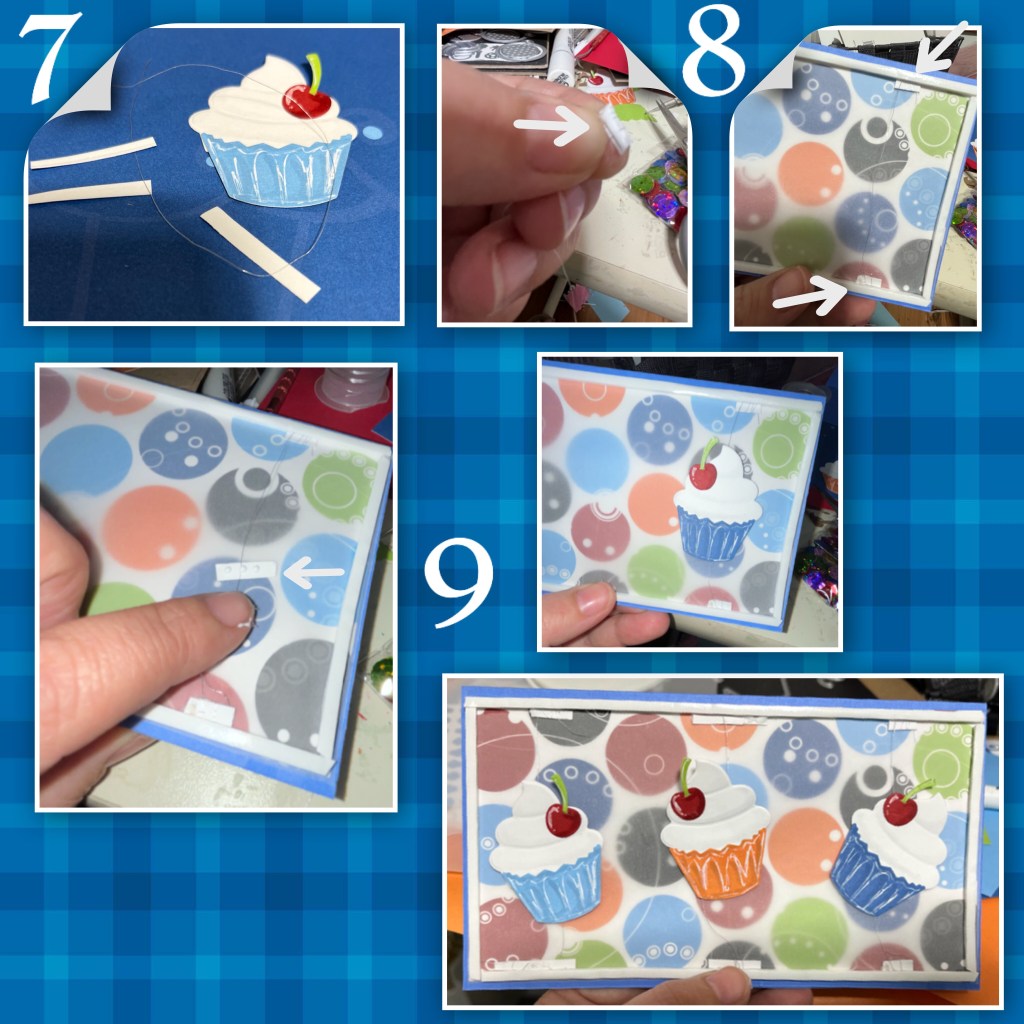
7- to make the floating cupcakes you need 3 small strips of cardstock, very thin thread, and a cupcake.
8- I like to wrap the ends of the threads around the thin pieces of card stock. That way it can’t come loose. I made one once where I just stuck it to the adhesive and it worked it’s way out. adhere one end at the top and one to the bottom, make sure the thread has a little bit of slack.
9- instead of washi tape (I find it doesn’t stay stuck) I used a little piece of cardstock and adhesive to stick the cupcake to the thread. I did the same to add the other three.
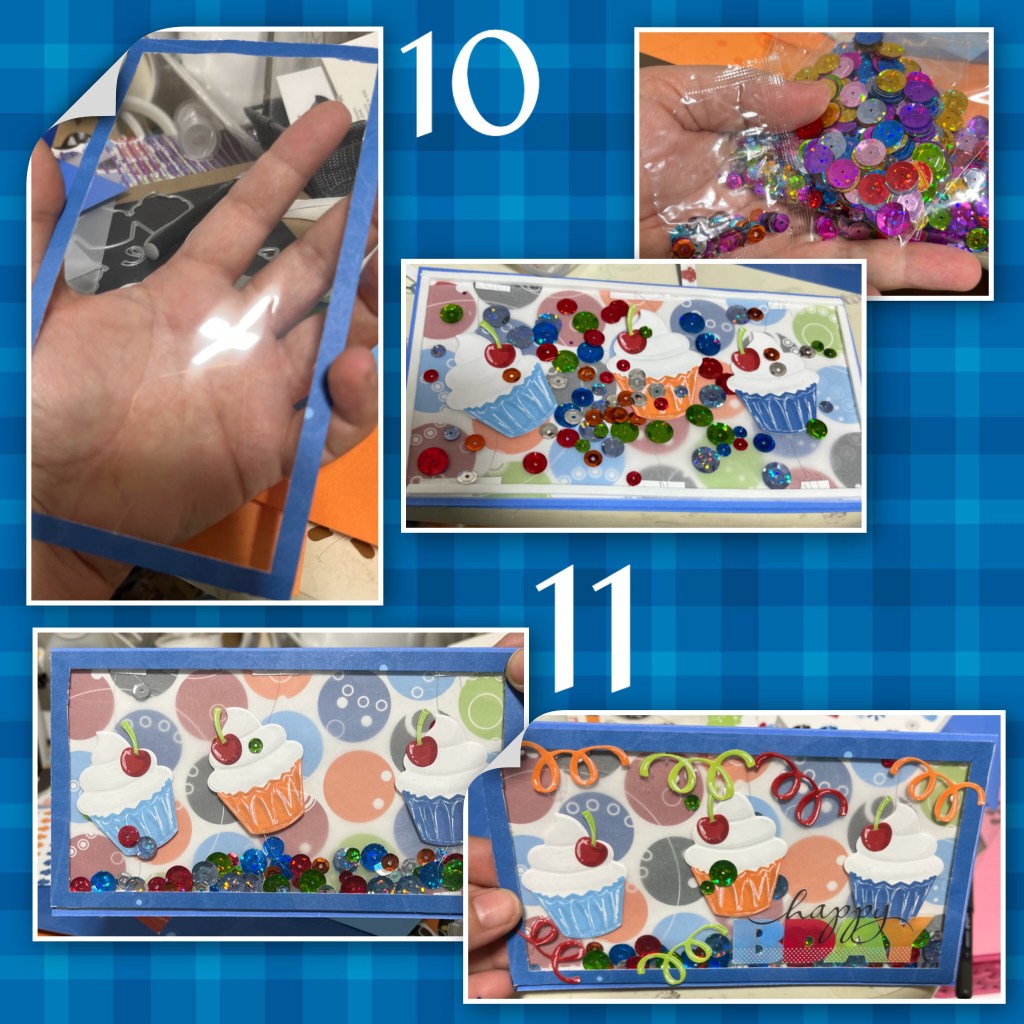
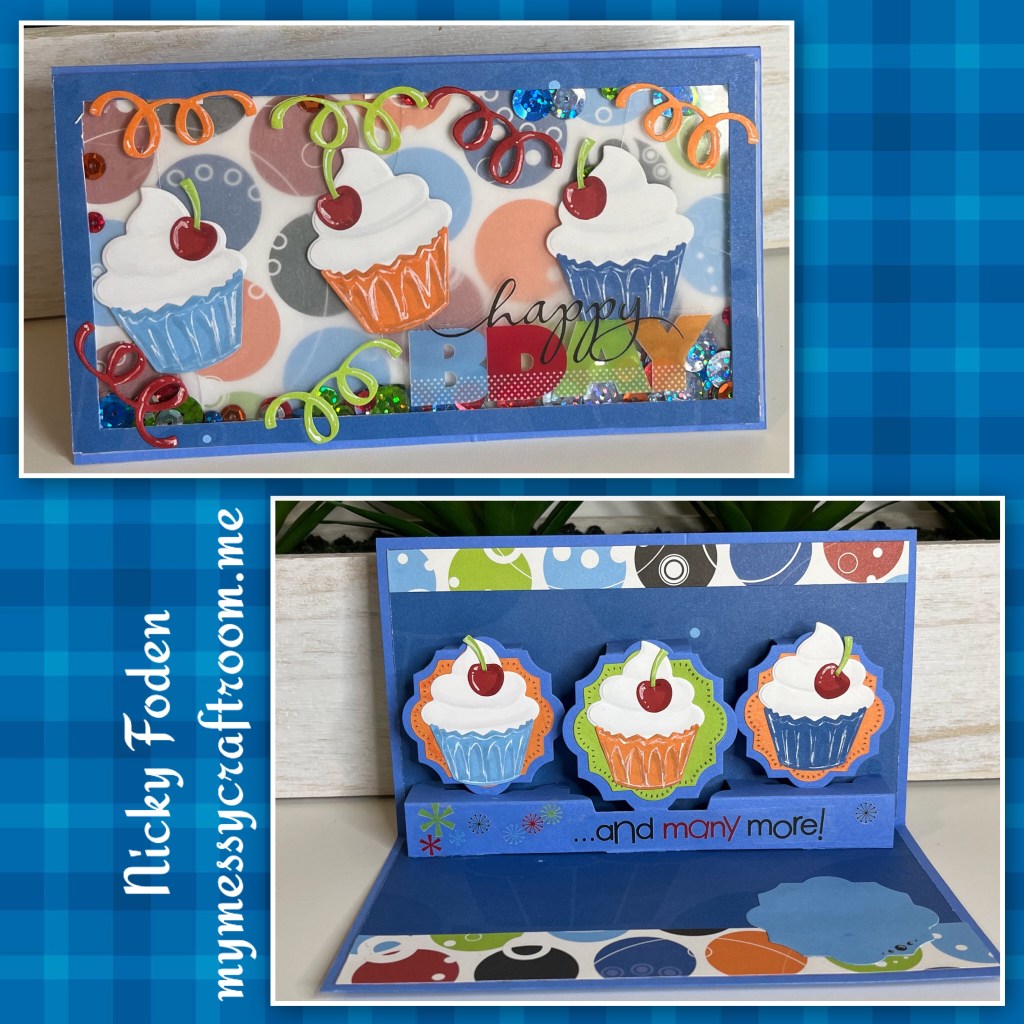
10- I cut a piece of acetate and made a frame to fit the front of the card. I dug out some dollar store sequins and picked out the colours that I needed
11- I added the acetate front and also added some streamers (the die comes with the cupcake set)I also add the “Happy BDAY sticker that came with the CM scrapbooking kit.
12- the blue patterned paper has cupcakes on it. I added it to the inside.
13- I diecut the Little Labels pop up and added it to the card (Karen has a assembly video at the link ⬆️) I added the green and orange labels from the same set and added the cupcakes.
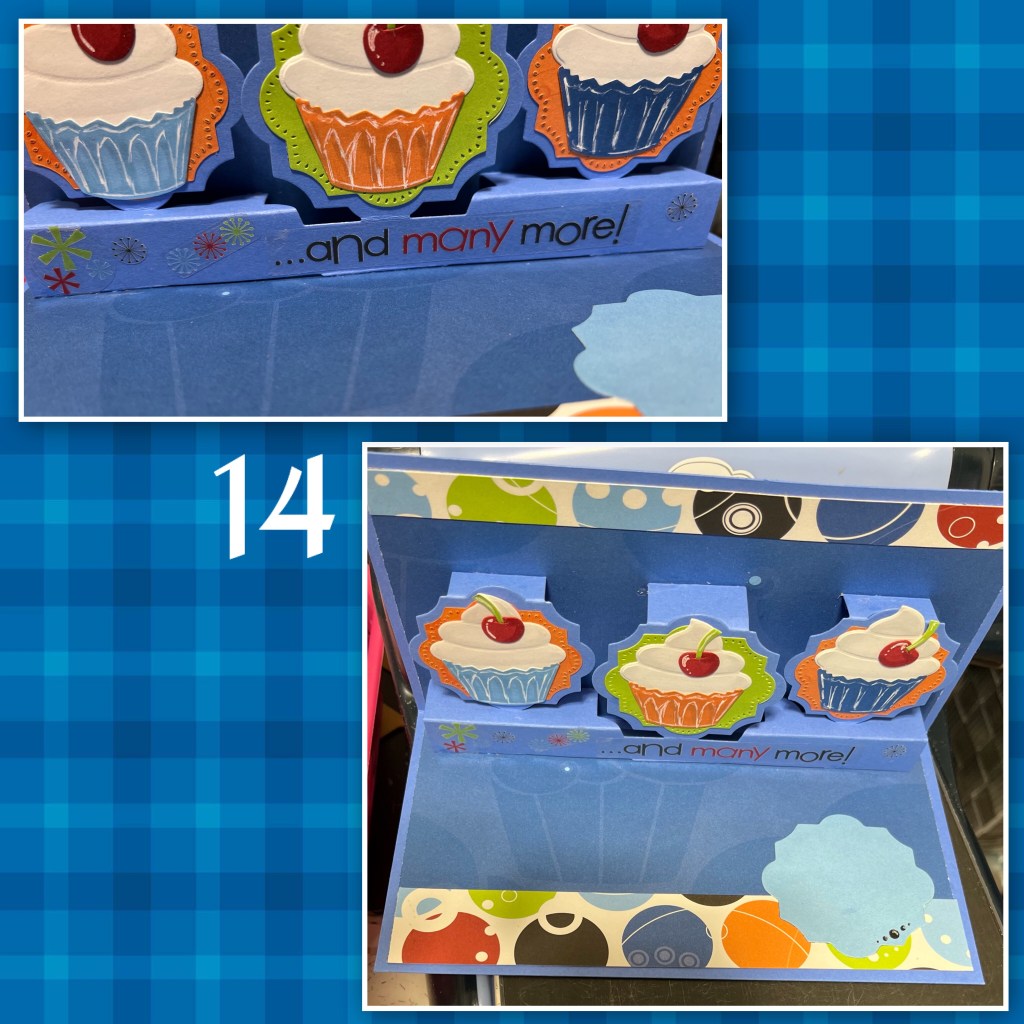
14- I added a few more stickers from the SB kit under the cupcakes. I also added a larger label from the Paper Frames set for a place to sign. I also used a fine tip black pen to add dots to this label.
Other Tools used

Love this!
LikeLiked by 1 person