
I had so much fun playing Craft Roulette last week that I thought it play again. This weeks perimeters are “mini drop down”, colours “from patterned paper”, it has to have a “bouquet”, and at least 3 layers. I chose to use the Pop n Swap die-set from Karen Burniston, and instead of a flower bouquet I made a balloon bouquet. I dug this patterned paper out of my stash, and I actually have 4 layers.

All the fun is in the reveal, to see this card in action please check out my FACEBOOK page, feel free to join if you would like to share your own crafty creations. You can also see a video of this card on my INSTAGRAM page.
1- the paper and card stock is from my stash and are all different companies
2- the card base is 11” x 5 1/2” scored at 5 1/2”. I cut 2” from the top of the front flap

3- Layer, Red 5 1/4” x 5 1/4” X 2, 5 1/4” x 3 1/4” X 2
Blue 5” x 5” X 2, 5” x 3” X 2
Patterned paper 4 3/4” x 4 3/4” X 1, 4 3/4” x 2 3/4” X 2
Not necessary but I cut the insides out to use for the balloons.

4- add all the layers to the card base.

5- cut, fold, assemble and add the Pop n Swap to the card base as shown (video directions can be be found HERE)
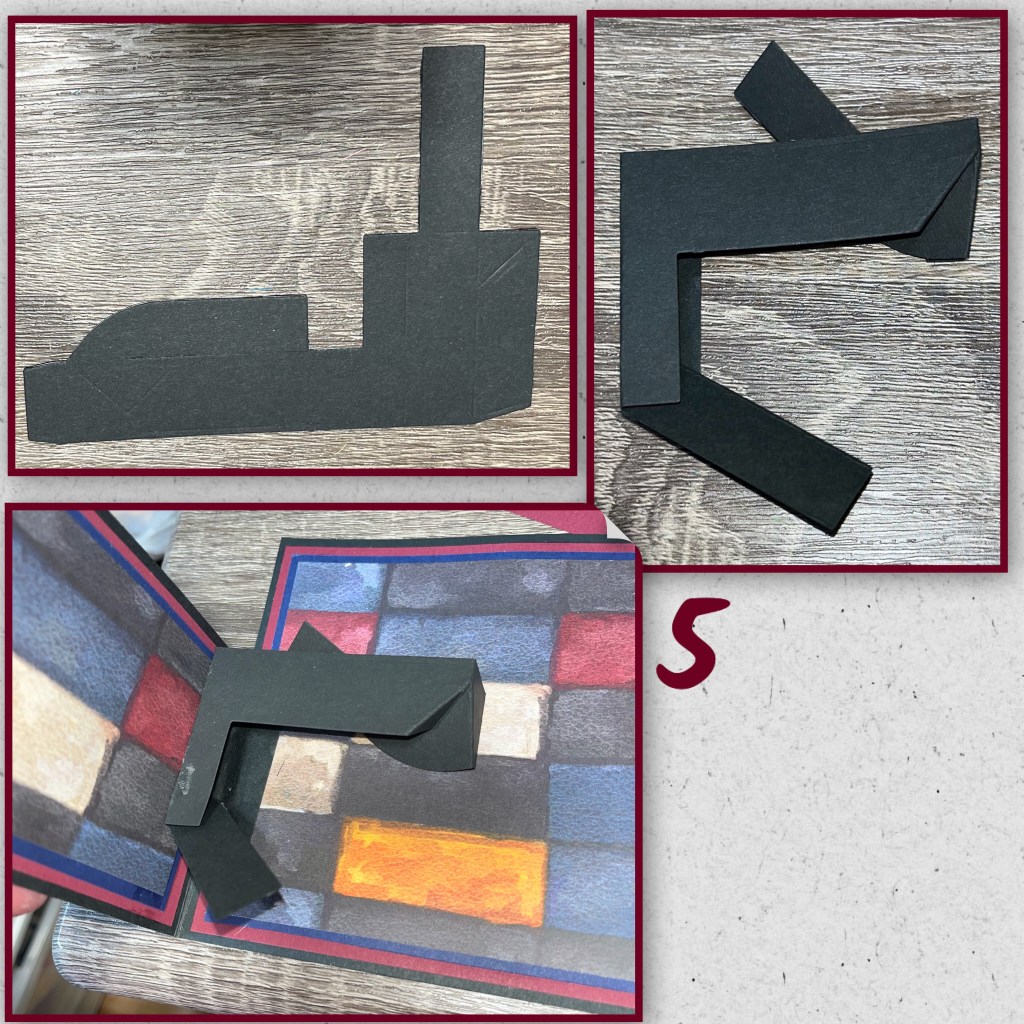
6- I cut the black rectangle using the large rectangle from the Pop n Swap, I cut the red rectangle a little smaller. I also diecut Happy Birthday and the Happy Birthday Shadow, and added them to the card over the mechanism

7- I cut a black and clear rectangle using a die from the same set, the clear one will be used with the balloons from the Balloon Collage add on and balloon and streamers from the Big Birthday Charms
8- the black one I used with a smaller grey rectangle, cut from the same dieset and “to you” from Word set 2 Birthday

9- I added the black rectangle to the bottom arm of the mechanism first, I ended up with the words being catch points so I add 2 little half bubbles to the bottom back side of the Happy Birthday rectangle. Now the bottom rectangle on the bottom arm glides right under.

10- the clear rectangle I added with double sided tape to the top arm. Make sure the arm will move freely, I added the balloons one at a time making sure the will fit when the arm goes down behind the large rectangle.

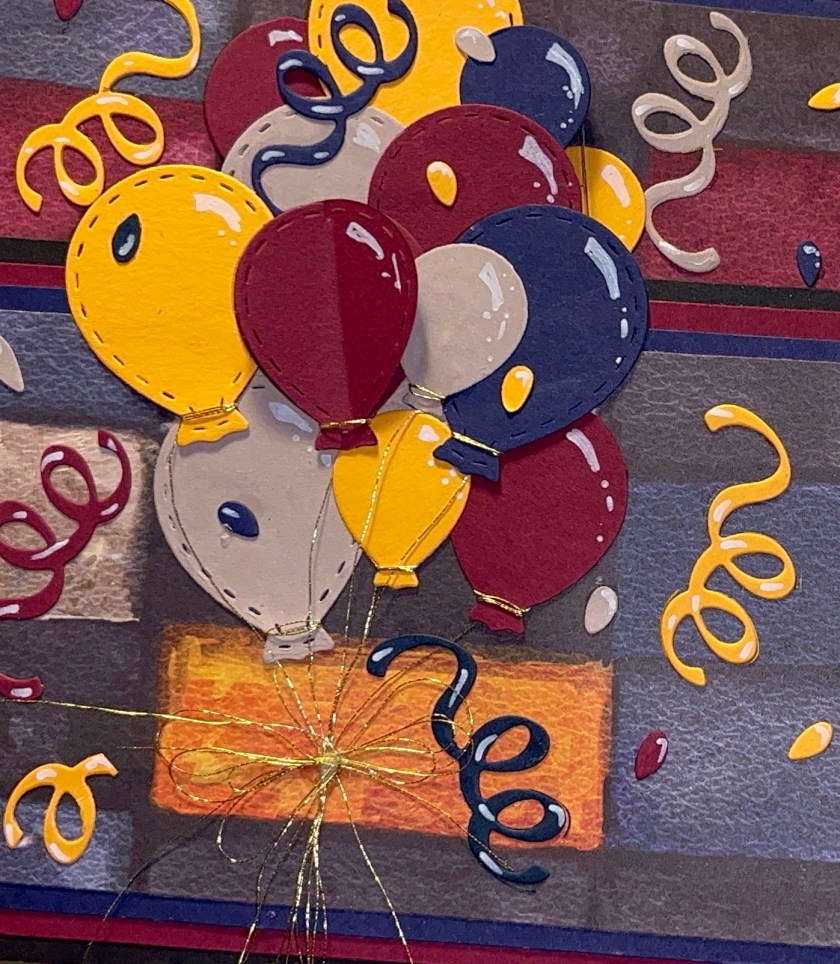
11- I added gold thread to the balloons that will be going on the front. I added them as shown, as well as the streamers.

12- the pieces that fell out of the streamers I used as confetti, I added white highlight to the balloons and added a few pieces behind the balloon pop up to fill some space. I tied the gold threads together and made a bow separately then glued it on.

Tools

This is stunning Nicky love your enthusiasm to show us all how these are created on here… x
LikeLike