
SURPRISE!!!! It’s a February mini-release, and it is so fun. It definitely has a beachy feel but the Little Twist Panel is very generic and can be used for any occasion.

A perk to being on Karen Buristons design team is we get the diesets in advance so we can have plenty of cards made in time for the sneak peek, so the day I got them I could not wait to play. Even though this is a Christmas card it could easily be made into a birthday, anniversary, just about anything.


All the fun is in the reveal, to see this card in action please check out my FACEBOOK page, feel free to join if you would like to share your own crafty creations. You can also see a video of this card on my INSTAGRAM page.
1- I found this pretty pink striped paper and thought it would be great to use for this card. The card base will be a 8” x 4” card, I cut the patterned paper to 7 3/4” x 3 3/4” and I cut 3 with stripes and one without.
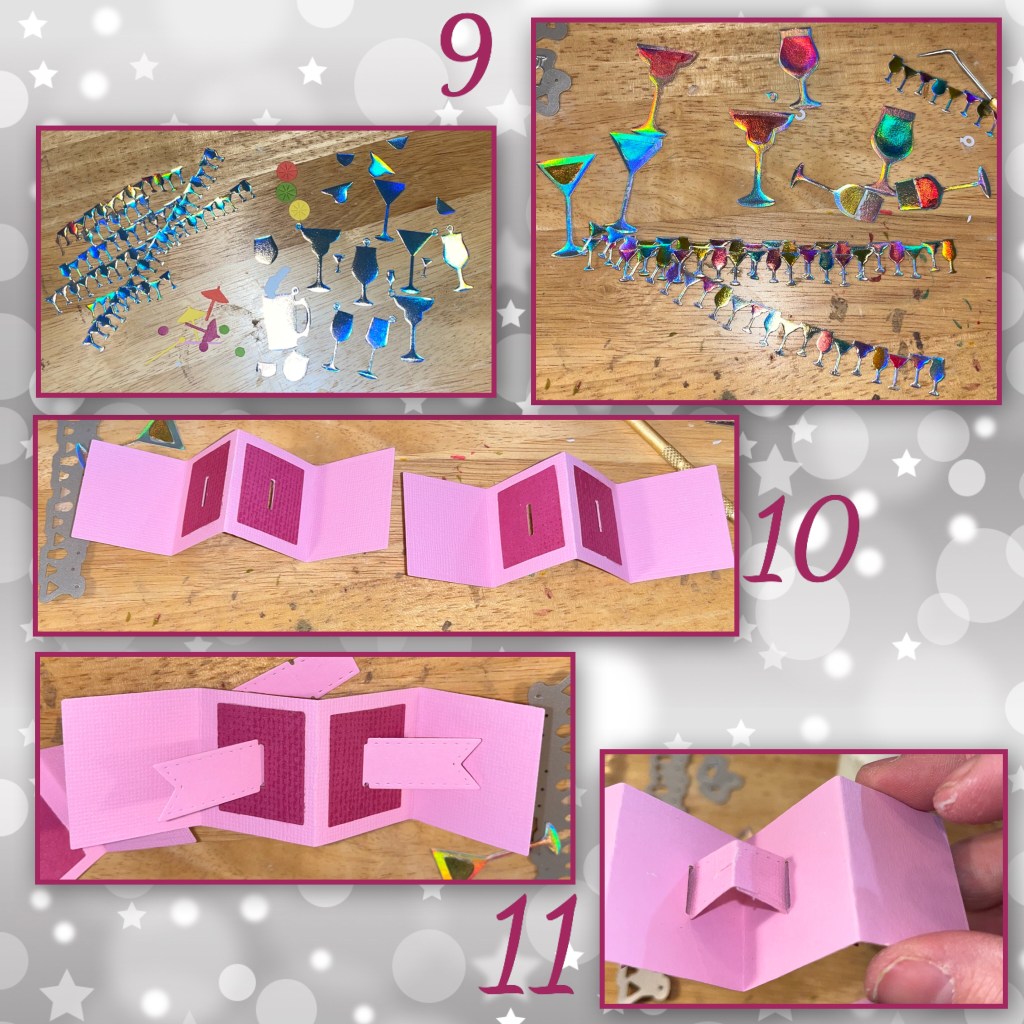
2- I cut out the pieces from the new Little Twist Panels die set to make the mechanism, panels, and the pieces needed to add to the panels (frames, squares, and banners)
3- to add the banners they they need to go through the slots in the center 2 panels, so the decorative squares will also need to have the slots cut. So they will need to be cut with the panel die and the square die

5- fold the mechanism as shown, the arms need to fold up and in with the mechanism is folded closed
6- so I had only read the directions once then hit the ground running so I measured the center of the card and drew a dot, and then the centers between the ends of the cards and the middle dot, and drew dots, so there are three dots. What I should have done was make sure there was at least 1 1/2” between the 2 mechanisms. When the card opens the inside panels do touch each other, but not too bad. I should have spaced them out a little bit more.
7- added one of the mechanisms
8- add the second mechanism

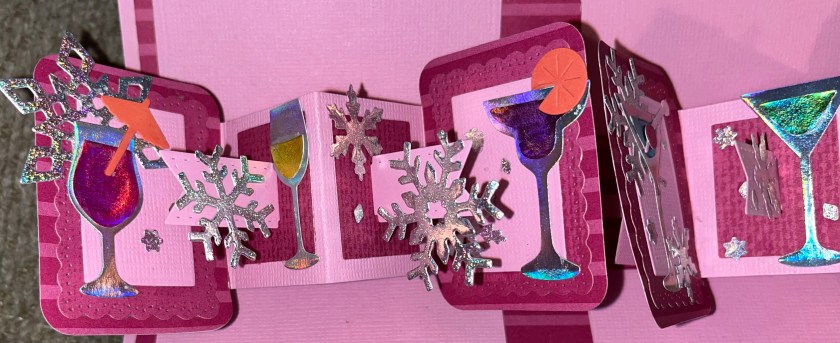
9- diecut the cocktails from the Happy Hour die set and the cocktails border from the new Beach Borders dieset from holographic cardstock. The lemon/lime/orange/ wedges, umbrellas are cut from cardstock. I coloured in the beverages with sharpie markers to get the bright vibrant colours.
10- fold the panel piece and add the squares over the slots, as shown.
11- add the banners to the slots, you will need to fold in the end of the banner to get it through the slots, the adhere the tabs from the 2 pieces together behind the panel.
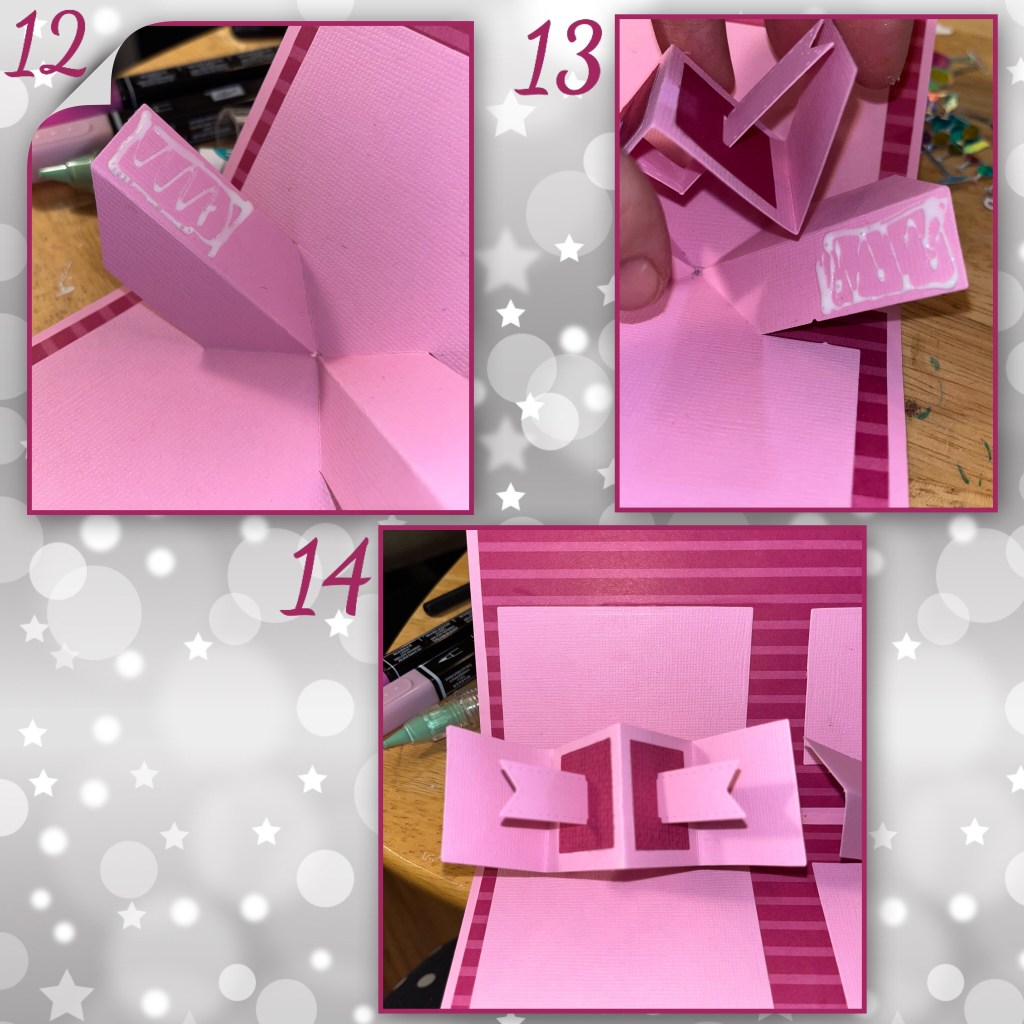
12- to add the panel to the arms add adhesive to the left arm as shown, then line up the top left corner of the long panel to the arm.
13- add adhesive to the right arm as shown, then line up the bottom right corner of the long panel to the arm
14- what it should look like
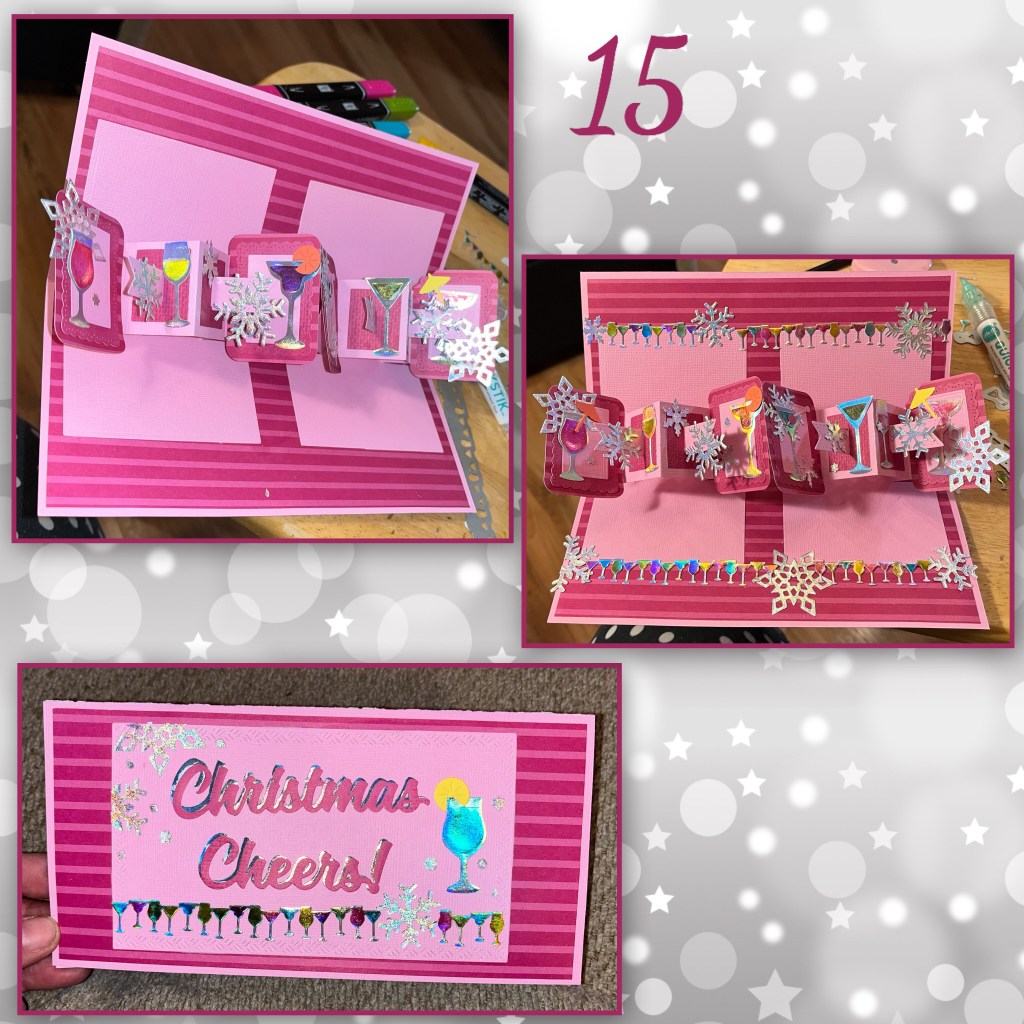
15- now time to decorate, I added all the pieces that I have diecut above, and also some holographic snowflakes left over from another card. On the front I diecut Chirstmas, from the Merry Christmas dieset and Cheers from the Cheers set, I gave them both a holographic shadow. The little sparkles that are around are the confetti bits that came out of the snowflakes.
All the die cuts used are from Karen Burniston
Winter Charms snowflake
Holiday Charms snowflake
Merry Christmas Christmas
Cheers cheers!
Tools

Nicky amazing card love the inside I have one similar but assembling it was a pain but you make this look a breeze and stunning. After seeing your page here I will try again… same brand..
LikeLiked by 1 person