
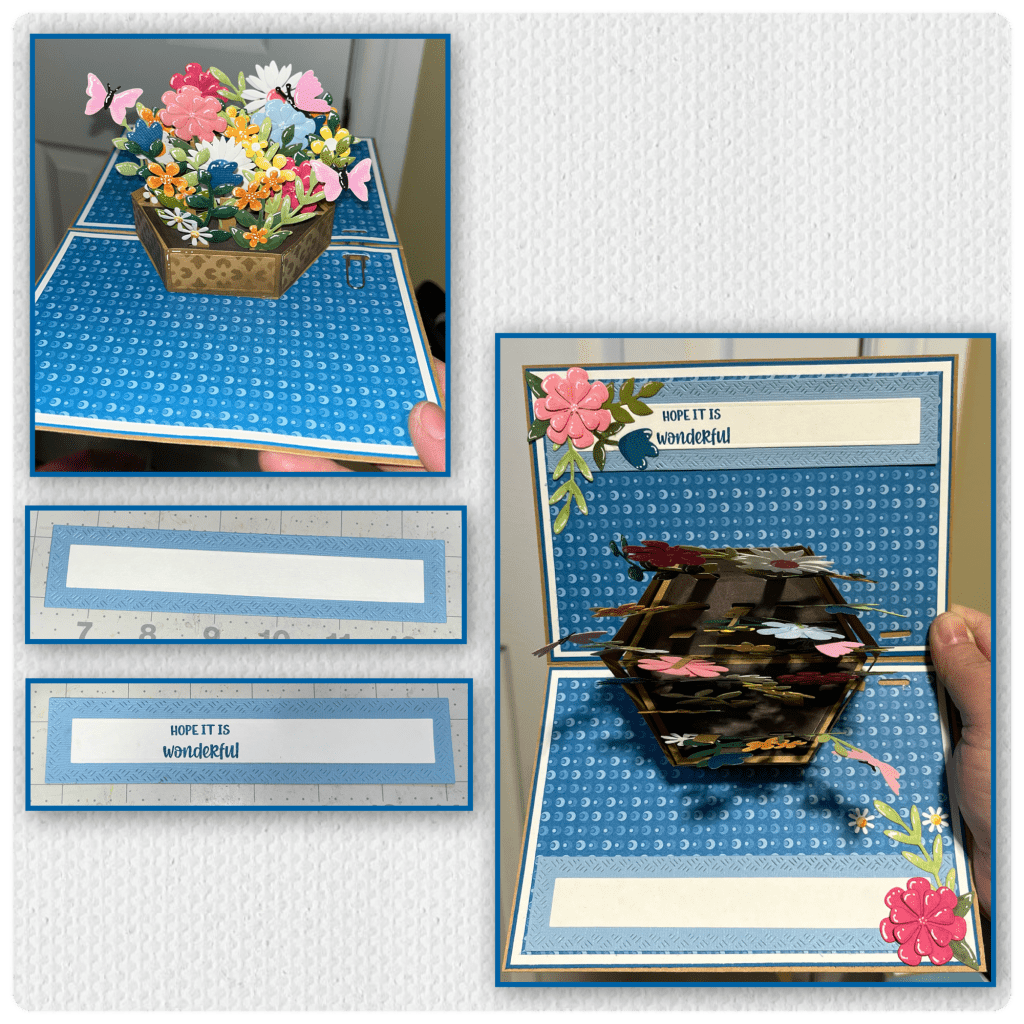
Welcome crafty friends to my blog, today I am sharing my take on Karen Burnistons design team challenge. This month’s challenge is “Set the Stage” and we were to make a card using the new Stage Pop Up die set. I decided to make a flower basket and adding it to the inside of a card. This is what I came up with.
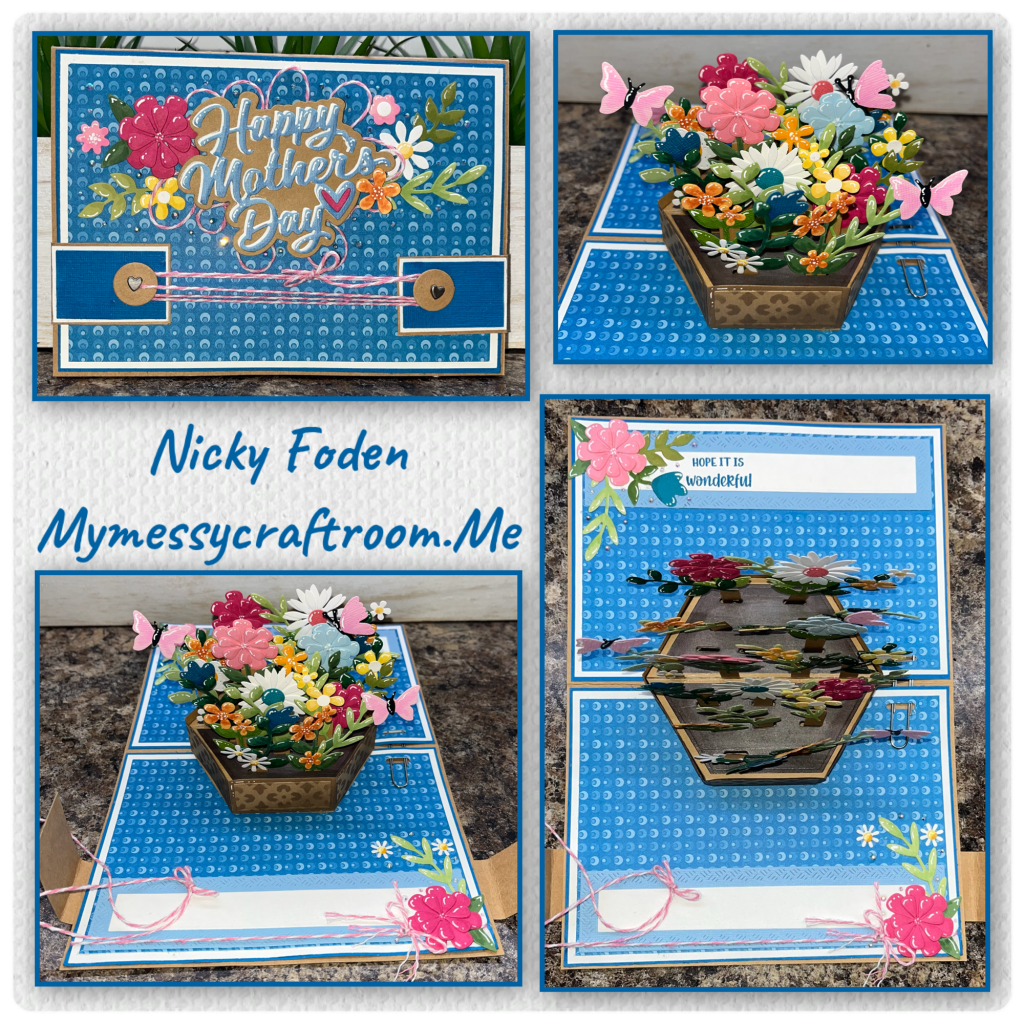
All the fun is in the reveal, to see this card in action please check out my FACEBOOK page, feel free to join if you would like to share your own crafty creations. You can also see a video of this card on my INSTAGRAM page.
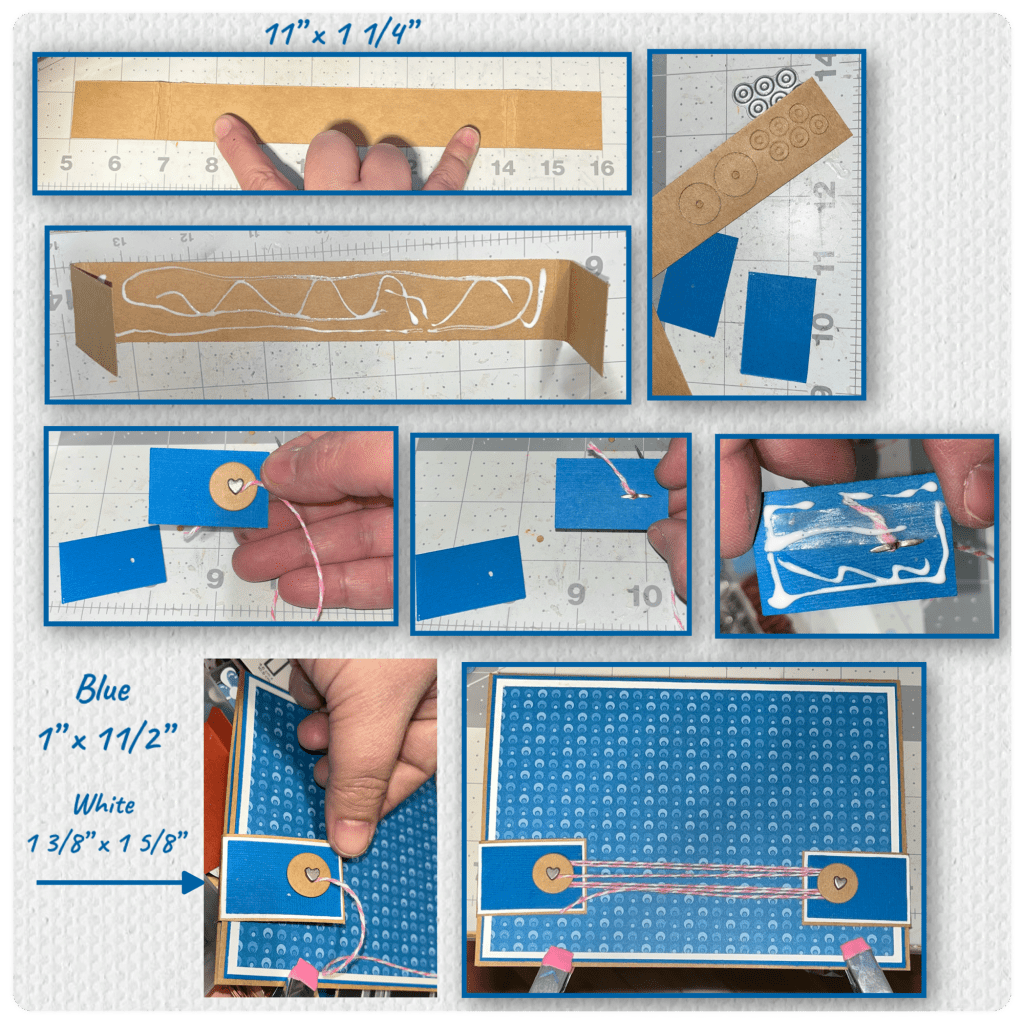
I found this pretty paper and then dug through my stash to find coordinating card-stocks. I cut the card base from kraft cardstock, and cut the layers as shown below.
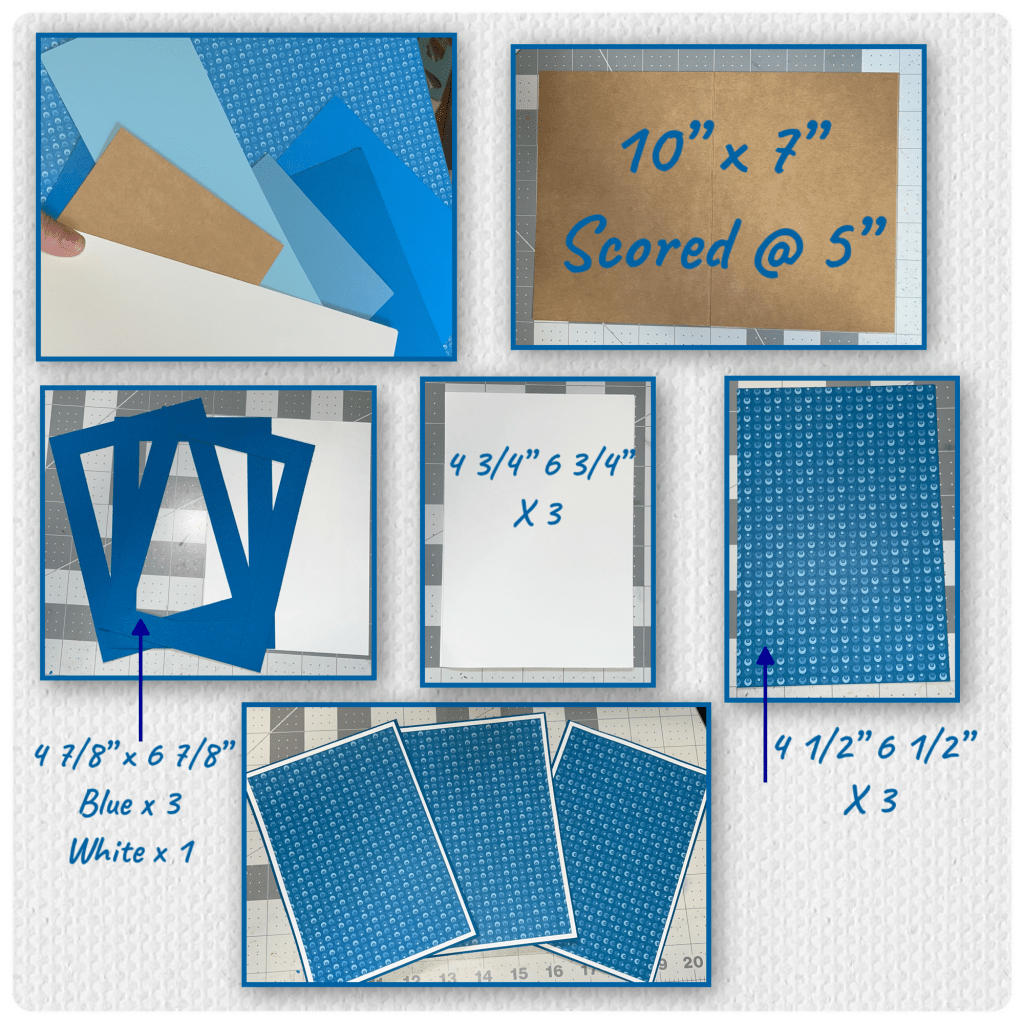
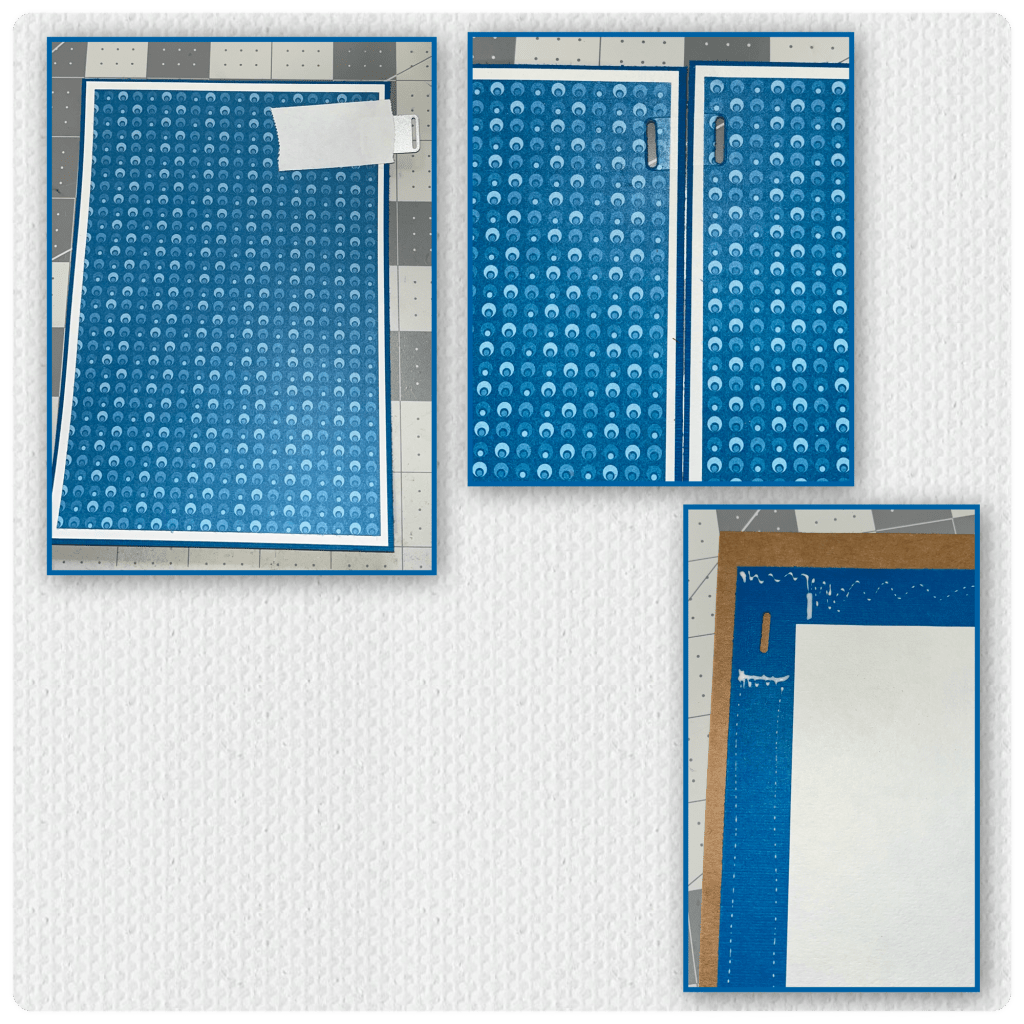
I wanted to try the paper clip slots but because the card base was too big to run through my diecutting machine I thought I would try doing it this way. Using the die from the Display Helpers I cut into the panels one at a time. When adding the panels to the card base I made sure not to add glue directly round the slots so the paper clip will have space. Sorry I am missing a few photos but I added the panels to the front and inside, I put a plain white panel on the back.
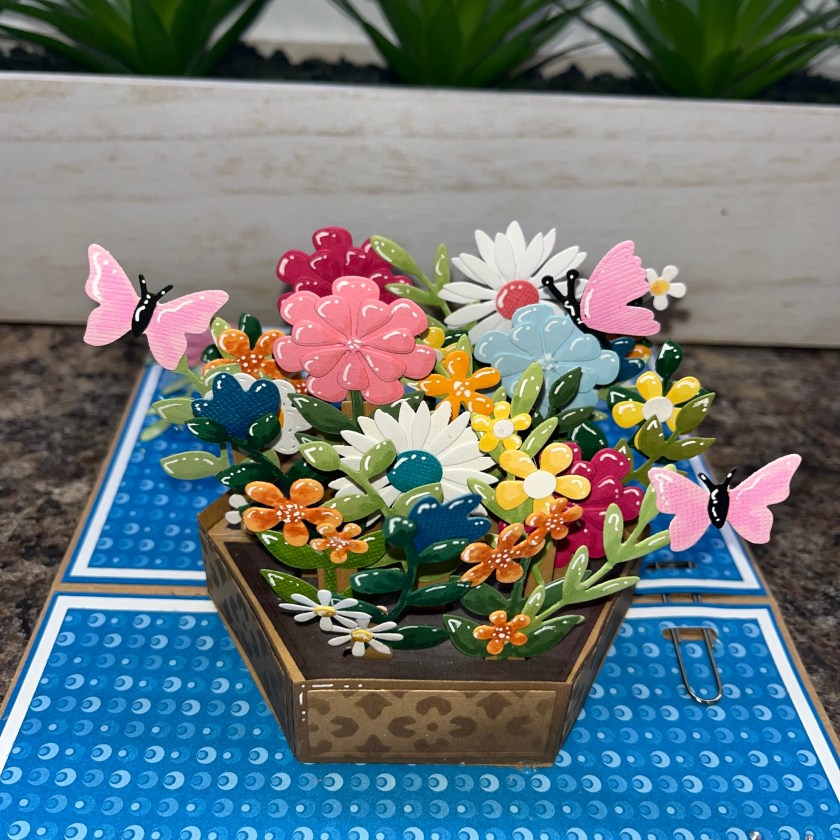
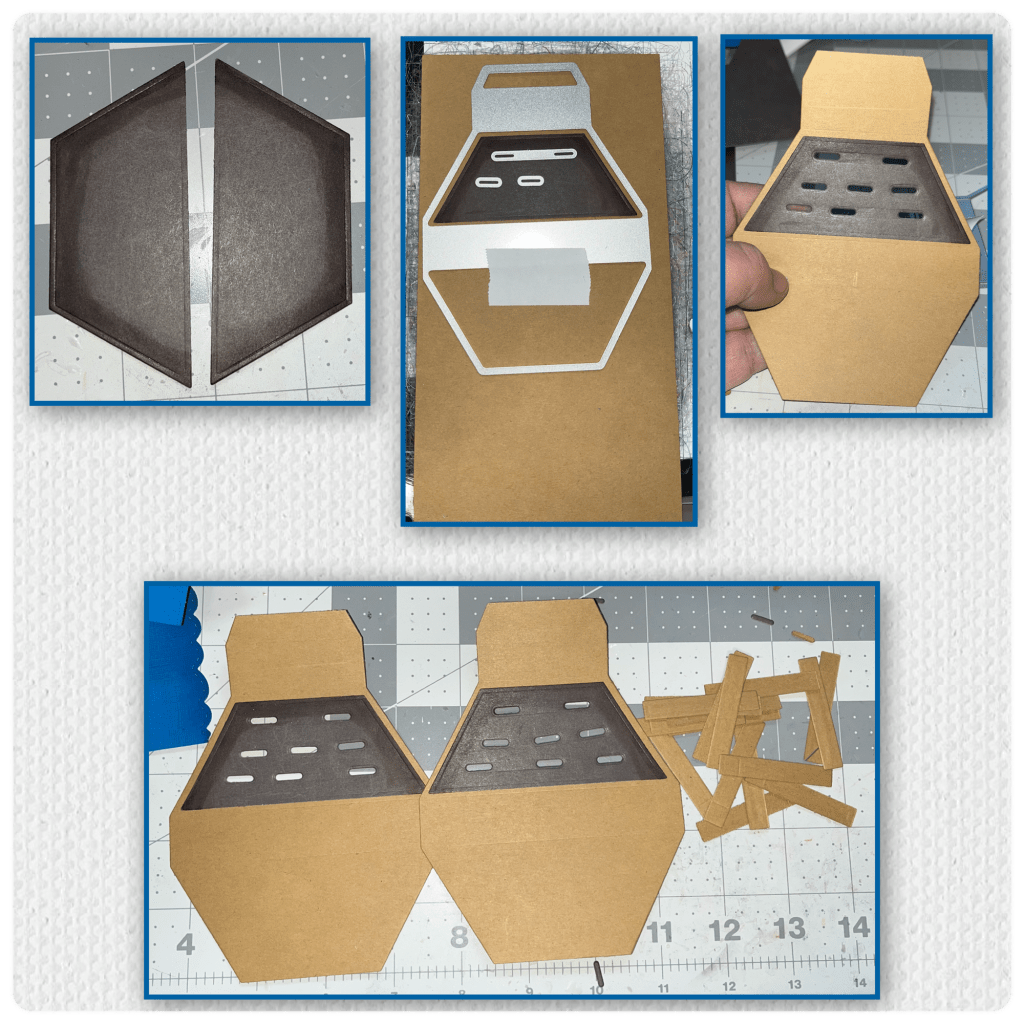
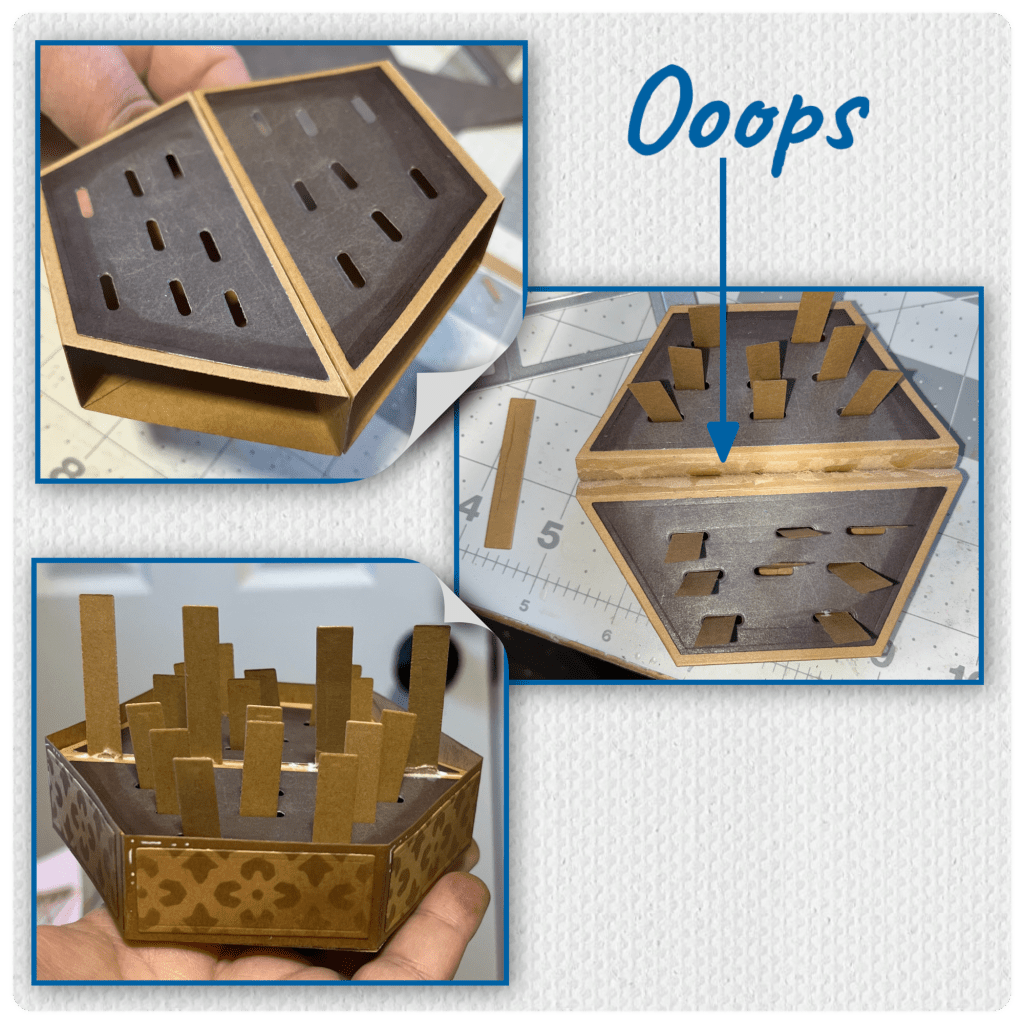
I decide on working on the basket next. I cut out the pieces of the Stage Pop up (Karen has a video tutorial on the product page at the link ⬆️ ) I wanted it look like there was dirt inside so I cut out the dark brown top and inked the edges. I made sure to have a lot of slots and tabs to add inside.
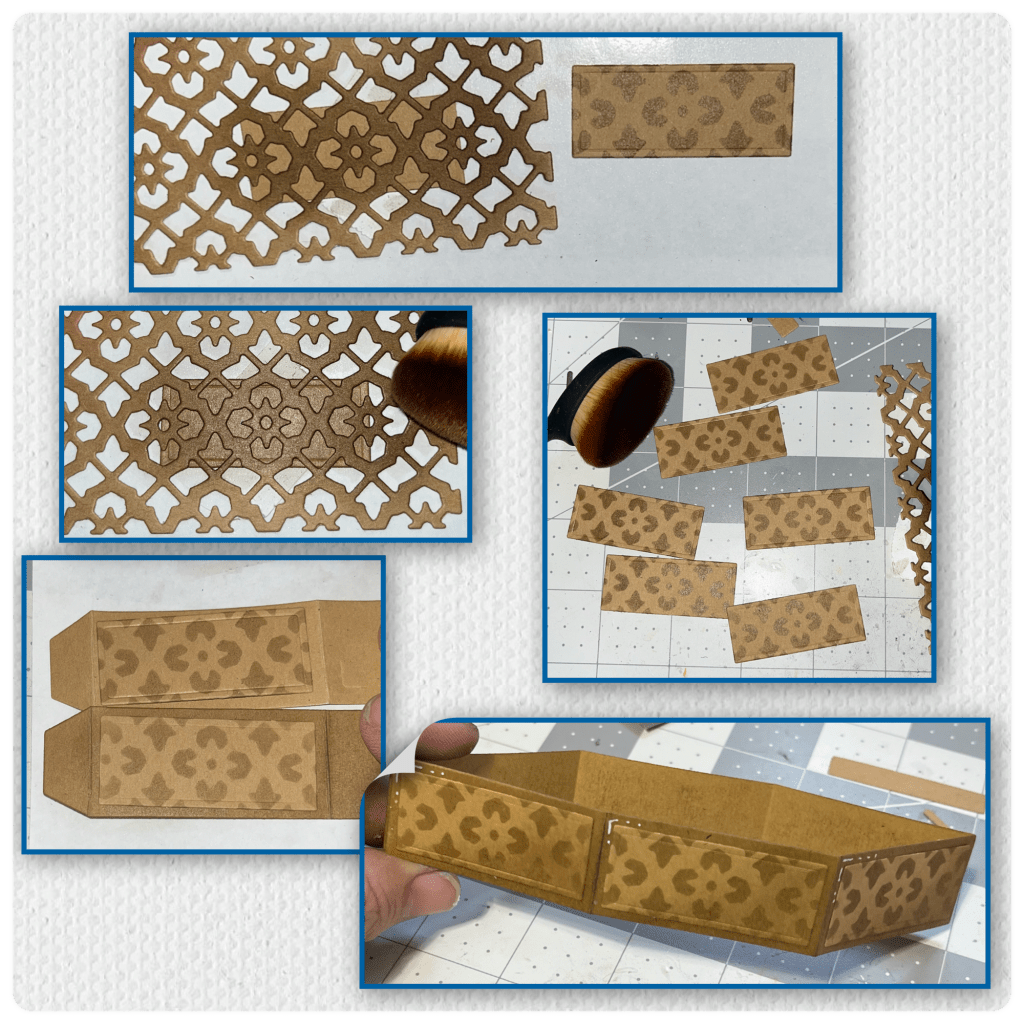
To add the basket detail I made a stencil out of thick card stock using the Pattern Plate- Tiles die. I cut the band and the rectangles using dies from the Stage Pop up. I centred the stencil in the same position on every rectangle to give a uniformed look, and brushed on the ink. I added shading to the bottom right of each rectangle and white highlights to the top left.
I made a little boo boo, I glued the two halves of the stage together before adding the tabs, so I gently pulled them apart then added. I added all the tabs into the slots in the stage.
Most of the flowers I pulled out of may container of extra die-cuts, I will list them at the bottom.
If you look at the leaves you will see the difference that highlight and shading makes. Be mindful of where you place the flowers and leaves to make sure that all the pieces stay inside the card when closed, and don’t catch on the band. I went for a wild random look.
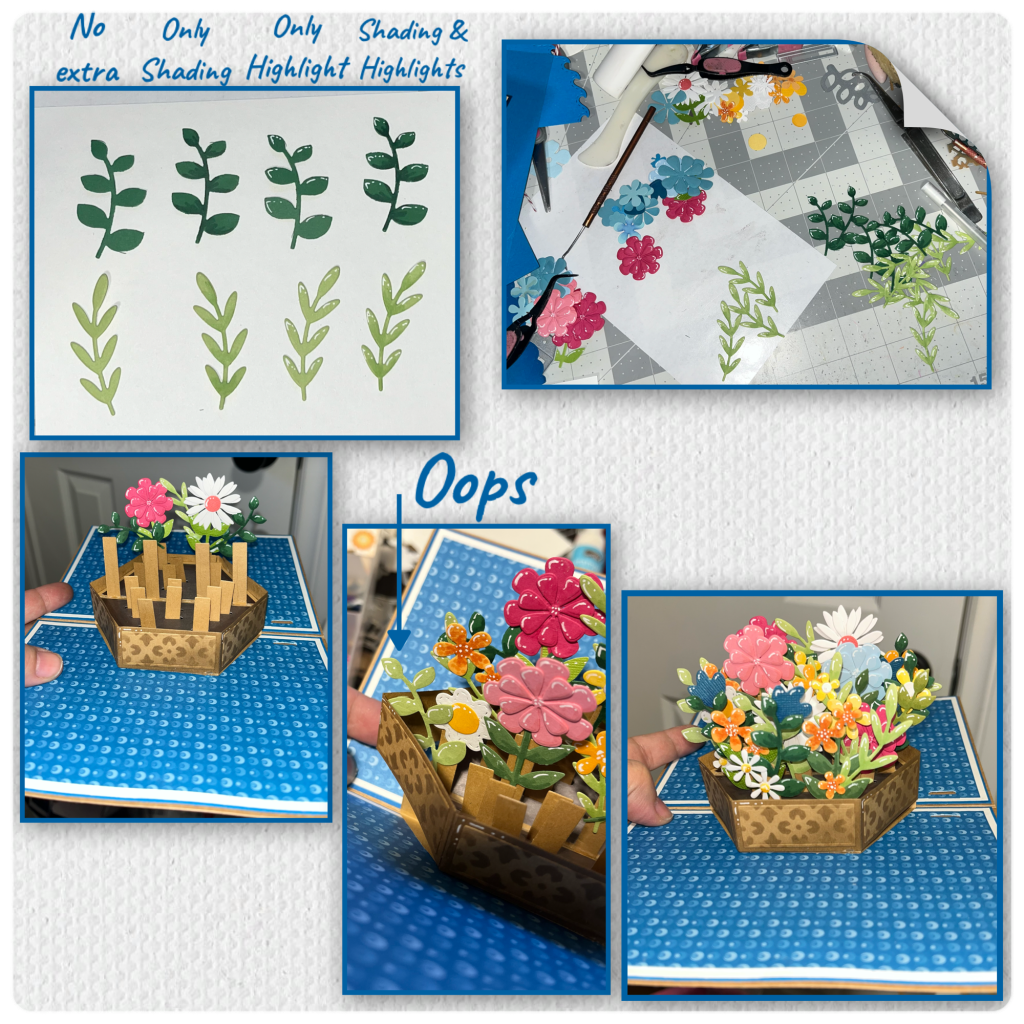
I added a few butterflies to my basket. I cut a couple of borders using the Long Rectangles Crosshatch and added more leaves and flowers. On the top one I stamped the greeting using a stamp from the Birthday Belated Clear stamps
The card is thick and doesn’t want to stay closed so I decided to make a closure. I cut a long piece of cardstock as shown and just folded the sides in. I cut the blue and white rectangles as shown below. Using the Flaps and Closures (Karen has a video tutorial on the product page at the link ⬆️ ) I cut out and assembled the pieces and added them to the blue squares. Then I added them to the white squares and then to the band.
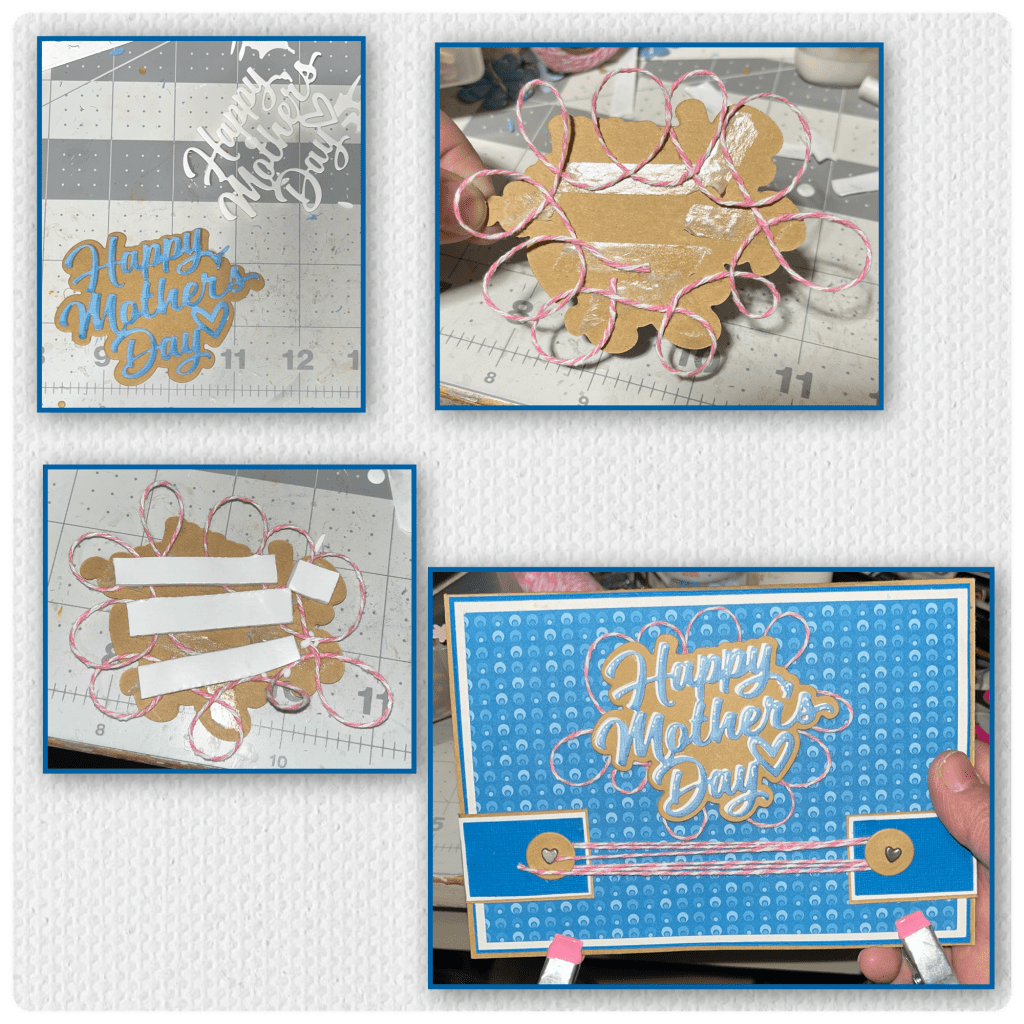
I cut out the pieces of the Happy Mother’s Day, I cut the top part from blue and white, adding shading and highlight to the blue piece, then layered onto the shadow. I wanted to add more string so I twirled it around the back as shown to make a whimsical frame then added to the card.
I added more flowers and leaves.
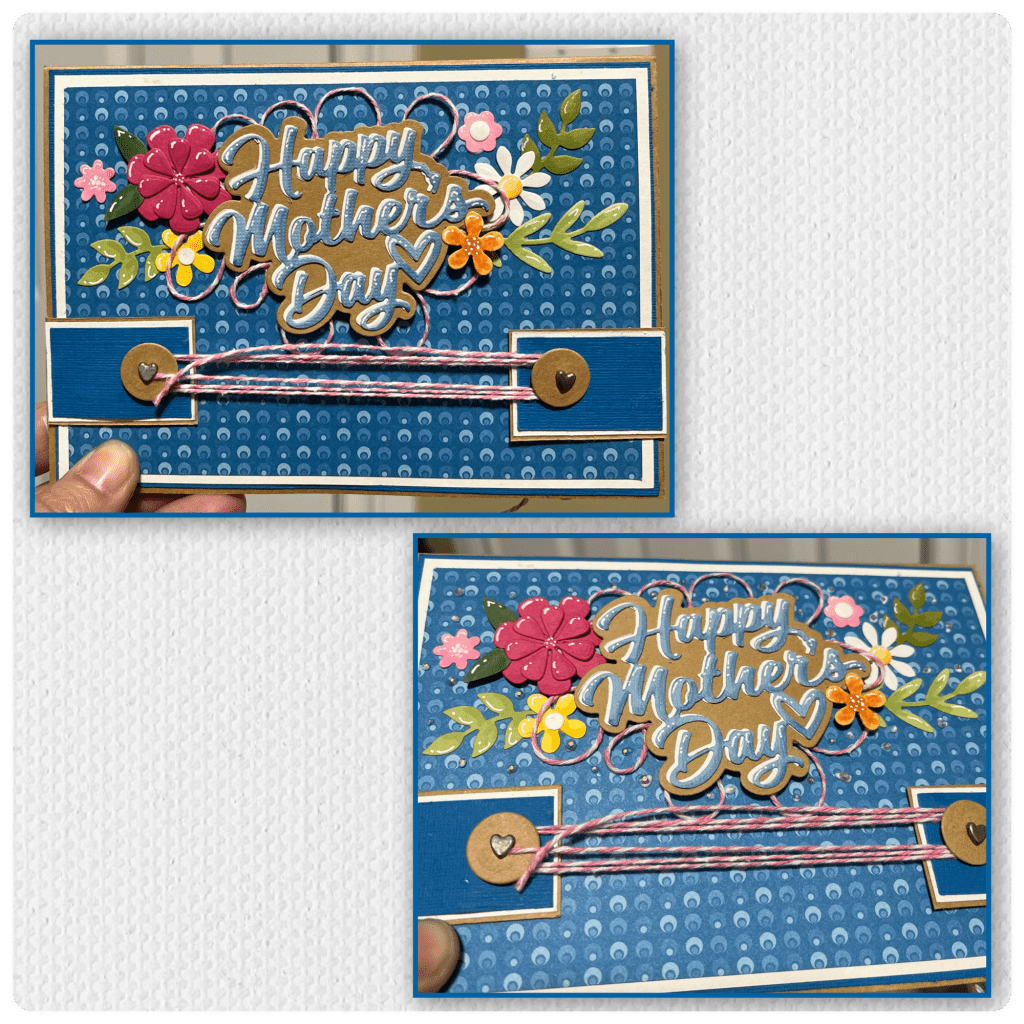
I wanted to have a bit of string on the inside so I carefully pulled up part of the bottom border and wrapped a piece of string around it and added a little bow. I also tied a little bow at the bottom of the string that is on the front. I added a bit of glue to keep the bow from coming apart. Then I added some itty bitty gems around the flowers on the front and the inside.

If you look to the right of the flower basket you will see the paper clip in the slots holding the card open. It doesn’t go all the way through to the front but it still holds the card flat open.

The diesets that I cut the flowers from
Autumn Elements -leaves
Thank You Lorna Add on– leaves
Butterfly Collage add on– butterflies
Other Tools used
