
Wow, it’s been almost a year since the last time that I played Craft Roulette and I’ve said it before and I’ll say it again, My Craft Roulette cards are some of my favourites, and this one is no exception. This is a card I never would have came up with if I hadn’t been using the Craft Roulette parameters. These are the parameters ⬇️
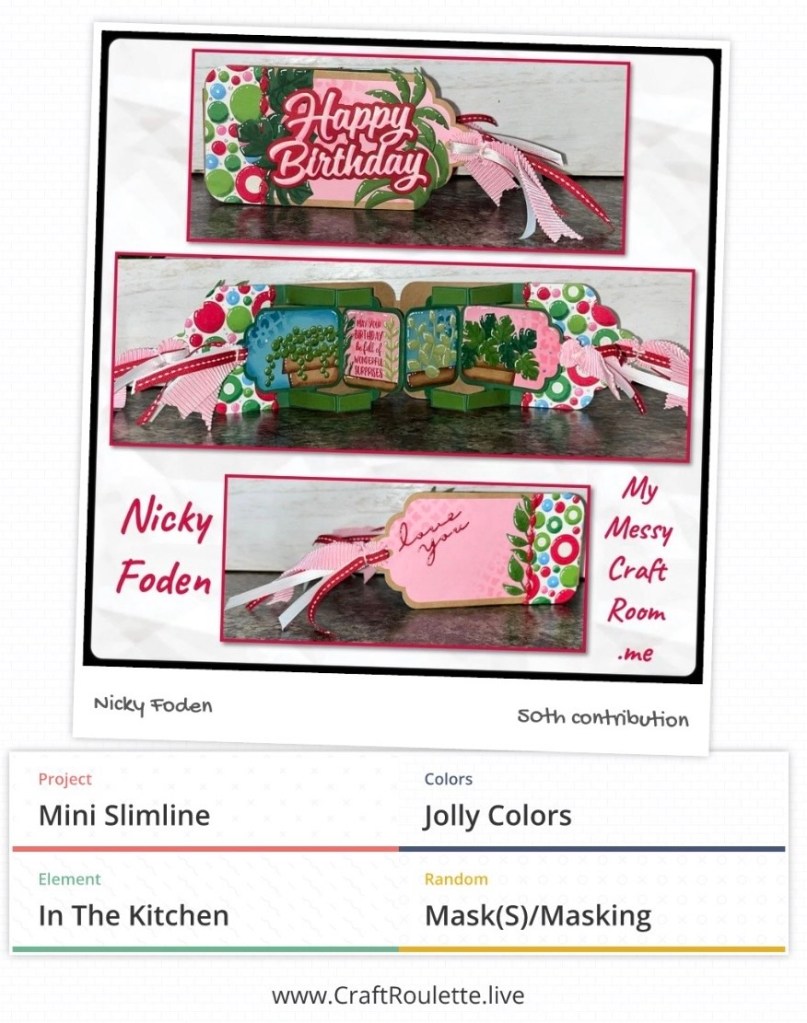
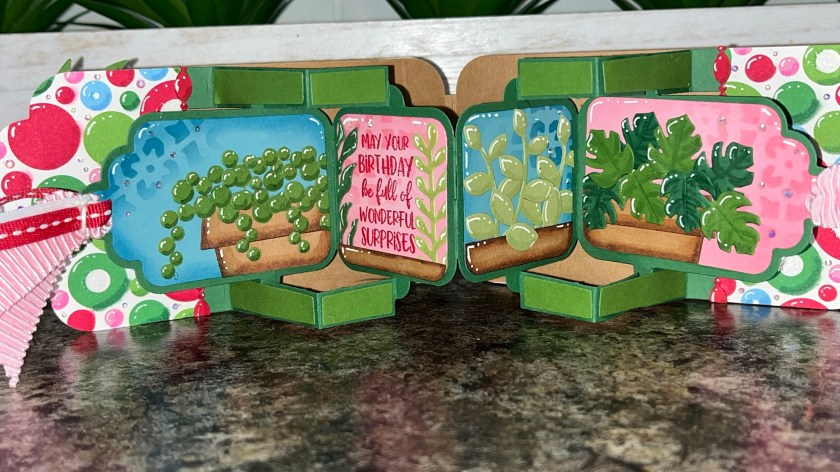
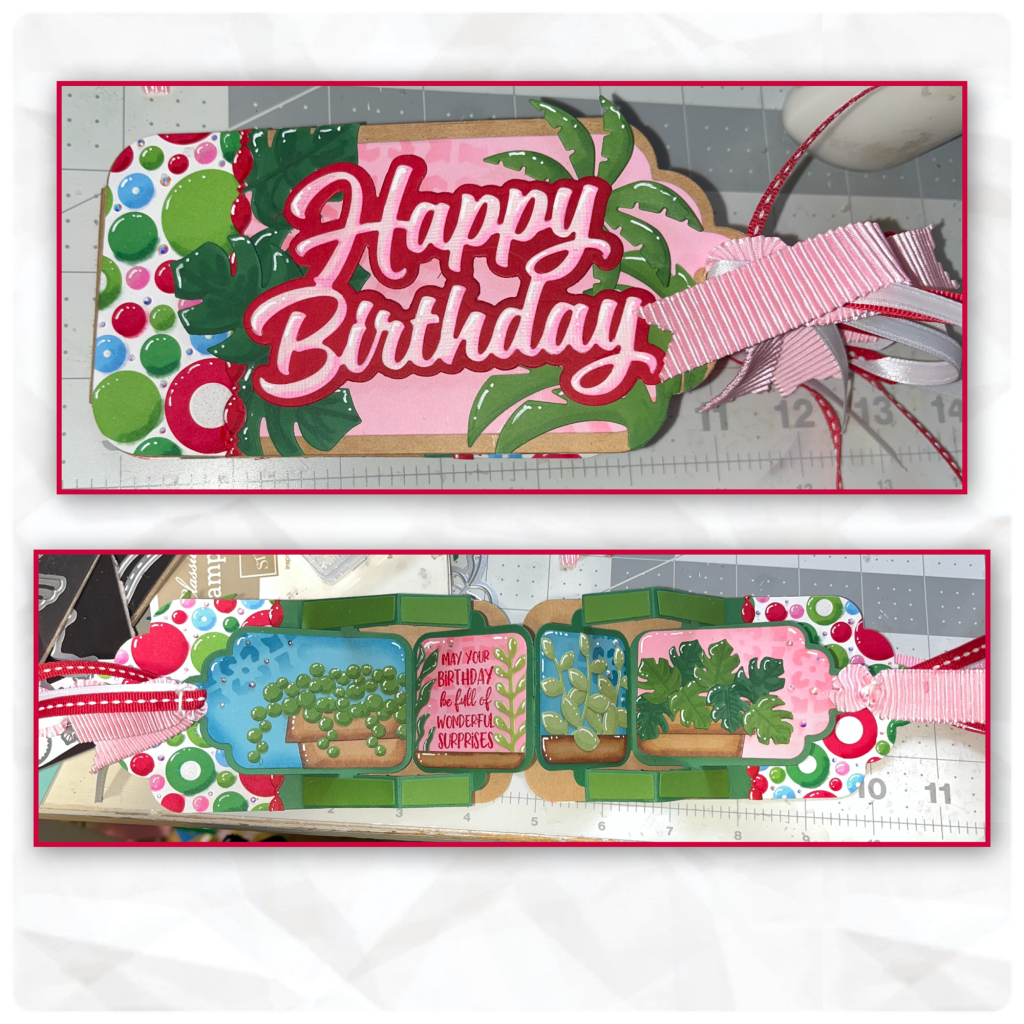
…. And this is how I met them. It is a min slimline, I think of Jolly colours as Christmas colours so I grabbed a piece of Christmas paper that wasn’t too Christmasy and used colours in the paper. In my kitchen I have several house plants, and I masked with a stencil on the front, back and on the tags.
All the fun is in the reveal, to see this card in action please check out my FACEBOOK page, feel free to join if you would like to share your own crafty creations. You can also see a video of this card on my INSTAGRAM page.
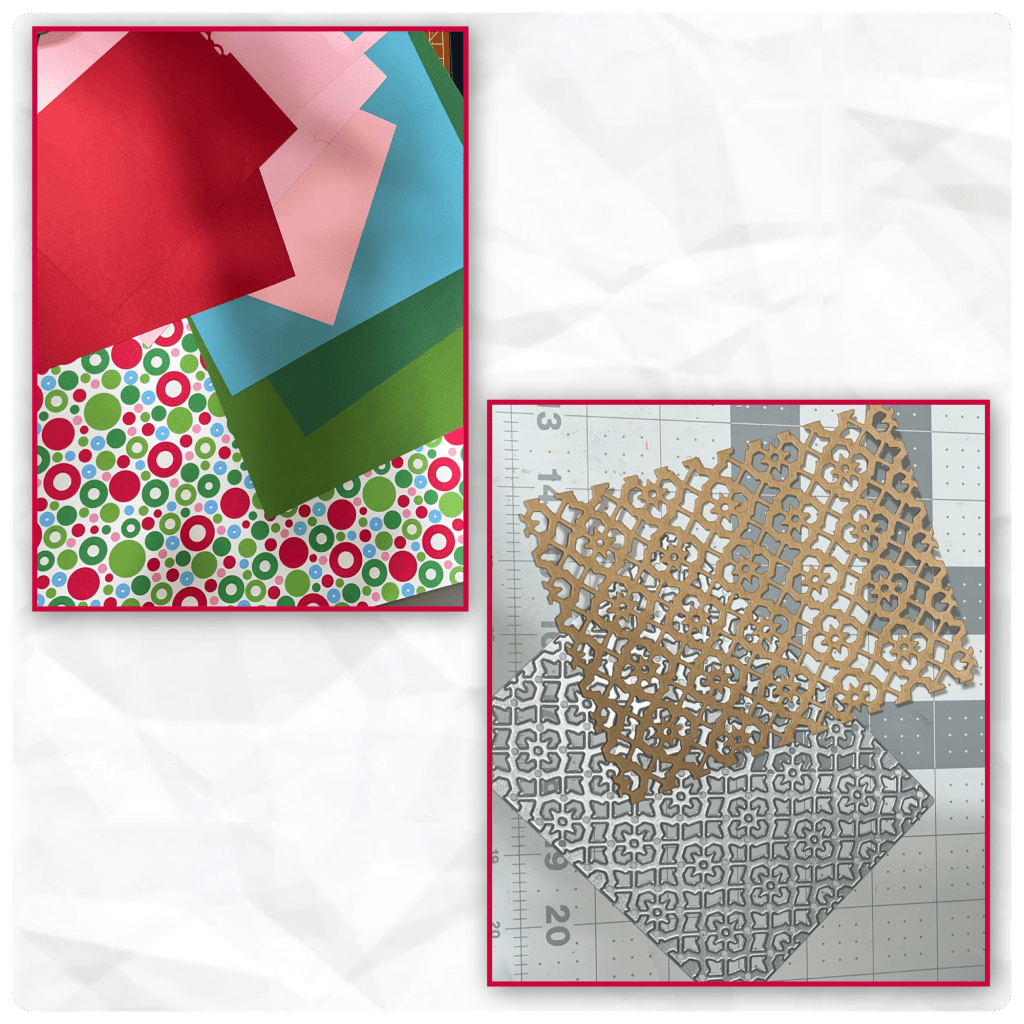
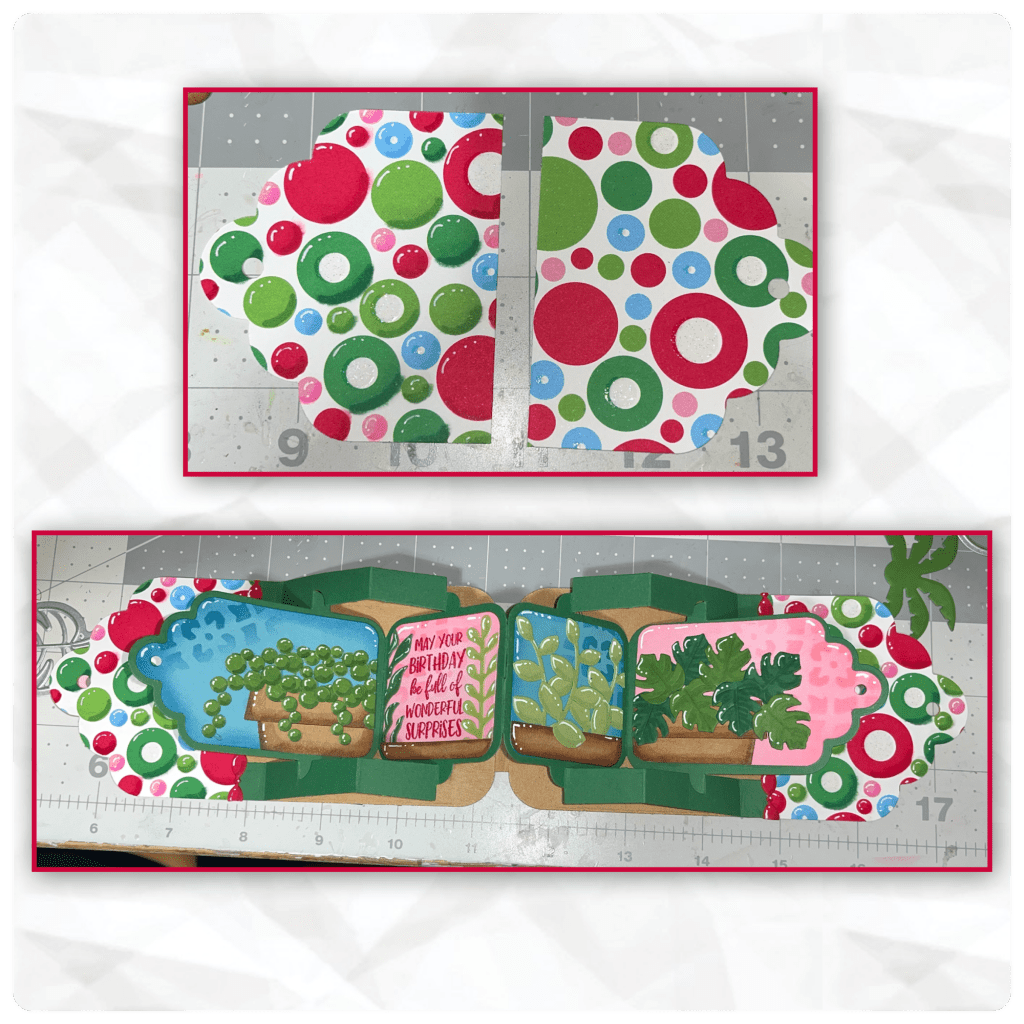
Here is the paper I pulled from my stash, and the cardstock colours to match. I don’t really have a lot of stencils so I made one using Pattern Plate- Tile and a pretty thick cardstock.
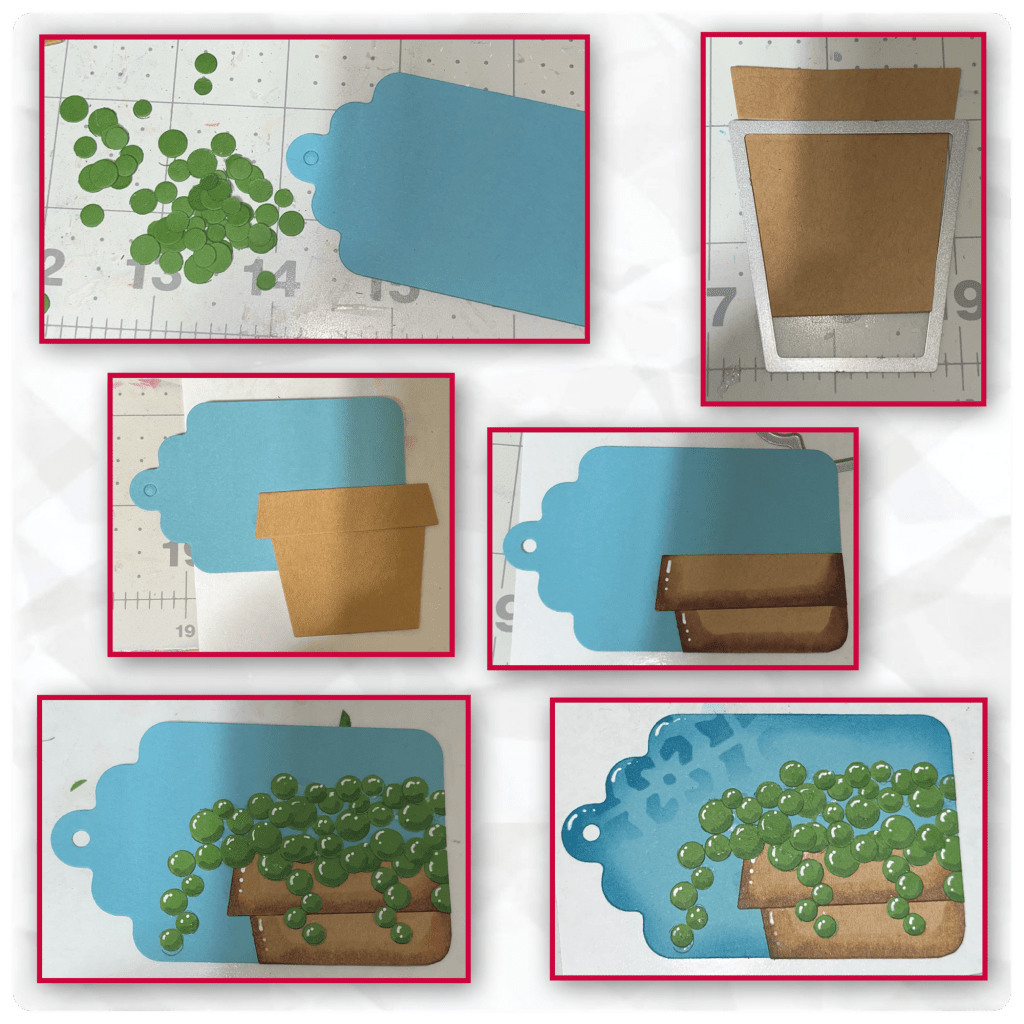
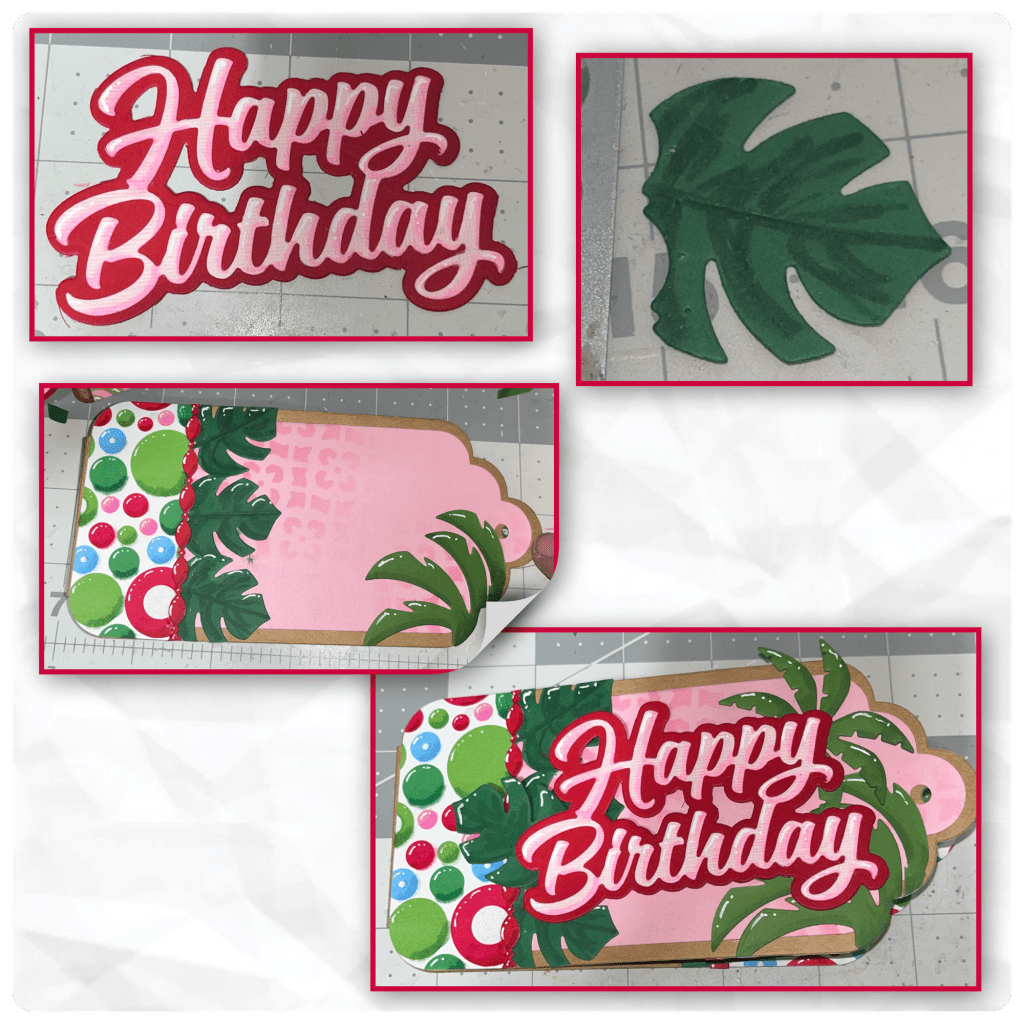
I wasn’t sure what I was exactly going to do so I thought I would make the tags first to see if I liked how they turned out. I cut out the tag from the Tagbook pop up, and several little circles (from Woven Basket & Fun Flowers) from green. Using a die from the Flower Pot pop up I cut the pot and using the same die I cut the pot as shown. I flipped the top piece over to make a small flower pot. I added it to the tag, and trimmed it as shown. I added shading with an alcohol marker and highlights with a white gelly roll pen. I added the circles to make it look like my String of Pearls plant. I added shading and highlights. Using a blending brush and my stencil I added the pattern to the top left as shown. If I were doing this again I would have done this step first (I did this on the other 3 tags)
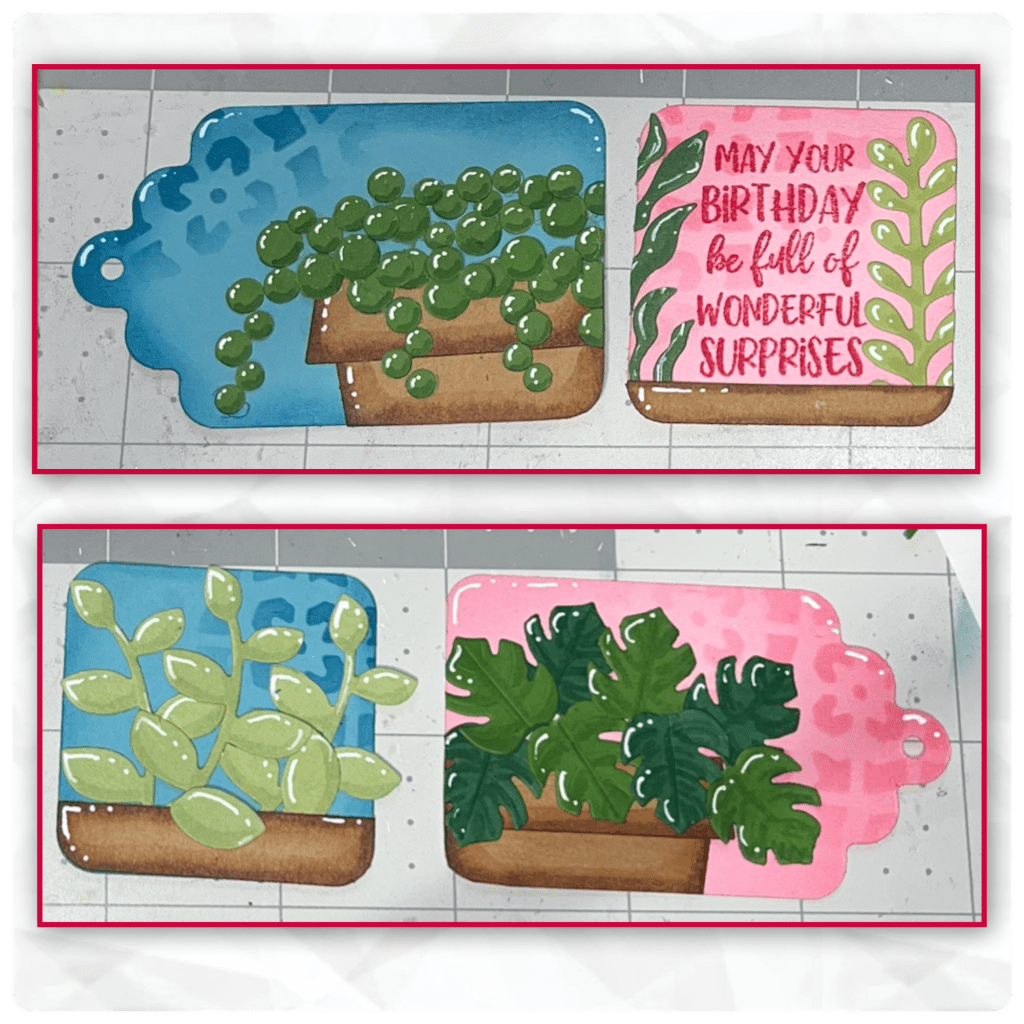
So I basically did the same steps to create the other tags. The leaves on the large pink tag are from the Landscape Scene I have a container with extra diecuts so I pulled a few from there as well (Flower Pot Add ons, Garden Charms and Autumn Elements). I stamped the birthday greeting from Stage Scenes Clear Stamps before adding the diecuts. I added the brown piece along the bottom to resemble the plants being in a pot.
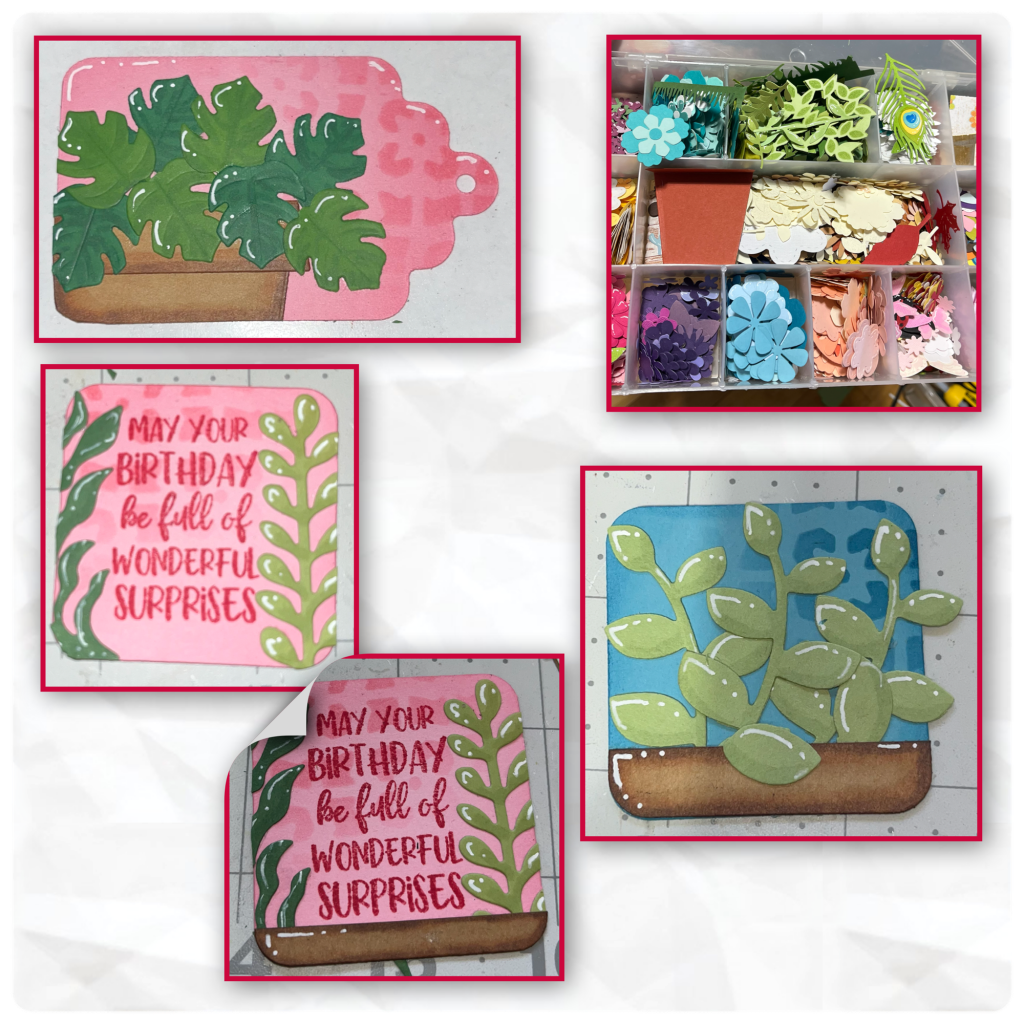
These are what the finished tags look like. I am happy with how they look so I will continue with the rest of the card.
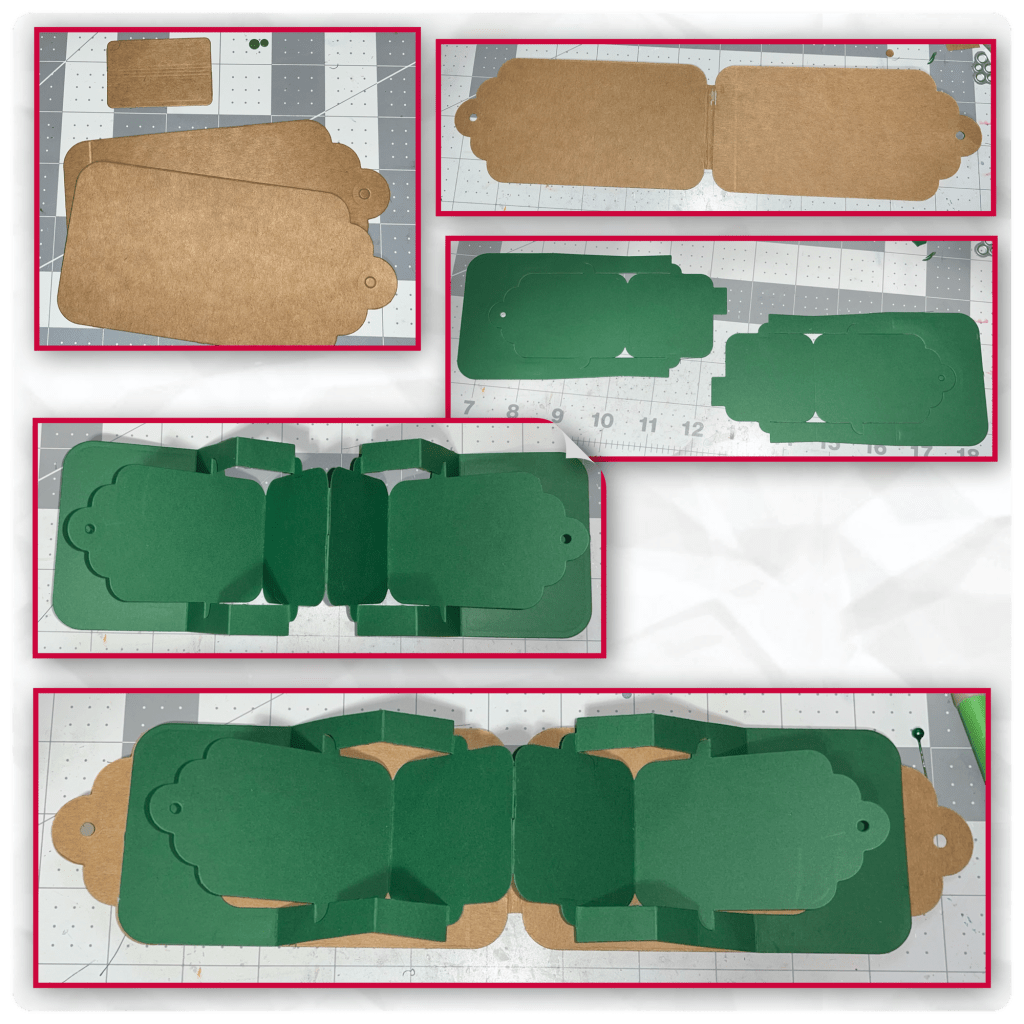
I cut the card base and the mechanism from the Tag Book Pop-Up and assembled (Karen has a video tutorial on the product page at the link ⬆️ )
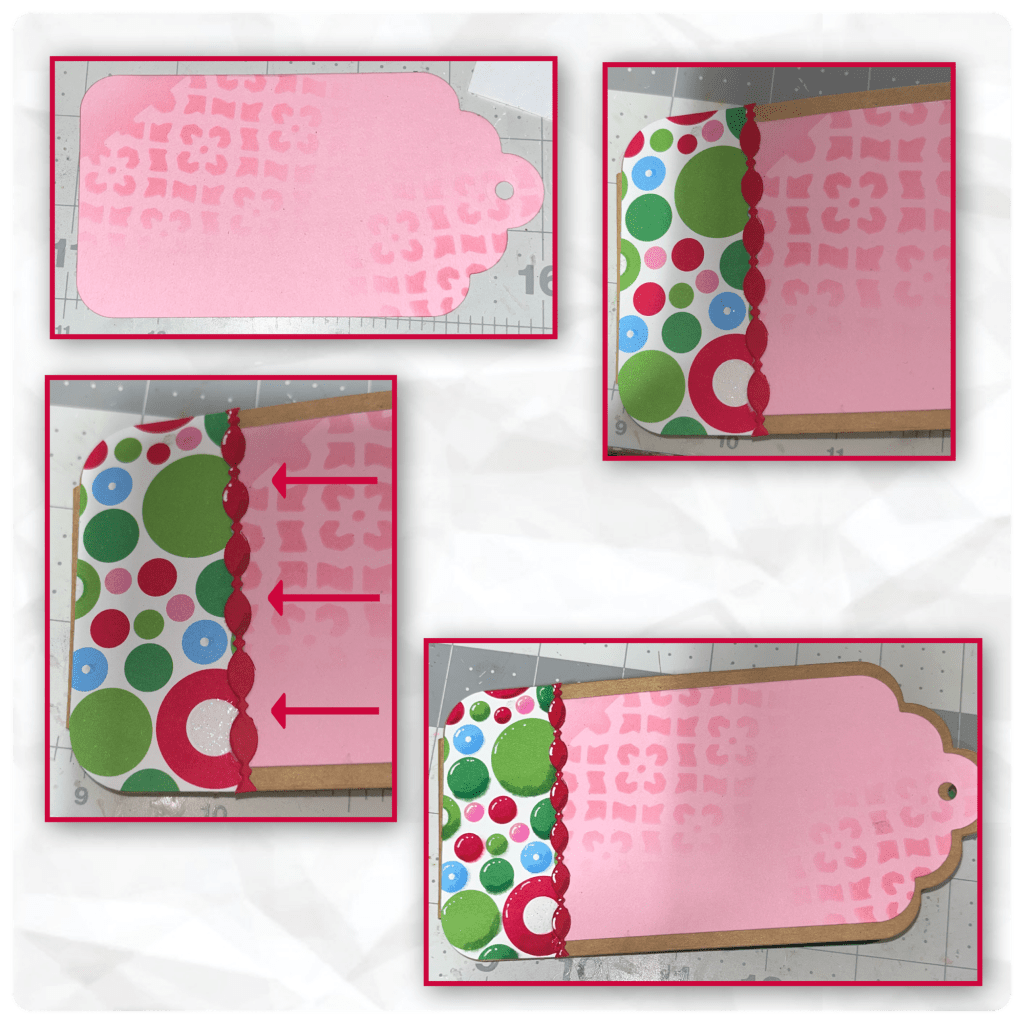
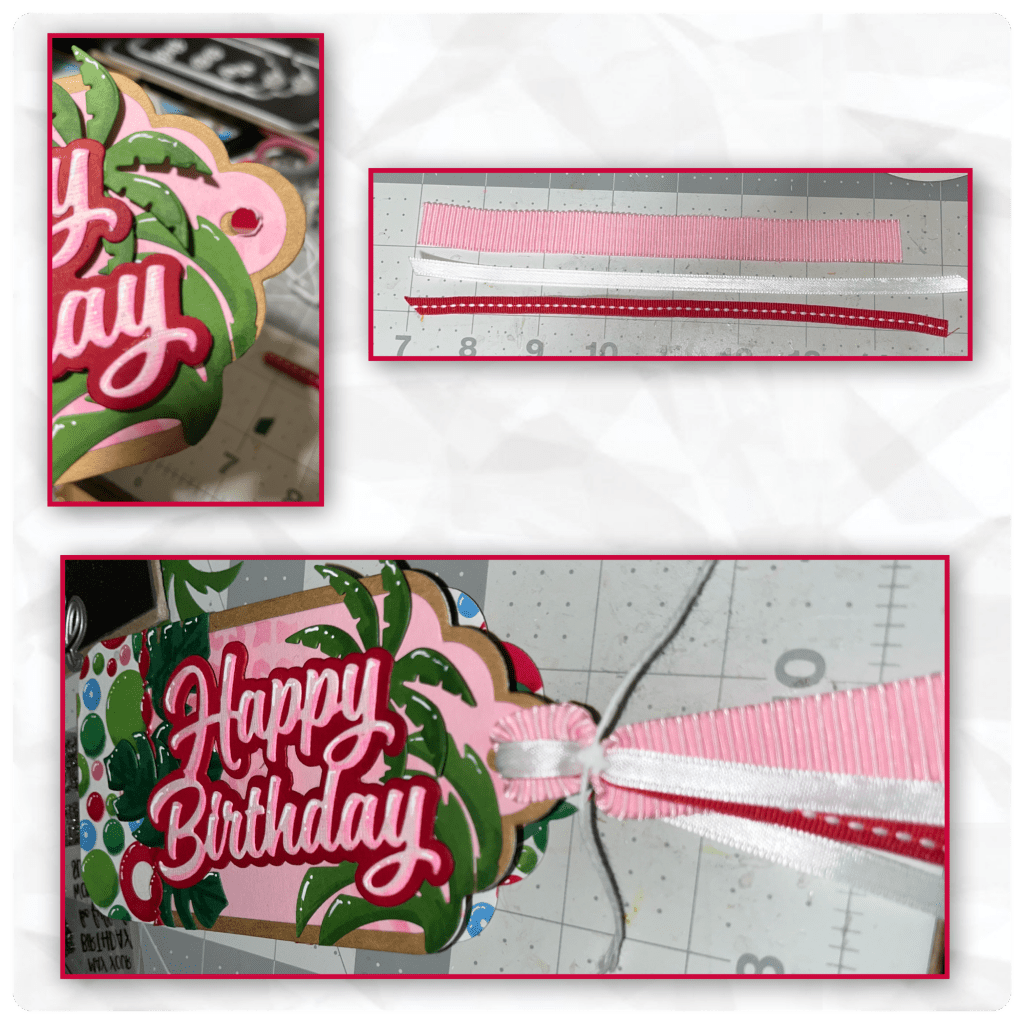
I thought that I would switch gears for a bit and start working on the front. From the Topper Tags set and used the die that is 1 size smaller than the card base. I used the stencil the same as before then added it to the card. NOTE if you want there to be an evenish frame around the pink tag then the holes will not line up properly. Using the large tag die (from the Tag Book Pop Up set) I cut the patterned paper to make a border. I added a red trim from the Border Blends-Party. I really like the look of adding shading and highlights to the trim. To show the difference, you can see in the photo with the arrows that the bottom 2 sections have nothing added, the middle 2 just have shading, and the top 2 have shading and highlights. I also have fun adding shading and highlights to the patterned paper, the ink bled a bit but I think it gives kind of a water colour look.
I cut out the Happy Birthday and Happy Birthday Shadow and added Alcohol Marker shading and white gel pen highlights. When I cut the leaves from the Landscape Scene I realized that I should have added the leaves under the border. To get it to look like it was under the border I used the border die to cut the sides out of the leaves, then added to the card. I used the Palm trees from the Palm Tree Pop up. I used foam adhesive to add the Happy Birthday.
I popped back into the inside, I used the large tag again to cut the patterned paper to fit the on the sides as shown. I decorated the same as I did on the front. Then I added all the tags to the mechanism.
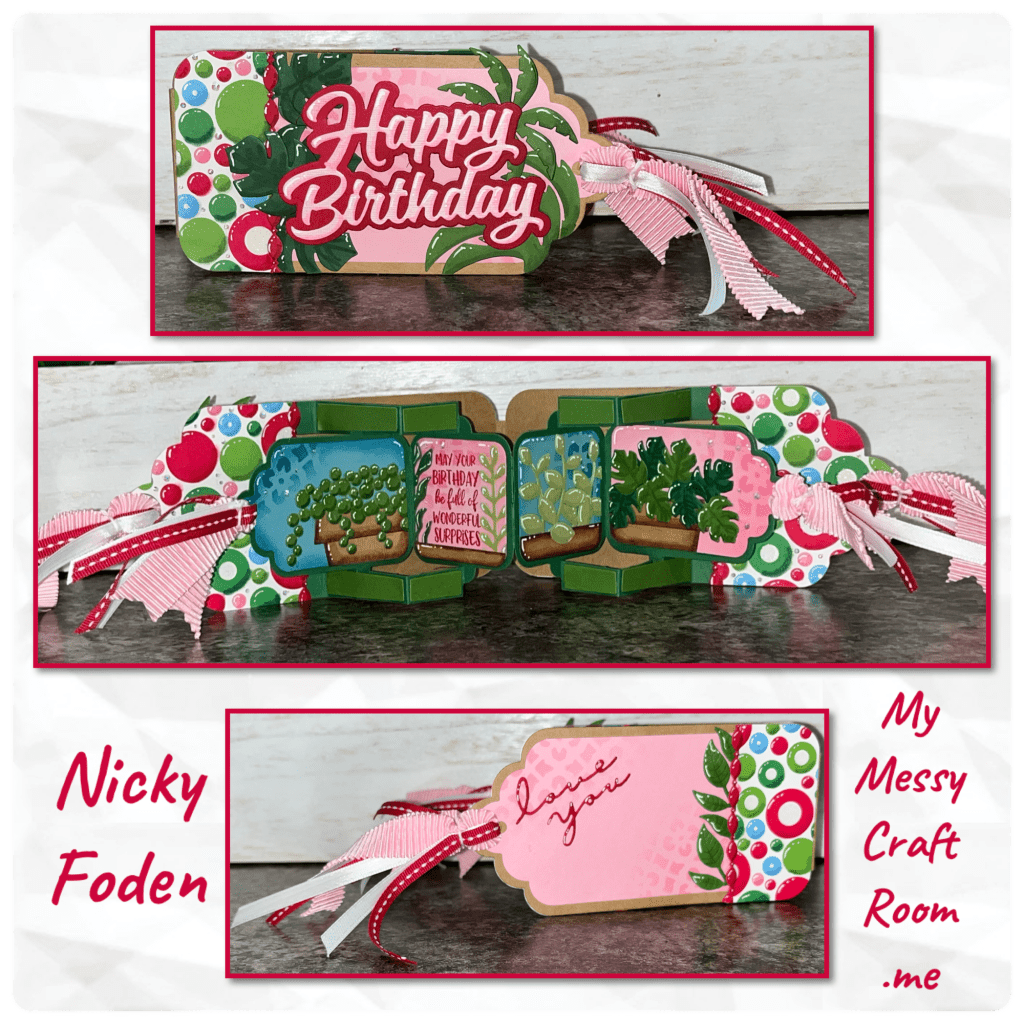
I wanted to add ribbon to the card so I cut roughly 8” of each. I used a pointy tool to make the hole bigger before adding the ribbon. I just pulled the ribbon through and then tied it with a small piece of bakers twine. I did this for the front and the back. For the inside tags I cut the ribbon about 2” shorter, then did the same. I trimmed the ends once I was finished.
I decorated the back as shown. I also added the Love You (not seen in this photo but on the bottom of the blog photo) These leaves are from the Playful Pop Up. I added the lighter green layers on top of the arms. I usually do this step earlier but I wasn’t sure what colour I wanted to use. I was going to use the pattern paper but settled on the green as to not over shadow the plants on the tags.
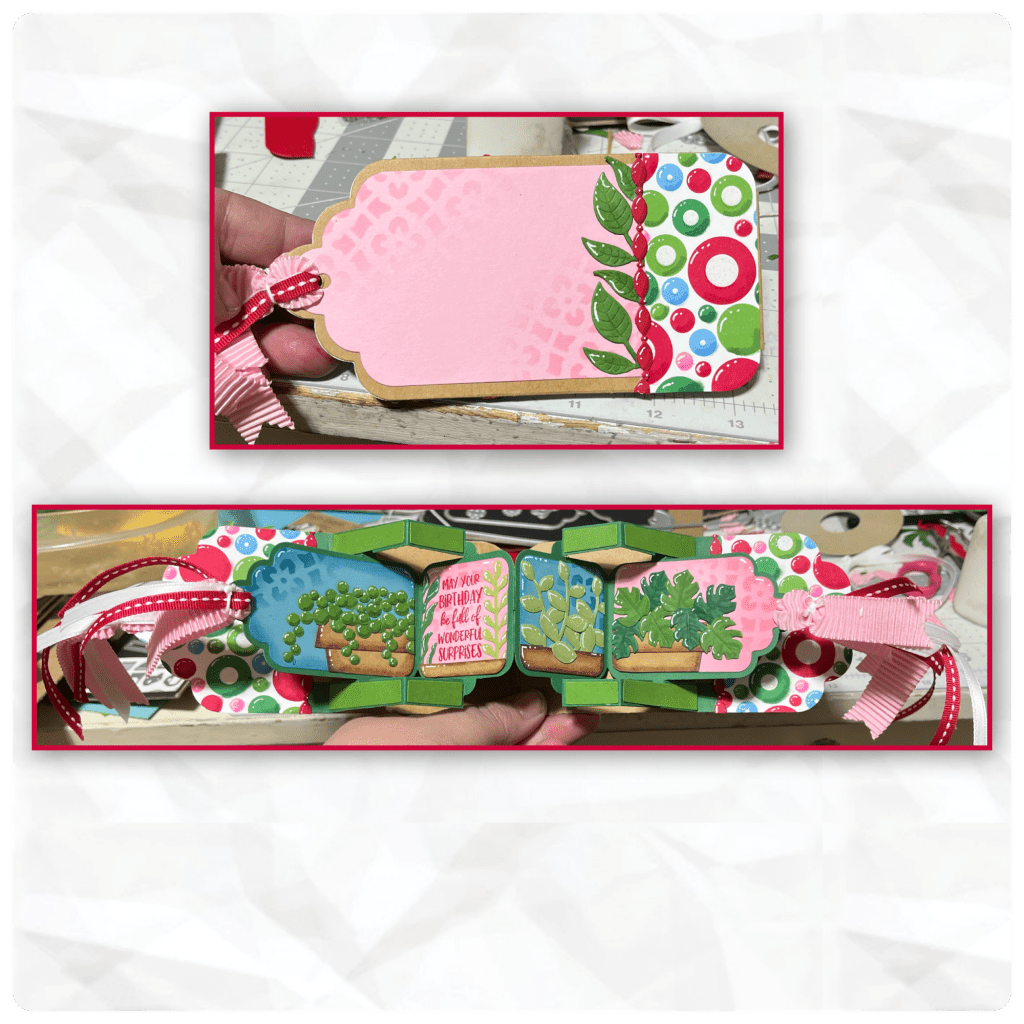
I added itty bitty gems randomly around the pattern paper and on the stencilled part of the tags.
Other Tools used
