
Welcome Crafty Friends, to our Karen Burniston Products – KB Riley LLC November Release Blog Hop. The Design Team have come together with Karen today for a fun blog hop to celebrate the release of 15 new dies and 5 new stamp sets. Sneak peeks of the new release started last week, and the dies are available to order NOW!

This release includes:
• 1 new Pop-up Die Sets
• 2 new Playful Add-on Die Sets
• 1 new Ball Add-on Die Sets
• 3 new Ball Access Tab Die Sets
• 3 new Word Die Sets
• 3 new Border Die Sets
• 1 new Greetings Label Die Set
• 1 new Stand Alone Die Sets
• 5 new Clear Sentiment Stamp Sets
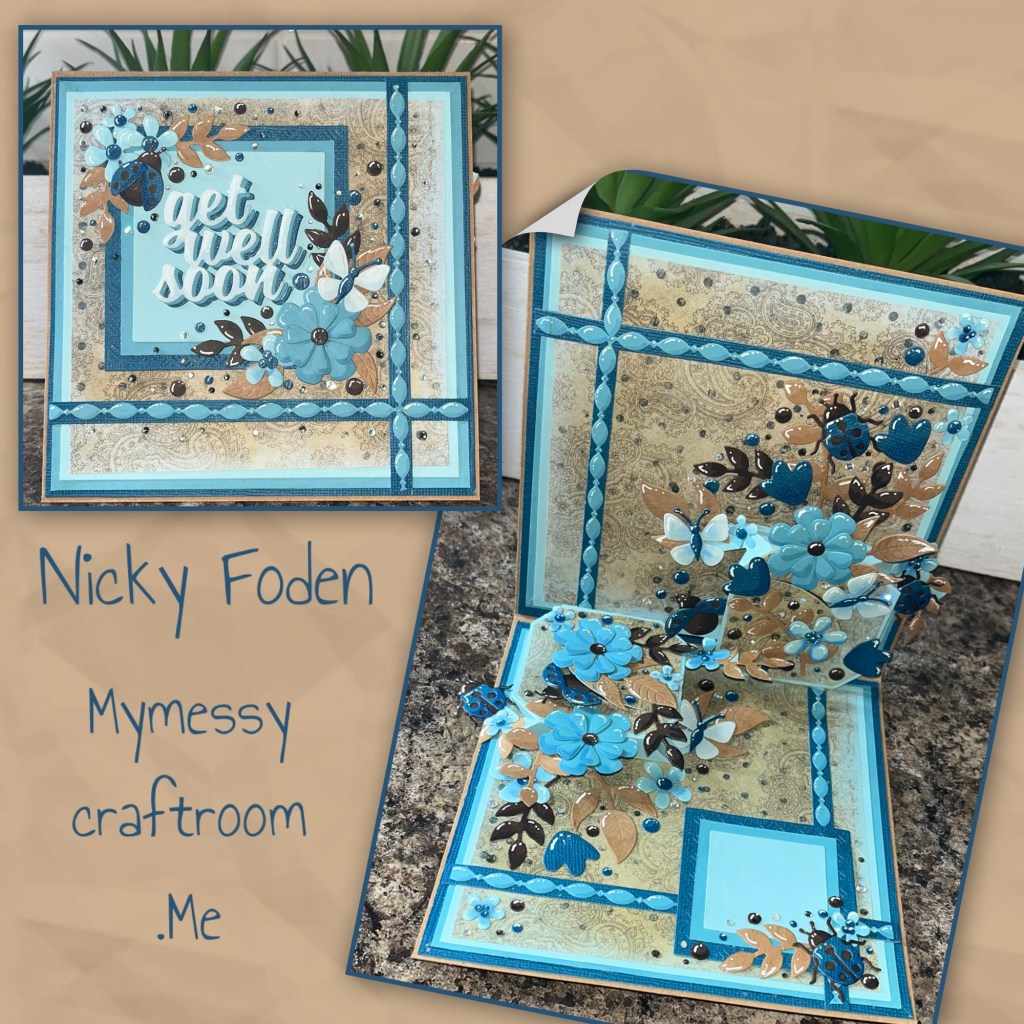
I had so much fun with this new release ESPECIALLY the new Playful Pop up, I am pretty sure it is my new favourite die set, as it is so versatile. I was so stumped on what card to chose because I had made a few (sorry not all posted yet) but then I unexpectedly needed to make a “Get Well Soon” card and I just love how it turned out so I knew it had to be this card.
GIVEAWAY:
To celebrate the release Karen Burniston and each of the Karen Burniston – KB Riley LLC Design Team members will be giving away a $25 Gift Certificate to some lucky person who comments on our blog posts, so make sure you join the hop and comment on everyone’s blog post. Winners will be randomly chosen from ALL of the blog hop comments received on our blog posts by Monday, 1st December 2025. Lots of chances to win some goodies, so just leave a comment on this post or any other blog hop posts to enter! Don’t forget to leave some way for us to contact you, in case you are a lucky winner!
Karen Burniston * starts here
Me * ends here
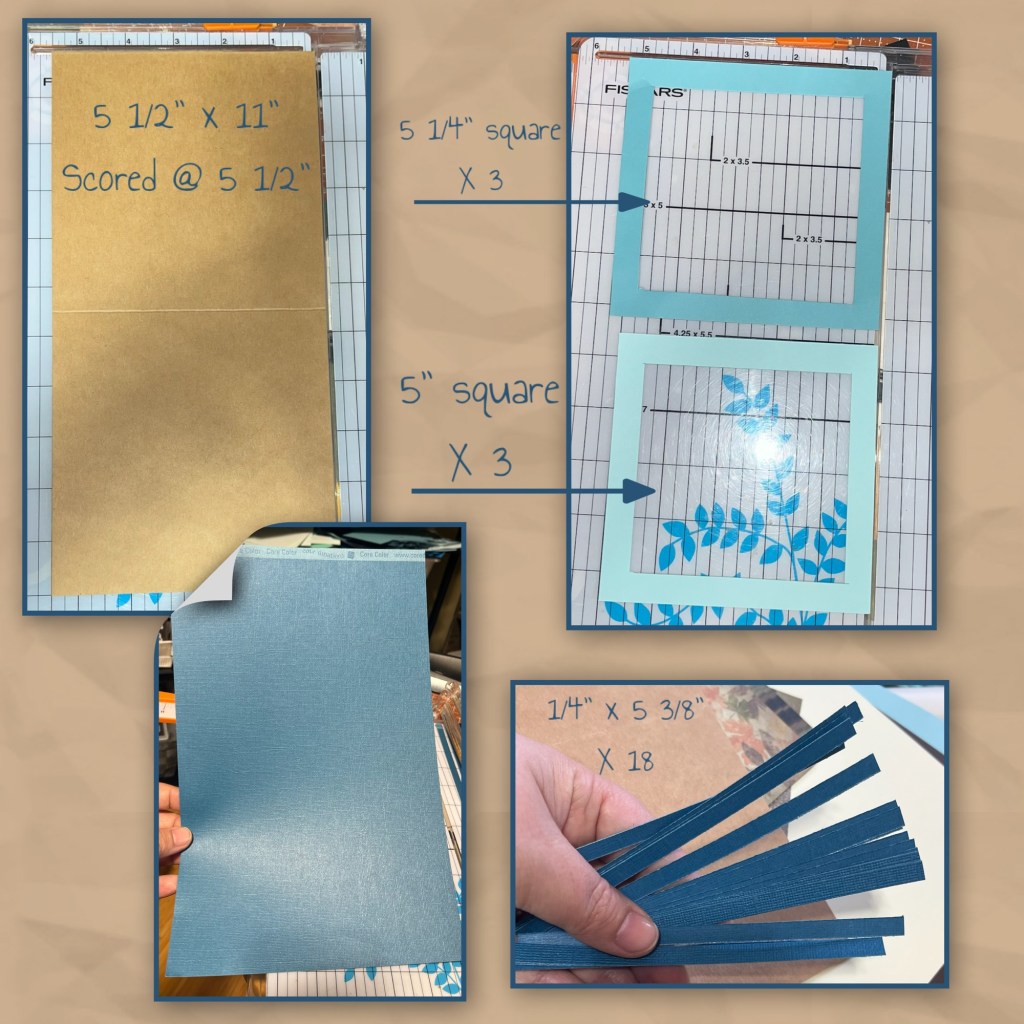
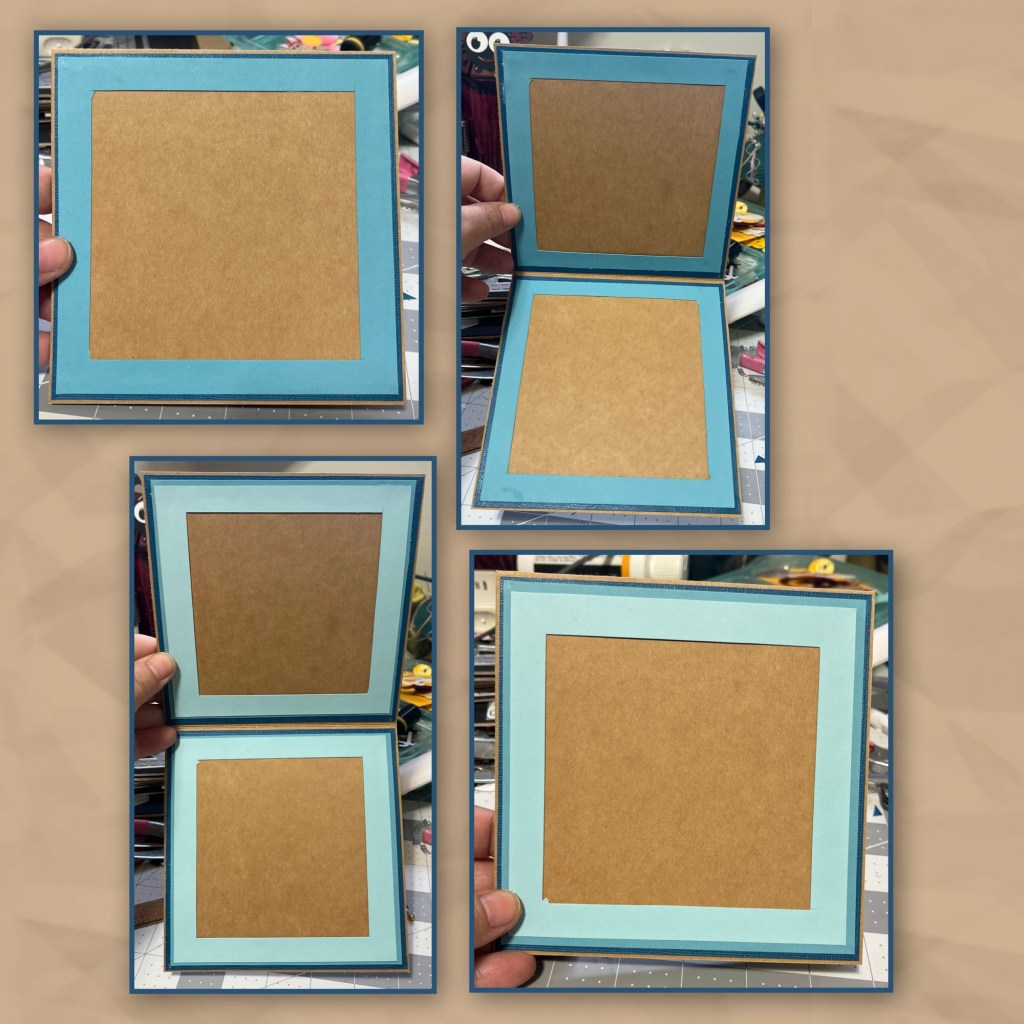
I knew I wanted to put 2 Playful Pop Ups but I wanted to add them offset from each other, on the same fold as apposed to side by side, so I thought they would fit the best in 5 1/2” square card. so I cut the card base and 2 of the layers as shown. I wanted to have three shades of blue BUT I only had one piece of the dark blue which would not be nearly enough to layer behind 3 other panels so I thought I would try something different. So I cut 18 1/4” strips of the darkest blue cardstock.
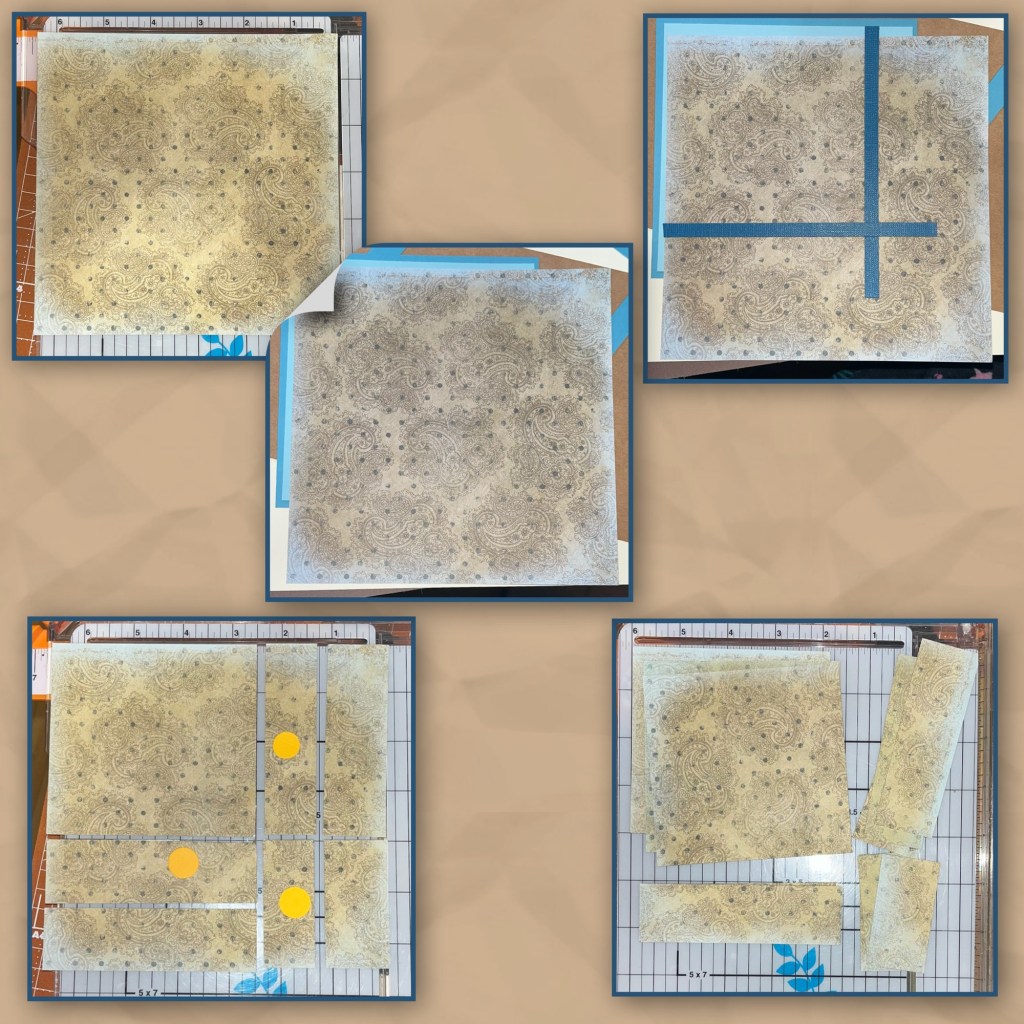
I really liked this patterned paper, it’s hard to see but around the edges it looks like it has been sponged with a lighter blue ink, and I really liked that look and wanted the panels to have that edge, I didn’t want to cut them off but I had to make the panel smaller. I laid the piece of paper over the blue layered frames (they are not glued together yet) and marked where I am going to put the dark blue borders. Then I cut the paper as shown , the pieces with the yellow dots are the pieces that are not needed. The bottom right piece I ended up cutting it into a square the same height as the piece beside it. I cut three pages this way.
I took 4 blue strips and cut the corners off 2 as shown. I added the strips with the corners first, to the top and the bottom. Then I added the other two strips to make a frame. I added the same frames to the inside as well.

I added the medium blue frames over the dark blue, and the light blue over the medium blue.
When I cut the patterned paper I left the pieces big enough to slightly over lap, so when gluing them down I made sure to line up the edges so when I add the dark blue borders the edges will be completely covered. I did this for the front and the inside.
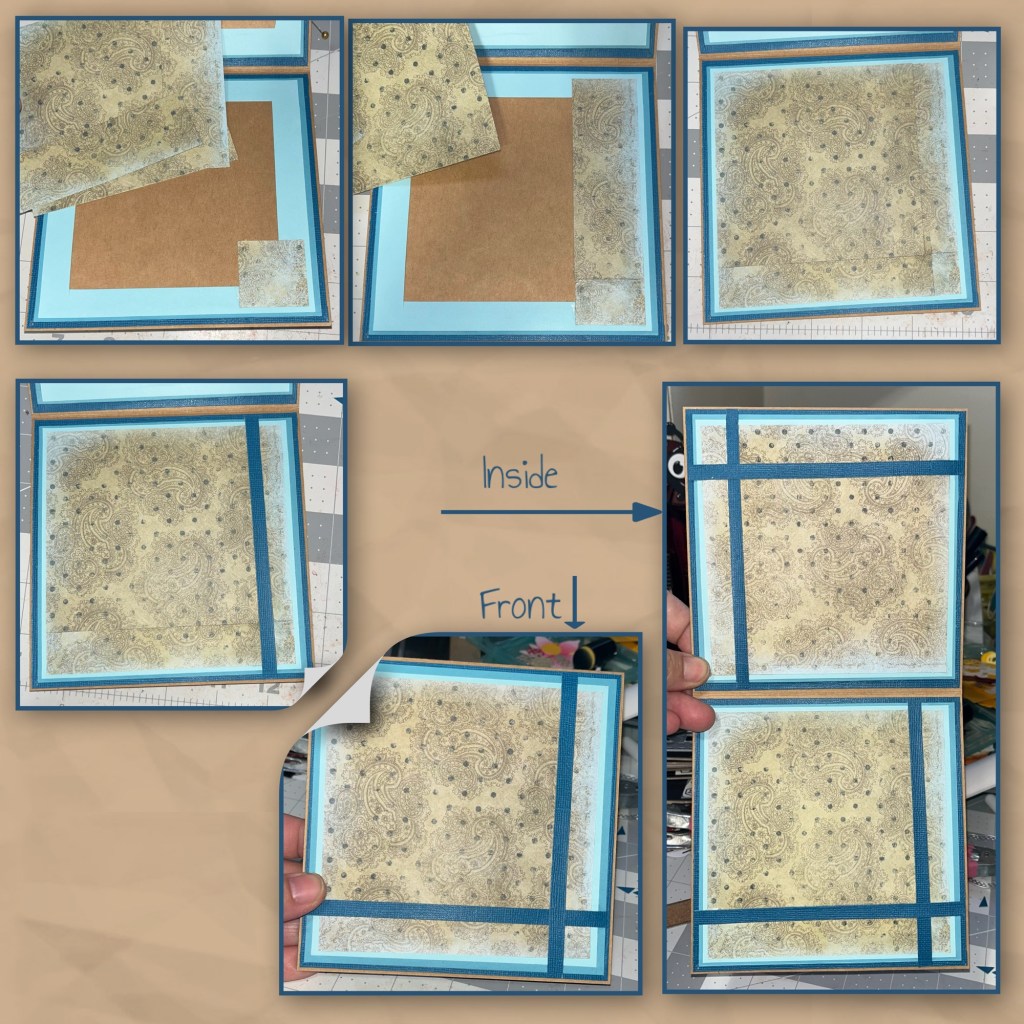
I thought it still needed a little something so I cut lighter blue borders using the Border Blends- Party. I added Versa Mark marker to the bottom right and white Gelly Roll pen to the left of each of the little bubbles along the border.

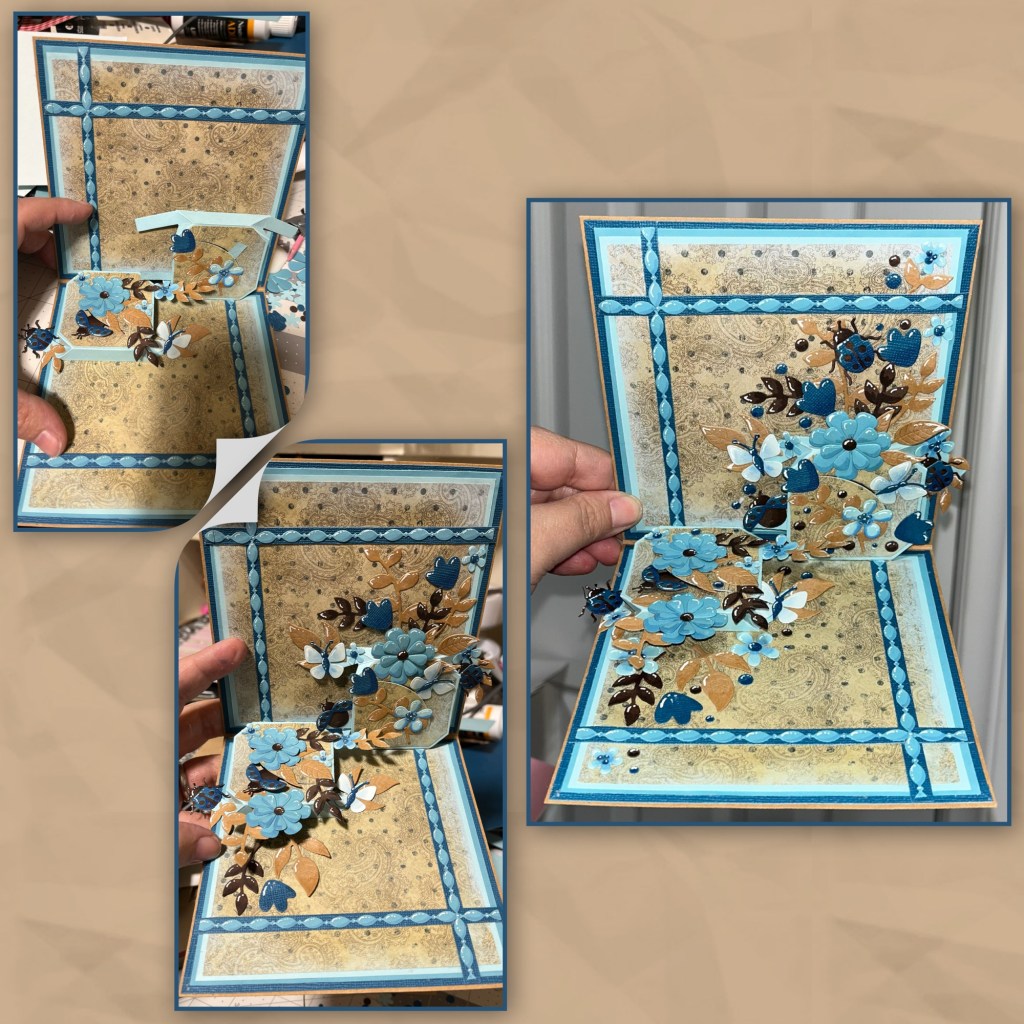
I cut out and assembled 2 Playful Pop ups (Karen will have a video tutorial on the product page soon) . I thought it would be easiest to add both mechanism at the same time. Once you install one, then the card will only open so far so I thought adding the second one would be more difficult.
First I added adhesive to the flap with the smiley face then added each of them to the card as shown. Then I folded them to the closed position, used a clip to hold each of them into place, added adhesive to the long tab then closed the card. I held the card closed for a few minutes to ensure the mechanisms were glued down.

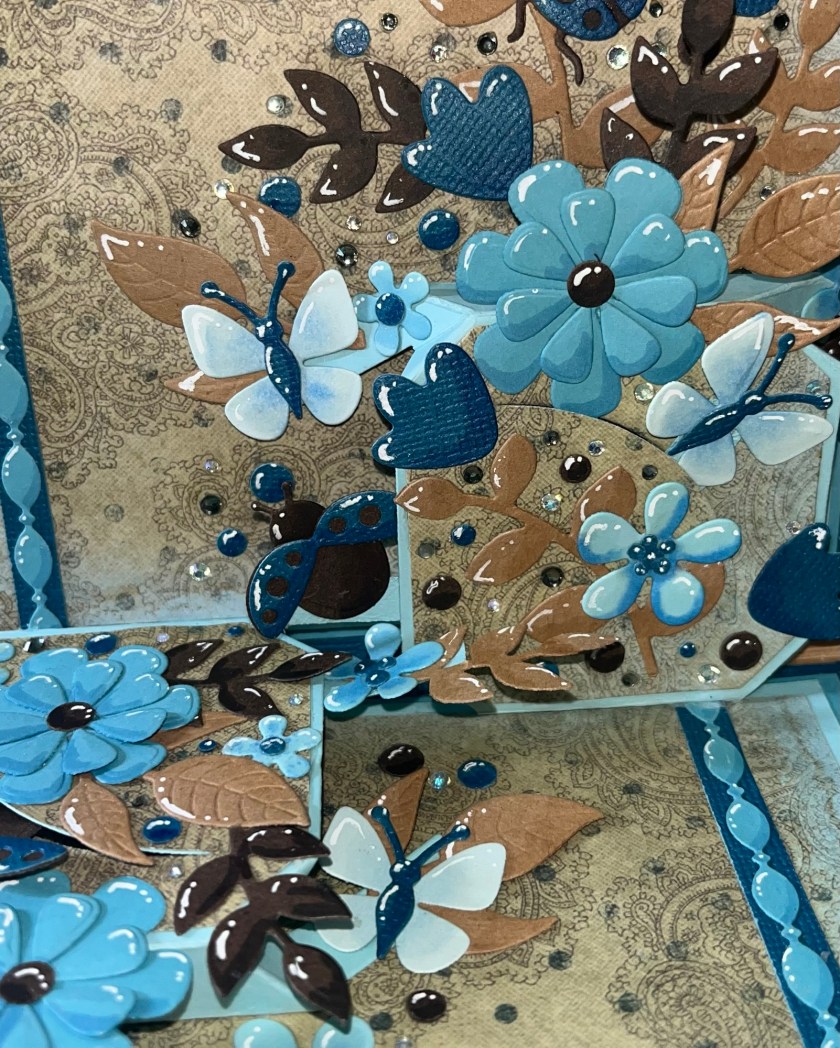
I cut out several flowers, leaves, flowers, butterflies, and lady bugs (yes there are such things as blue lady bugs, I googled it) (all the links will be at the bottom of this post). I used alcohol markers and a white gelly roll pen to add shading and highlights to the pieces.

I started adding the pieces to the mechanism making sure that the arms all open and close without catching on anything. I added all the little blue dots that fell out from cutting out the lady bugs and some of the brown flower centers randomly in some of the spaces.
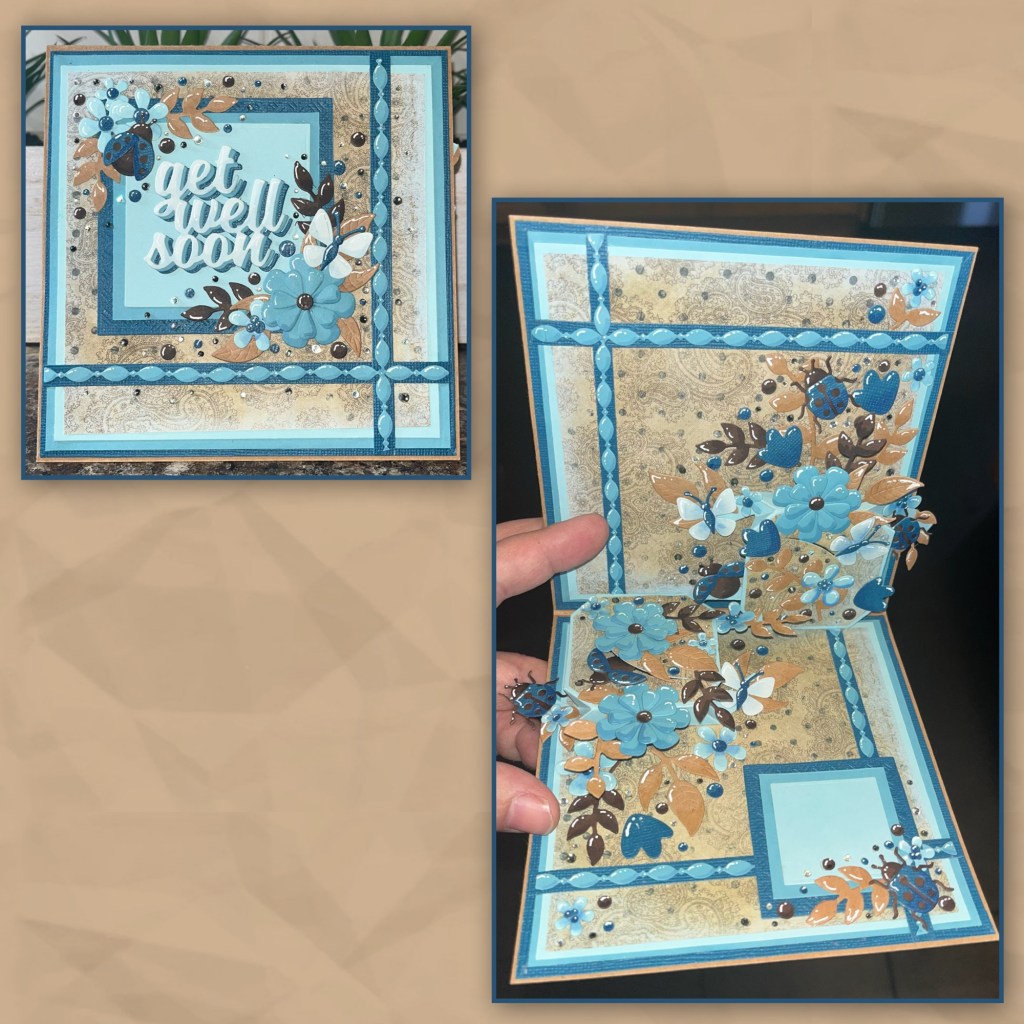
I needed squares for the front and the inside. The dark blue and the light blue squares were cut using the Squares Crosshatch, the medium blue I cut with a cutter to make it fit between the other squares. Layer as shown. Originally I diecut Get Well Soon twice, added shading and highlights to the lighter blue than layered them. When I went to add them to the card I found that they didn’t pop as much as I would like, so I cut from the dark blue, added it to the back of the other 2 then added to the large square.

I added the large square to the front and embellished to match the inside. I added the small square to the inside and embellished it as well.

It needed a little sparkle so I sprinkled some itty bitty gems randomly around, in the spaces between the flowers.
The dies I used to decorate
Flower Pot Add on -large flowers, tulip shaped flowers
Fun Flowers -small flowers, brown dots, leaves
Autumn Elements – leaves
Fun Fold- lady bugs, leaves, blue dots
Other Tools used

Gorgeous card! Love the colors and all the details. Thank you for the awesome instructions. vrc at prodigy dot net
LikeLiked by 1 person
So pretty with all of the flowers, these colors and the framing.
slrdowney at hotmail dot com
LikeLiked by 1 person
What an impressive card, so beautifully done! Love how you placed the two mechanisms on the same fold, yet apart from each other so we could see the full range of movement from both. Had to go straight away to your IG account to see all the fun movements that happen as this card is opened!
LikeLiked by 1 person
Gorgeous card!! Love the colors you chose, and love the double use of the pop up mechanism!!
LikeLiked by 1 person
Wow! This is next level beautiful and detailed! What a marvelous card (better for feeling better than chicken soup!). Nice work, love the new playful die set, cannot wait to get it!
LikeLiked by 1 person
Lots of pretty details on your card! Love the pretty flowers and the colors you used!
deniseb777(AT)gmail(DOT)com
LikeLiked by 1 person
This card is so beautifully detailed. I love the way you used the paper. Very creative.
LikeLiked by 1 person
I love all the cards made with this new die set!
LikeLiked by 1 person
I grow up. I wanna be able to decorate cards like you.
LikeLiked by 1 person
When I grow up I want to be able to decorate luke you!
LikeLiked by 1 person
love the blue colors.
LikeLiked by 1 person
I love the colours you used for this card. Beautiful design.
LikeLiked by 1 person
The beauty and depth of this card is overwhelming! The ‘white gel’ pen adds a distinct addition, as usual! Thanks for sharing your creativity!
LikeLiked by 1 person
this card is absolutely beautiful!
LikeLiked by 1 person
I am in love with this card! It is beautiful!
LikeLiked by 1 person
I am in love with this card! It’s beautiful!
LikeLiked by 1 person
Wow, stunning card! What a thorough tutorial!
LikeLiked by 1 person
Love everything about this card, especially the colors, thanks for sharing. terrylstuart at comcast dot net
LikeLiked by 1 person
this is a gorgeous card!! I love the colors. I love the double mechanism. I love it all!!
LikeLiked by 1 person
This is so pretty!!! Love the colors!
LikeLiked by 1 person
Nicky, as always a great card and your directions so helpful!
LikeLiked by 1 person
This would make anyone feel better! I LOVE LOVE LOVE the colors! Gorgeous design and flowers! Thanks for the step by step
LikeLiked by 1 person
what a beautiful get well card. I am sure it will cheer up the recipient.
LikeLiked by 1 person
Your cards are ALWAYS so colorful and go above and beyond! I really like how you used a background for the trims – I will start doing that, it adds SO much!
LikeLiked by 1 person
I love all of your details. Great card.
LikeLiked by 1 person
Beautiful card – you always are so inspirational and I really appreciate you sharing how you made them!
LikeLike
Beautiful card – you always are so inspirational and I really appreciate you sharing how you made them!
LikeLiked by 1 person
wow!! Blue ladybugs!! Your cards are always a great inspiration!!
LikeLiked by 1 person
Love the card.
LikeLiked by 1 person
Love this card and blue is a favorite color!
LikeLiked by 1 person
I adore the colors you used! I love the white gel pen highlights-I struggle with where to put them – great job!
LikeLiked by 1 person
So gorgeous! What a great job.
LikeLiked by 1 person
Can’t wait to make this beautiful card
LikeLiked by 1 person
such a great card, I love how you accented with the white pen
LikeLiked by 1 person