
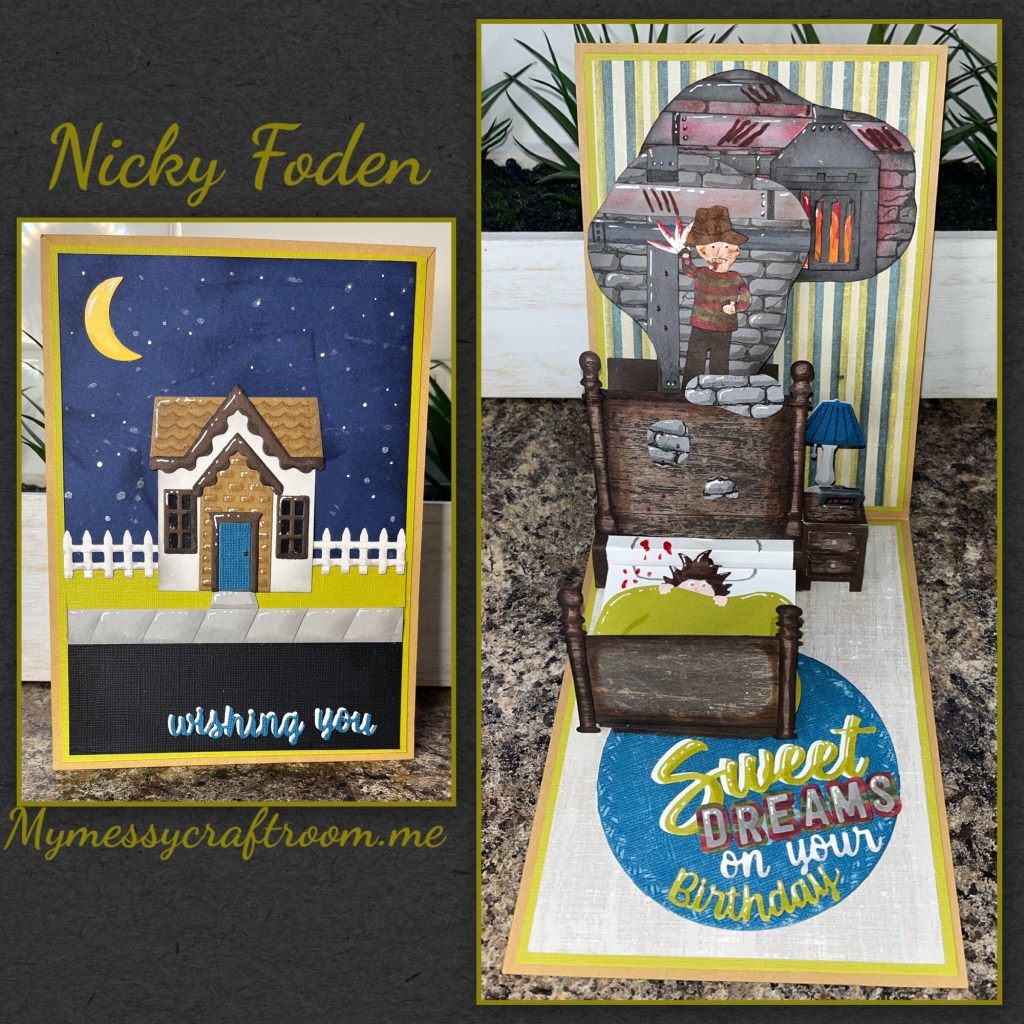
Last year was Jason, this year its Freddy. My brother loves horror movies and I’ve been enjoying making him these birthday cards, my head is already thinking of what to do next year.
All the fun is in the reveal, to see this card in action please check out my FACEBOOK page, feel free to join if you would like to share your own crafty creations. You can also see a video of this card on my INSTAGRAM page.
I cut the card base out of the Kraft cardstock as shown. Adhere end to end. I added the green panels and the the patterned panels. I chose patterned paper that would work as wall paper and carpet.

Diecut and assemble the pieces from the Parcel Pop Up (Karen has a video tutorial on the product page at the link ⬆️) I added it to the left side of the card. I cut a blue circle that matches the stripes in the wall paper using the Circles Crosshatch, I used Core Color Cardstock so I roughed it uo a bit with an Emory board.

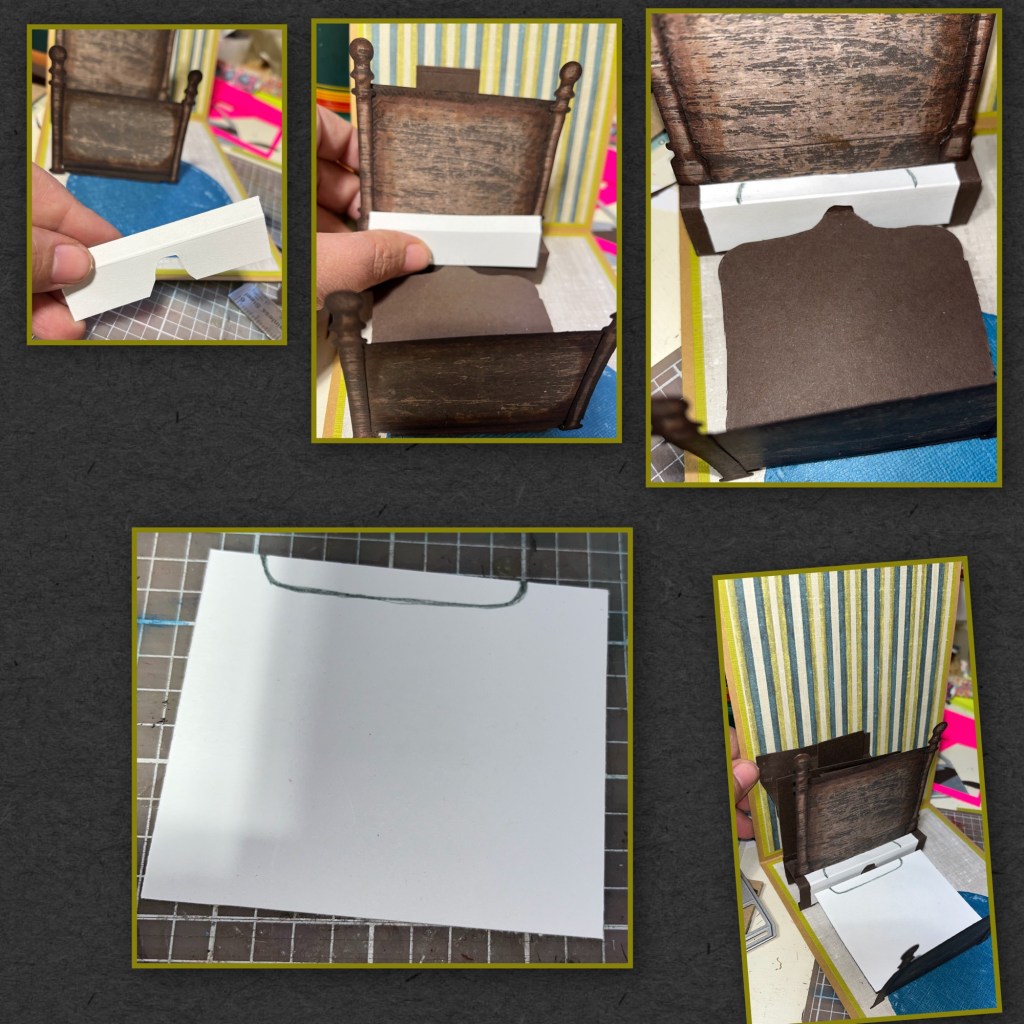
To make the bed I used the Lorna Label dieset. I folded a piece of cardstock in half and lined the die up with the folded edge as shown to double it up. I was planning on attaching the Lorna Label to the Parcel Pop up but the Parcel Pop up wasn’t wide enough along the bottom. So I had to add the strip as shown.
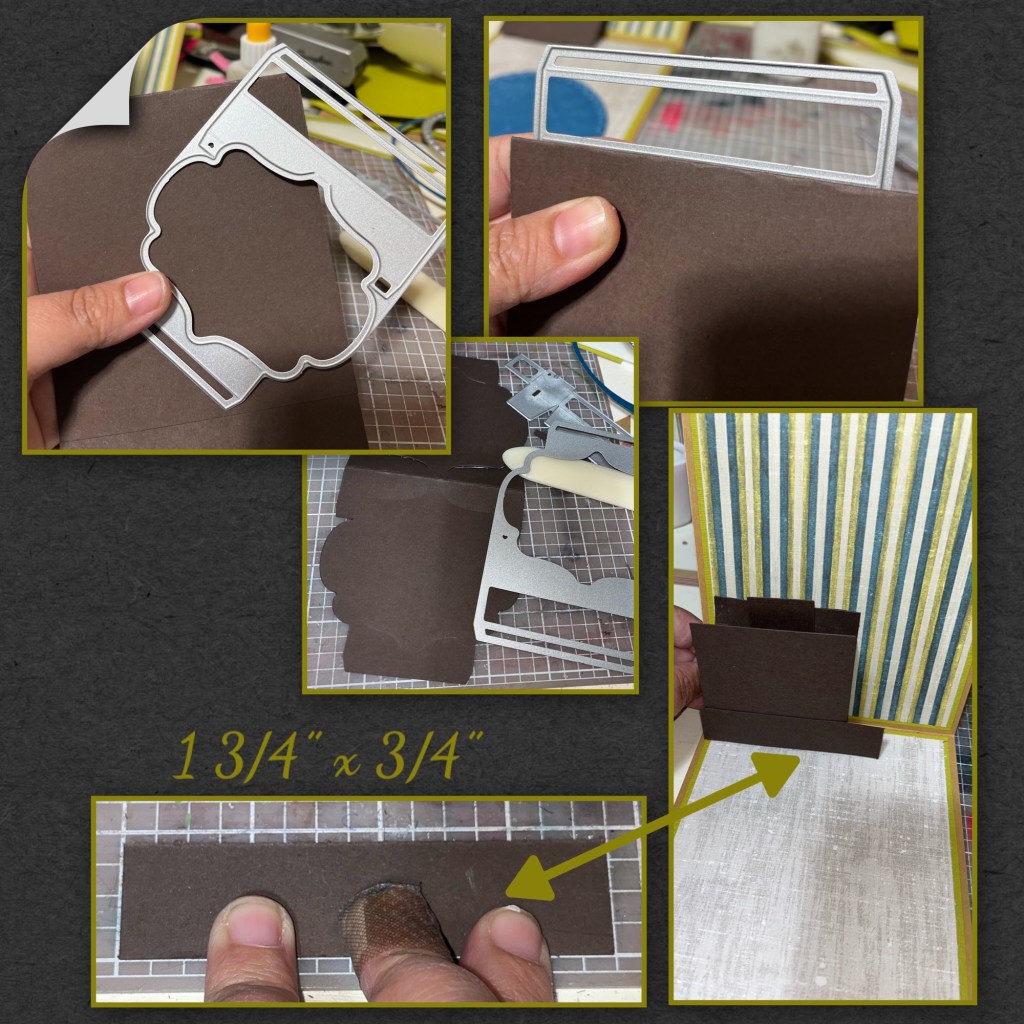
This is where I was figureing it out as I went. So I hopefully I remember it all. The Lorna Label was going to be too tall to fit on the Parcel Pop up but I needed the top piece to attach it down. So I dew a line and cut, then glued that top piece behind the main piece. I also cut off the top point of the Lorna Label. I added the Lorna Label as shown, and attached it to the Parcel Pop up as if it were the back of the card.

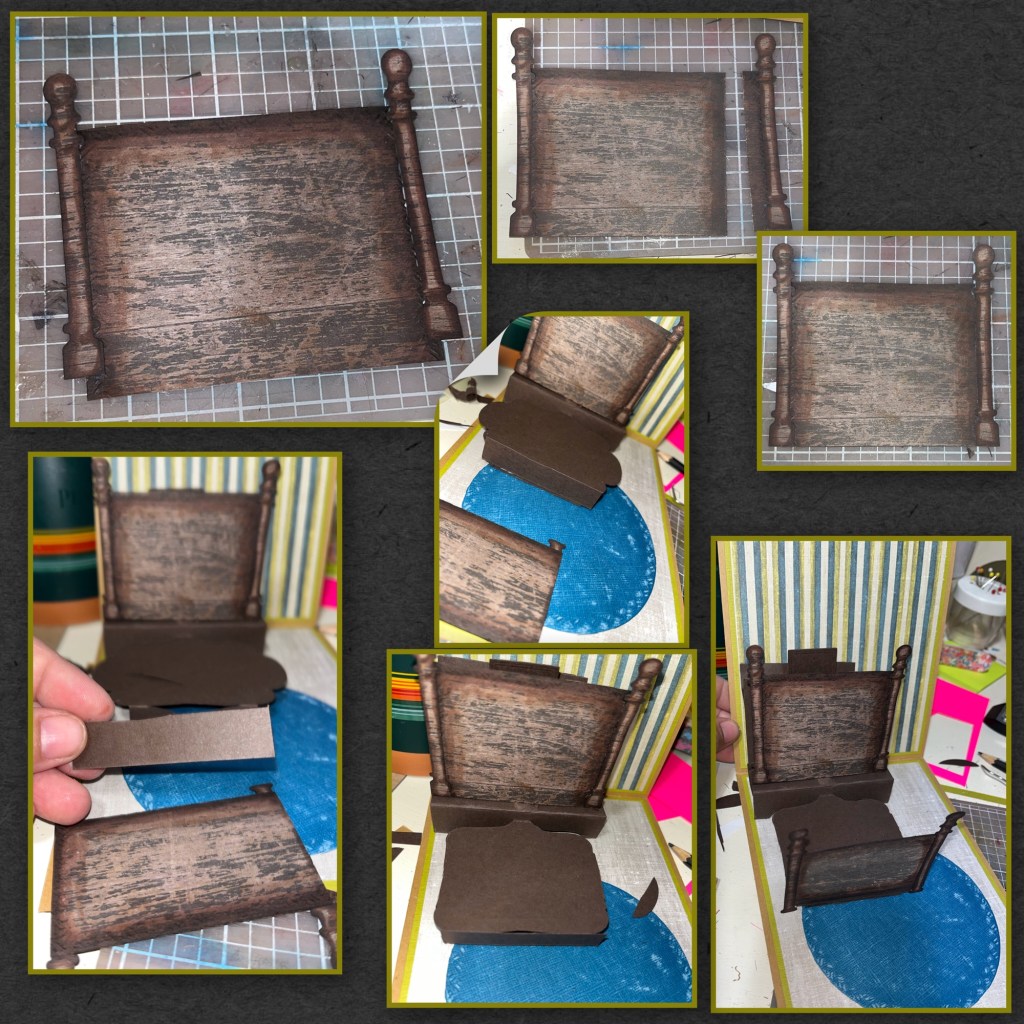
I used the Street Post Pop up to make the bed poles. I made the head board poles taller that the foot board. I used alcohol markers to add some definition. I started using the Squares Crosshatch to make the headboard and foot board but ended up trimming. I used alcohol markers to the headboard and footboard as well.

When assembling the headboard I found it too big so I trimmed a little off the bottom and the right side. I cut a thin piece of cardstock and attached it to the bottom of the Lorna Label so the foot board will have something to attach to. I also trimmed the sides of the bottom Lorna Label so they will be straight.
To make the pillow I cut an L shape piece of white with a notch to fit over the brown box piece where the Lorna Labels meet. I cut a 2 1/2” white square and drew the pillow on to both.
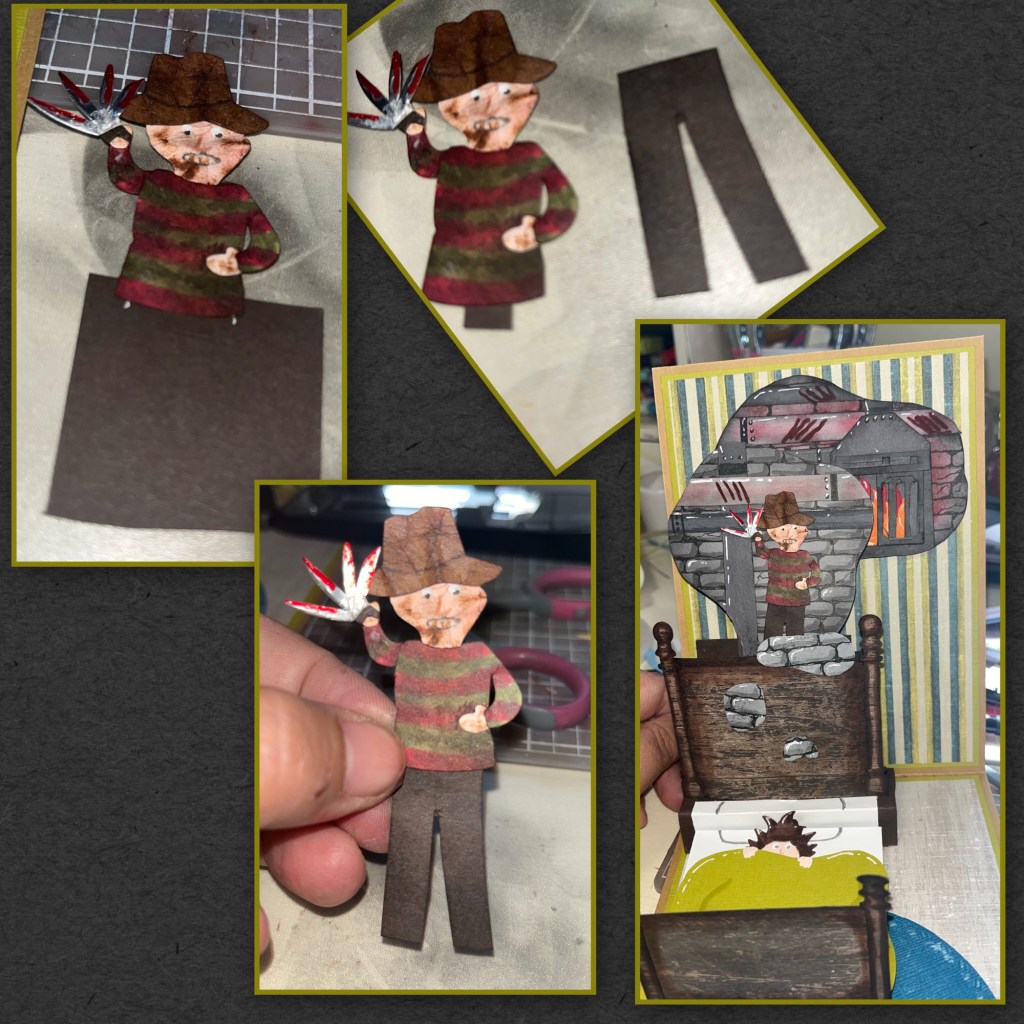
Using the Gnome and Santa I created the head in the bed by trimming the beard and put it on as hair. I hand cut a blanket that is roughly 3”x 4”, I added shading with a Versa Mark Marker, and highlights with a white Gelly Roll pen and added what would be feet.

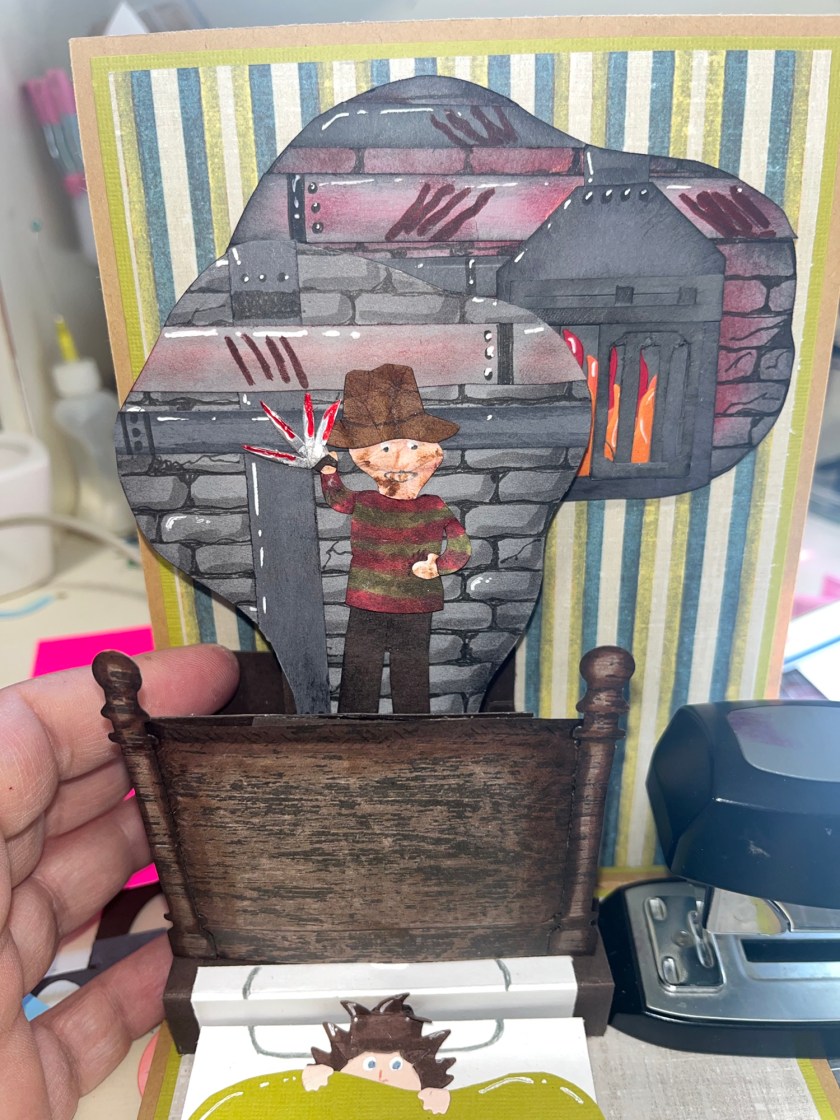
Using the Gnome and Santa head and body, the hat from the Camping Charms I created the Freddy. I used alcohol markers to make the stripes. I crinkles the cardstock and sponged brown ink to give Freddy his scars. I trimmed the knives from the Oven Extras as show to make Freddy’s infamous glove of blades. I added a long strip of card stock from top to bottom to give him some stability.

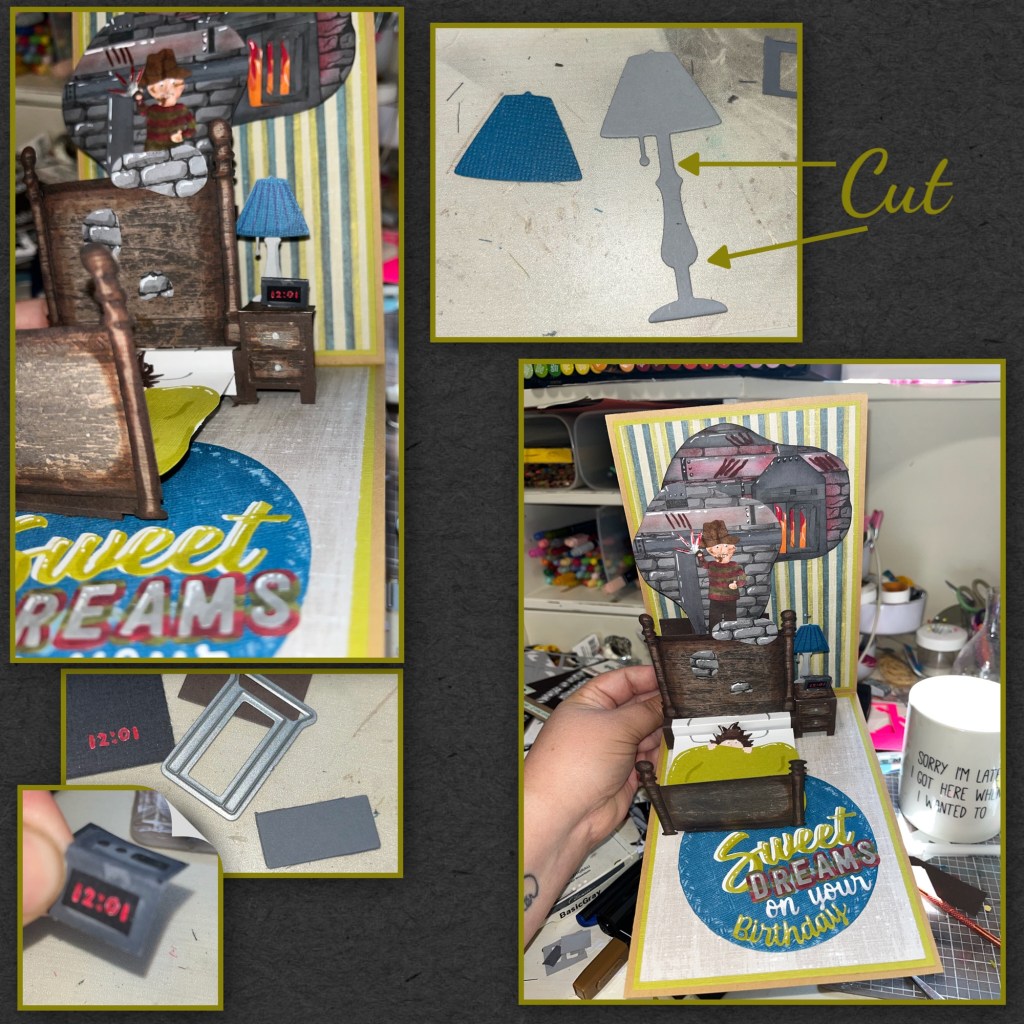
I hand cut a large dream bubble as shown, and drew on bricks as shown. I added some dark grey ink as well as I shading with a Versa Mark Marker, and highlights with a white Gelly Roll pen

I converted the barn door from the Barn Pop Stand into the furnace door, I trimmed the track as well. My intention was to have it open and close but it didn’t glide very well. I hand cut the furnace using the door as reference for size. I used the fire from the Fire Place Pop up. I added some red ink to the bricks to make it look like a hot glow. I hand cut some pipes and coloured with grey and red ink and drew on the blade swipes. Add all the elements and trim the edges of the furnace that over laps the edge of the dream bubble.
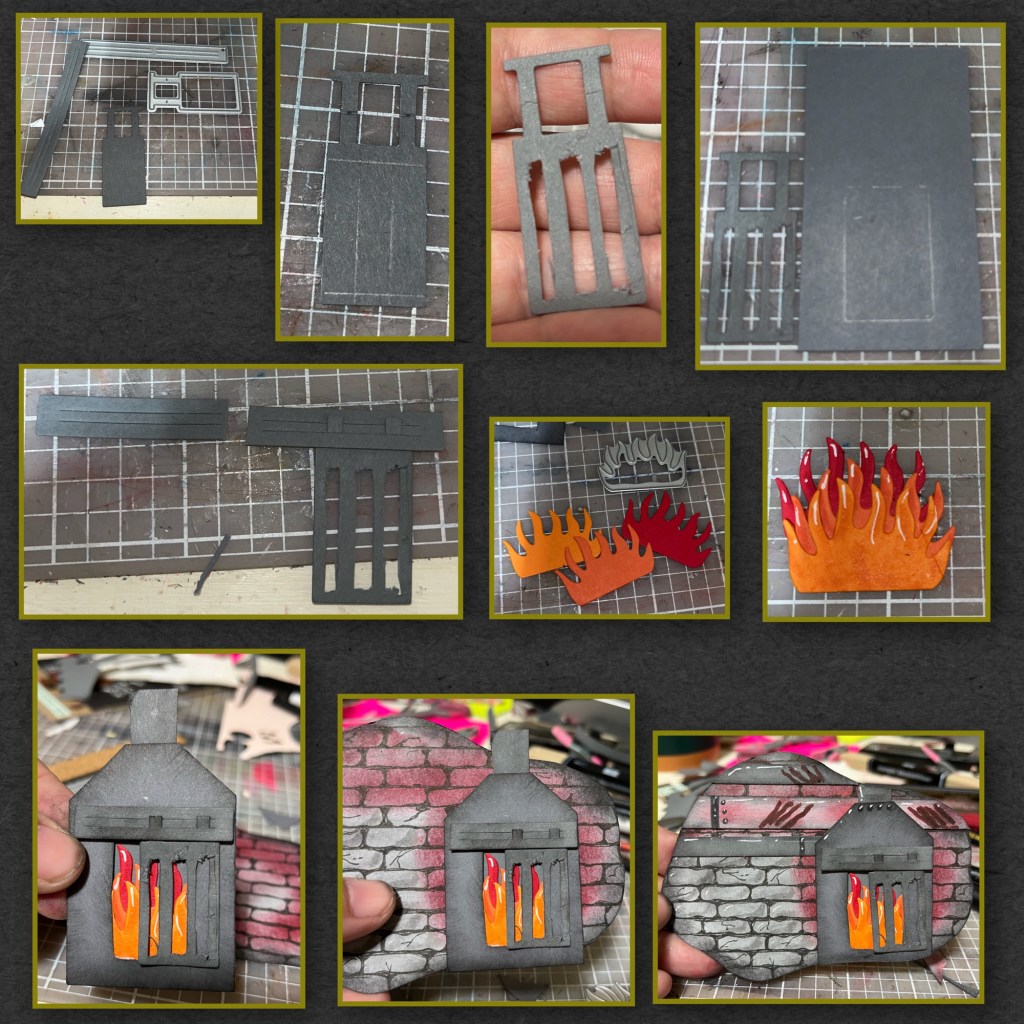
Cut and add bricks to another dream bubble, draw and cut pipes as in the previous step.

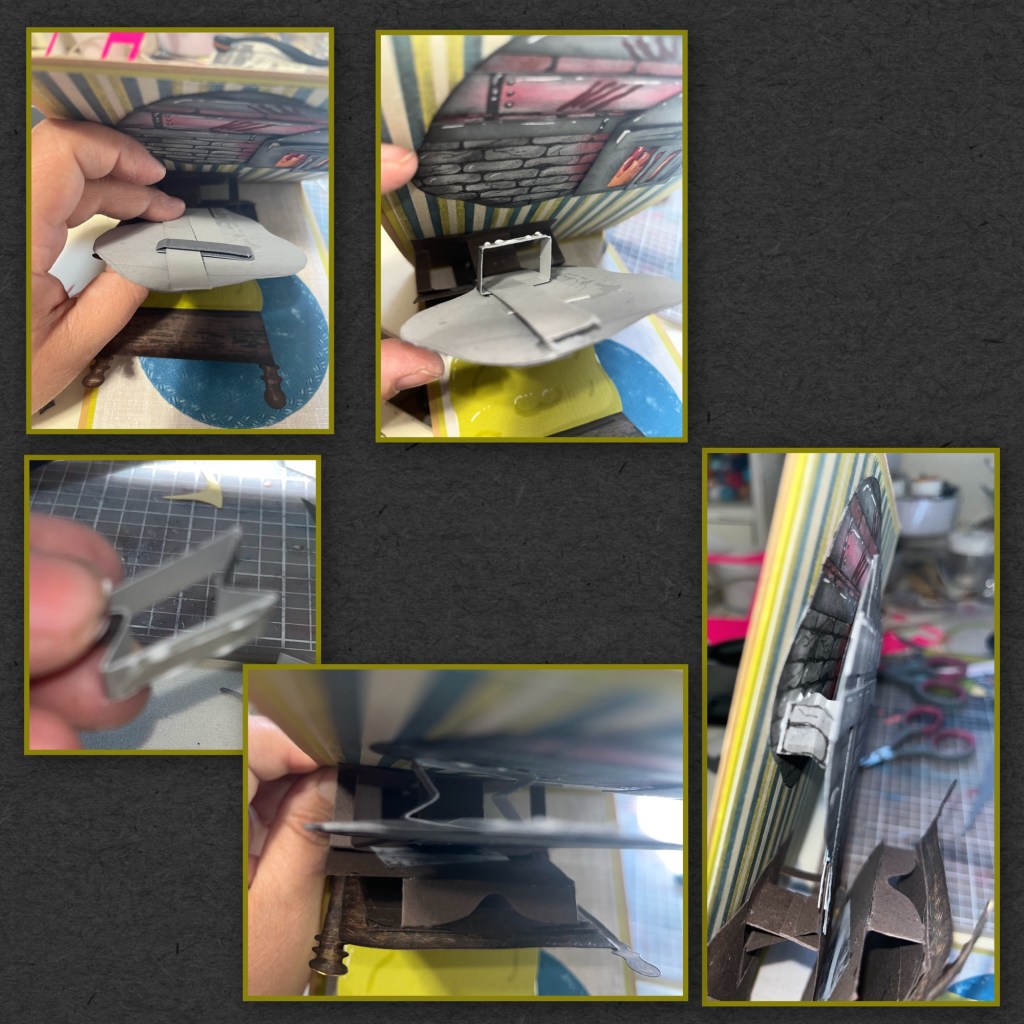
I needed to extend the arm so I made a long rectangle, folded in half and added glue as shown. Sorry I forgot to measure. And I sandwiched the original raising tab in the middle of this piece. I added the second dream bubble to the cardstock strip and added the first dream bubble to the right and a bit higher.

So the bubble attached to the raising tab is really top heavy so it flops over. It took a a few tries because I needed to attach it to the card but it had to still slide up and down. I added a long strip of cardstock behind the bubble only attaching at the top and bottom. I made a small band to use as an attach point but it was too thin. I made a box but it was too thick. So I made a box with the sides bent in and this worked perfect. Slide the strip through it and attach it to the card.
I had to give Freddy some legs, I also added glue to his blades and when it dried I coloured with red sharpie. I added him to the moving dream bubble. I then cut and drew 3 small bubbles, getting smaller the closer they get to the dreamer.
I diecut “dreams” using the Mini Alphabet and Numbers, the shadow from white and I used alcohol markers to colour them to match Freddy’s sweater, and the letters from grey. “Wishing You” and “on your” is from Word set 18-Connectors, and “Sweet” from You’re Sweet. Birthday is from Word set 2- Birthday, I added white shadows as shown and I added shading with a Versa Mark Marker, and highlights with a white Gelly Roll pen

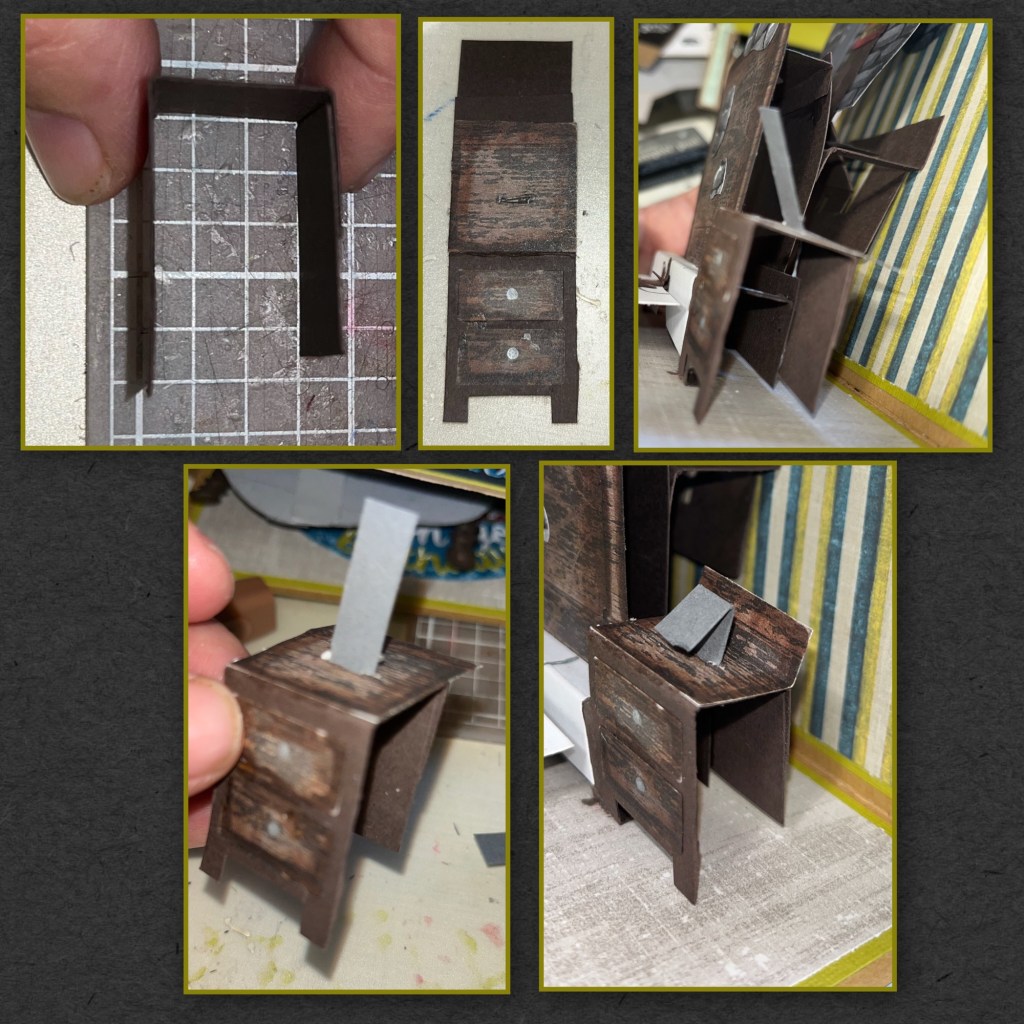
I decided to fill in the space beside the bed by making a night stand. Using the drawers from the Oven Pop up as reference for width I made the night stand 1 1/2” tall, 3/4” deep, and 3” long in the back. I used alcohol markers to make it match the bed. I put a slit in the top and added a small strip of grey cardstock as shown. I added it to side of the bed as shown.
Add the words to the carpet as shown.
To make the lamp I used the lamp from the Family Room Pop up and cut where shown, then adhered the pieces back together but making it shorter. I used the door from the Holiday House to make the alarm clock I printed the numbers on black card stock with a white pen, when it dried I added red over the white, trimmed and then added to the clock. I drew the buttons on the top with a black marker. I added the clock to the grey cardstock sticking out of the night stand. I added the the lamp to the back side of the clock.
Cut a piece of navy blue card stock to 5” x 5 1/2”, I rubbed it against a navy ink pad. I splatted some gold Smootch spray for stars. I decided to double up on the fence from the Farm Edges so the slats would be closer together. The house is from the Holiday House. I drew the sidewalk as shown, I added shading with a Versa Mark Marker, and highlights with a white Gelly Roll pen. I just cut a piece of black to fit along the bottom. And add the “wishing you”


Other Tools used

One thought on “Nightmare Birthday card”