
So this is my first blog post in almost 2 weeks. To say I’ve been under the weather would be an understatement, but I’m on the mend and decided to make this post. This is actually a card I made last year but haven’t had the chance to post it until now.
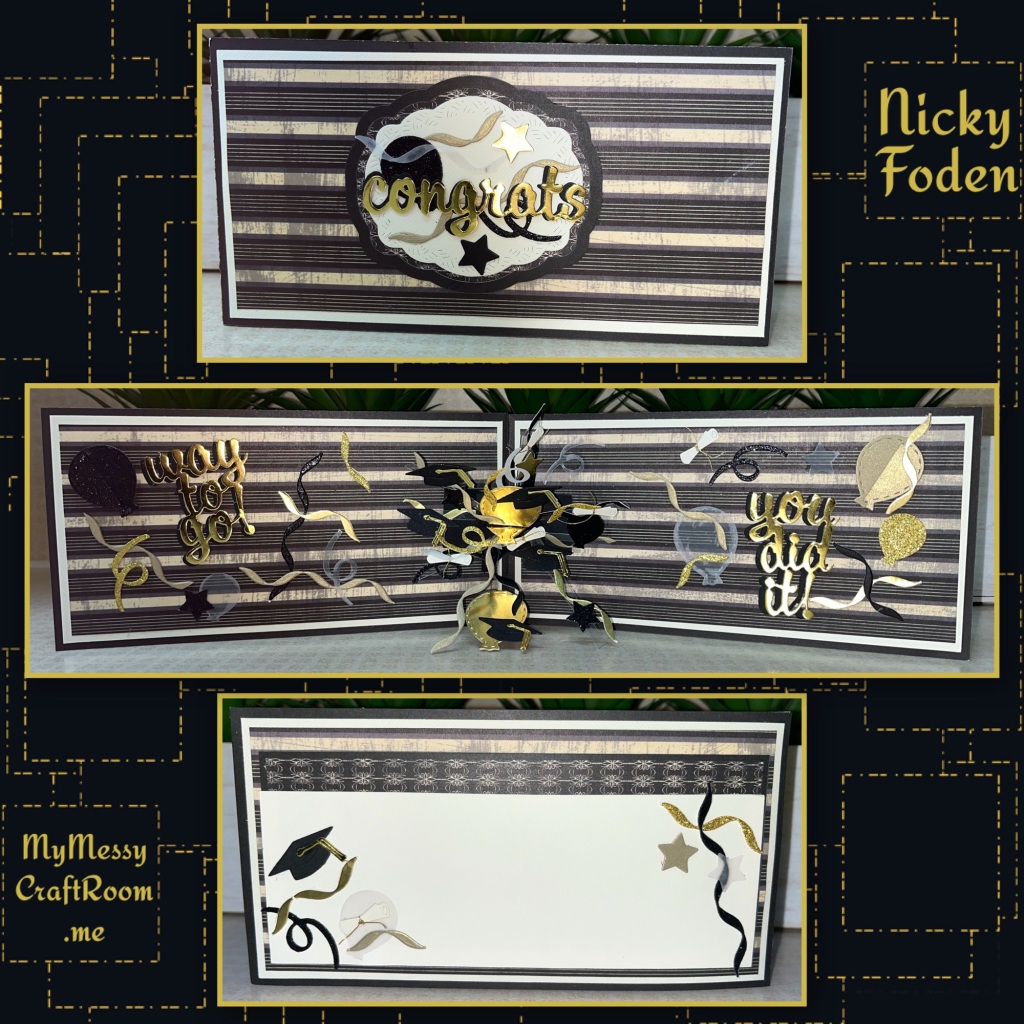
All the fun is in the reveal, to see this card in action please check out my FACEBOOK page, feel free to join if you would like to share your own crafty creations. You can also see a video of this card on my INSTAGRAM page.
I don’t remember the exact dimensions but I’m pretty sure I got them right. If not they are pretty close. Attach the 2 black panels together and add the cream panels to the front back and inside as shown.
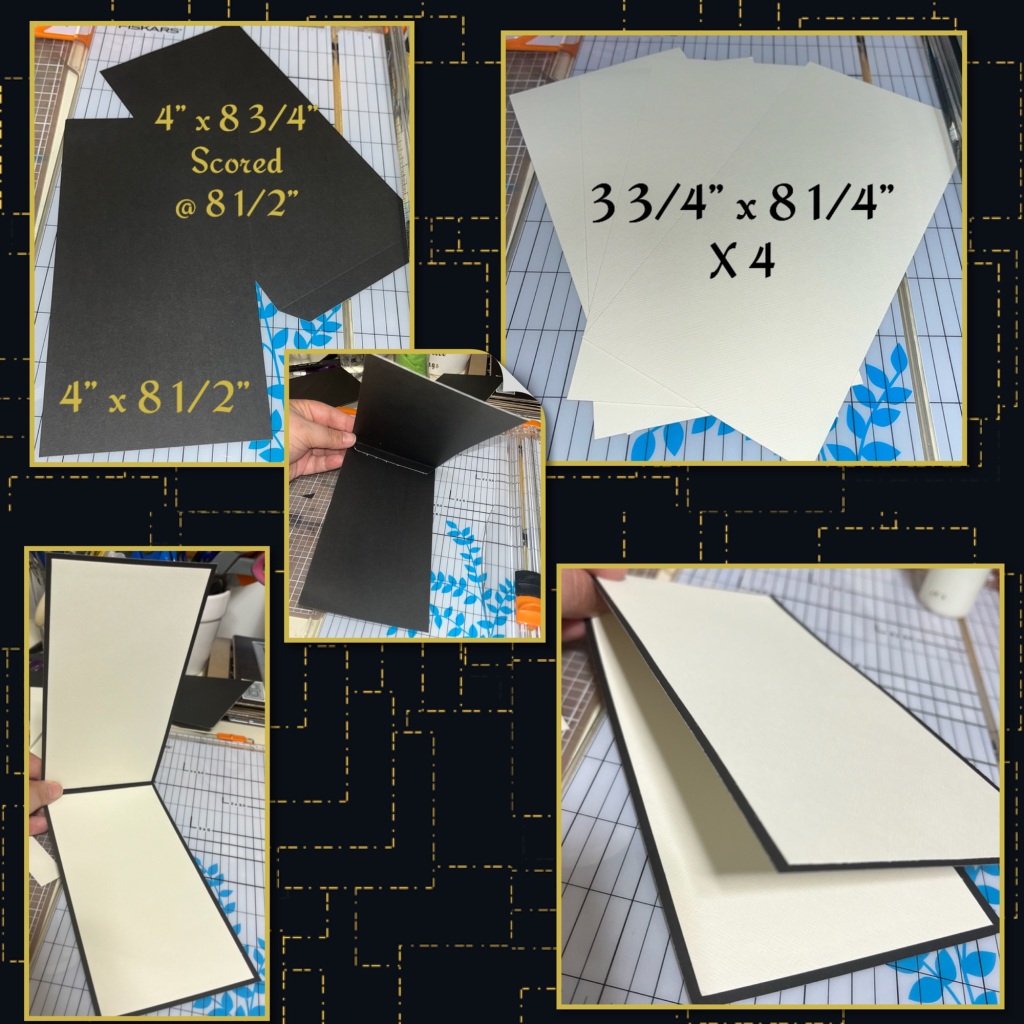
I cut the patterned panels to 3 1/2” x 8” x 4, add them to the front back and inside.

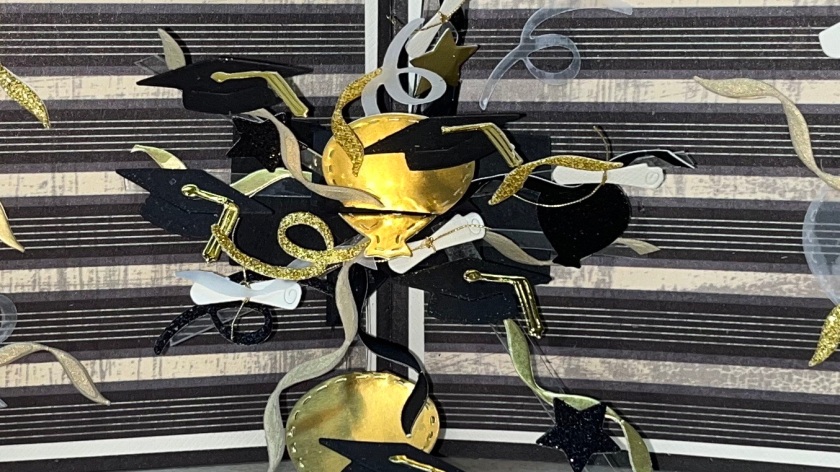
I assembled the Heart Collage Pop up mechanism with acetate arms (Karen has a video tutorial on the product page at the link ⬆️ )
All the fun bits for the mechanism are from the following: Caps and diplomas from Tiny Accessories 2, Streamers are from the Border Blends Trims, balloons are from Balloon Collage add on. The stars are from the Surprise Ball Pop up . They are cut from Black, a couple different golds, and vellum. The diplomas were cut from cream and wrapped with a tiny gold string.
The words are from Word Set 8 – Congrats and they are cut from gold with a black a shadow.
Add the pieces to the inside of card making sure that it can open and close freely.

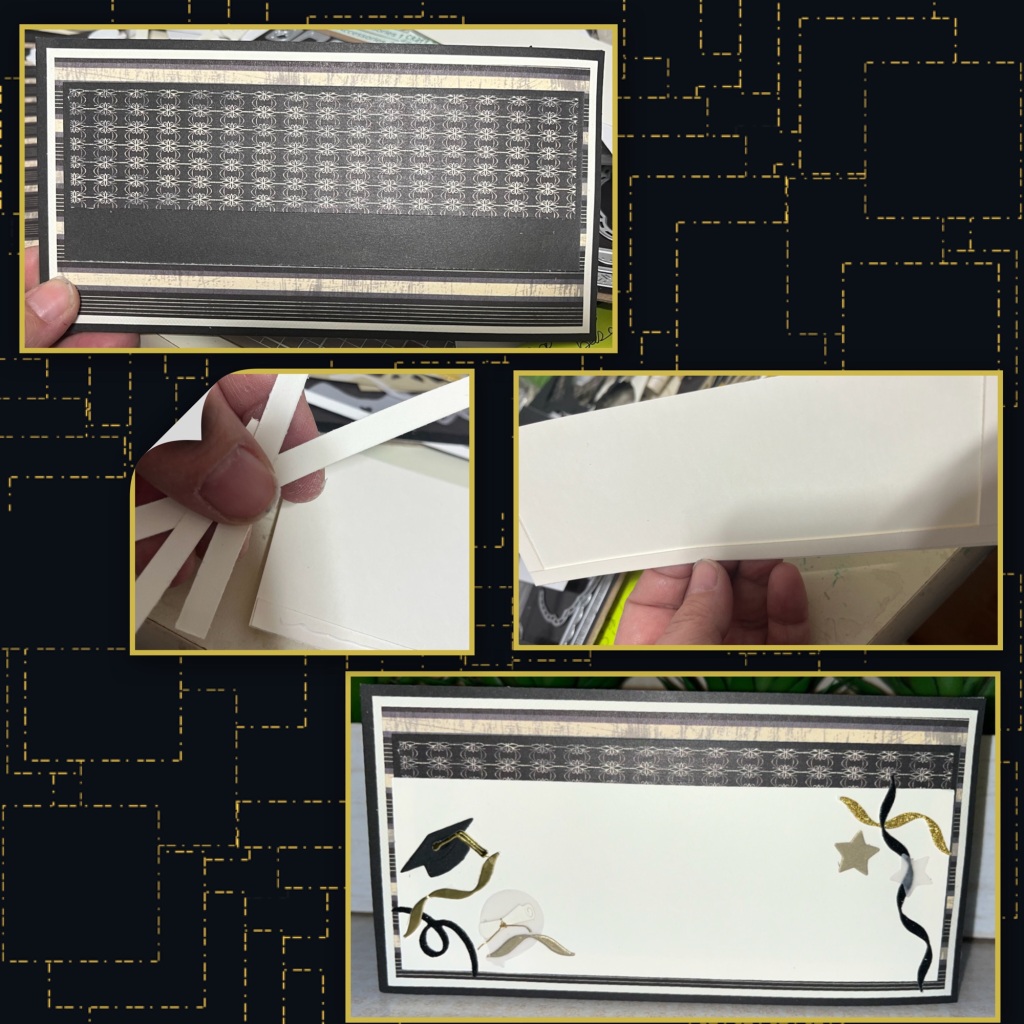
I diecut labels from the Labels and Rectangles Crosshatch set and layered and added to the front of the card. I added some of the extra pieces left over from the inside.

On the back side I added a panel that matched one of the labels I used on the front. I didn’t have enough to cover the whole back but that’s ok because only the top will be visible. I cut some skinny strips of cream cardstock and layered them. I added them to the back of a 7 1/4” x 2 3/4” piece of cream cardstock. This is used to make a pocket so the strips go down both sides and the bottom. Add the pocket to the card and I added some extra pieces from the inside.

Other Tools used
