

*Hello, hello… I’ve been under the weather for the last week and I feel like I’ve been slacking. My Karen Burniston challenges start in August and I’ve started on those, but those are under wraps until the scheduled dates, so I thought that I would share another Christmas in July card. I made this card for my sister and her family a couple of years ago. It was my first Pop n Swap so I hope you all like it.
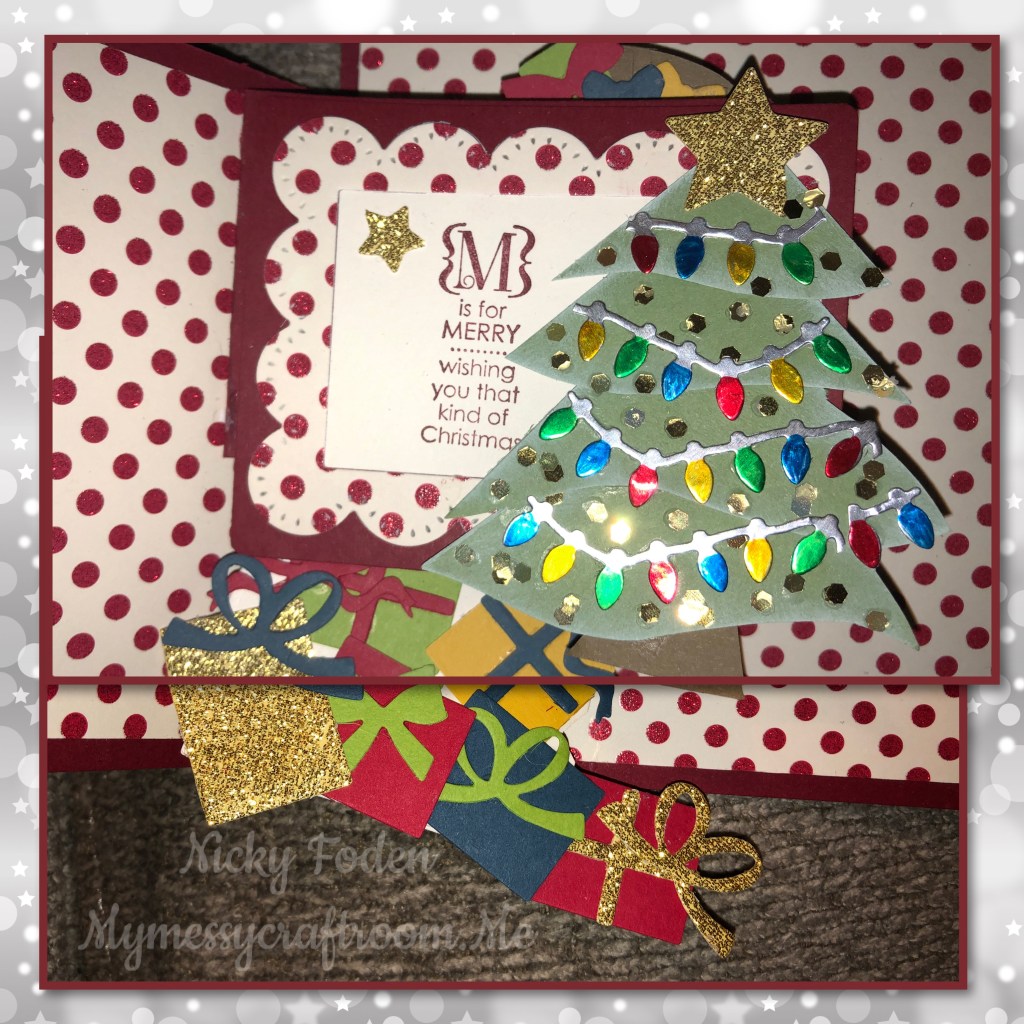
The next photo is actually 2 photos that I lined up. I was in a hurry to get pictures and didn’t get a great one of the gifts swooping under the tree
All the fun is in the reveal, to see this card in action please check out my FACEBOOK page, feel free to join if you would like to share your own crafty creations. You can also see a video of this card on my INSTAGRAM page.
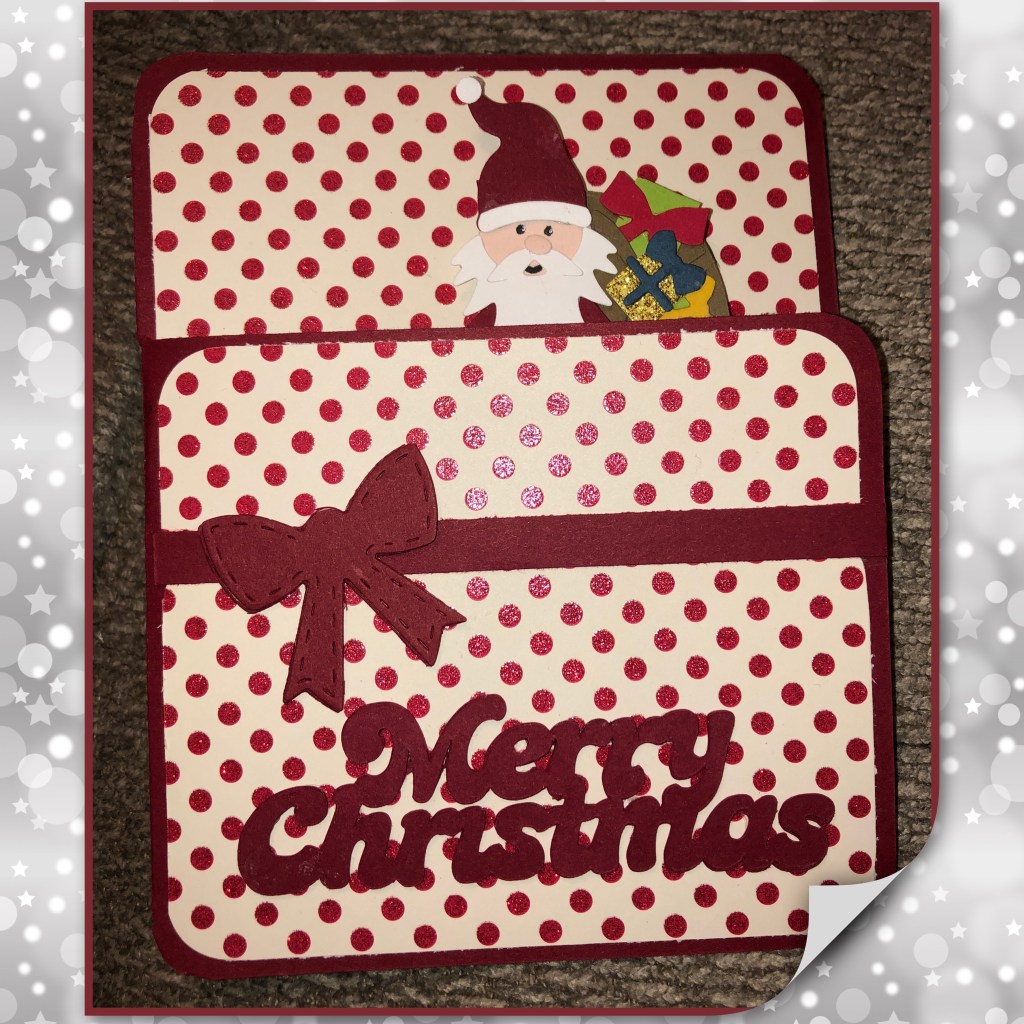
The cardstock I used for this card is from Stampin’Up. The red is Cherry Cobbler and the polka dot paper is a retired designer paper, it’s hard to see but the polka dots sparkle.
The main dieset used is the Pop n Swap from Karen Burniston.

1- if you look close I drew on the score lines, there are 4 vertical folds and they all fold mountain fold.
2- should look like this
3- fold the top part of the mechanism like this
4- the arm will be in this location
5- the other side of the mechanism needs to be folded like this
6- the mechanism should look like this

7- card base is 9 1/2” x 6” scored @ 5 1/4”
8- cut 2” from the top of the front flap
9- I cut the polka dot paper to fit both the inside and the front panel ( The front panel I have in two pieces because that’s all I had left of the pattern paper.)
10- card base

11- add the patterned paper to the inside
12- add the patterned paper to the front
13 – add adhesive to the mechanism as shown and adhere to the fold of the card
14- it should look like this

15-fold the mechanism on the left side as shown, and add adhesive to the little tab
16- close the card so the adhesive will now stick the mechanism to the right side. It should look like this
17- I cut a large panel and 2 frames, I stamped a greeting in a small panel. All the dies are in the Pop’n Swap set
18- I layer all the pieces together as shown. The frame has the solid red under the polka dot paper for dimension.

19- add adhesive as shown
20- add the panel
21- make a Santa, I had to cut off Santa’s feet to fit, this Santa is from the Gnome and Santa set
22- add Santa to the top swing arm
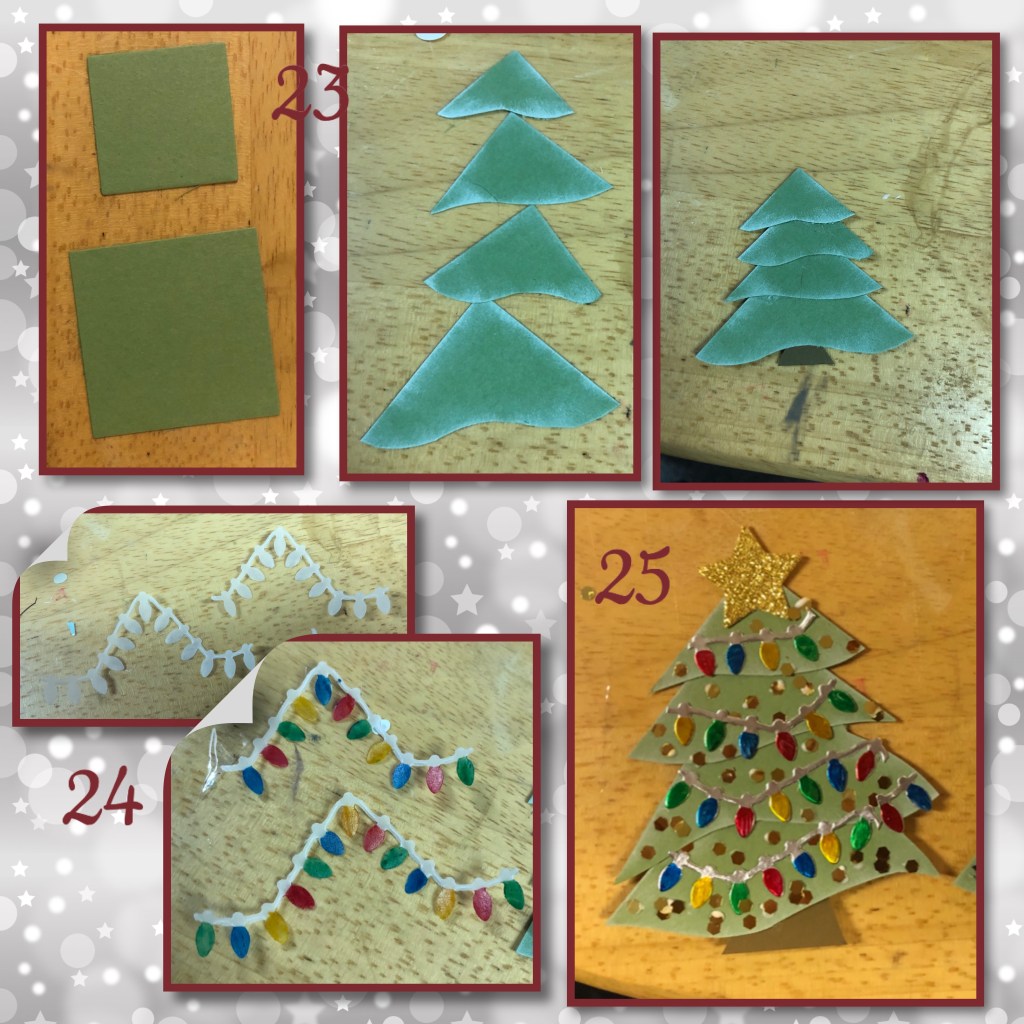
23- I cut 2 squares (sorry I forget the size) cut them in half with a swoop, sponge with white and assemble l, add a little trunk.
24- diecut lights from The Holiday House die set. I die cut from Vellum, then colour with alcohol markers.
25- Decorate the tree with the lights, a Gold star, and some itty bitty sequins for bobbles.

26- Diecuts gifts and bows in multiple colours with the gifts from the Gifts Pivot Panel dieset
27- add the gifts to the bottom swing arm.

28- “Merry Christmas” was die caught three times, this is an image from my Scan n Cut. I also die cut a bow and cut a long strip to use as a ribbon.
29- layer the greeting together. Add the pieces to the card front as shown.

Santa peaks over the front flap of the card, and when you open the card he ducks in behind the panel as the gift swoop out from under the tree.

To see some other fun interactive Christmas cards please check these out
Christmas Card 2019 Santa in Chimney
