
I know I say this every time there is a new Karen Burniston release, BUT I had so much fun playing with these new dies. I found myself in my craft room quite a bit these last few weeks (my house work has been slacking 🤫)
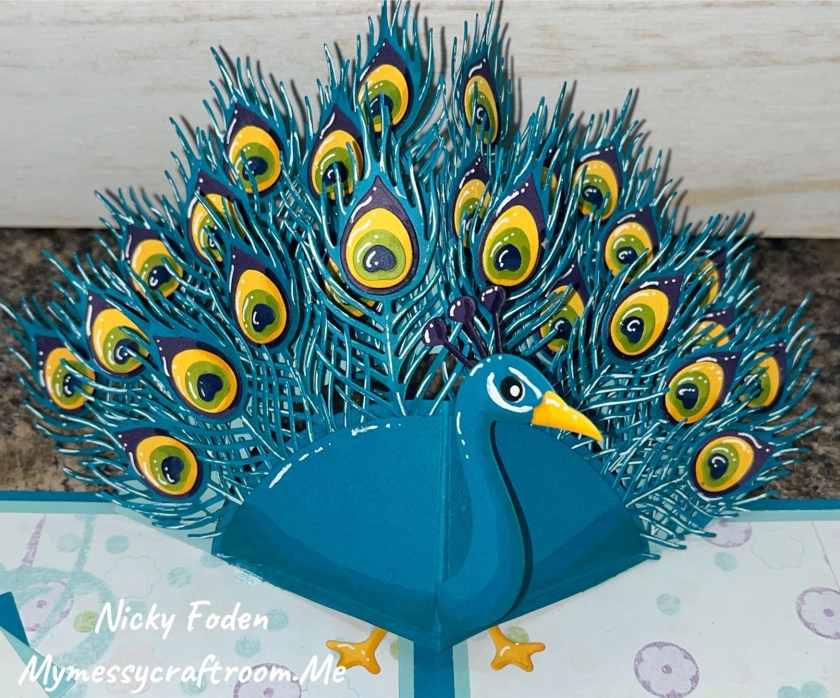
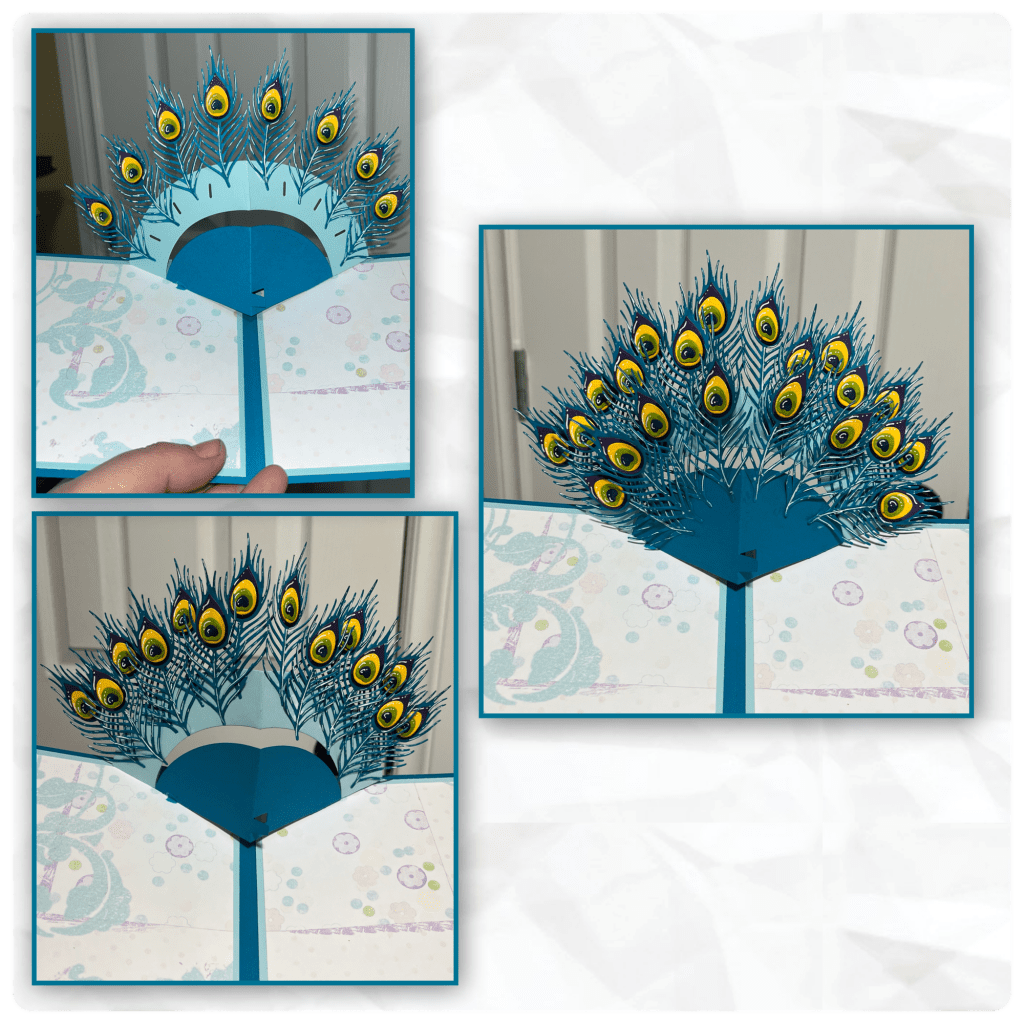
I am so excited to share my first card from Karen Burnistons January Release. This one is my personal favourite, I used some of my favourite colours and I think it turned out wonderful. This Peacock and on turns the Arch Pop Up into this cool peacock. You can make it with a few feathers or as many as you would like to add. I decided to make a matching little peacock.
All the fun is in the reveal, to see this card in action please check out my FACEBOOK page, feel free to join if you would like to share your own crafty creations. You can also see a video of this card on my INSTAGRAM page.
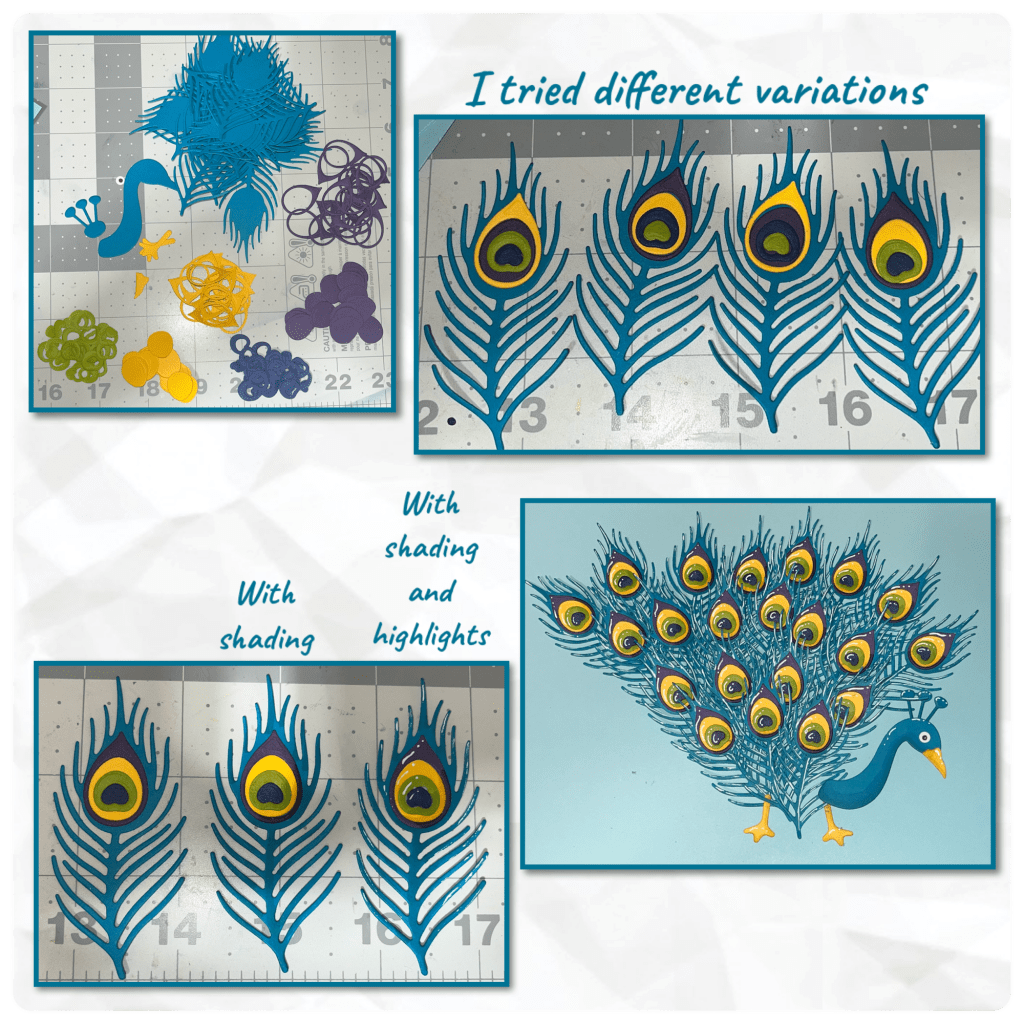
I started by cutting out all the pieces from the Peacock Add On. For the layers on the feathers I cut out multiple layers so I played around with the different options. I decided on a pattern, and I will put the rest of the pieces away for a different project. I added shading with alcohol markers and highlights with a white Jelly Roll pen. I originally made 21 feathers but then ended up making more. The Peacock has 25 and then I added one on the front.
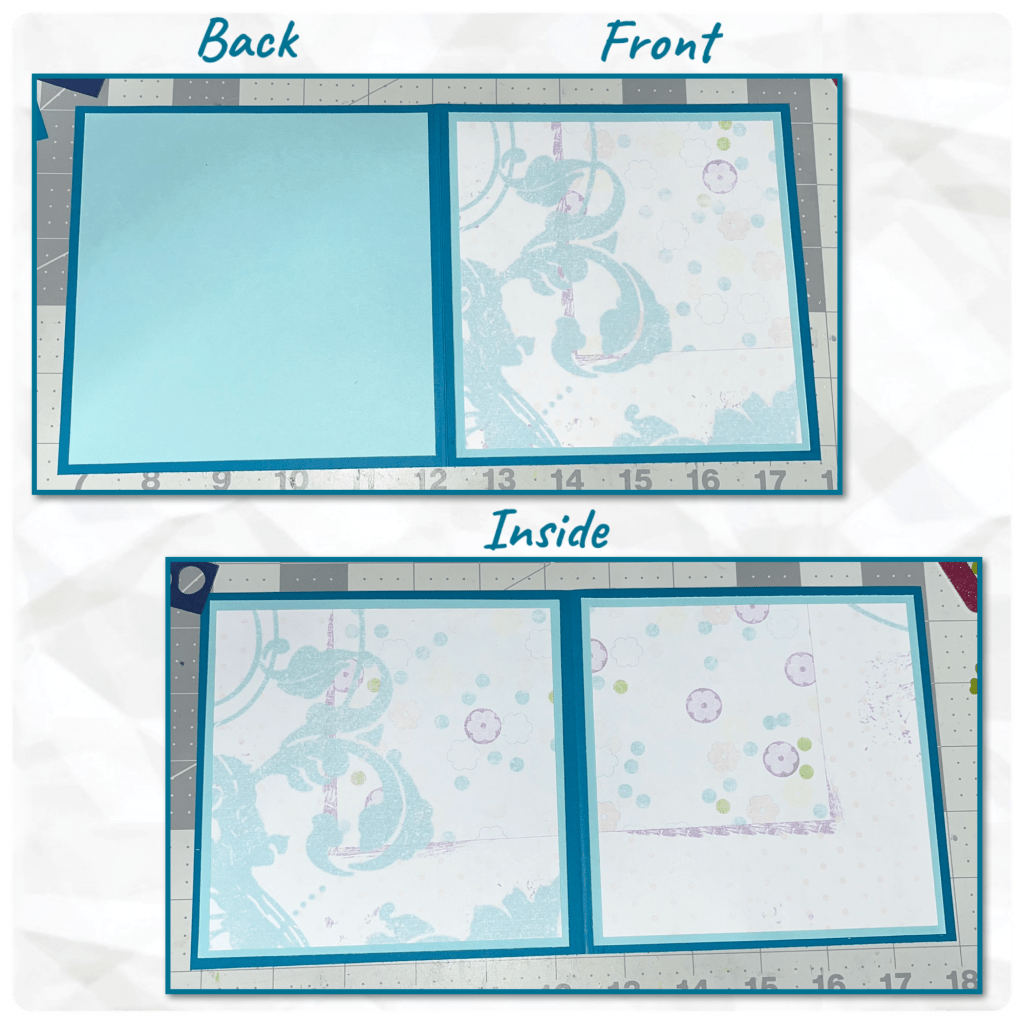
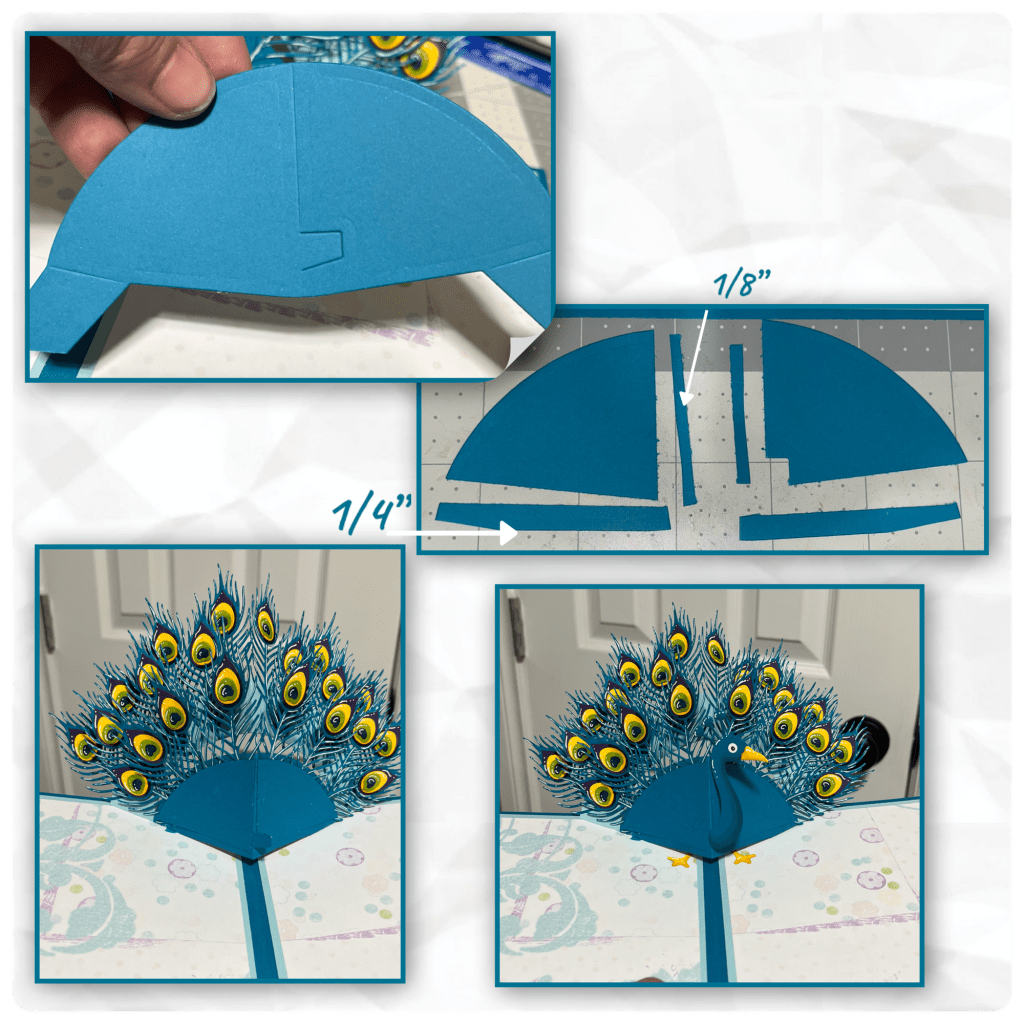
I wanted to make sure all the feathers fit so I made a 5 1/2” card using the measurements below. I added a couple of layers, I found this pretty patterned paper that I thought would work great.
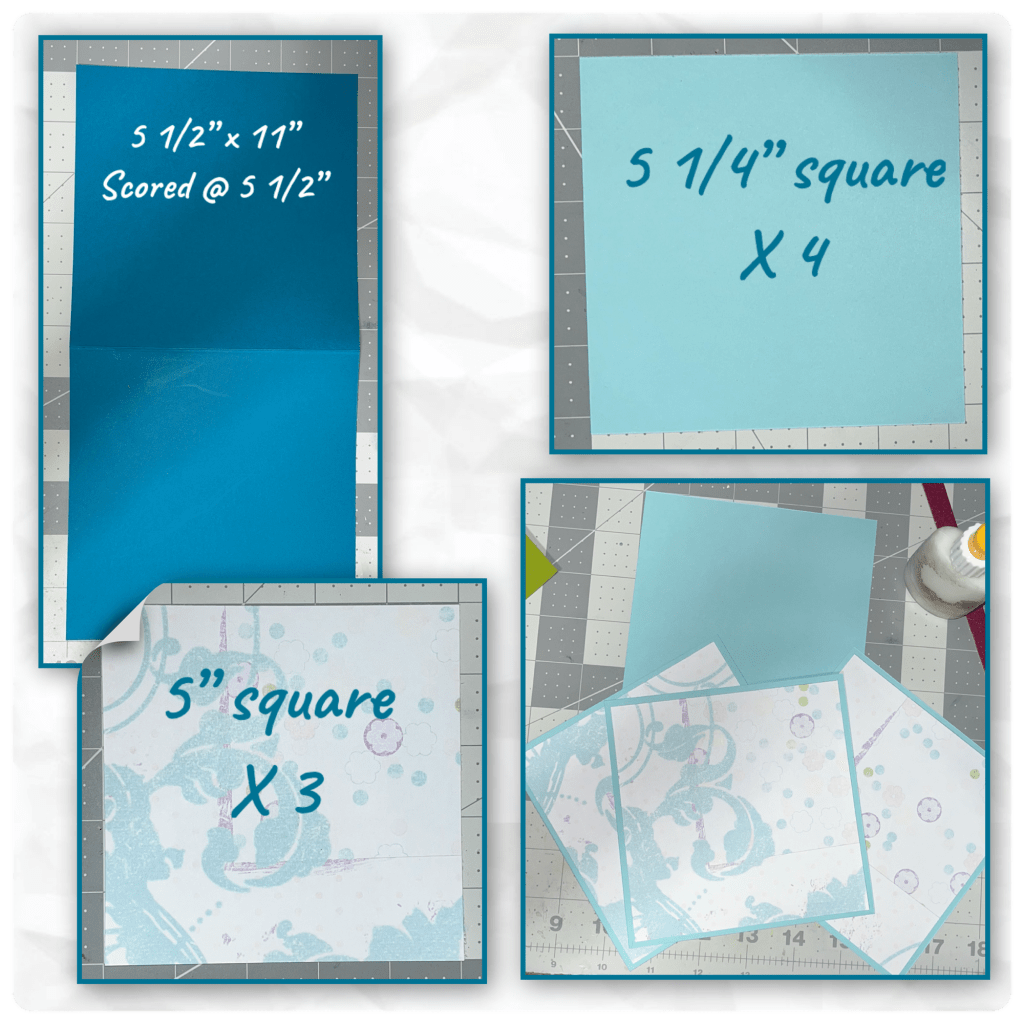
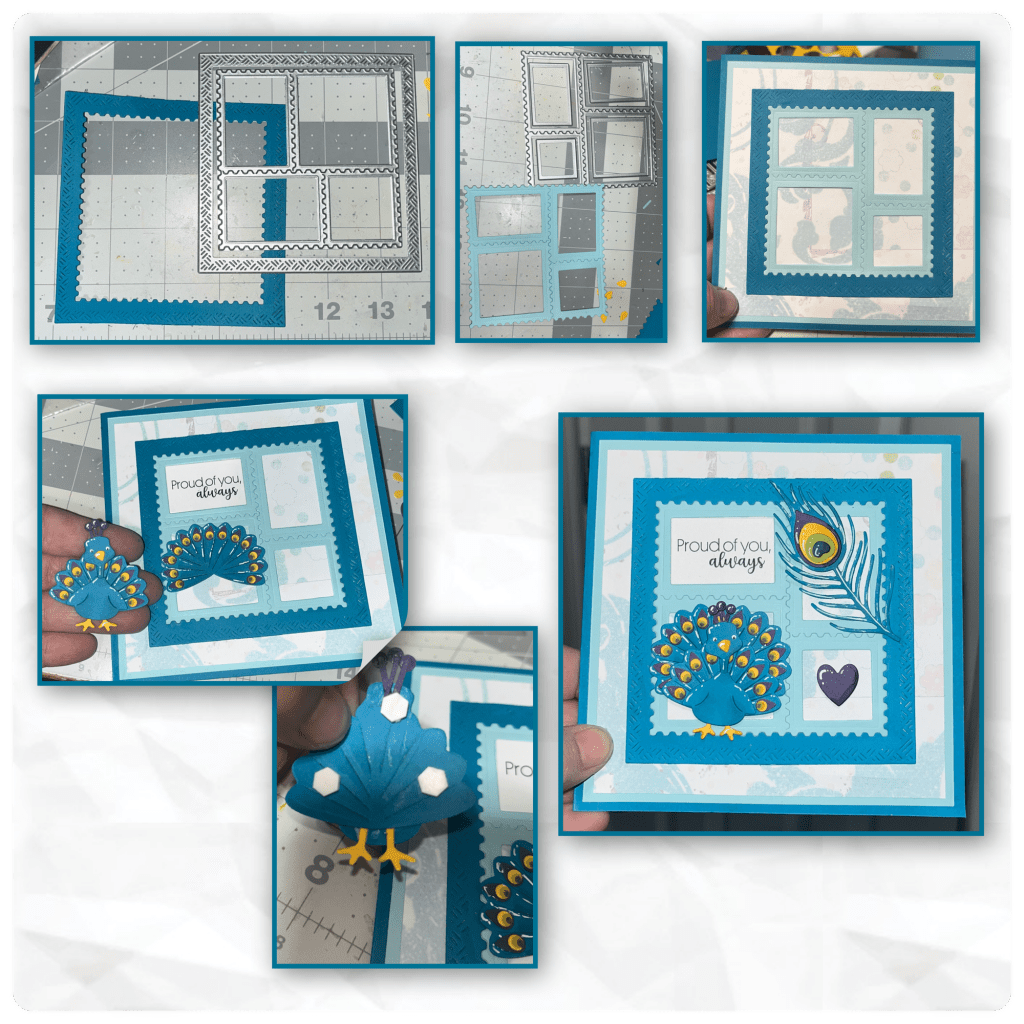
Add all the panels as shown.
I cut the pieces for the Arch Pop Up and the body for the peacock. I added the pieces as shown below. Karen Should have a video soon.
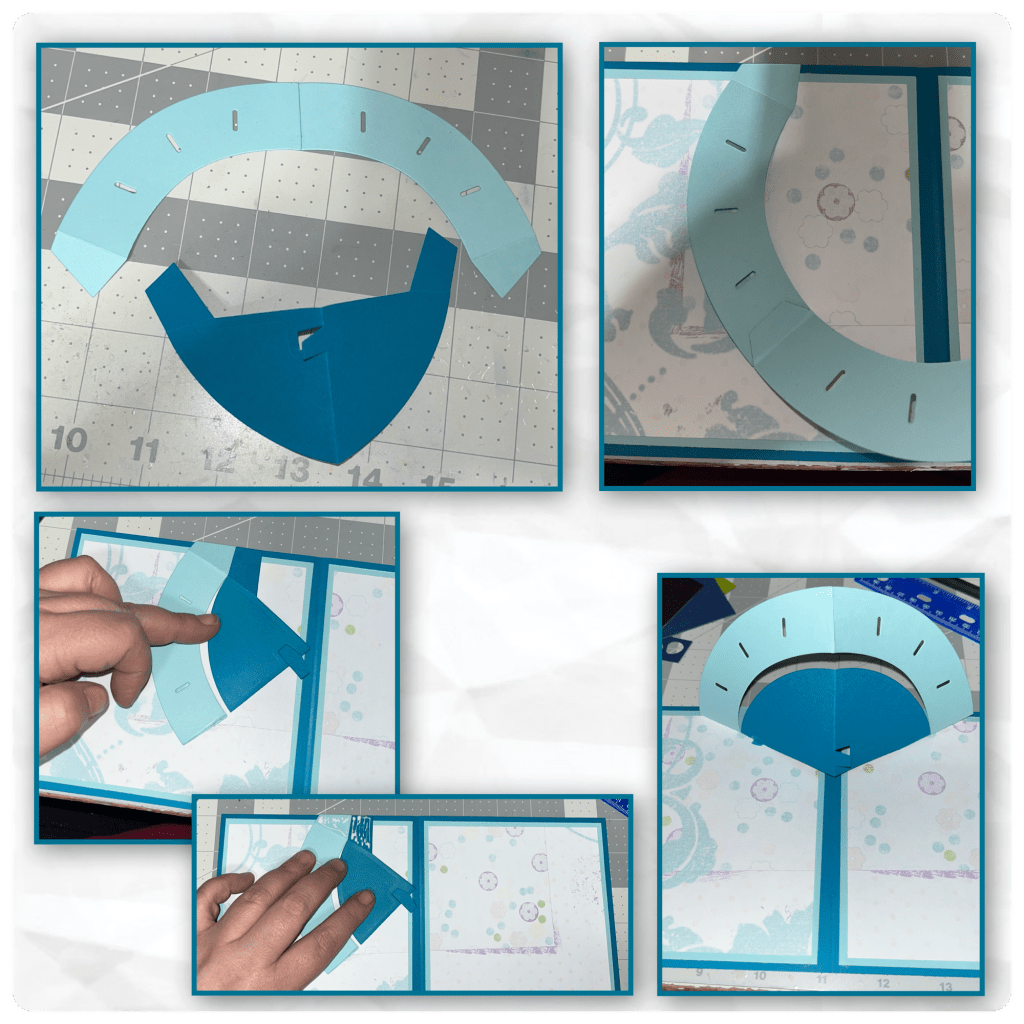
I started adding the feathers to the arch, one row at a time spacing them out. I added the second row putting them in between the feathers from the first row. The third row I added to the peacock body and spaced them evenly apart.
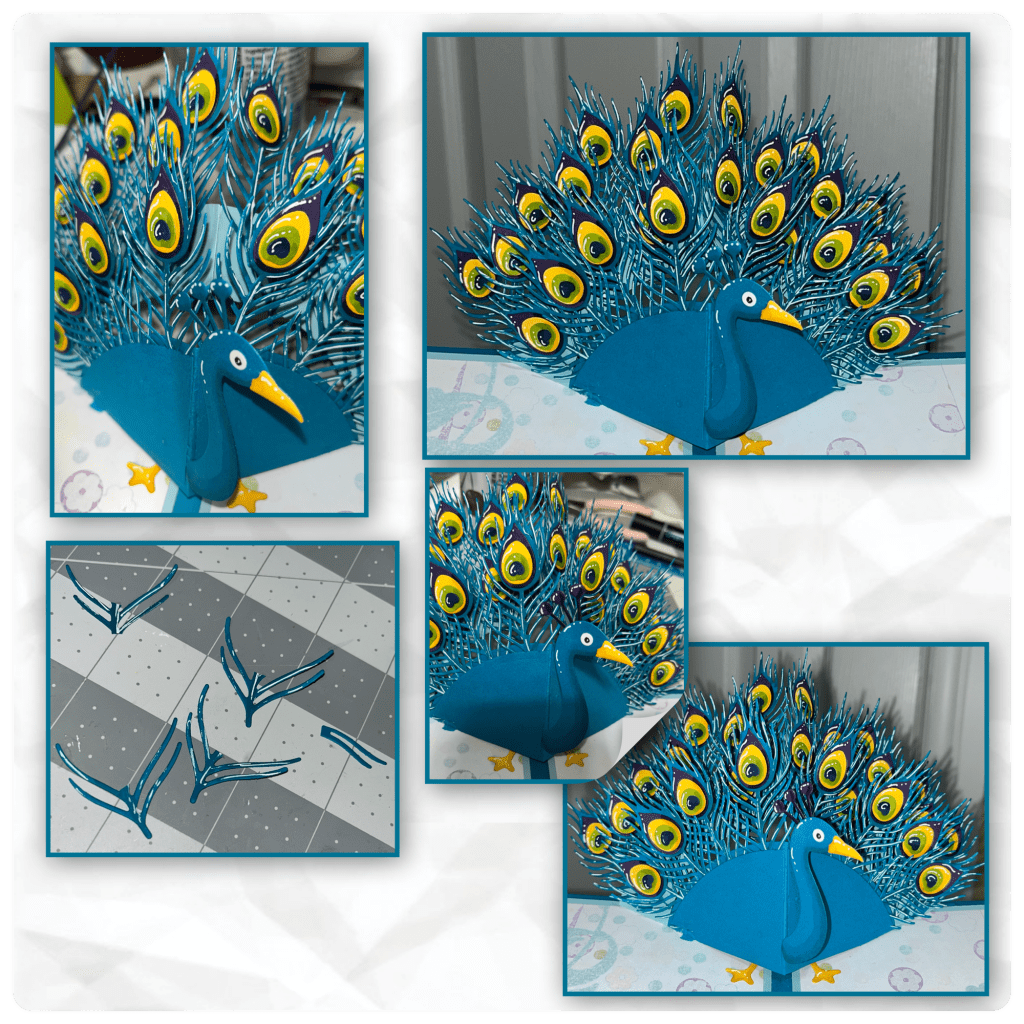
I decided that I didn’t like how the feathers looked where they attach to the body, so I die cut out a second body piece. I cut it in half where the score line is. I then took about 1/4” off the bottom and about 1/8” off the inside as shown below. I added the two pieces over the original body then I added the head.
This is where I decided to cut a few more feathers because there were a few black spaces that I felt the need to fill. I trimmed some of the feathers to fit and was left with a few stray pieces, I actually used those as well to fill in some of the little spaces. I decided to change the teal plume on top of the head to a purple one so it would pop a bit more.
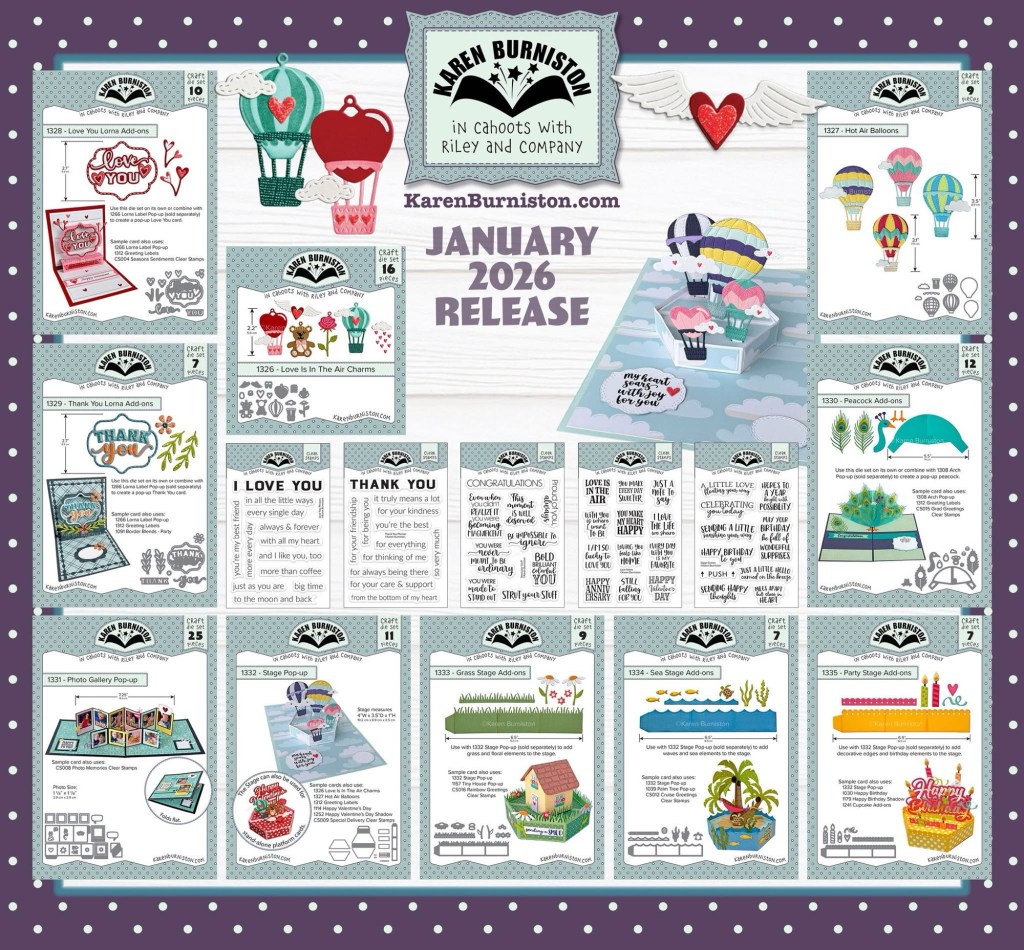
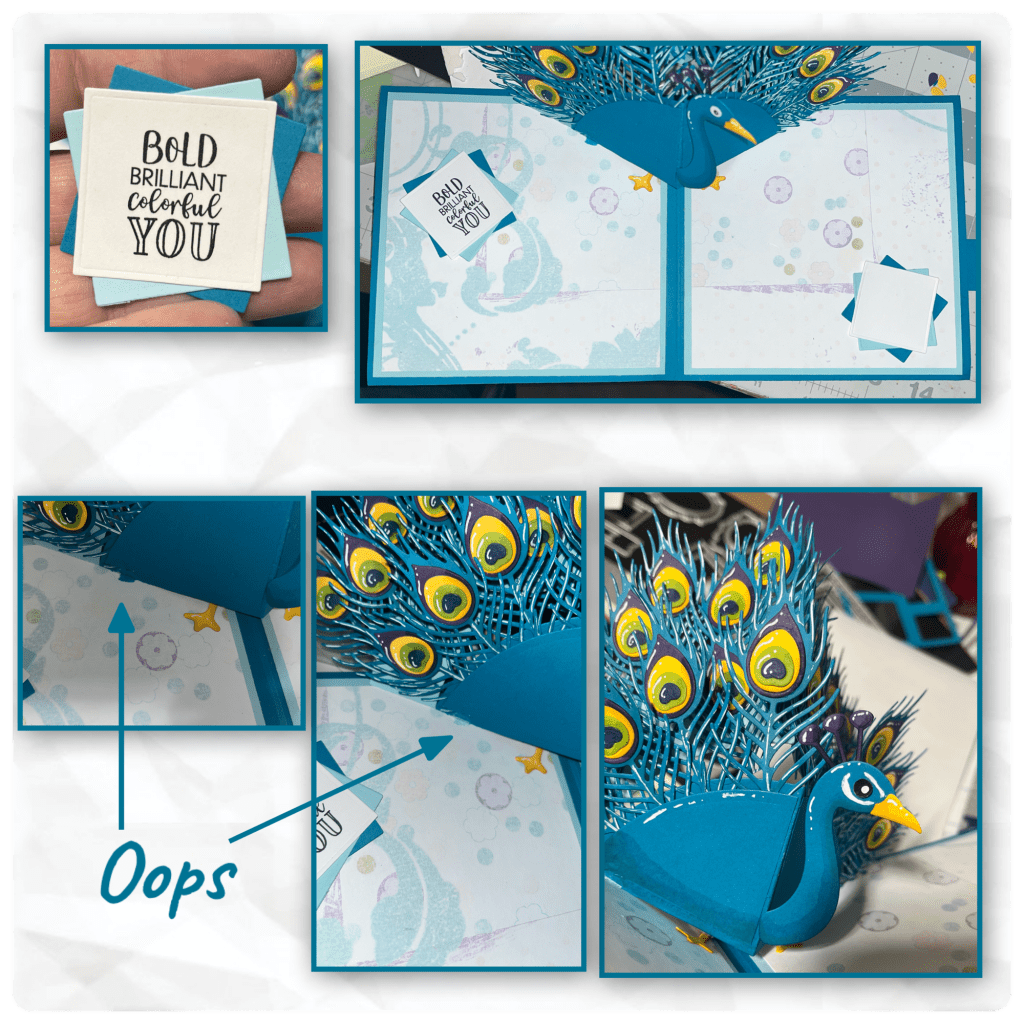
Finishing touches for the inside. I stamped the greeting from the new Strut Your Stuff and cut the square , then cut two more with the 2 blues and added to the card. I made another set of squares as a place to sign. I made bit off a boo-boo, I had a little glue leak out when I added the body and the cardstock stuck to it. I used a white gel pen to cover it. It didn’t completely cover it, but it did camouflaged it quite well as it looks like the other blue dots that are on the paper. I was looking up photos of peacocks and decided to change the eye to black and draw on the white markings on its face.
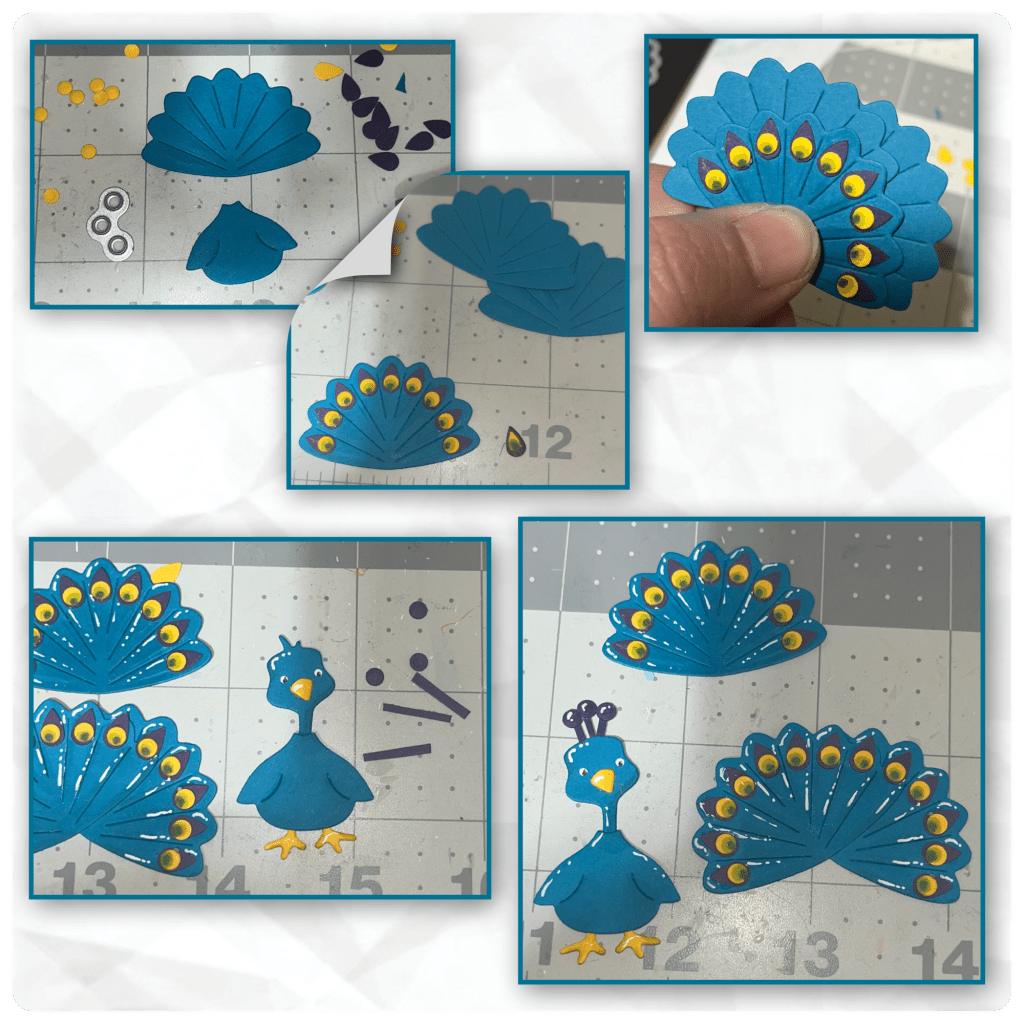
I really enjoy making matching characters for the front of the card so I decided to make a peacock out of the turkey from the Feathered Animals . The only tool that I used that is not from KB is the tear shaped hole punch. The little circles are from the new Grass Stage Add On (they are the flower centers) I used alcohol markers to add the little dots inside the yellow dots. I wanted to add a row of feathers behind the first row so I cut out 2 sets of the tail feather piece and overlapped them as shown. I used the same little circles to make the plume and I hand cut the little stick shapes.
Now for the front…..
I thought the patterned paper was so pretty I didn’t want to completely cover it so I used the large squares Squares Crosshatch and then nested the Postage Pop up inside to get the frame. Then I used Postage pop up again and nested the shapes inside to make the windows. I stamped another greeting from Strut Your stuff Clear Stamps and cut out the greeting and added to the top left. I glued down the back feathers and added foam adhesive to the other half of the peacock and added to the card. To finish it off I added a feather and a heart.
Even with all these feathers this card is surprising light and closes nicely without the need of a closure.

Other Tools used

Your talent, and design and patience is incredible and a fab result. Great steps on the blog thanks xx
LikeLiked by 1 person