

What says Christmas like a big fuzzy pink sloth, lol. I have a sweet little granddaughter that has her most favourite toy in the world and you probably guessed it but it is a pink fuzzy sloth. When I saw her last her I asked what kind of Christmas card would you like and she said a “Baboo Card”, but I want Baboo on the inside. I have made her a few cards with a her little sloth friend hanging out but this is the first one that I have made her that is this big. I think it turned out pretty cute.
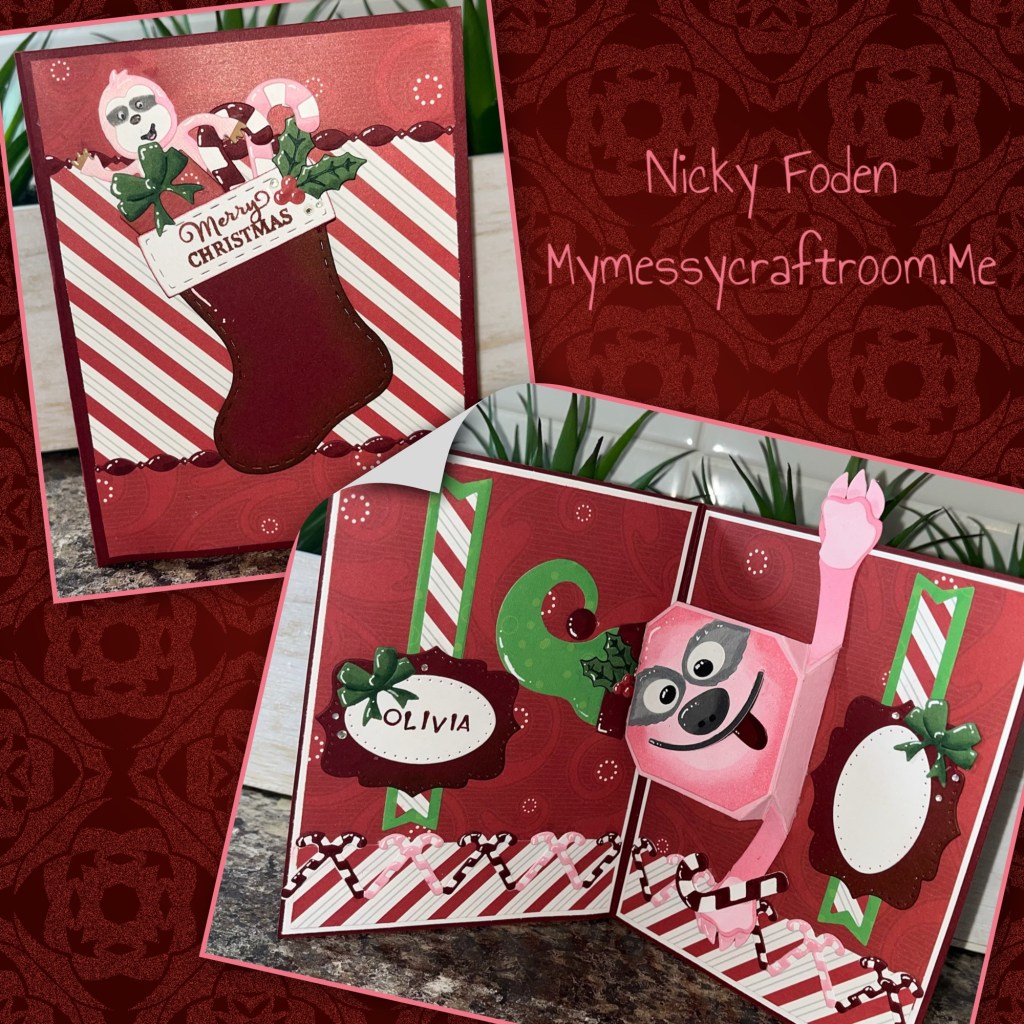
All the fun is in the reveal, to see this card in action please check out my FACEBOOK page, feel free to join if you would like to share your own crafty creations. You can also see a video of this card on my INSTAGRAM page.
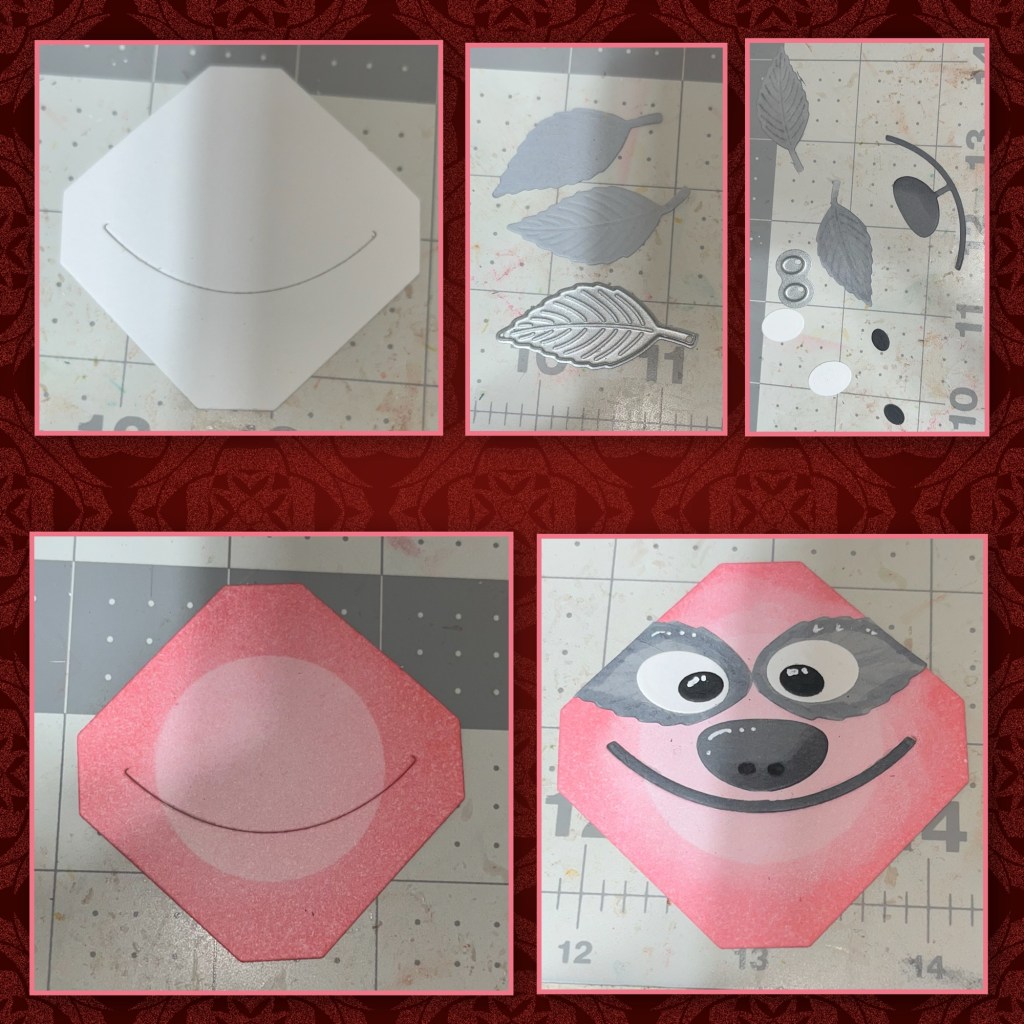
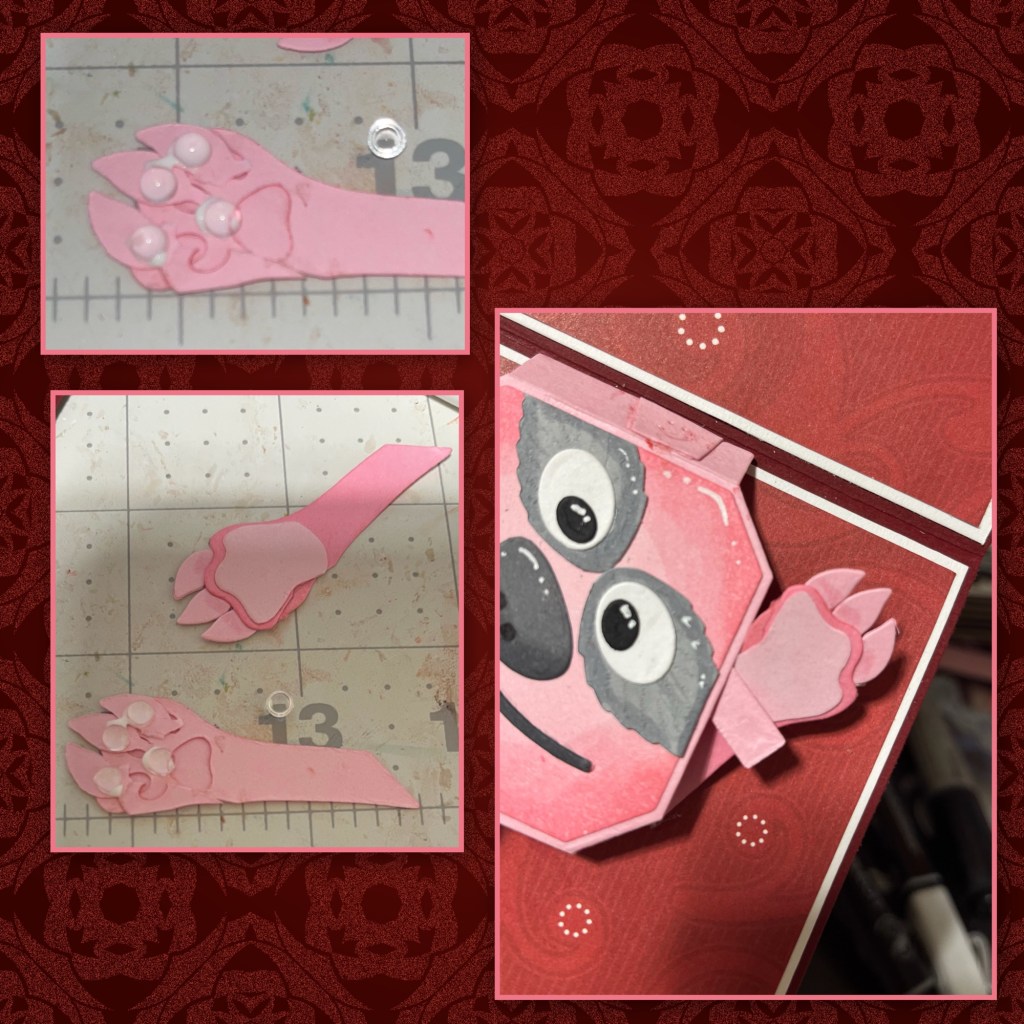
I knew what I wanted to do but I wasn’t sure if I would be able to pull it off. So I decided to start with the face. I cut the top piece from Playful Pop up for the face, and the two large leaves are from the same set. The eyes, nose and mouth are from the Cat and Dog Playful Add ons. I used a a brush to add on the pink ink. I started by having a circle mask in the middle, to have the outside darker than the inside, then I inked the inside. I trimmed off the little piece from the mouth/nose piece. I used a grey alcohol marker to add shading and a white gelly roll pen to add highlights. To give her the “slothy” features I wanted the nose to be closer to the mouth and I added the eyes sideways. Looks like a sloth to me so I continued with the card.
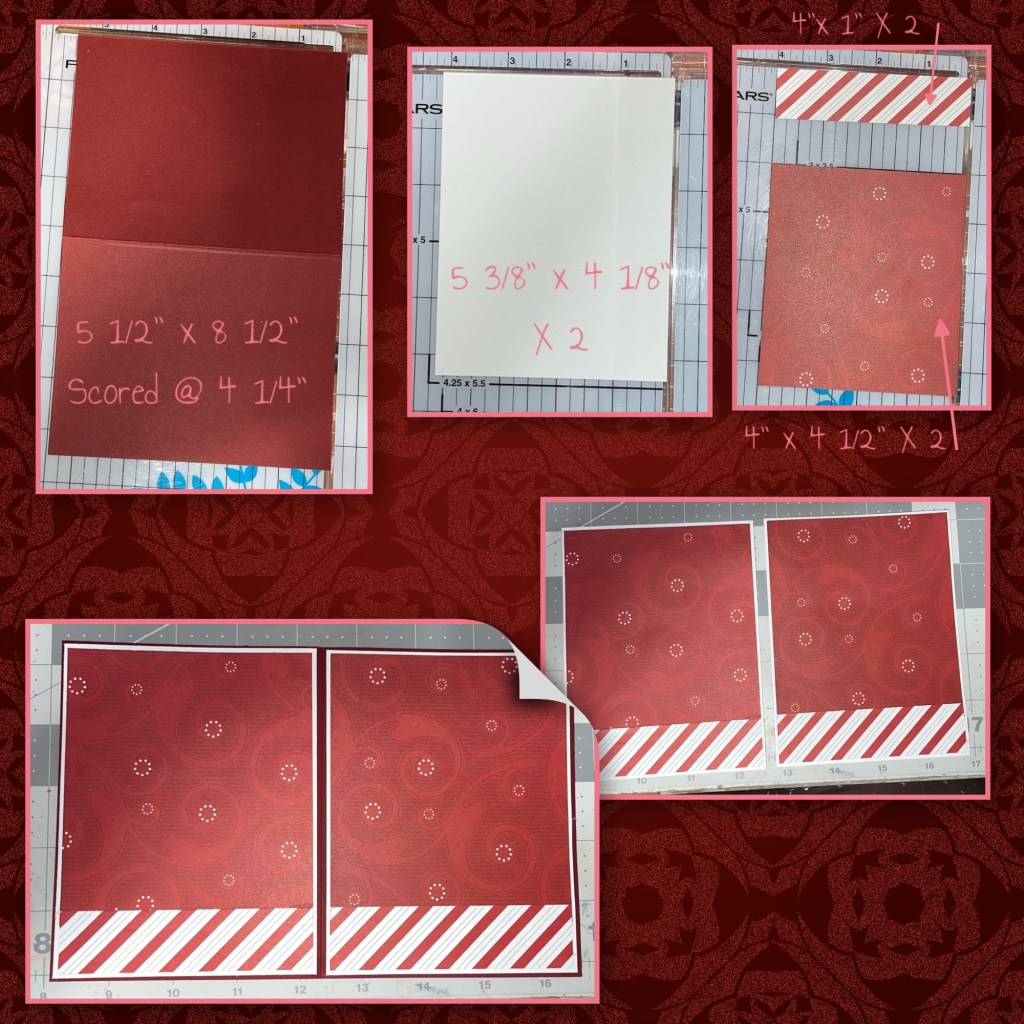
I wanted to make a 5 1/2” x 4 1/4” card so I cut the card base and the panels as shown below.
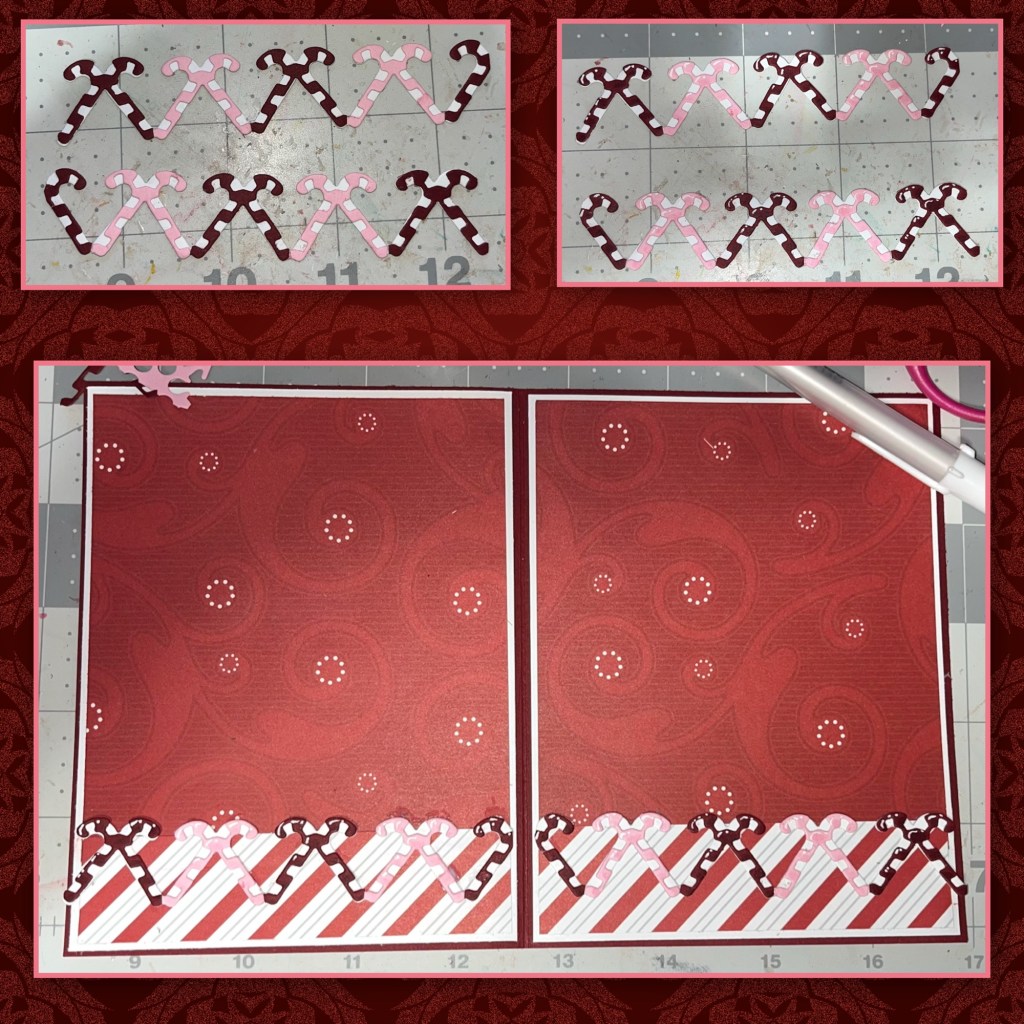
I wanted to add borders to cover where the 2 patterned papers meet so I cut out the candy cane borders from Christmas Borders 2 from pink and red and added as shown.
I cut out the rest of the pieces from the Playful Pop up, add added the face to the mechanism, then add to the card (Karen has a video tutorial on the product page at the link ⬆️ ) this sloth is a three toed sloth so I started by cutting the paw pieces form the Cat and Dog Playful Pop up add on, I also cut the the small leaves from the Fun Flowers. I trimmed and combined the pieces as shown.

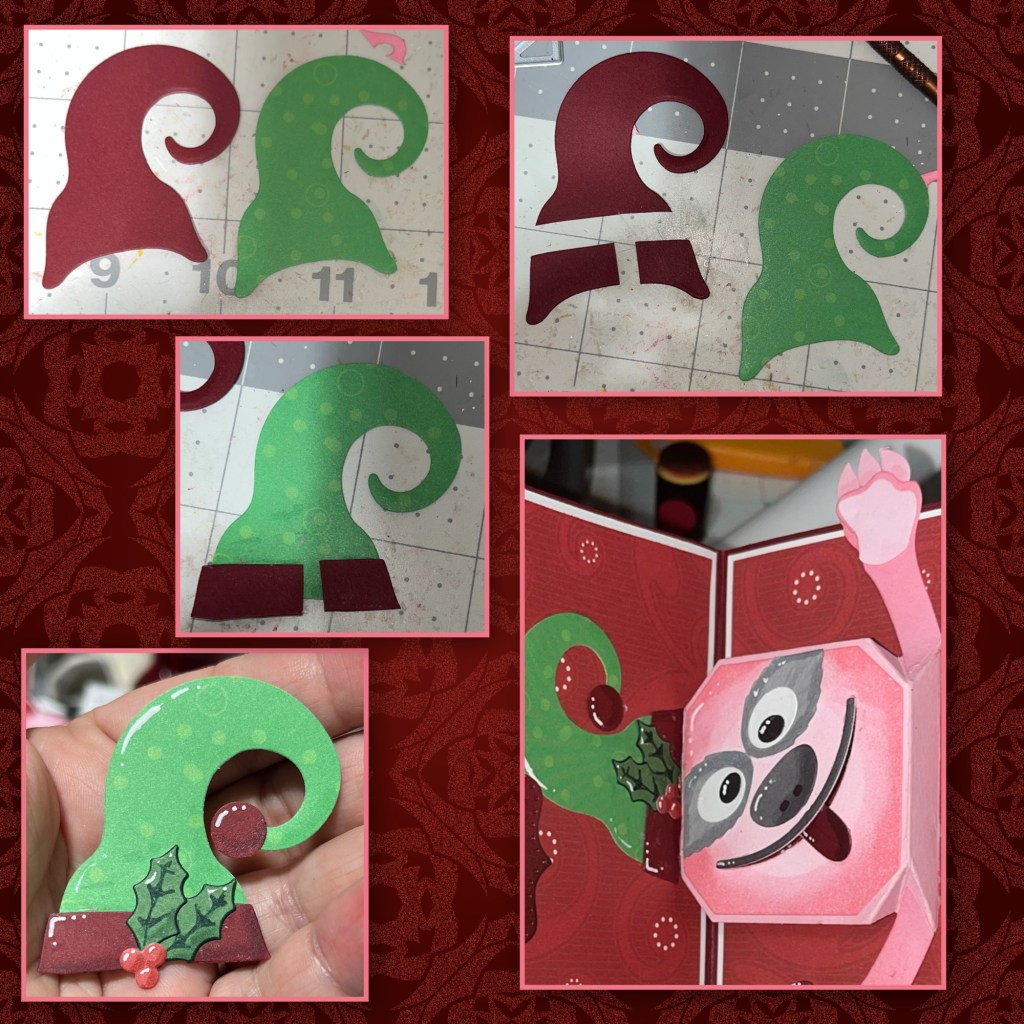
Because I figure things out as I go I didn’t think about the paws caching on the borders. So on the bottom hand/paw I decided to add a couple of 1/2 bubbles to the back of the paw so when I open and close the card the bubbles will glide over the border without catching. For the upper arm I decided to cut it off. He doesn’t have an ear and I thought about attaching the hat but it would have been too sideways so I decided against it.
I cut the hats from Mini Ball add ons 1- Gnomes, I wanted the red hat to look like a band so I trimmed it as shown. The holly and berries is from the Merry Christmas Lorna Add on. I added highlights and shading, then added a shown.
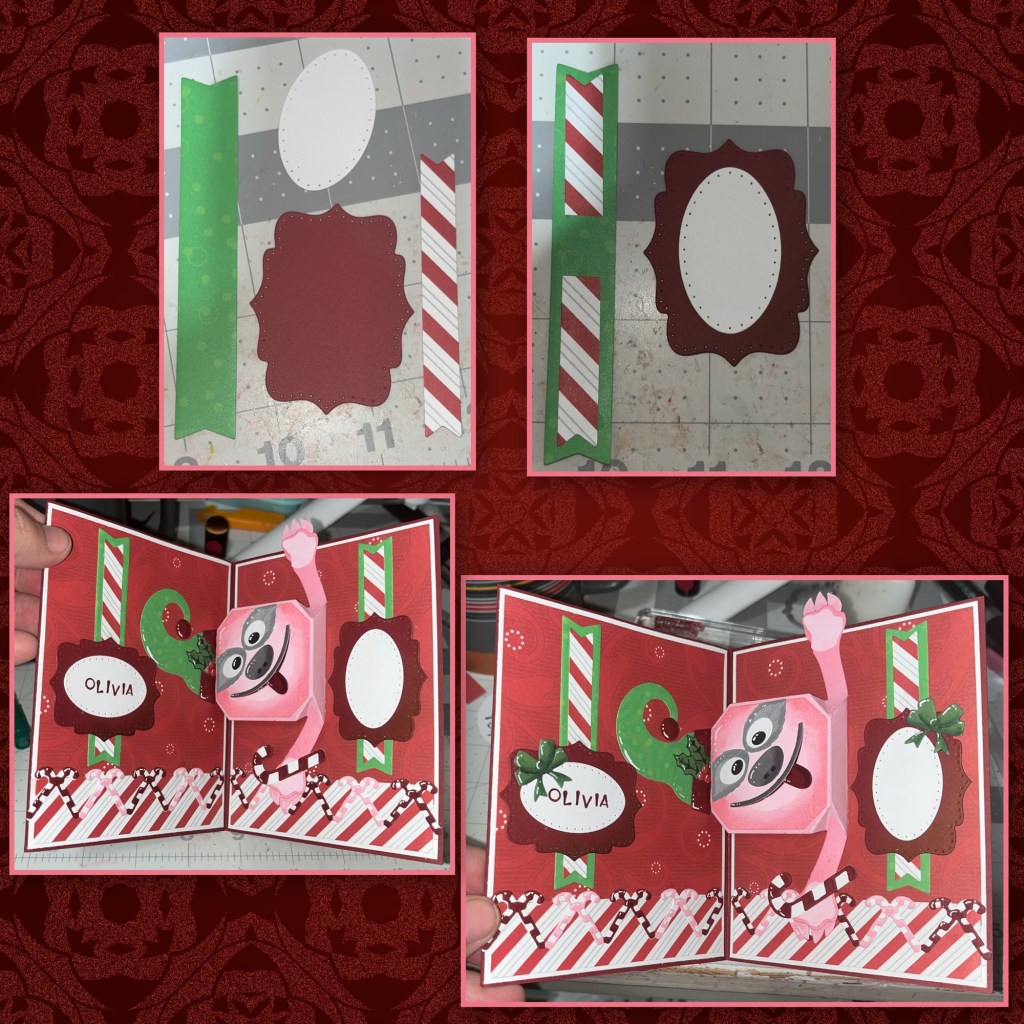
I wanted to get creative with the new Greetings Labels, I cut out 2 of each as sown. I wanted the smaller banner to fit inside the larger banner but it doesn’t quite fit, so I cut the smaller one where I know the red label will cover it when done. The one on the left I stamped My granddaughters name and added it the tag sideways. The one on the right I added up and down for a place to sign. The bows and the large candy cane that my little pink friend is holding is from the Stocking Pop up
Now for the front, I cut the layers and borders as shown. I cut the stocking from the Stocking Pop up. I sponged ink for shading and added highlight. I added pieces to match the inside. I chose a thinner border from the Border Blends – Party. And assembled as shown. I thought it needed a little something and I wanted to add our furry friend to the front as well so I cut and trimmed the monkey from the Monkey and Lion set and turned it into a sloth and added him to the stocking.
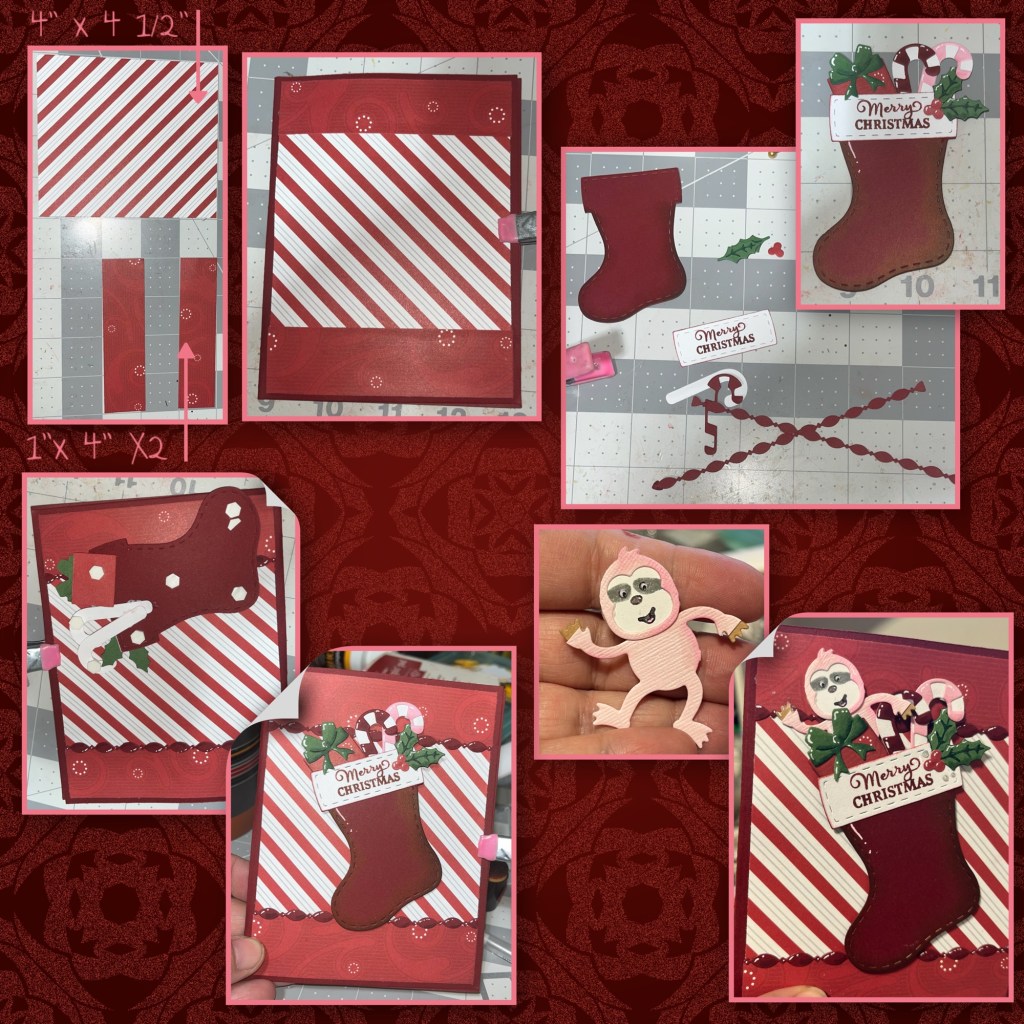
I added some gems to the front and the inside.

Other Tools used
