
Wow has this month just flown by, I can’t believe Halloween is tomorrow (I still have to buy my candy lol). Today I am sharing my third (and last) card of my little series of cards using the same card base, colours and patterned paper.
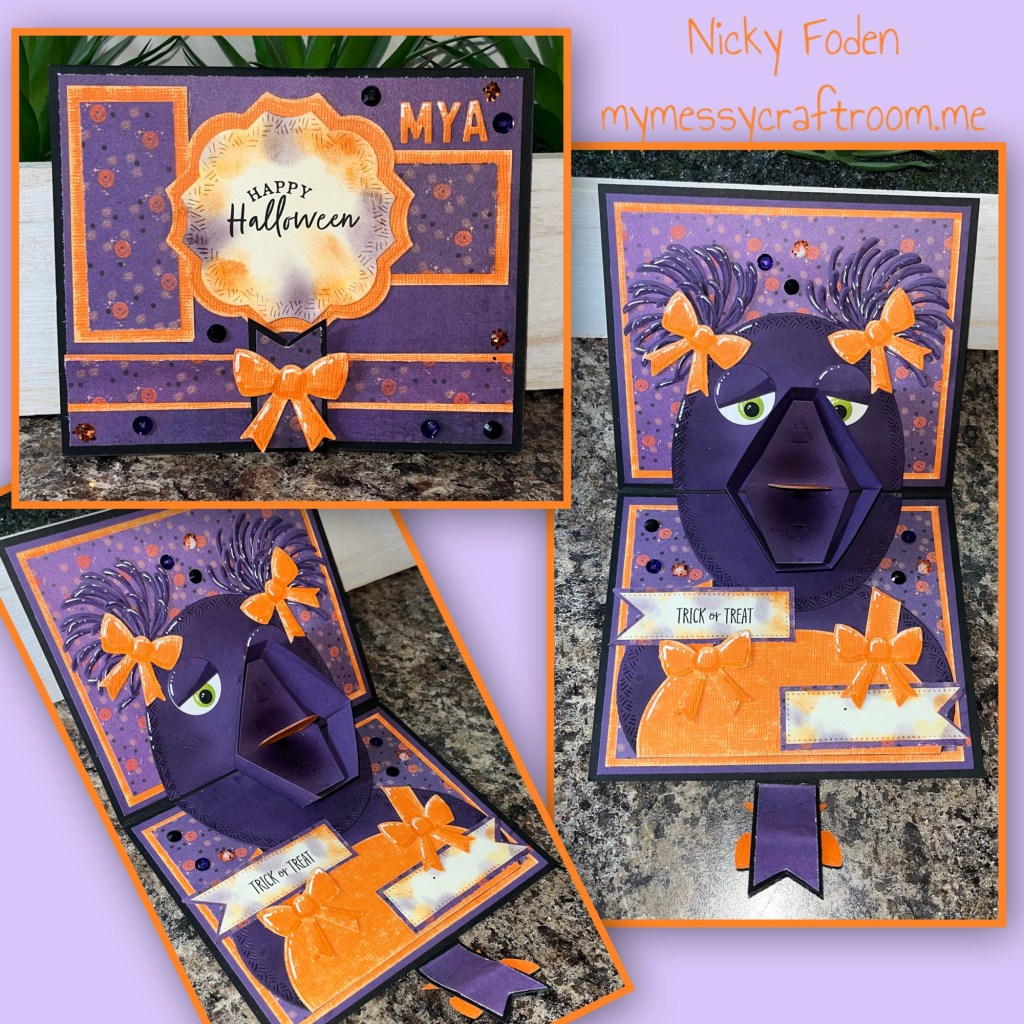
All the fun is in the reveal, to see this card in action please check out my FACEBOOK page, feel free to join if you would like to share your own crafty creations. You can also see a video of this card on my INSTAGRAM page.
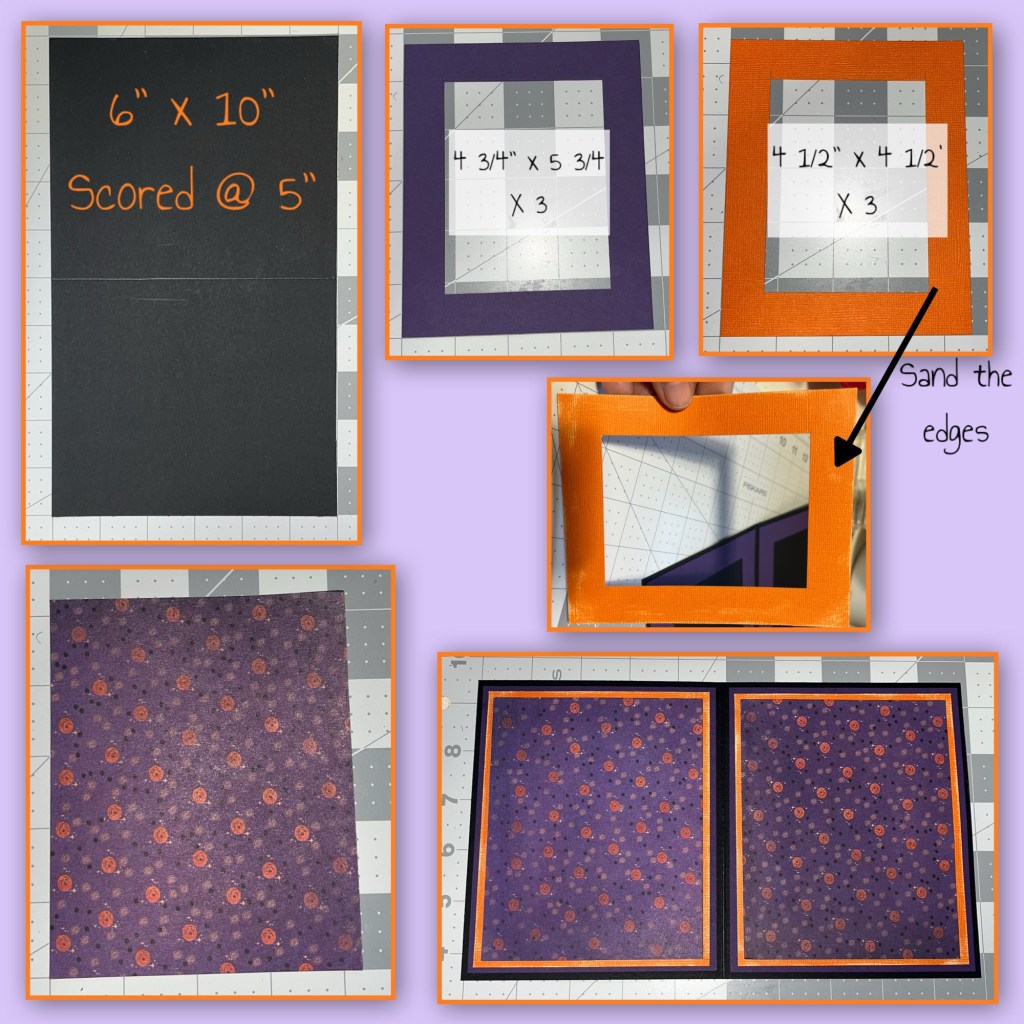
Because I have 3 darling granddaughters to make cards for sometimes I cheat a bit on some of the holiday cards (is Halloween a Holiday 🤔) So for this card I cut the card bases and the inside layers all the same.
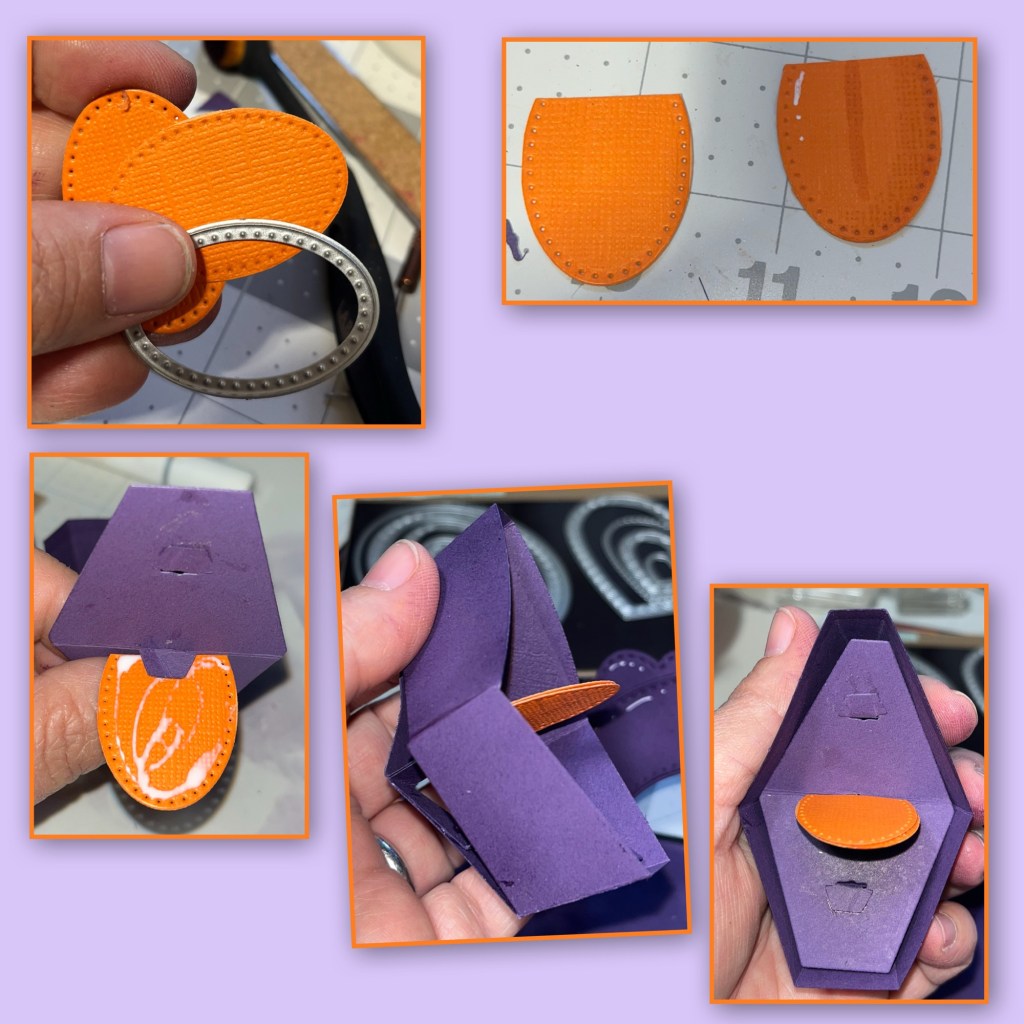
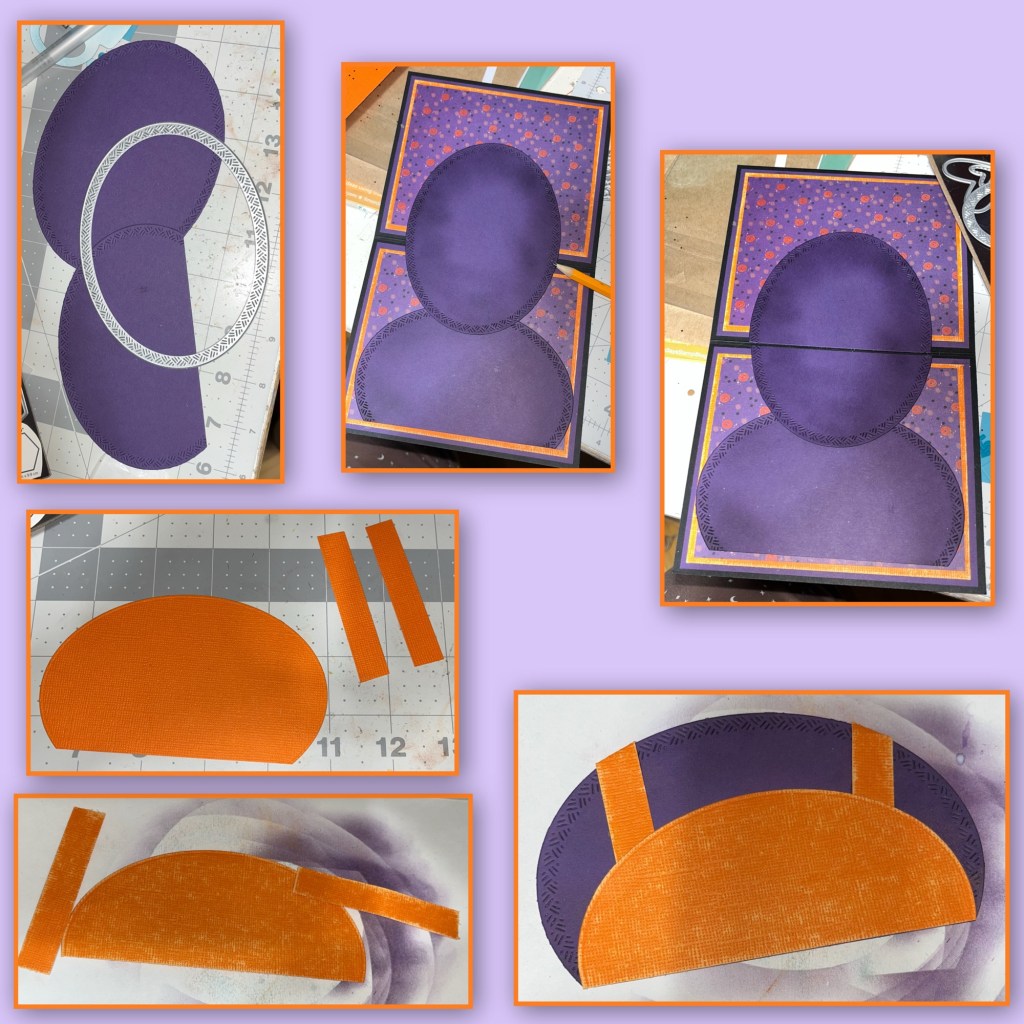
I cut and assembled the Boat Pop Up (Karen has a video tutorial on the product page at the link ⬆️ ) from the purple cardstock. I cut a tongue from orange cardstock using a small ova die (sorry I forget which set I grabbed the oval from but any small oval will work). I attached the tongue to the middle part of the boat, where the sail would attach if you were to attache the sail for the sailboat.
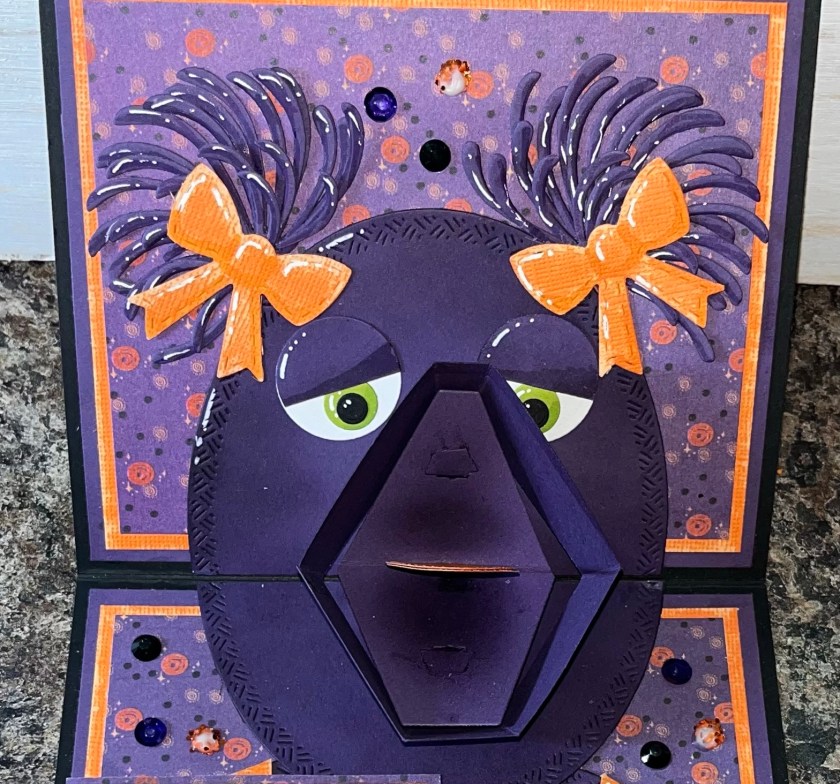
I used the largest oval from the Ovals Crosshatch as shown. I brushed ink around the edges. I laid it out to decide where to cut the head in half and decided on roughly half. Make sure the boat mouth will cover the head without going over the edges. Using a smaller oval from the same Crosshatch set I cut a section from orange as shown to make the overalls. I cut two thin strips of orange as well. Because it is Core Color cardstock I roughed it up a bit, then added to the bottom purple oval.
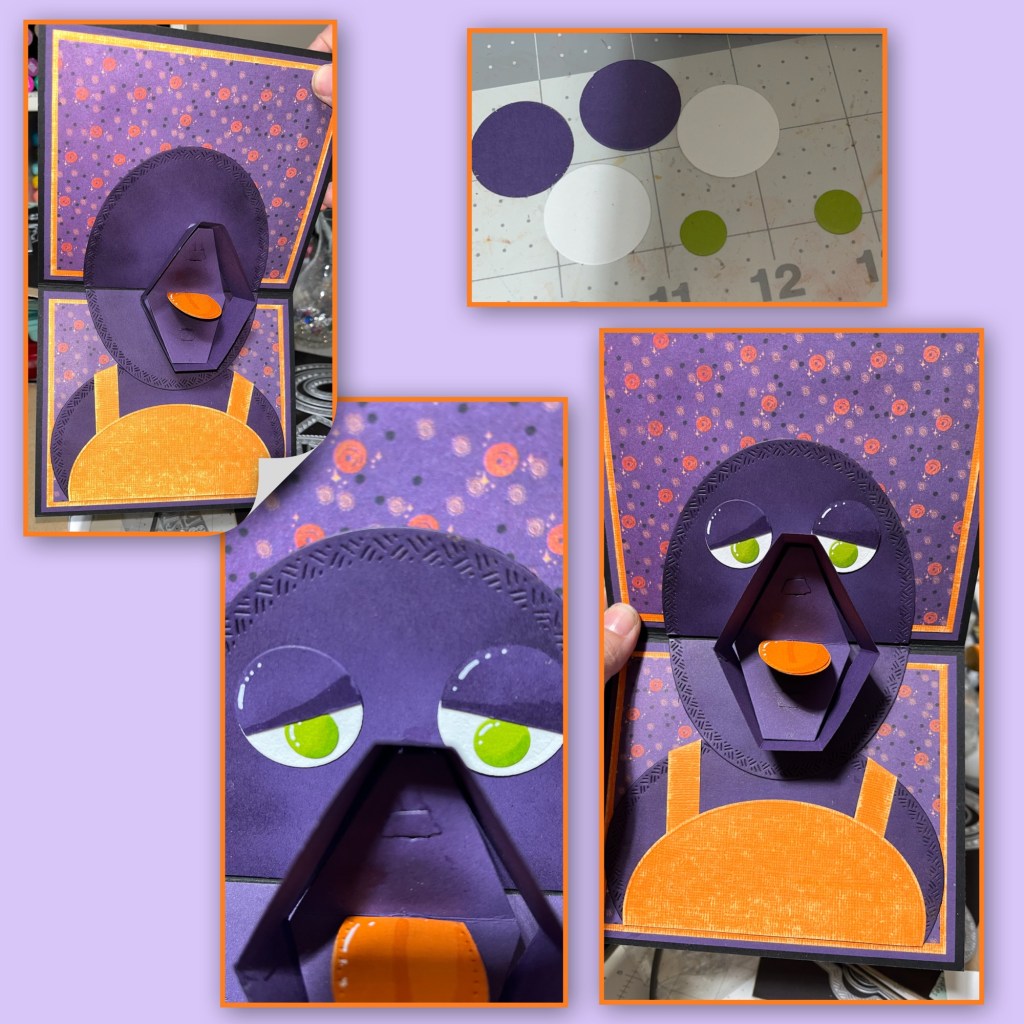
Next I added the boat mouth to the head. I cut 2 x 1” circles from both purple and white and 2 x 1/2” circles in green to make the eyes and added them as shown.
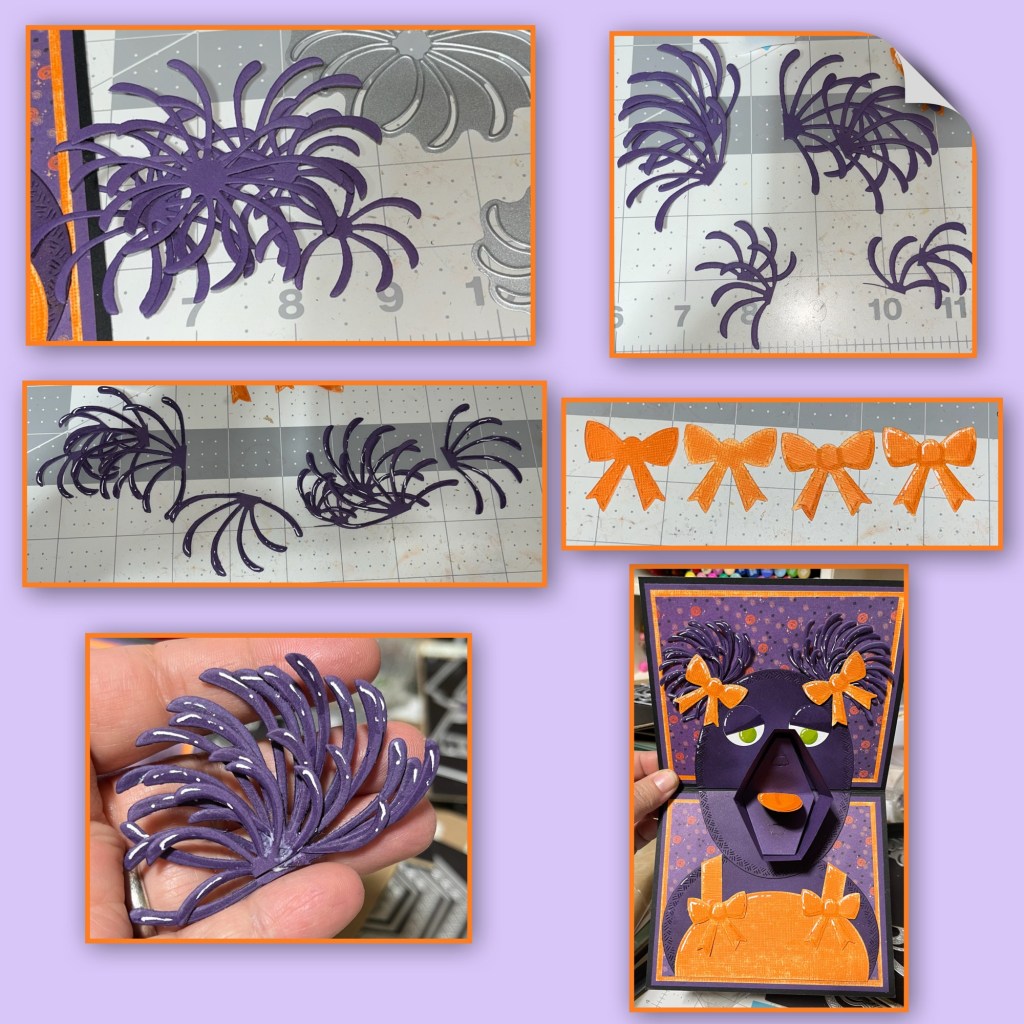
To make the piggy tails I cut out several Fire Works in the 2 shapes shown below. I cut them in half the I added shading with a Versa Mark Marker, and highlights with a white Gelly Roll pen then grouped them together. I used the bow die from the Parcel Pop up and cut it out 5 times from orange (1 will be used later). I roughed them up to match the overalls, then I added shading with a Versa Mark Marker, and highlights with a white Gelly Roll pen. I added 2 bows to her hair, and 2 to the overalls.
I used the new Halloween Phrases stamp sets to stamp “Trick or Treat” then I cut it out using the smallest rectangle in the Short Rectangles Crosshatch, then cut the end into a fish tail. I sponged the edges with purple and orange ink then cut a matt about 1/8” bigger. I cut a matching piece for a place to sign, then added to the card as shown.

Now on to the card front. I cut the purple paper as shown below , but before adhering it to the card front I added a small magnet to the card front. I then cut a band as shown below. I added the band to the right side of the card, glueing it to the back and having it fold to the front. I added the matching magnet to the band.
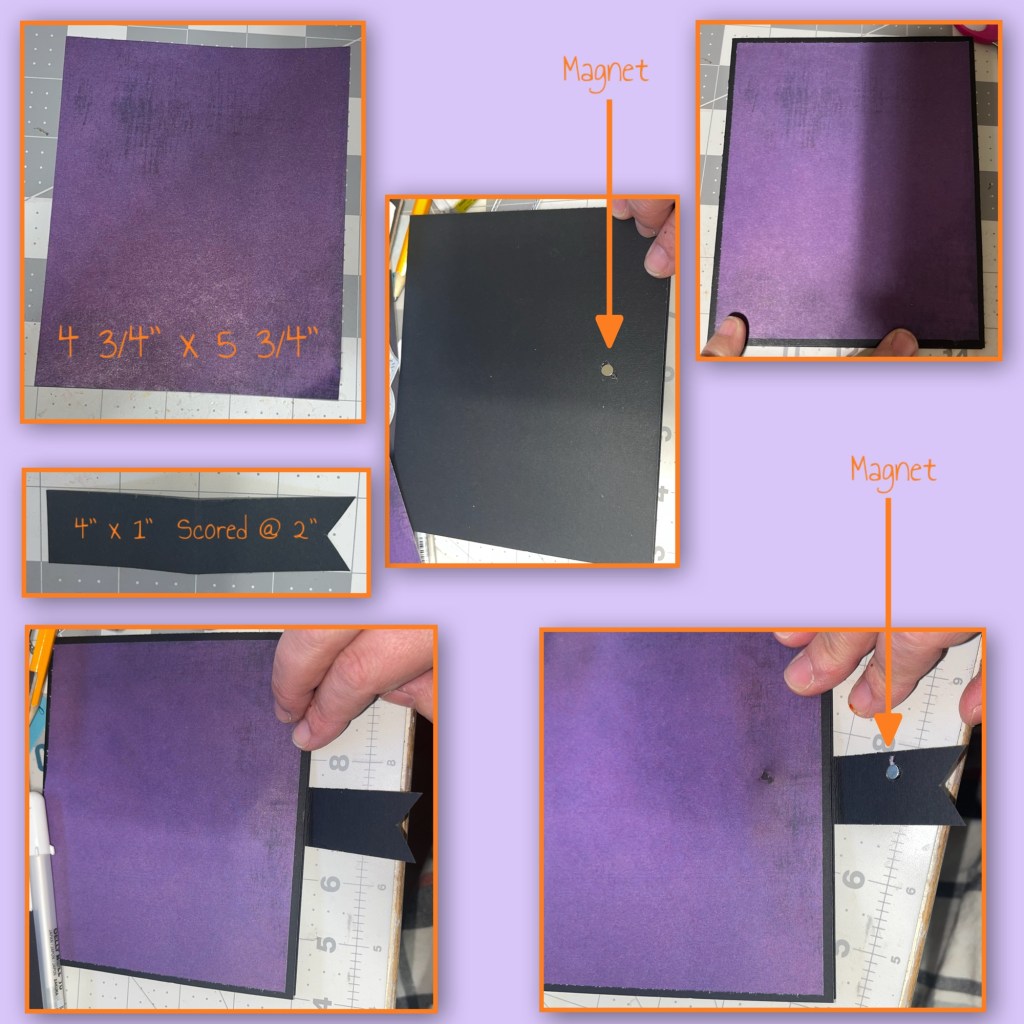
Soooo, while playing with the magnets I slightly ripped the paper so I needed to make a border to cover the hole. My magnets are not super strong so I needed to make sure I only had paper over the magnet and not cardstock because i was pretty sure the magnets wouldn’t hold through cardstock. So I cut 2 skinny strips of orange and a thicker piece of patterned paper. The combined dimensions are below. Add the border and I cut a piece of purple to add to the inside of the band to cover the magnet.
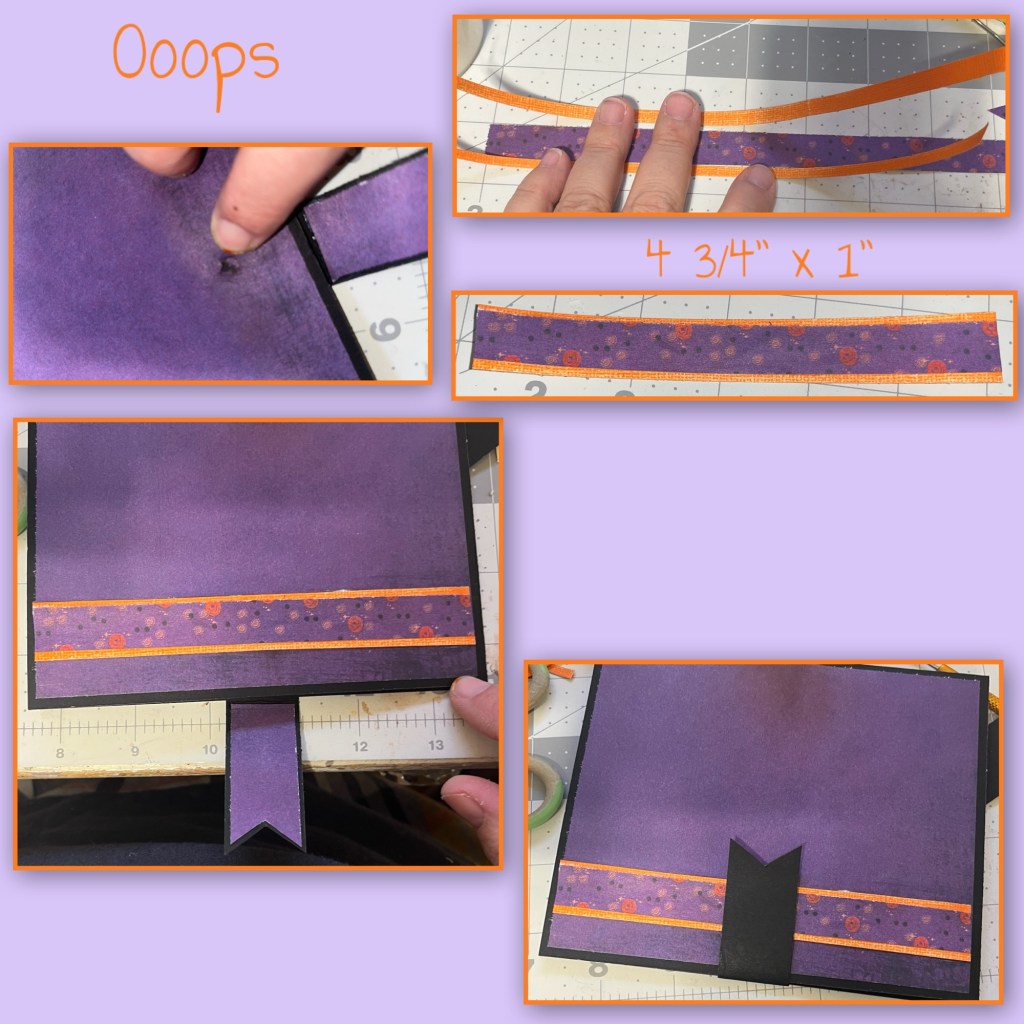
I used scrap paper to make the rectangles. I added the wrong photo though lol. The orange and the patterned paper over, not under. I just marked on the back of the pattern paper where I wanted to cut instead of measuring. I stamped the Halloween greeting from the Halloween Phrases, then cut and layered using the Labels Crosshatch. I also sponged orange and purple ink around the greeting. I cut out Mya using the Mini Alphabet and Numbers . I added some of the patterned paper to the outside of the band and added the extra bow.
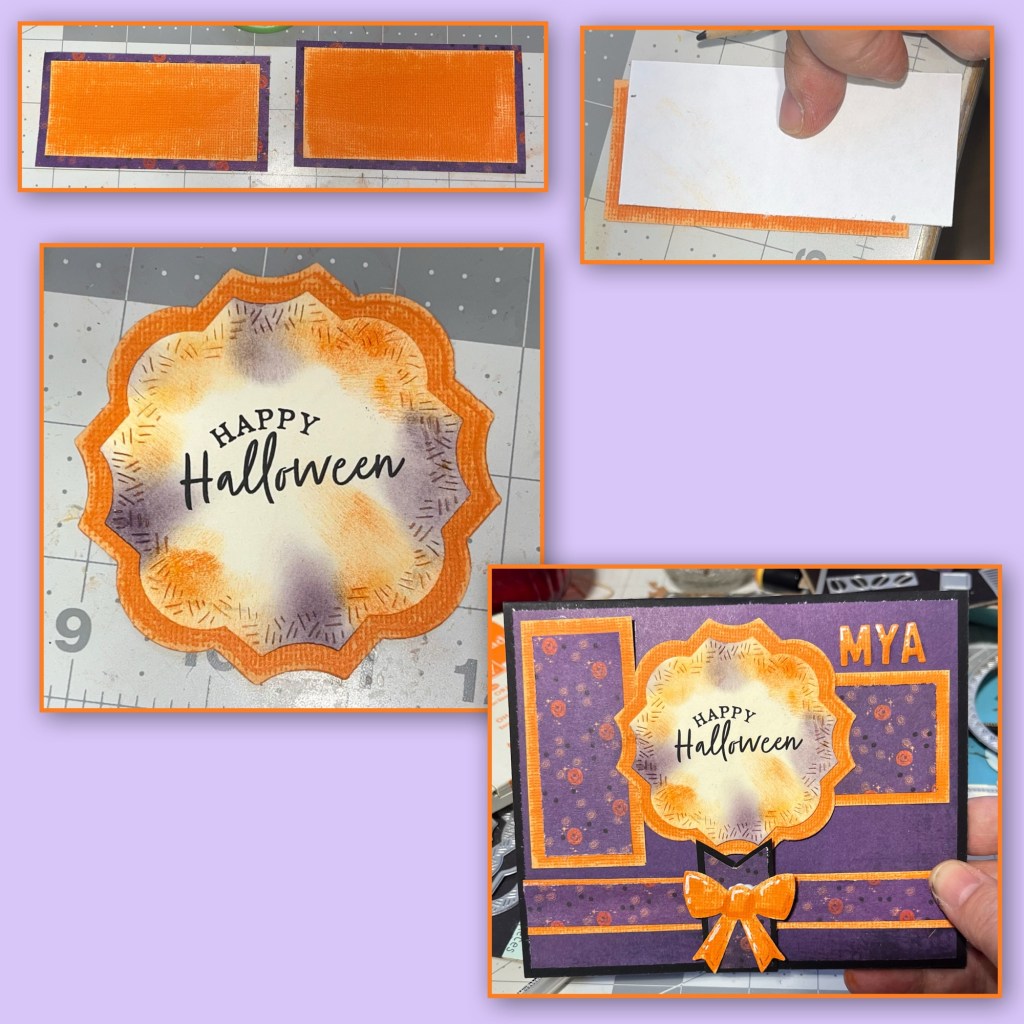
Like the other cards from this Halloween series I added purple sequins, black gems and orange glitter randomly around the card. I also decided to add pupils to the eyes to tone them down a bit.
Other Tools used

You always make the BEST cards! It’s so helpful to see each step in how to make it, thank you for the inspiration!
LikeLiked by 1 person