

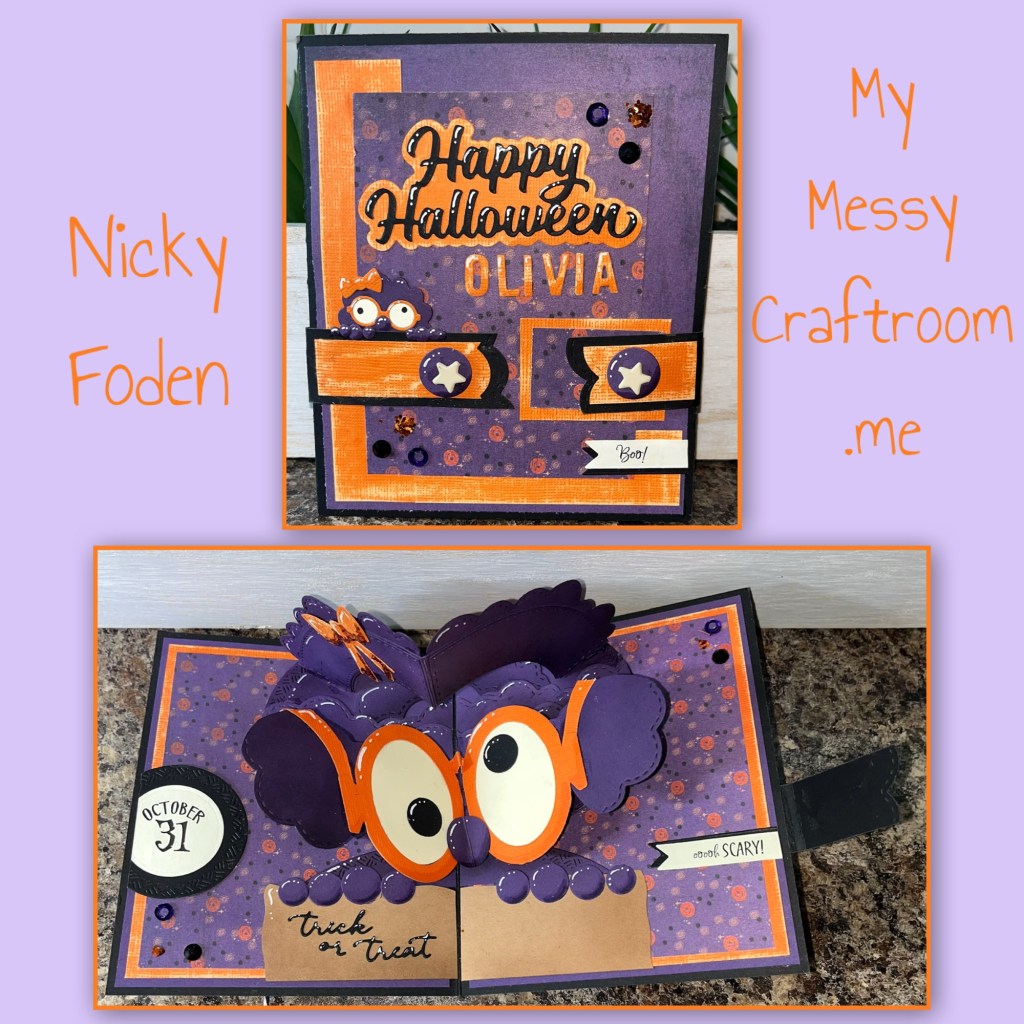
It’s spooky season and time to share my card for the Karen Burniston Design Team Challenge. This month’s challenge is “Peek-A-Boo!” I wanted to make a fun card for one of my Granddaughters so I came up with this cute purple monster. I also have a mini monster peeking over the band on the front of the card. I knew I need to make 3 cards, for 3 sisters so I decided to make a series of Halloween cards using the same size card base, and the same colours and patterned paper. This card is the first of the series. I am also using some of Karens new stamps on this card.

All the fun is in the reveal, to see this card in action please check out my FACEBOOK page, feel free to join if you would like to share your own crafty creations. You can also see a video of this card on my INSTAGRAM page.
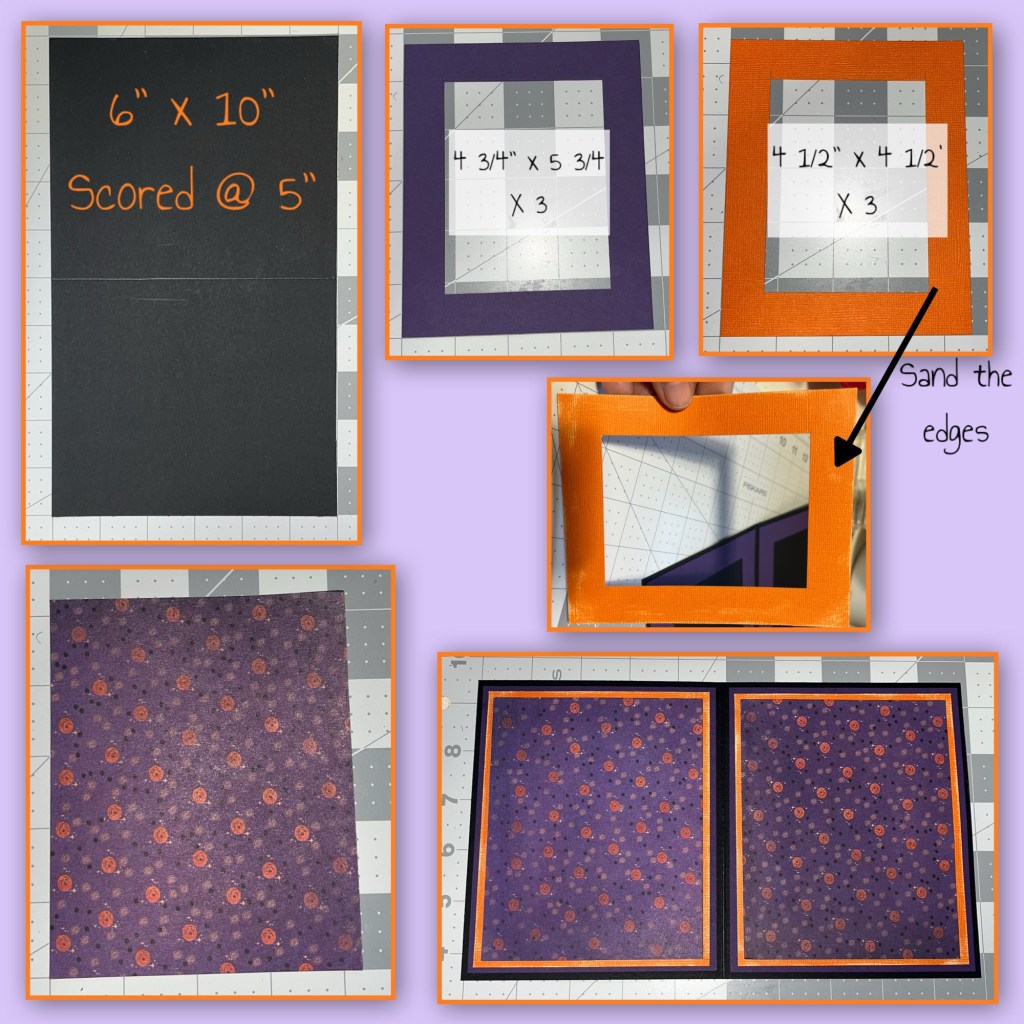
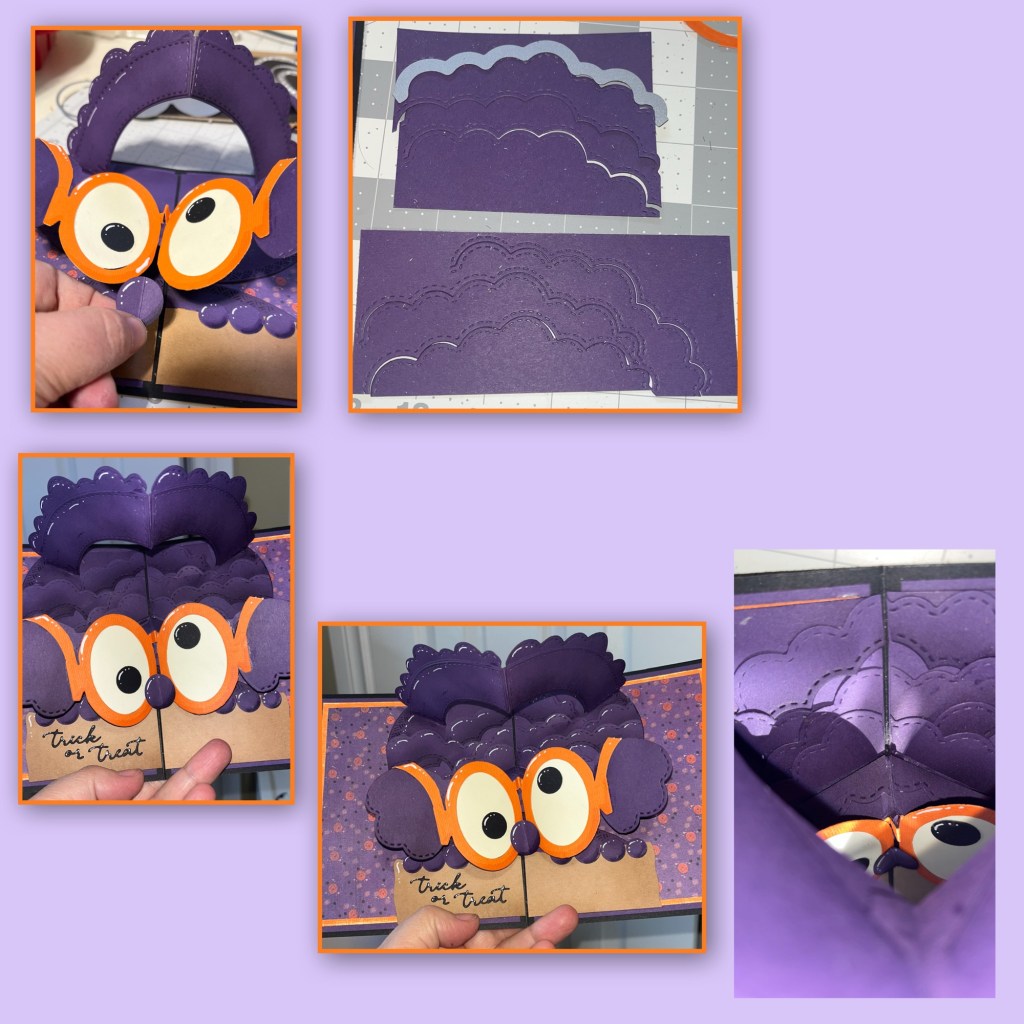
I created the inside of that card base as shown below, the inside of all three cards will be the same. I cut the centers out of the middle of the layers that will be covered, to save on cardstock and limit some of the bulk. The orange cardstock is Color Core cardstock so I used an Emory board to scuff up the edges.
When Karen released her Arch Pop Up die set, she mentioned that someone should make a Sassy Monster, I don’t this was exactly what she thought, but I thought that I would make my own sassy monster. I cut out the pieces of the Arch Pop Up, and the large piece from the Rainbow Add on. I cut some of the clouds from the Curved Edges into the purple cardstock, then trimmed them to fit behind the arch. I covered the front with the Rainbow add on piece. I brushed on some purple ink to add some shading.

Using the largest Oval Crosshatch I cut both halves of the monsters head. I cut just slightly over the half way mark. Then I trimmed a bit off to make both to make the top end flat. Hang on to the pieces that were just cut off. Then I inked up the edges. I also added white gelly roll pen to add highlights.
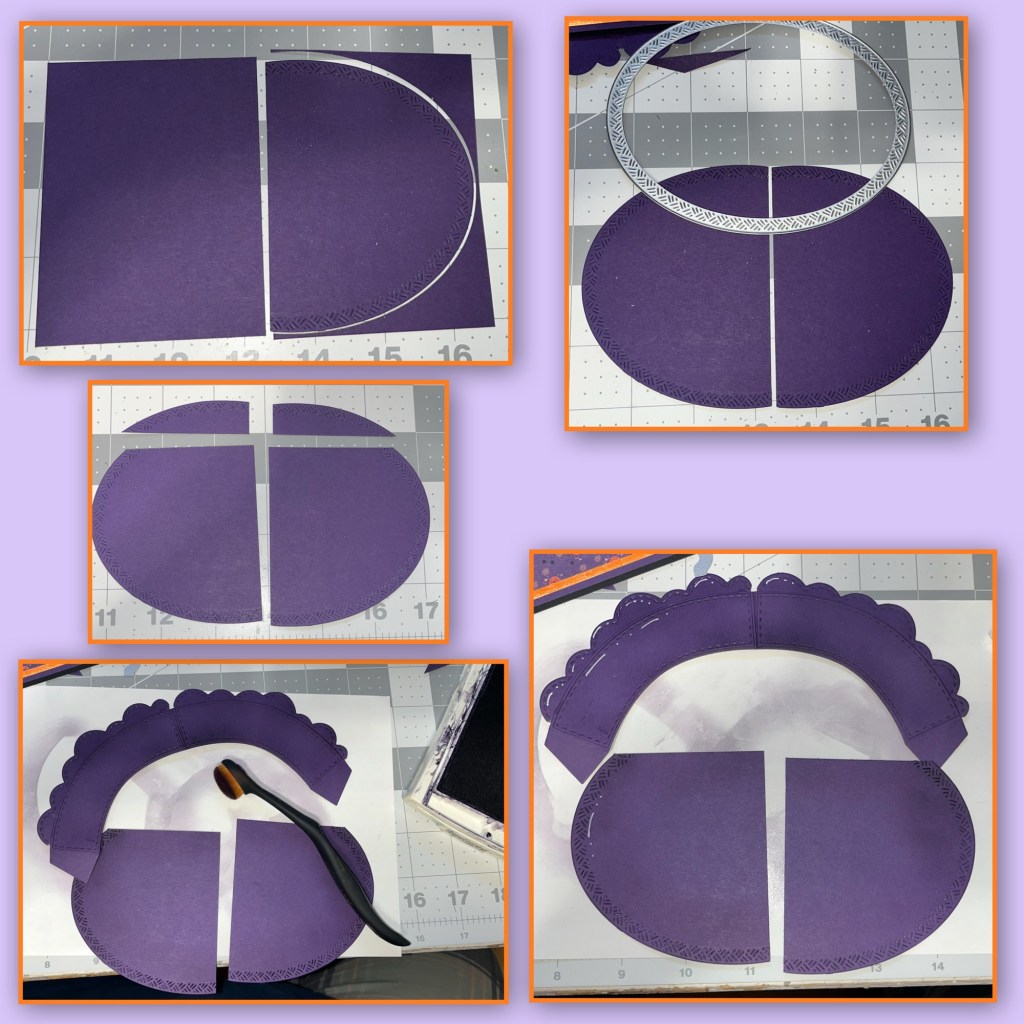
Adhere the ovals to the card base as shown, then add the arch to the cardbase. (Karen has a video tutorial on the product page at the Arch Pop up link that is above ⬆️ )

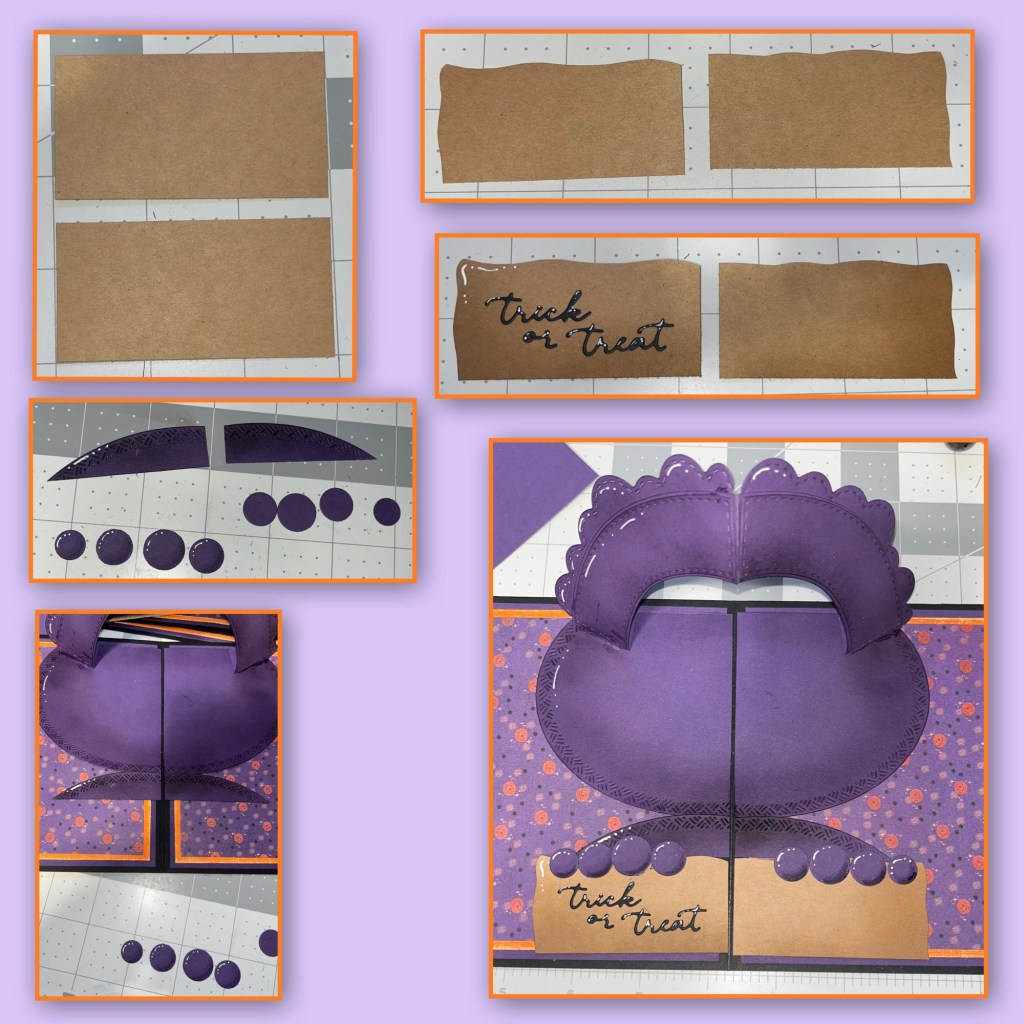
I wanted my monster to look like she was peeking out from behind her Trick or Treat bag. I cut 2 rectangles to 3” x 1 1/2” then I trimmed the top and the outside edges to give them more of a bag look. I brushed on a bit of ink to add shading, and white highlights. I cut the greeting from the Small Script Halloween , added to the bag, also added white highlights. I forget what circles I used for the fingers, just use what you have. Add the pieces that were set behind from the head, add them as a neck. Add the bag, and the fingers as shown.
I envisioned the next step a little different , but I tweaked it as needed. I cut out the mechanism for the Oval Frames Pop up and got it ready for assembly as per Karens video tutorial (on the product page at the link ⬆️ ) I soon realized that as it will go up it will crash into the arch. The arch goes down as the card closes and the oval pop up is going to go up when the card closes. I knew the outside ovals are going to be ears so I marked the amount of each ear that will have to be removed. I used the cloud die from the Curved edges to give the ears a scalloped edge. I cut out the eyes and the glasses from the same Oval Frames set. I added the Oval Frames mechanism making sure the mechanism are both able to close when the card closes.

I was hoping to put the glasses on the monster in the correct way that the die set was intend BUT the glasses and the arch head crashed into each other and there was no way they were going to share the same space. I gave the monster googley eyes. To get the glasses to fit I had to cut them in half. I made a little nose piece and pieces from another oval to make the arms for the glasses.
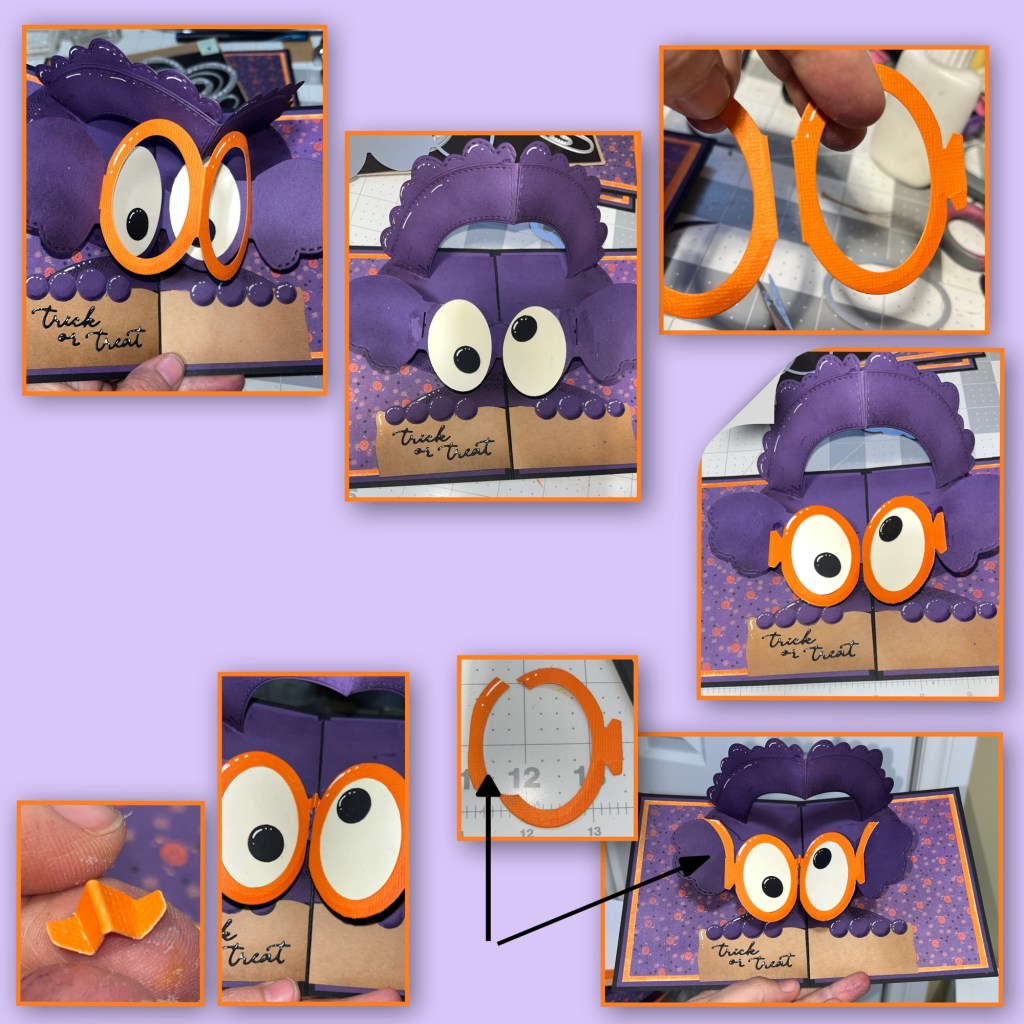
She didn’t look complete so i used a small circle to make a nose and cut out several curved clouds to add fur. I added brushed on ink for shading and white highlights. My daughter thinks it looks like clown hair. I did my best to match up the edages at the fold.
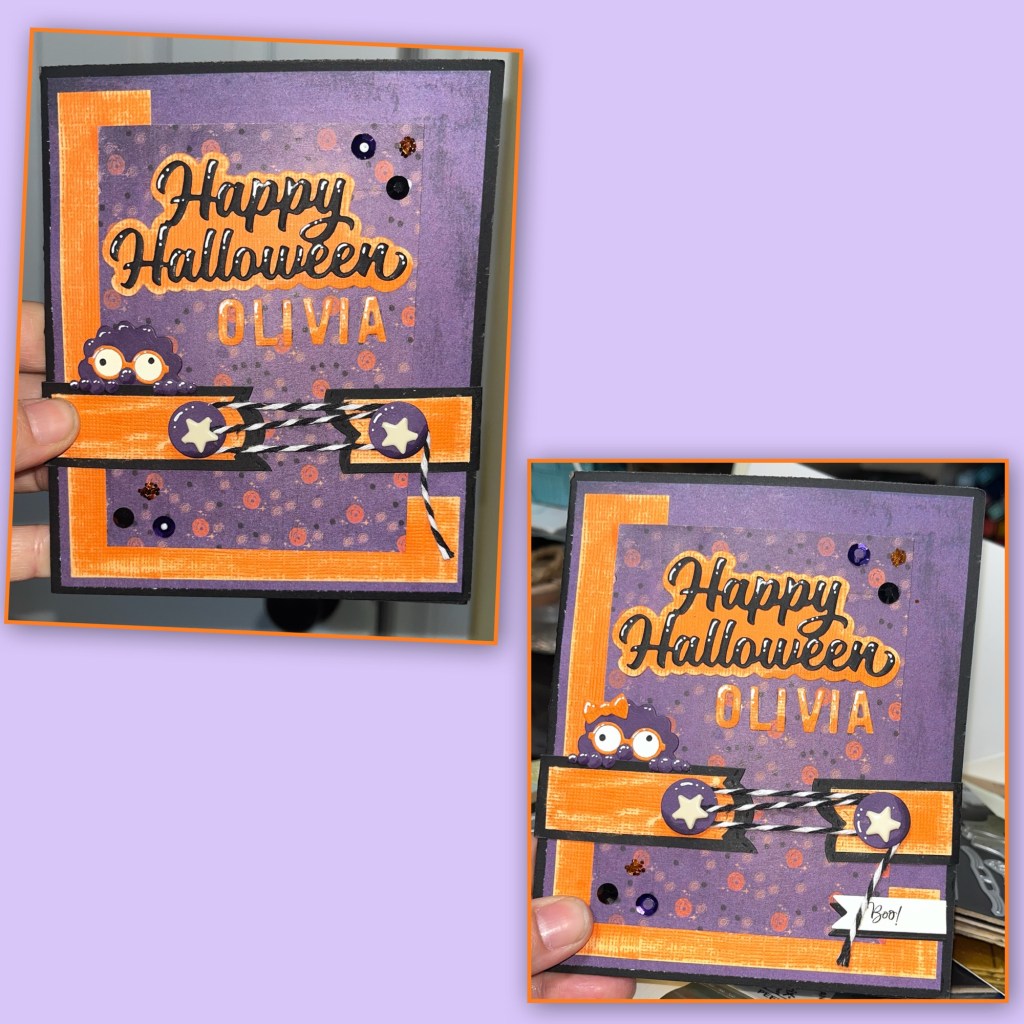
The card did not want to stay closed so I needed a closure. This is how I originally made the closure, but I ended up changing it to a magnet closure. If you want a string closure then follow these directions. I cut a belly band for around the card, the used the cloud edge did to add fun edges to both ends. I cut the circles from the Flaps and Closures (Karen has a video tutorial on the product page at the link ⬆️ ) I added the spacers, the string and a star brad to the left side, and just the spacers and the brad to the right side.

I just used some of the scraps that I had left over to add some layers to the front. The purple piece is 5 3/4” x 4 3/4”. The orange piece is an L shaped pieces and the patterned piece is about 4” x 5”. I added glue to where the band will adhere to the back and the left side. The right side is the side that is going to open so the card will open.

I used the Happy Halloween, and the Mini Alphabet & Numbers. I added shading with a Versa Mark Marker, and highlights with a white Gelly Roll pen. The little monster was created with a scalloped circle ( I think from the Circle Charm pop up and the glasses are from Book Worm die set.
On the front I added purple sequins , blobs of orange glitter with glue and black gems. I added the “BOO!” From the new Halloween Phrases stamp set on to a the banner from Long Rectangles Crosshatch, I added a black shadow banner behind and added it to the lower right side.
I thought that my girlie monster needed a hair bow, I used the bow from the Parcel Pop up and added a little bit of orange glitter then added to the left side of her head. I added an other stamped banner to the bottom right and one to a layered circle from the Circle Crosshatch. I added more of the bling from the front to the inside.

I decided to add a magnet closure instead of a string closure. The magnets I have work well through paper but not cardstock. So I glued down the small piece of orange cardstock. I added a small magnet then covered with the patterned paper. The other magnet is on the right side of the band, on the underside, then covered with a piece of patterned paper.

Die sets used
Other Tools used
