

This card is inspired by Karen Burnistons April Design team challenge card. Once I get an idea in my head I have a hard time moving on to something else. I wanted to make a more masculine style of card and I decide to make my card a 5” x 7”. The rest of the changes I made along the way.

All the fun is in the reveal, to see this card in action please check out my FACEBOOK page, feel free to join if you would like to share your own crafty creations. You can also see a video of this card on my INSTAGRAM page.
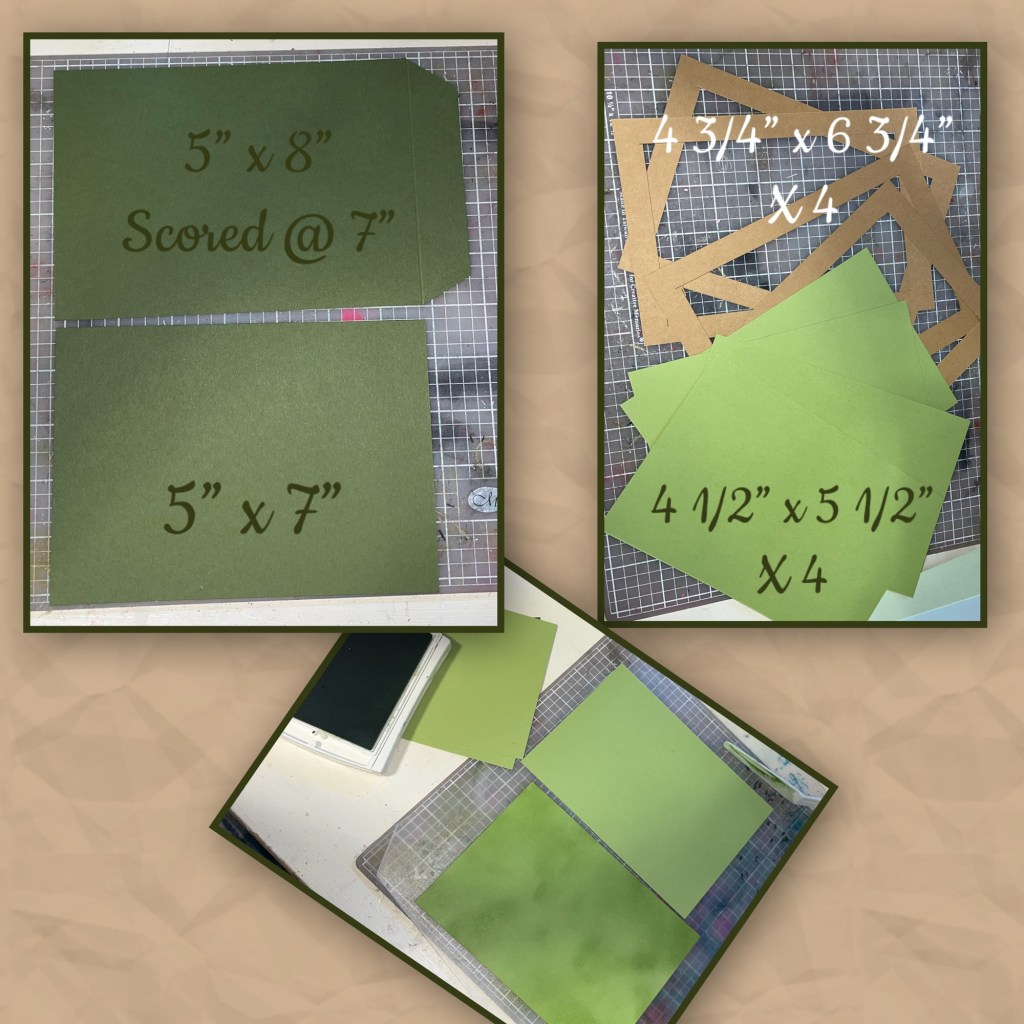
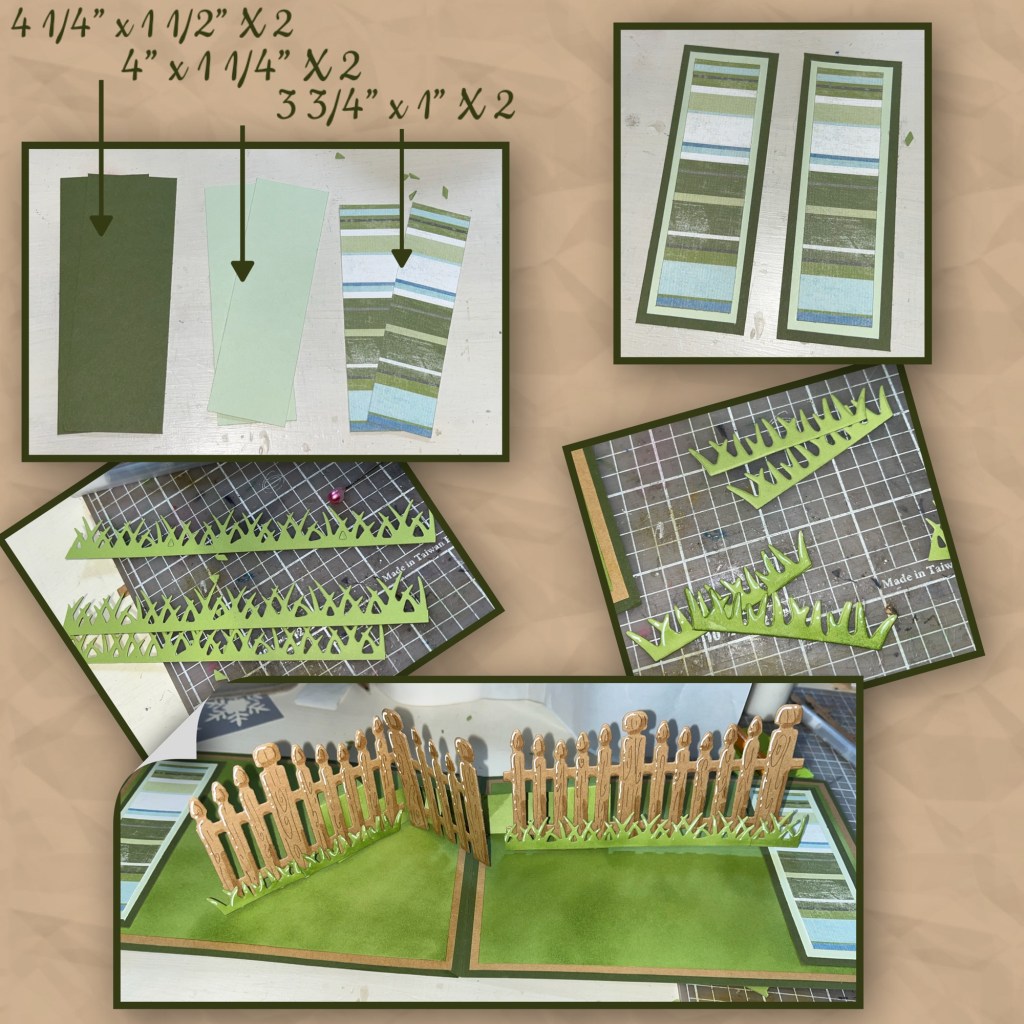
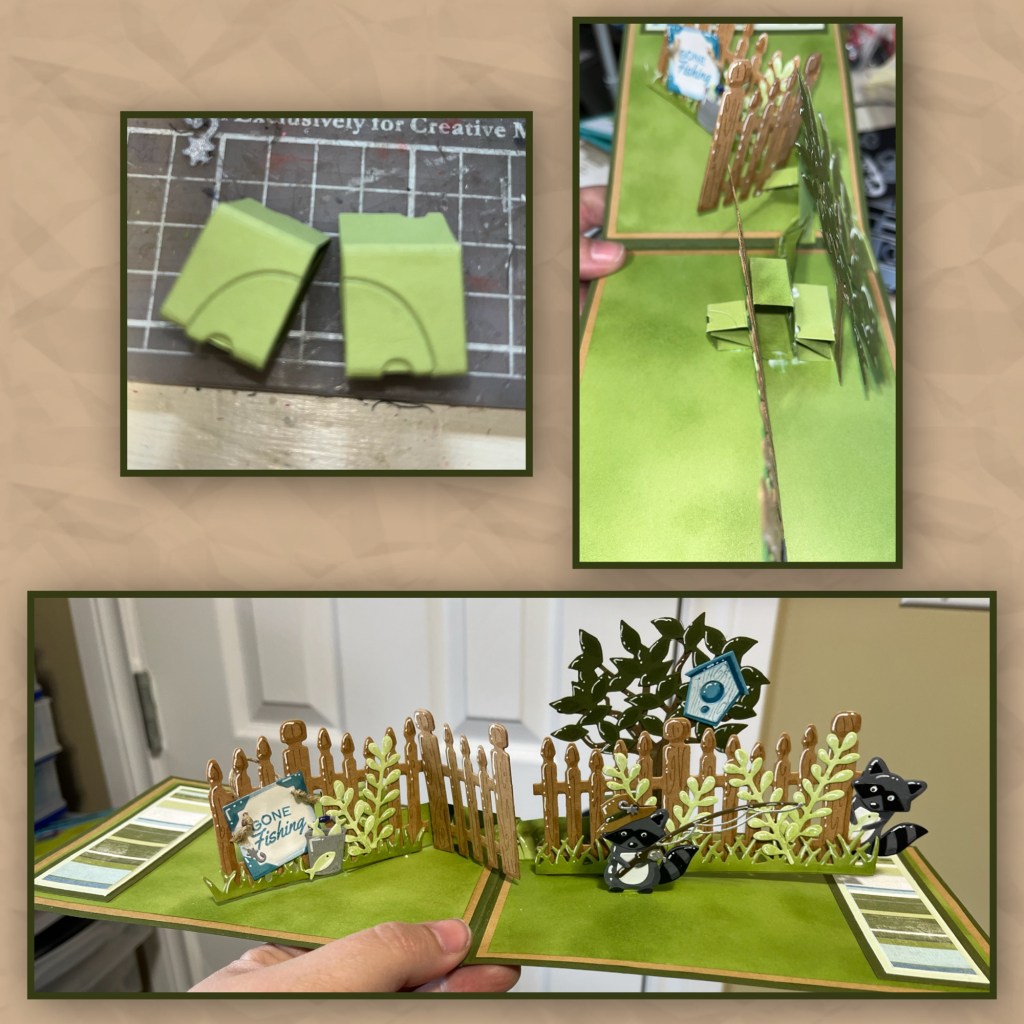
I cut the card base and panels as shown. I cut the centers out of Kraft coloured cardstock to lesson the bulk and conserve cardstock.
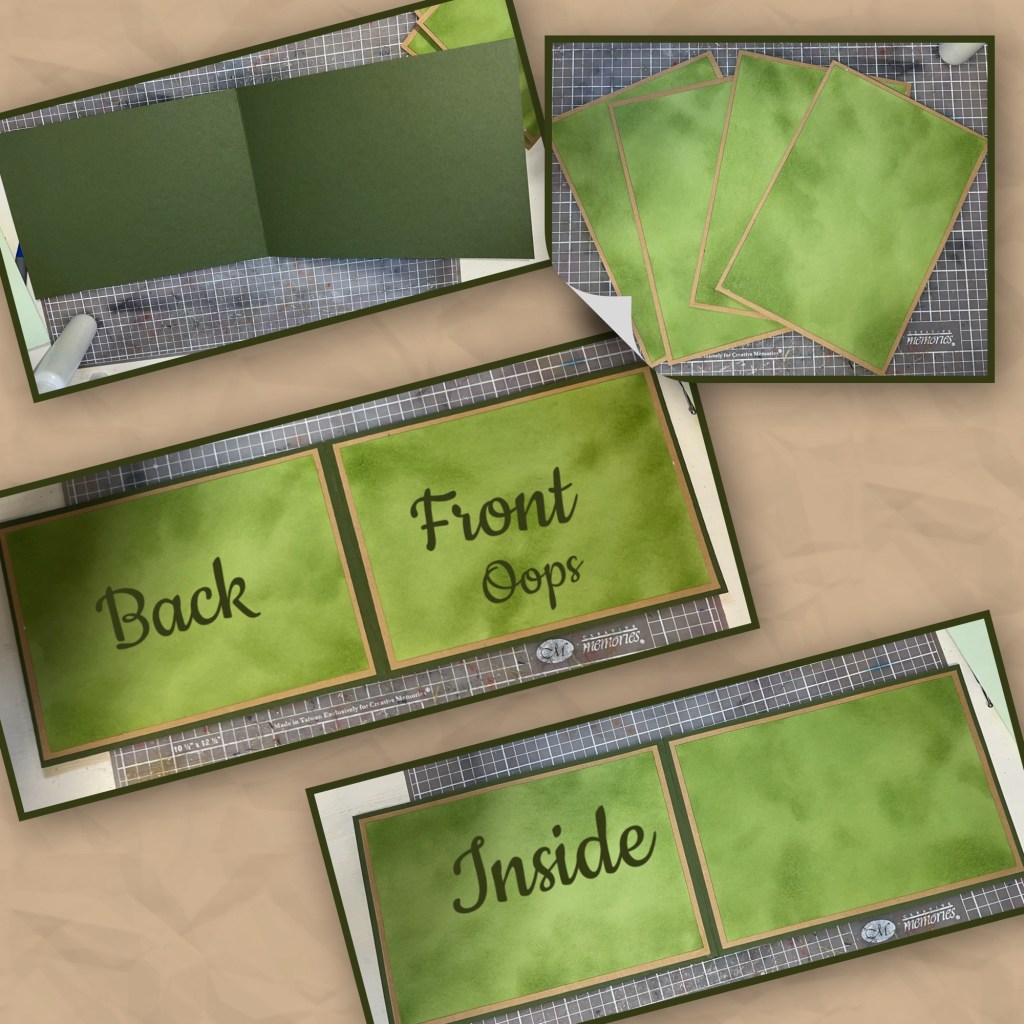
I wanted to add a bit of texture so I used a blending brush to add ink to the light green panels.
So on this step I made a boo boo. I watched the video about a week ago and forgot that I needed to add a staple on a later step so I should not have put the front panel on yet. I should have just added the panels to the back and inside.
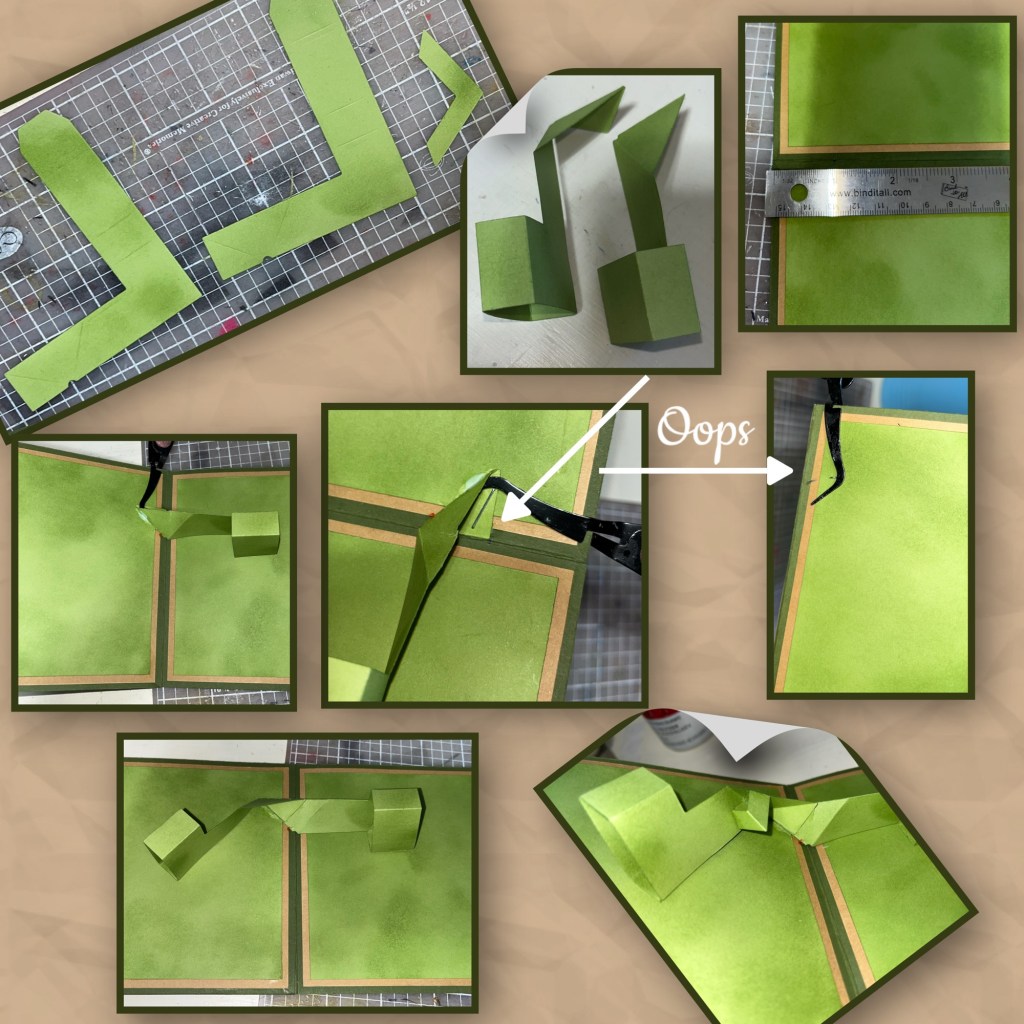
I know that these photos don’t explain a lot, I am showing the steps. I really recommend watching Karen’s YouTube Video for the complete tutorial on how to install the mechanisms. The mechanisms used are 2 of the Katherine Label Pop Up and 1 of the smaller of the Mini Pops.
This is the step where I had to add a staple to add to the strength of the attachment of the mechanism. Problem being the staple goes through to the front of the card. I will have to cover the staple at a later step.
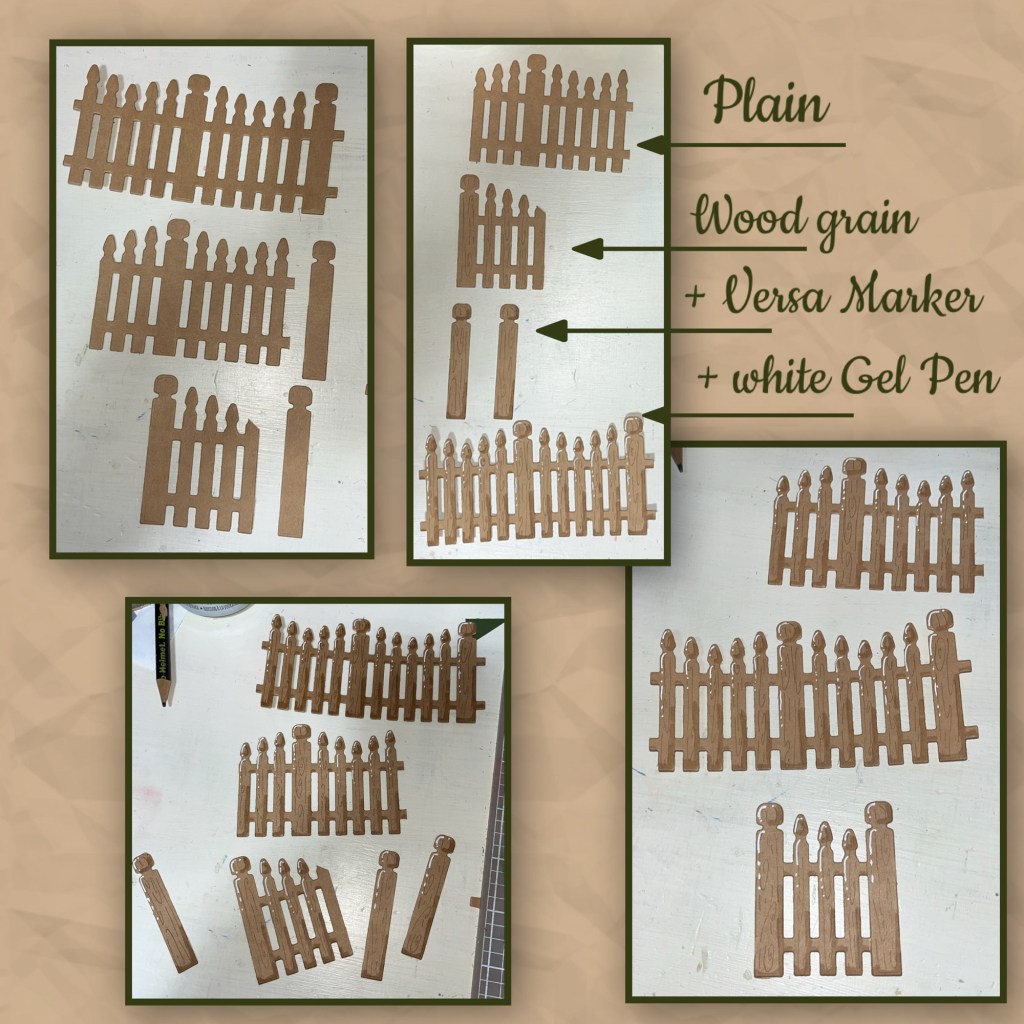
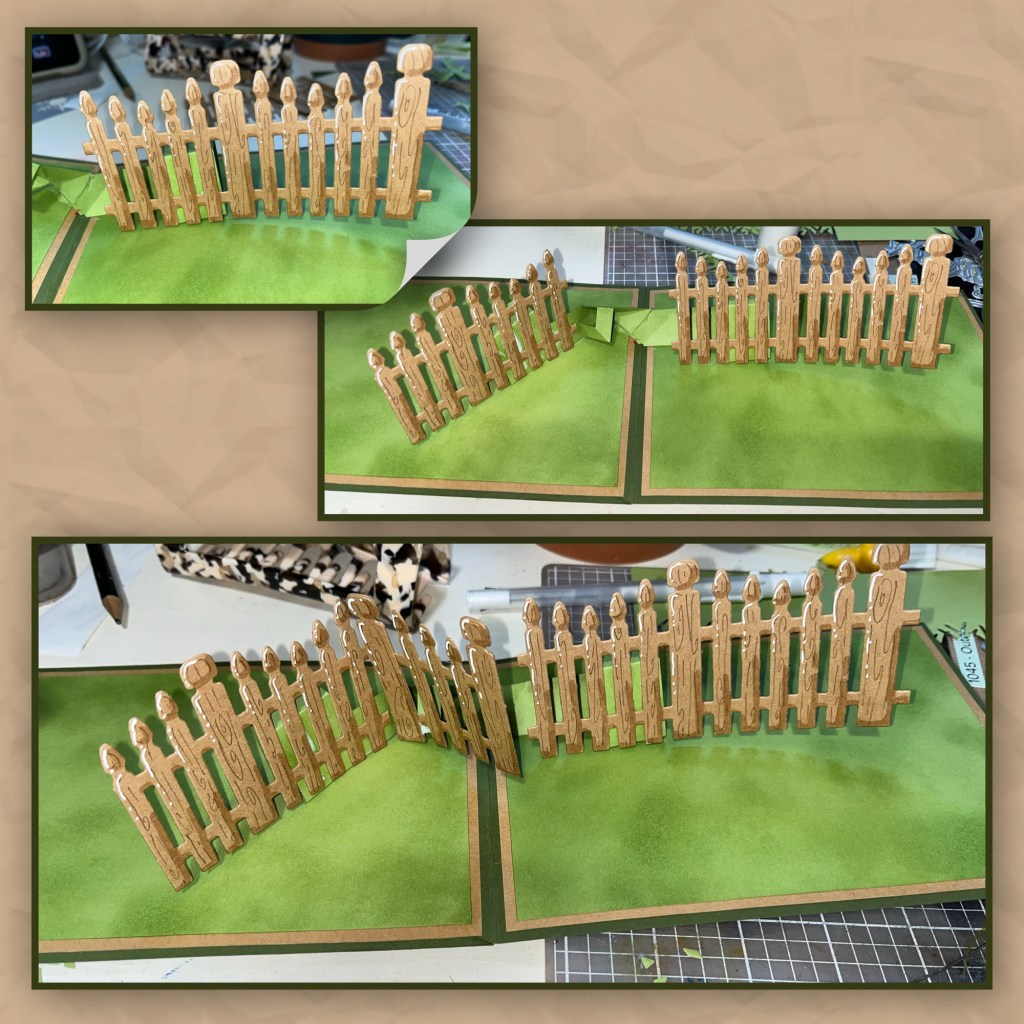
I diecut the sections of the Fence Add on as shown. I knew I was going to add wood grain detail with a pen, shading with a Versa Mark Marker, and highlights with a white Gelly Roll pen so I only cut the pieces I would need. The first photo is the pieces I needed but I also needed an extra post. The last photo shows the pieces as they will be installed into the card. Since Karen’s card is 5”x 5” and mine is 5” x 7” I didn’t shorten the fence piece that goes on the right side.
Still following Karen’s tutorial I added the sections of fence to the mechanism. I’ve also noticed that the longer section of fence seems to bow a bit.
I cut and layered 2 borders as shown. To help straighten the long fence I diecut 4 long strips of grass from the Nature Edges, I glued them one on top of each other to make it one stiff piece. I added shading with a Versa Mark Marker, and highlights with a white Gelly Roll pen, then adhered it directly to the fence.  The shorter grass pieces are from the Fence Add-on set. I decorated them the same as the long pieces and added them to the left section of the fence. 
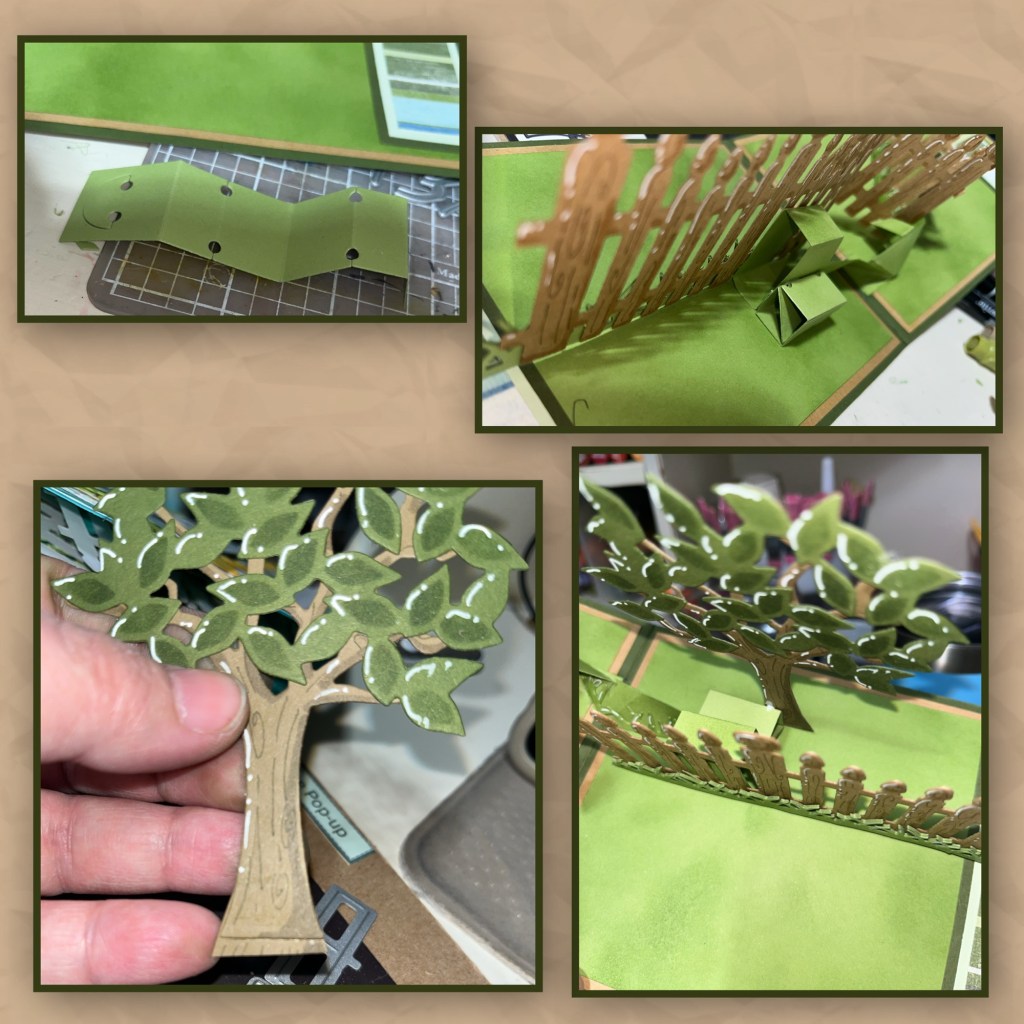
I wanted to add a tree behind the fence. In order for it to fit when the card was closed I had to add a Small Scenes Bam Box without the elastic. I added it behind the Katherine label making sure it folds flat when the card is closed. I assembled the tree from the Tree Pop Up, I brushed the stencil section of the die with green ink and added highlights with a white pen. On the trunk I drew on lines and added a little bit extra card stock in to the bottom. Then added it to the Bam Box hanging over the right edge.
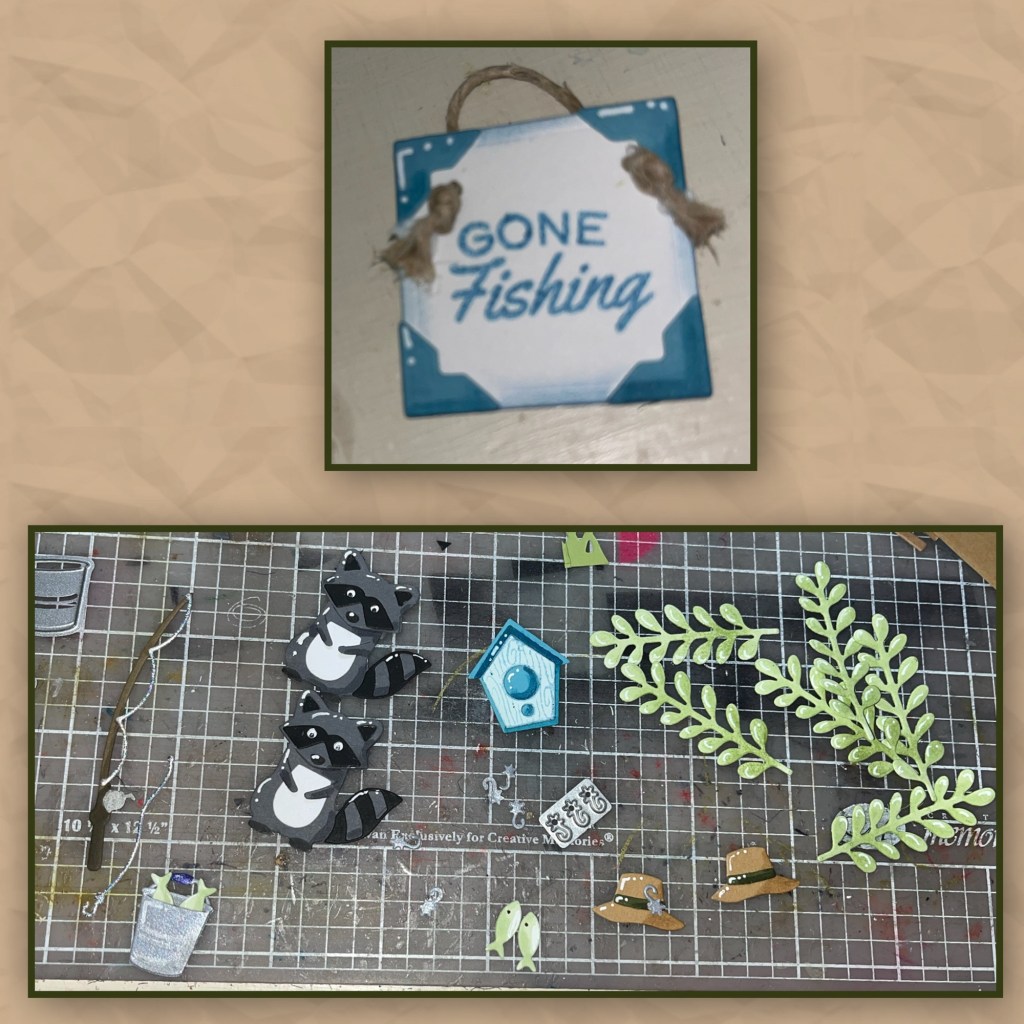
I assembled all the pieces for decorating the inside. The sign is made using dies from the Spinner Square Pop up , and a stamp from the Fishing Phrases and I added a little bit of twine.
The greenery is from the Flower Pot Add on, the birdhouse is from Bouquet Bits. The cute little raccoon is from the Woodland Animals set, and all the fishing pieces are from the Fishing Boat Add on. I added shading with a Versa Mark Marker, and highlights with a white Gelly Roll pen
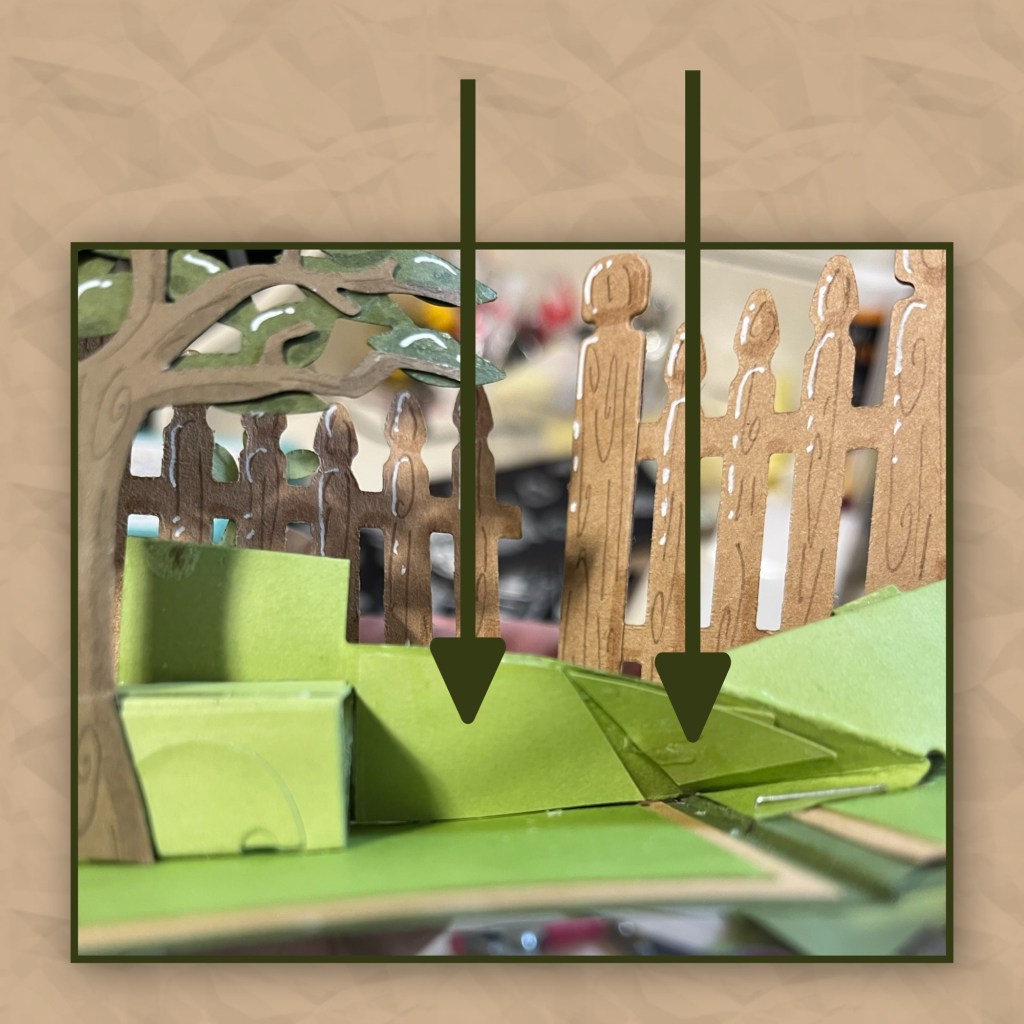
I decided that I wanted to have the raccoon be spaced out a bit from the fence so I made another Small Scenes Bam box without the elastic. I cut it in half so it would fit behind the raccoon. I put the 1/2 Bam box in front of the fence in front of the Katherine label and then added all the other elements.
This is about the time I noticed that with the extra pieces that I added to the Katherine Labels, the card wasn’t folding properly because the main mechanism wasn’t strong enough so I cut pieces to fit behind it. A small triangle and a rectangle that is cut on an angle on the rights side. If I were making this card again, I would have reinforced these pieces before adding the mechanism to the card. 
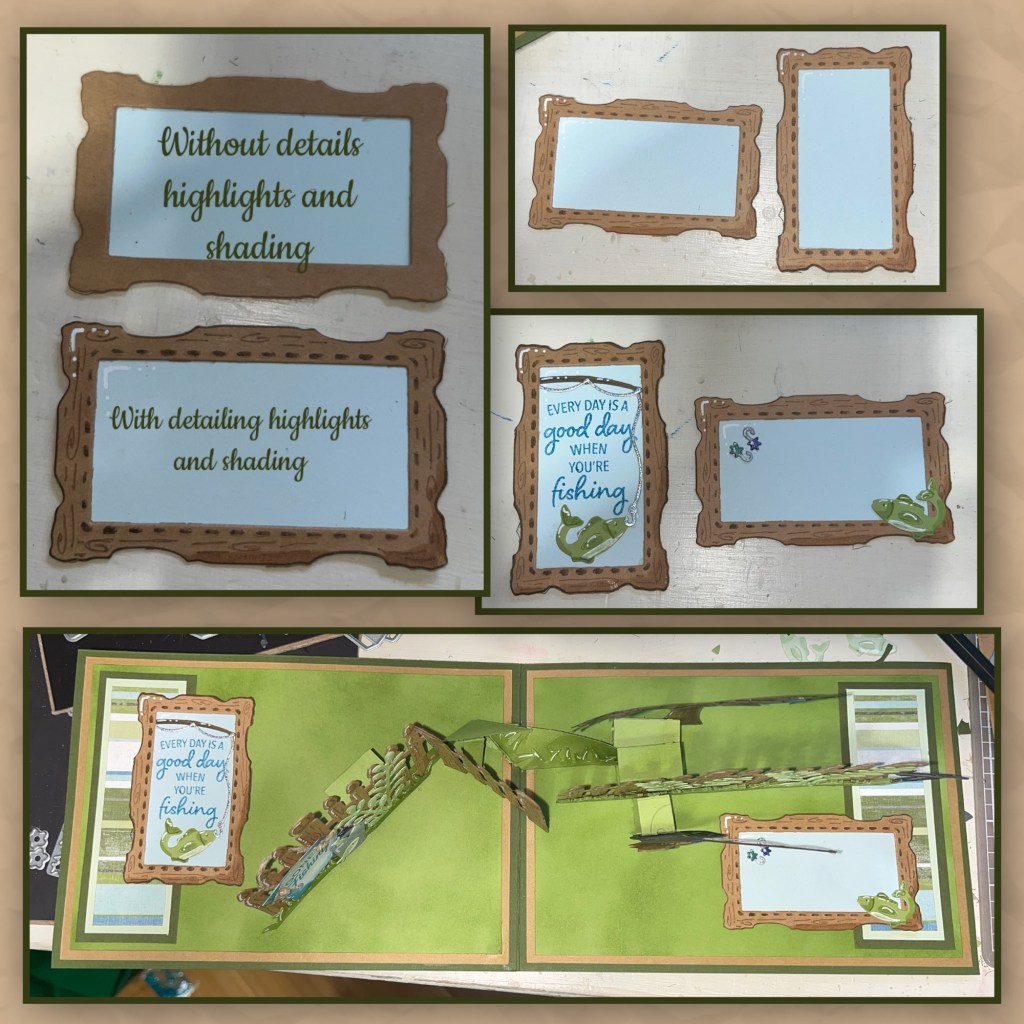
I assembled the 2 frames using the Slim Frames dieset. I added wood grain with a pen and, shading with a Versa Mark Marker, and highlights with a white Gelly Roll pen. I decorated the frames with one being horizontal, and one vertical. I stamped one of them, using another stamp from the Fishing Phrases stamp set. Then added a few of my extra pieces. 
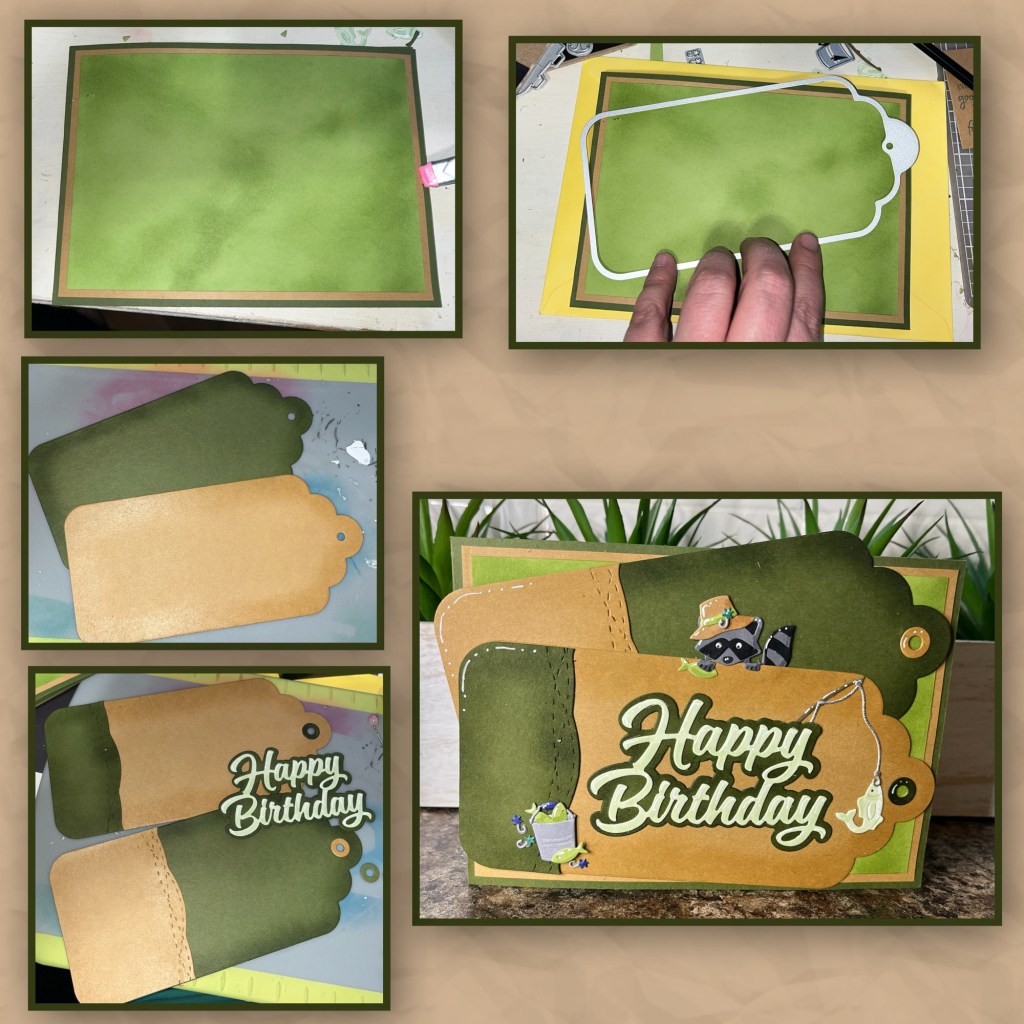
Now for the front. I have the little problem of covering the staple. I found an envelope that is bigger than the card so I knew that I could add pieces that extended out past the edge of the card. I created 2 extra large tags from the Topper Tags as shown, brushing Versa Mark ink around the edges.
I added Happy Birthday and the Happy Birthday Shadow and a few extra pieces from the inside.
Other Tools used

One thought on “Gone Fishing”