

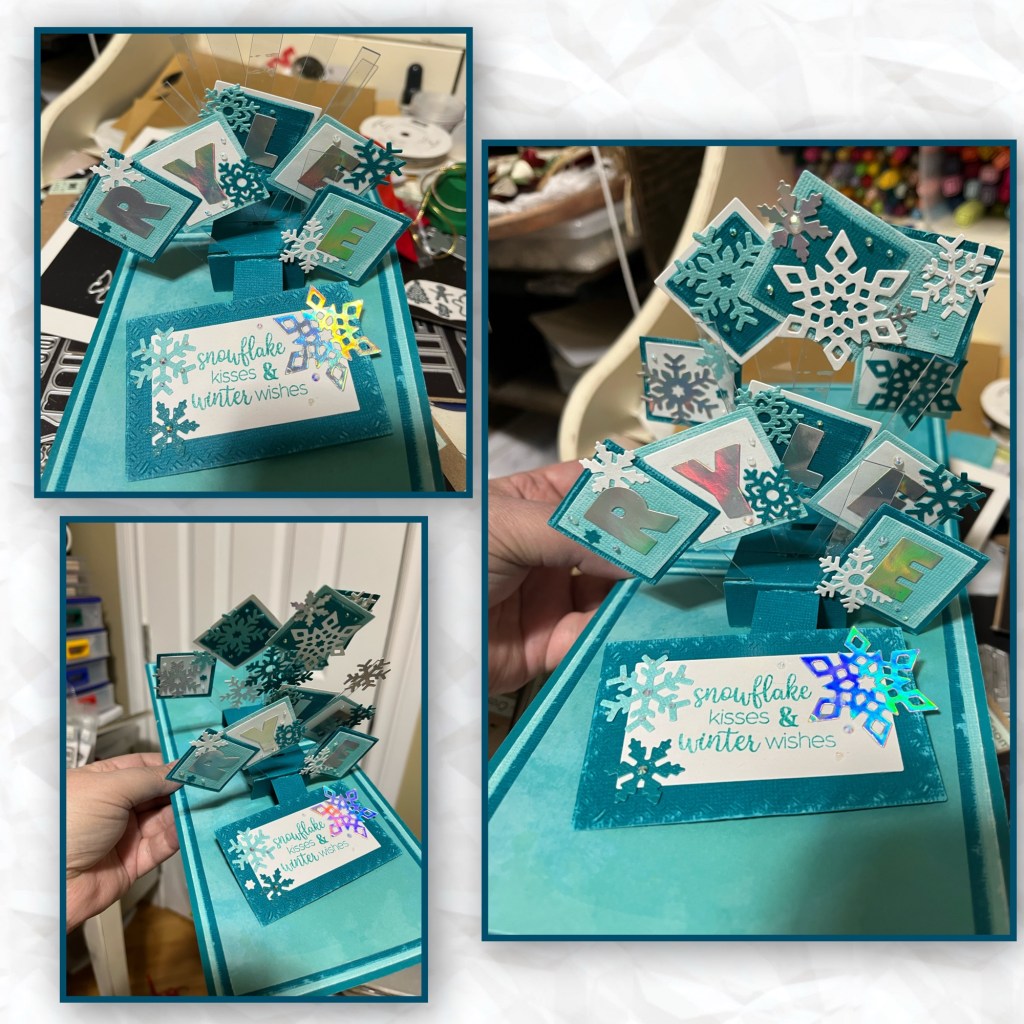
Ok, I’m back. I was having some technical difficulties but I am so excited to share this card. I am totally a team teal kind of gal and I made this card for my beautiful granddaughter 🩷 I followed Karen’s Happy New Year Card directions to alter the pop up mechanisms.

All the fun is in the reveal, to see this card in action please check out my FACEBOOK page, feel free to join if you would like to share your own crafty creations. You can also see a video of this card on my INSTAGRAM page.
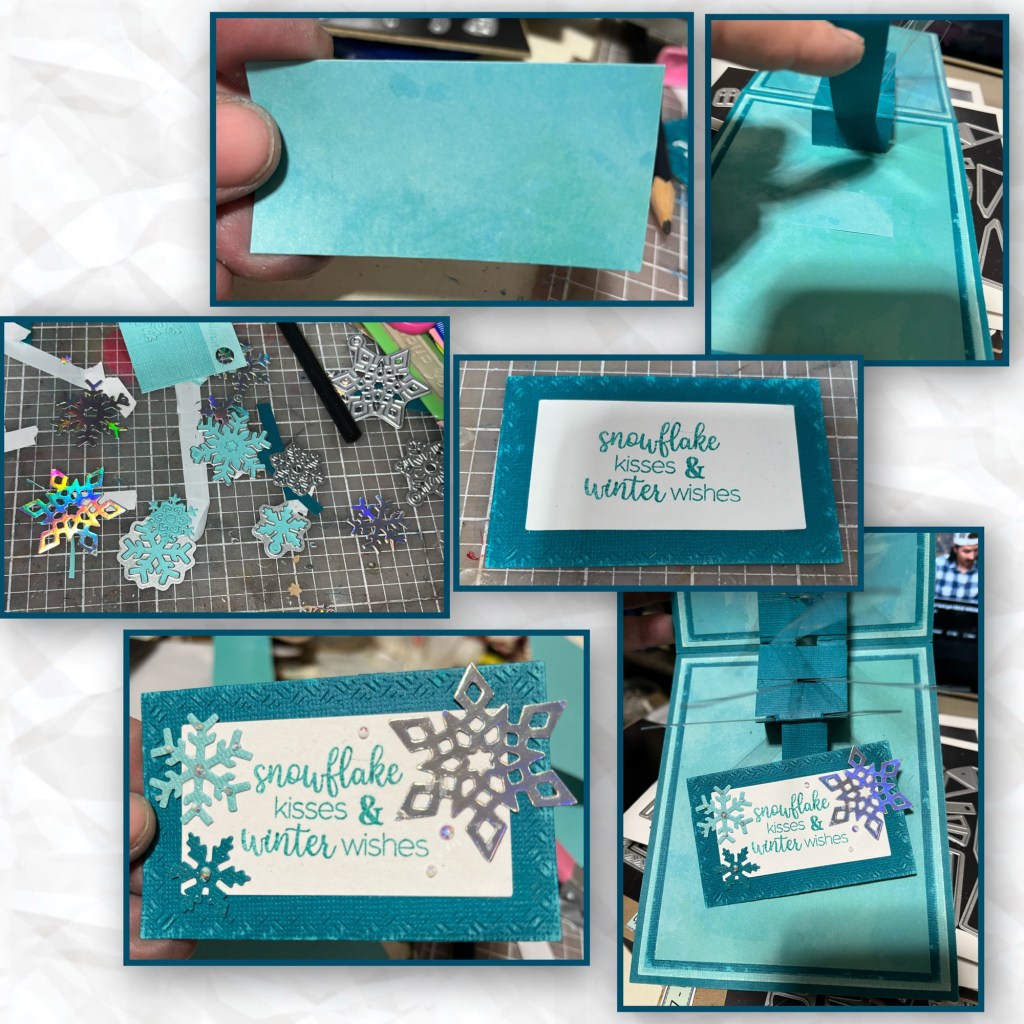
I went through my stash, and I found a few shades of teal from my Core Color card stock and a marble teal from a pack of Walmart paper. I cut the card base and panels as shown, I used the medium teal for the card base and the darker teal for one of the panels. I cut the middles out of the panels. to save card stock and lessen the bulk. I used the cut out pieces to die cut snowflakes at a later step. 
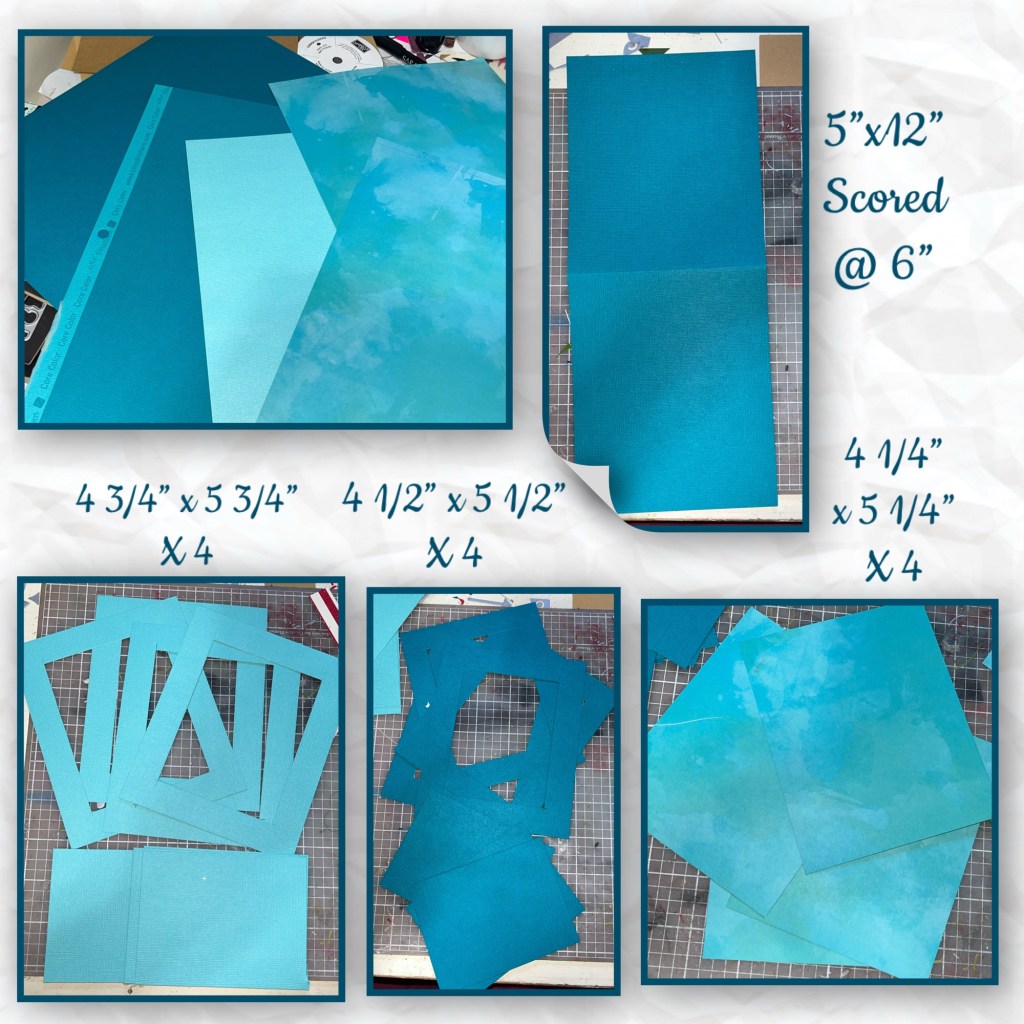
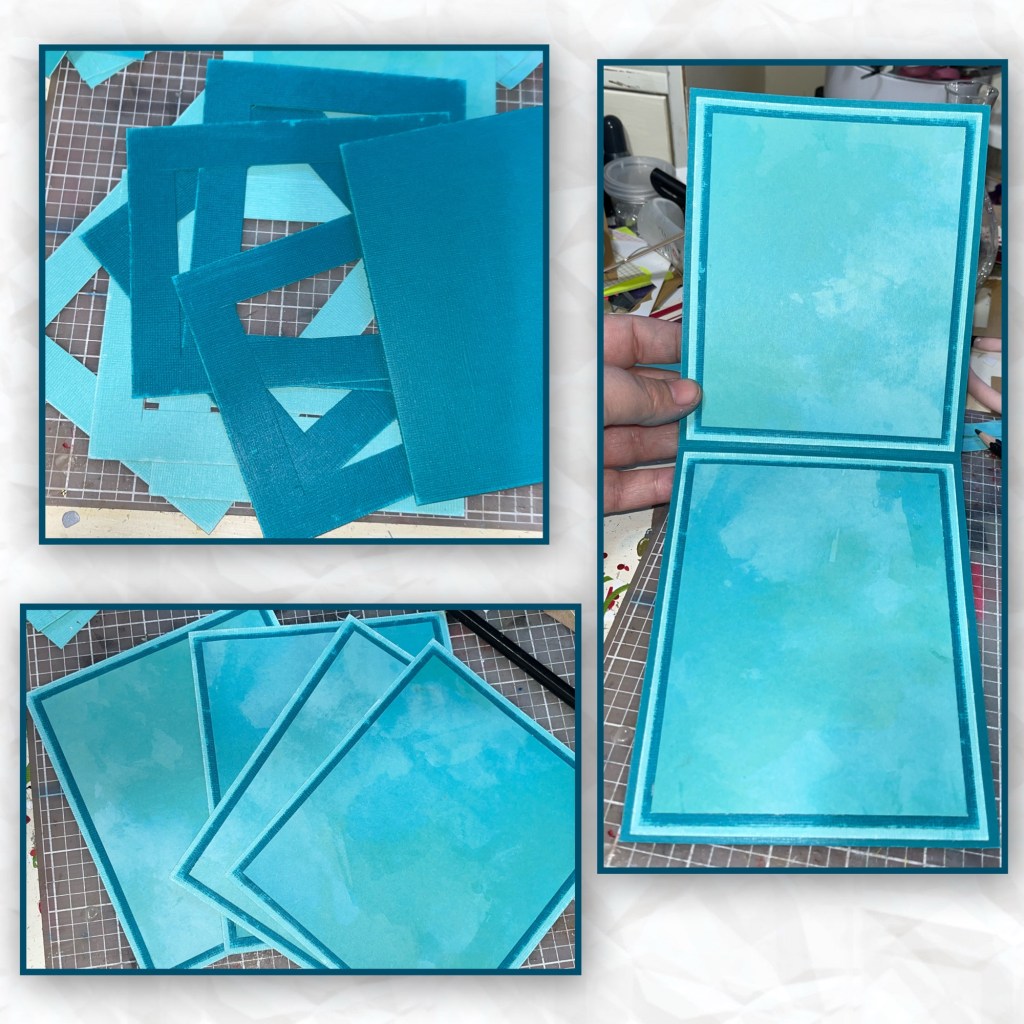
I scuffed up the edges of the panels, to show off the core colour from the card stock. I layered the panels as shown and added them to the front back and inside of the card. 
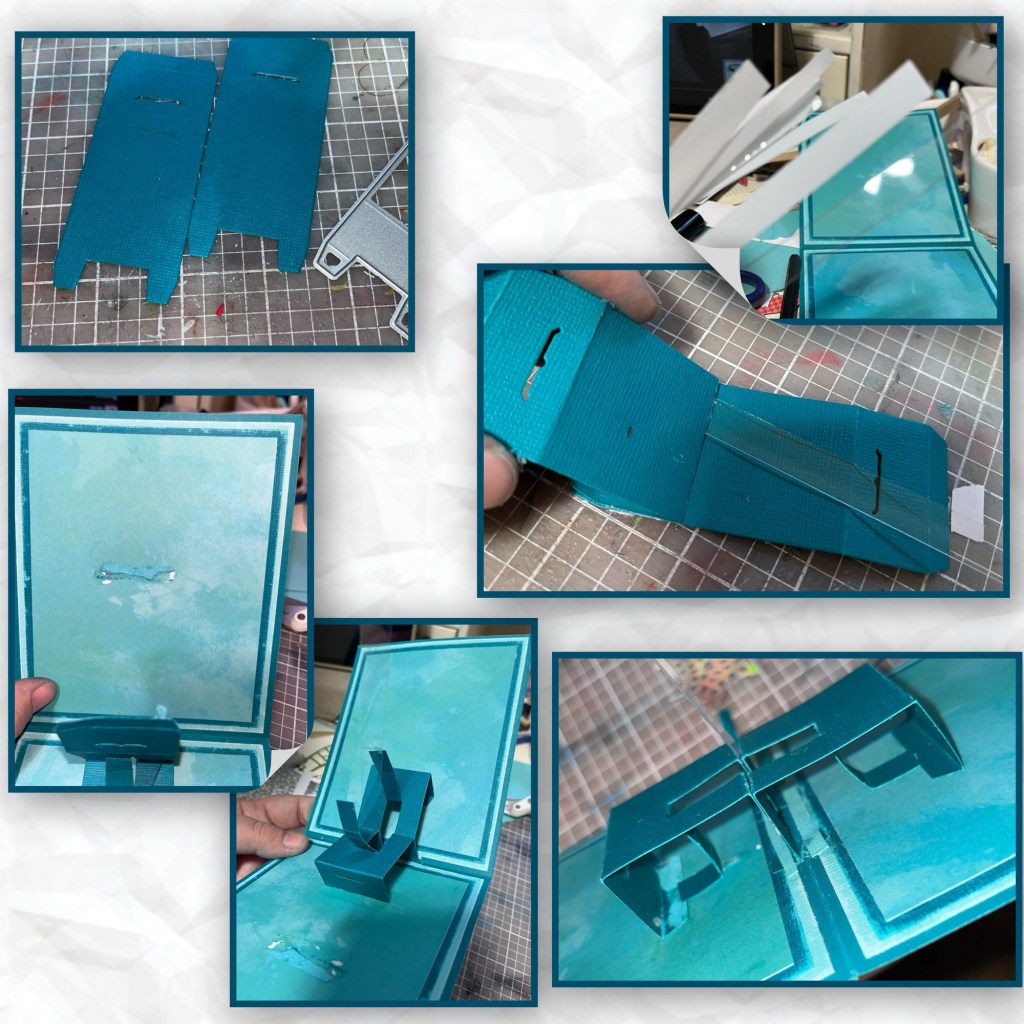
I cut out and assembled the Postage Pop Up following Karen’s Video
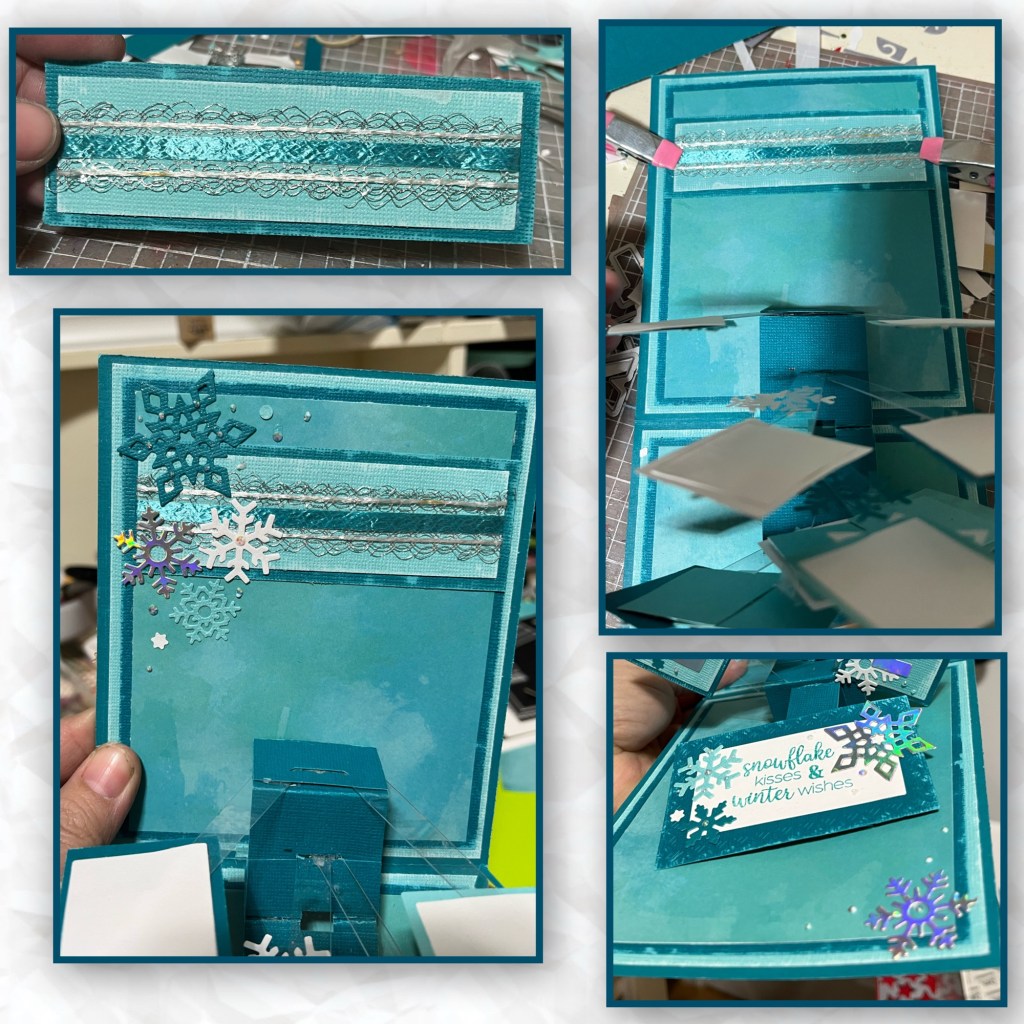
I’m showing photos as I was making the card. But it is too complicated to explain with photos. I highly recommend checking out Karen’s video.
I wasn’t paying 100% attention and I originally glued the mechanism down wrong and tore my paper. But if you follow me, you know there’s no turning back. I will find a way to salvage and fix the boo-boo. 
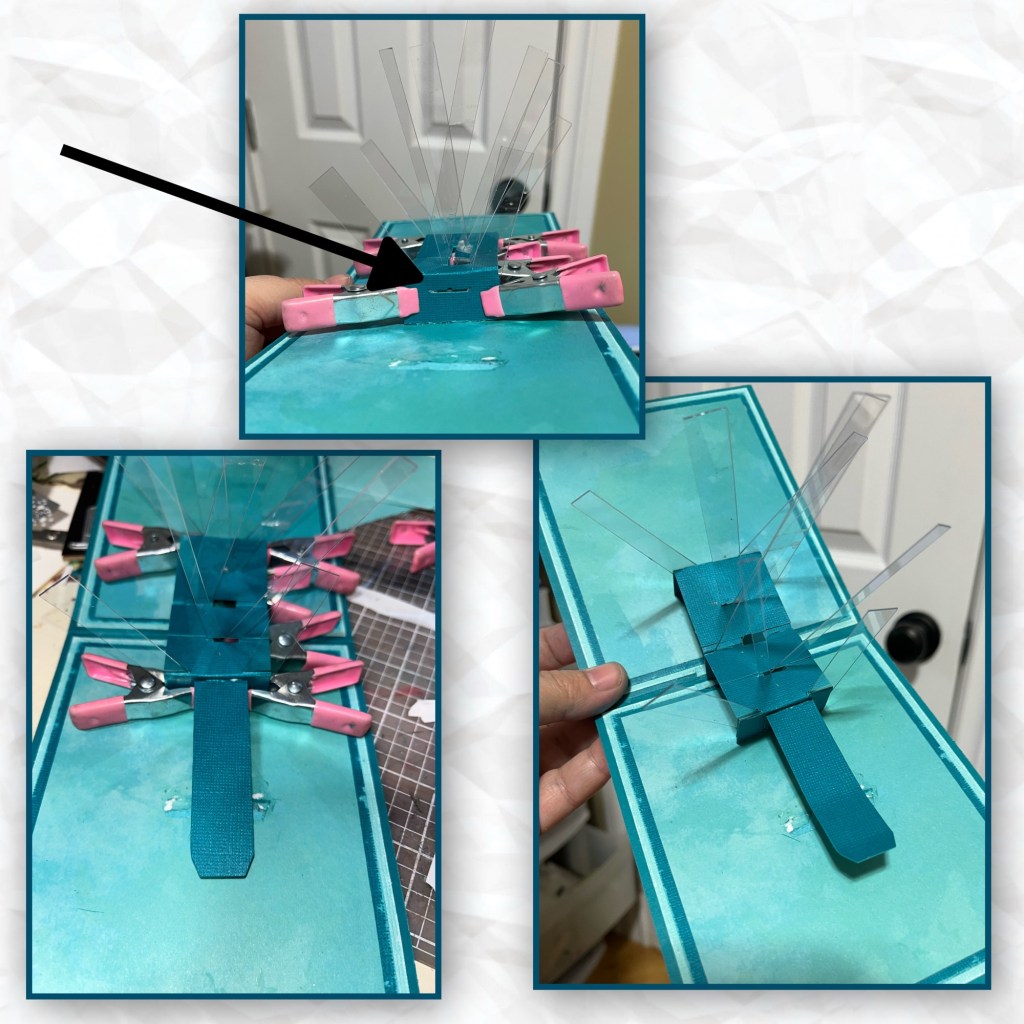
As Karen mentioned in her video. It’s better to use a dry adhesive when glueing down acetate strips. But I don’t trust my sticky strip. It’s pretty cheap. I got it from a Walmart I think. So I use the sticky strip and then wrapped a small piece of cardstock with liquid adhesive to extra stick some of these acetate pieces together Then glue them in. Hoping this trick will help it last longer. I use the clamps to hold things in place until all the glue gets a chance to dry.

Soooooo boo boo #2, I wasn’t going to add the greeting on the attached flap, but I thought it would help me cover up the rip in my card. The problem is where I’m supposed to attach the strip I covered the little slit in the mechanism on the inside so I couldn’t attached it properly so I folded the end and just glued it to the mechanism and I covered the slit in the mechanism so the strip isn’t quite as long as it should be, but it still works.
The rip was still noticeable, so I decided to just cover it with a patch. So between the patch and the greeting panel, it’s barely noticeable. I diecuts the snowflakes from the Winter Charms, Holiday Charms, and the Snow Charms. To make the greeting label I used the Rectangles Crosshatch and Winter Hugs Stamp set.
Using the square dies from the Photo Fan Pop up I diecut several squares in all the teals, a holographic silver and white. I cut out the letters from the holographic cardstock using the Alphabet set. I layered as shown and added the snowflakes and some itty bitty gems.
To make sure the squares would stick to the acetate strips I use a little bit of sticky strip and glue. Then I took an extra square and added sticky strip and glue and stuck it to the back. So the acetate strip is sandwiched between two squares. 
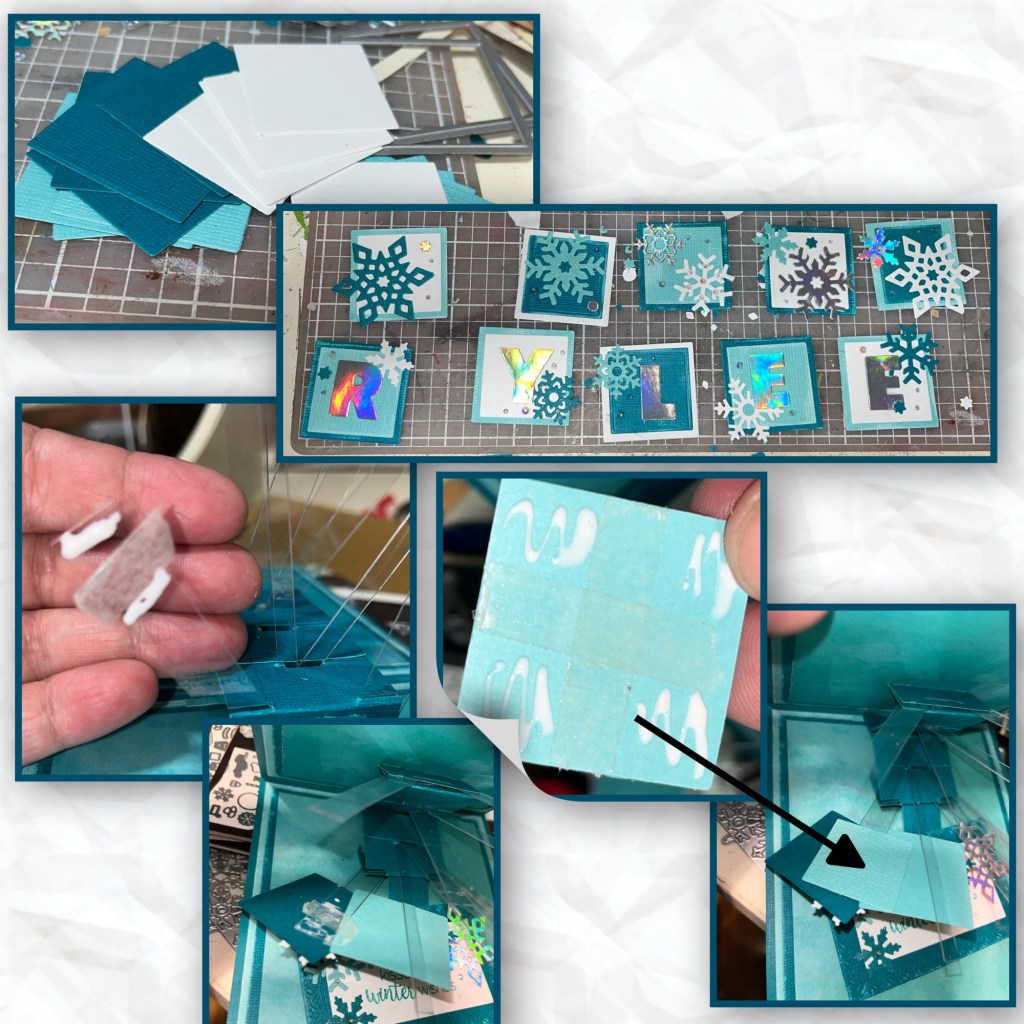
After adding all the squares to the acetate strips, I trimmed off any acetate that was hanging above a square.
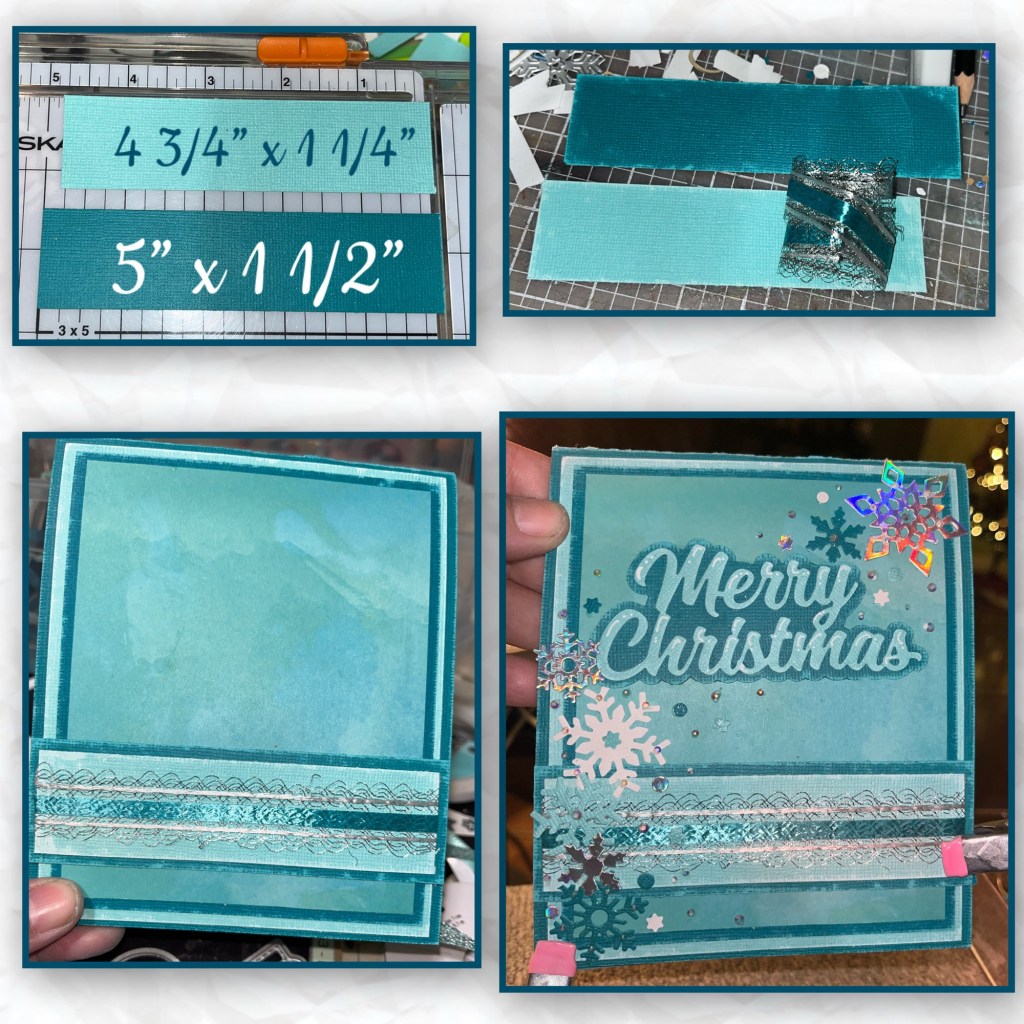
I thought the inside of the card needed a border as well, so I made one for the top I also added snowflakes and a few gems to the top left and the bottom right.

Other Tools used
