
Well, I’m a week behind again. This is a card I made for last week’s Craft Roulette challenge, and these are the parameters…

My belly band is a bit different. I added a rope band around the center panel. My cottage colours are a bit of a stretch, the wood and greens would be found in the trees, and the red and white could be a flag or tablecloth that could be found at a cottage. Santa is wearing a coat. I upcycled this card base, it was a card base left over from a class I taught over 10 years ago (I hang on to everything for ever) I also upcycled the thread I used, it was from a tag.
All the fun is in the reveal, to see this card in action please check out my FACEBOOK page, feel free to join if you would like to share your own crafty creations. You can also see a video of this card on my INSTAGRAM page.
This card base is a left over from a class I did forever ago so I measured my scores and my cuts. The vertical lines are all score lines and the horizontal lines are all cut lines. Fold as shown.
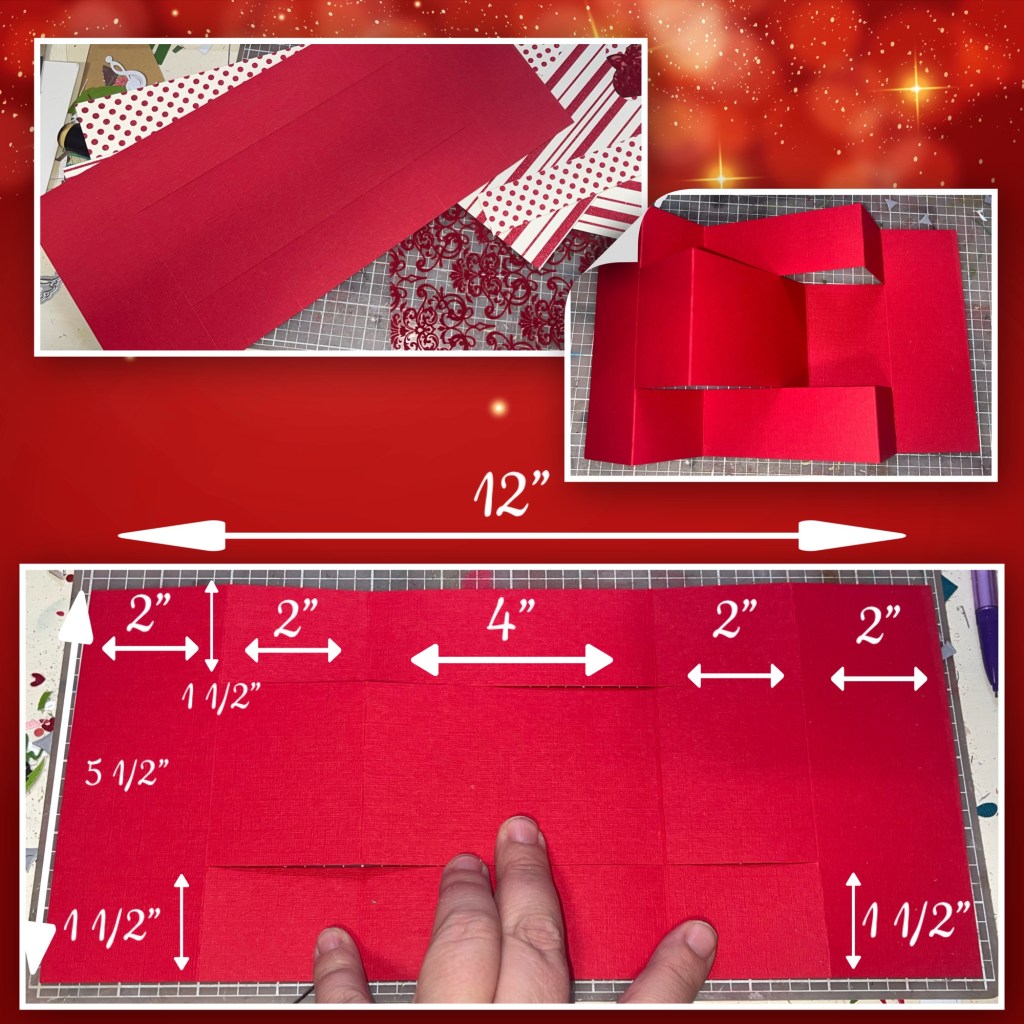
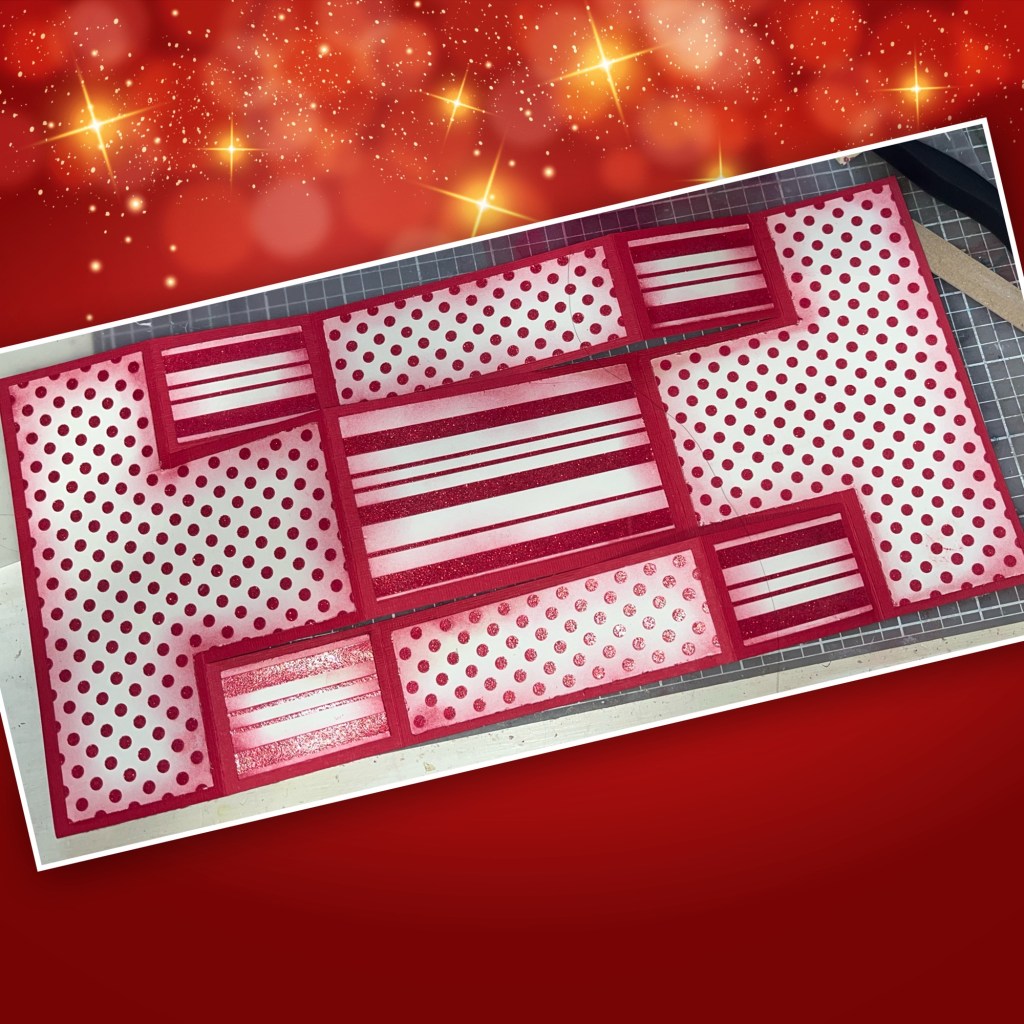
I hand-measured as shown. The small rectangles are wrong in the photo but the dimensions are correct. I originally cut them too short. I sponged red ink around all the edges.

Then added them all to the card base as shown.
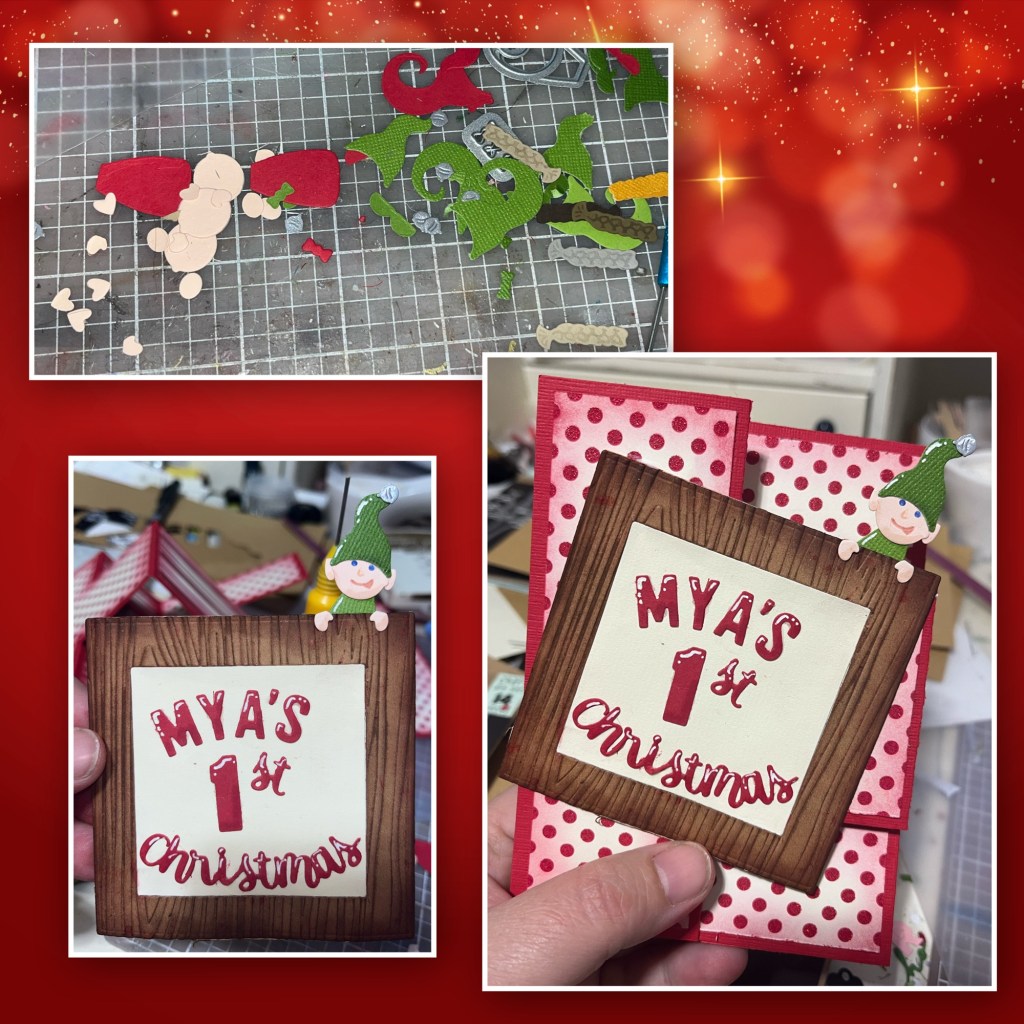
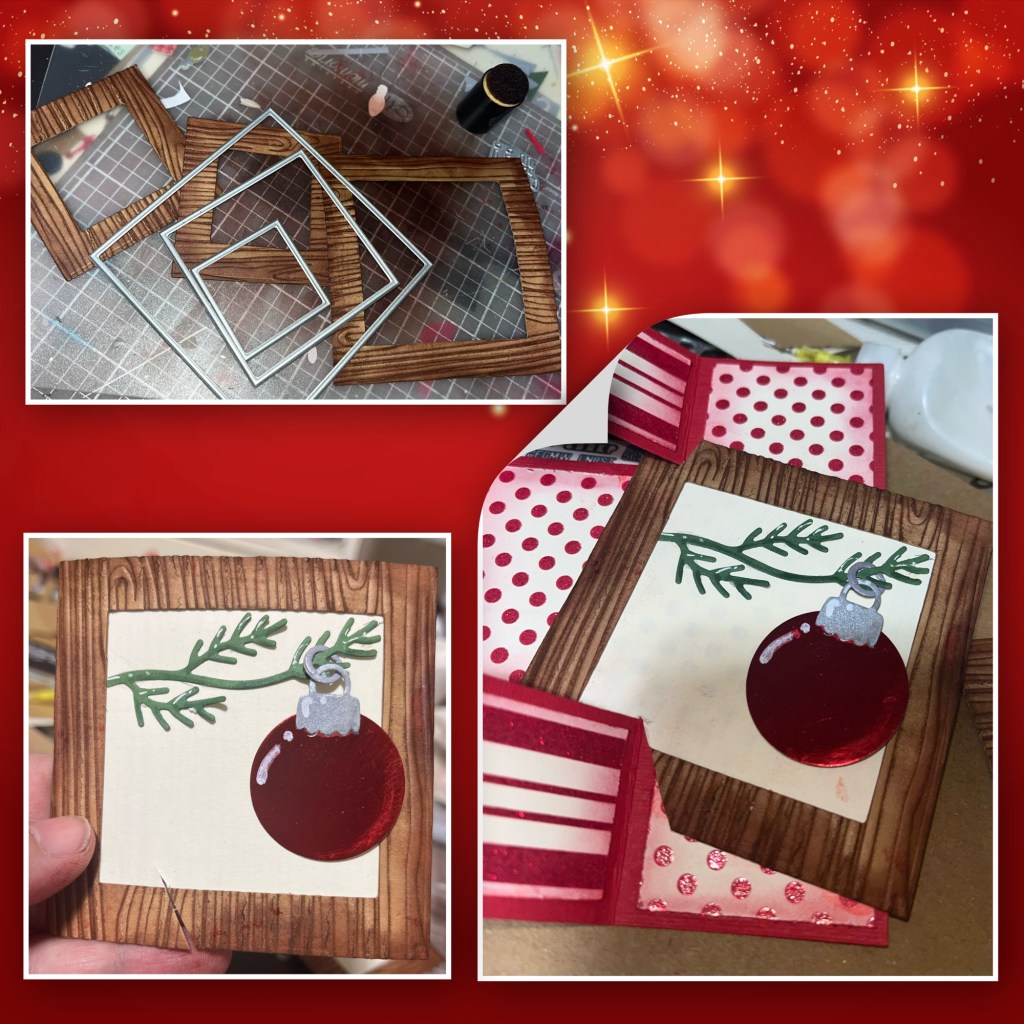
I used the 2 large non-crosshatched squares from the Squares Crosshatch set to cut the frame. I added brown ink to a Wood Grain embossing folder and embossed. I sponged with the dark brown to make the frame darker then added cream cardstock as shown. I made 2 of these.

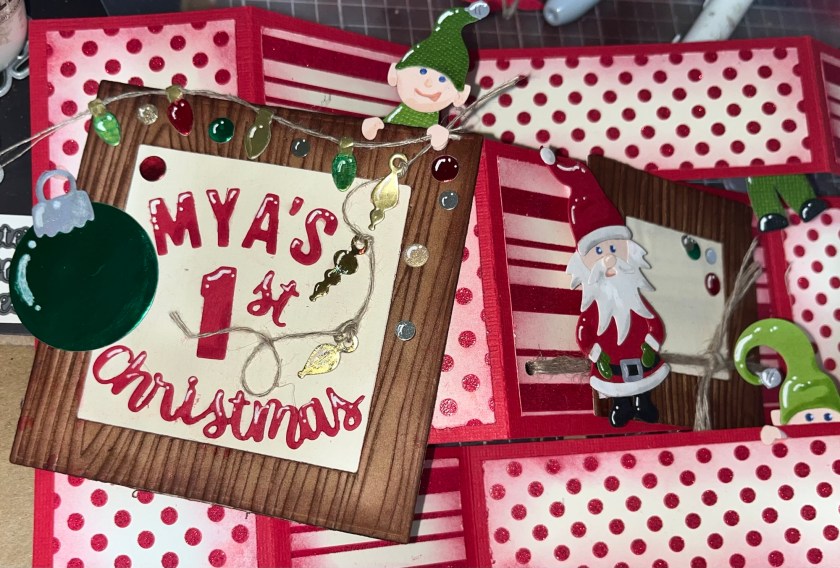
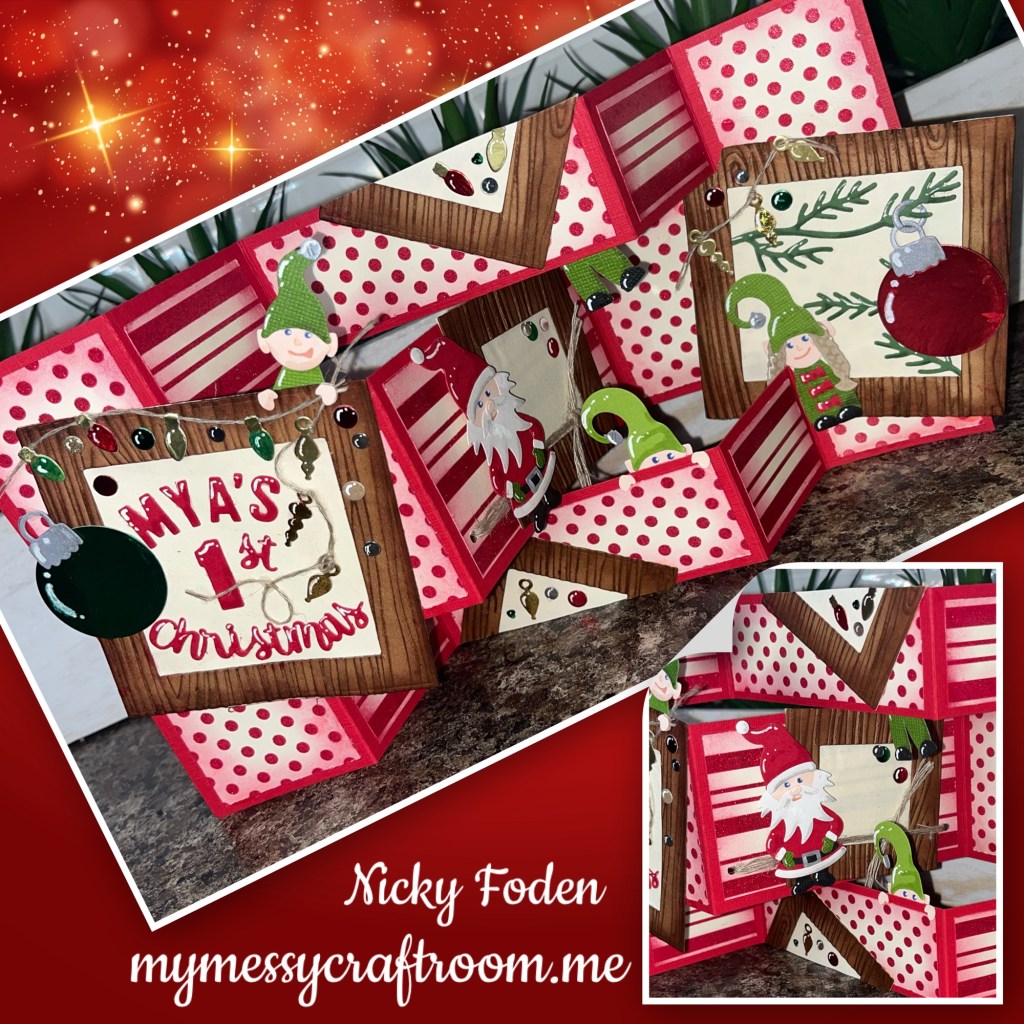
I diecut the words using Word Set 3 Holiday, Mini Alphabet & Numbers, and the Numbers dieset. To add the word Christmas I glued the middle down then curved up the ends. I added shading with a Versa Mark Marker, and highlights with a white Gelly Roll pen

I cut several Tiny Gnomes pieces and turned them it to elves buy using the little hearts as ears. I added shading with a Versa Mark Marker, and highlights with a white Gelly Roll pen. I added an elf to the frame and the frame to the card front.
Using the next smallest square from the Squares Crosshatch and the middles from the original frames that I cut earlier to make small frames. If I thought to do this when I was making the first frame I would have used all three dies to cut them at the same time. I embossed and inked them the same as the others. I cut the pieces from the Holiday Charms and added them to the second large frame. I used a ring from the Charm Rings set to dangle the red ornament. I had to trim the frame to tuck it in as far as I wanted it to be. I also made a Green ornament that is added later to the front
I added a small frame to the the middle of the card. I used a hole punch to add holes to both sides of the middle panel. I tied a piece of the twine/thread through the holes and tied a knot. I added a little bit of glue to the knot so it wouldn’t come loose. I wanted the frame to be kind of crooked but had to be mindful of how all the folds folded when closing the card.

I created a Santa, I added shading with a Versa Mark Marker, and highlights with a white Gelly Roll pen, I added shading to his beard with a grey alcohol marker. I added some foam adhesive leaving a gap where the thread will be and added it to the card.

I went through my stash of extra diecuts and I pulled out the Christmas lights from Penguin and Reindeer Snowman add on and added them to the thread, and gold ornaments from the Christmas Tree add on also added to a thread. I added the large green ornament and some silver, gold, green and red flat sequins randomly around. I added white highlights to all these elements.
I strategically placed the girl elf over the weird gap on the last panel and one playing peek a boo. One poor little elf is hanging from above the middle panel. 

I thought it need a little something else so I cut the last frame in half. I had to trim each one a little to get it to fit with out hindering the opening and closing of the card. I added a few of the embellishments that I had left over.
All the fun is in the reveal, to see this card in action please check out my FACEBOOK page, feel free to join if you would like to share your own crafty creations. You can also see a video of this card on my INSTAGRAM page.
