
Hello crafty friends, I know I’ve been MIA for the last while, I’ve had the craziest month, that included some technical difficulties. I have my card for Karen Burnistons design team October challenge which was “haunted location”, and I came up with a haunted Castle. I’m writing this blog post from my car, so it’s not going to be much of a post ☹️. But I plan on completing this post within the week (hopefully my tech issues are resolved)******EDIT******* blog post is now complete
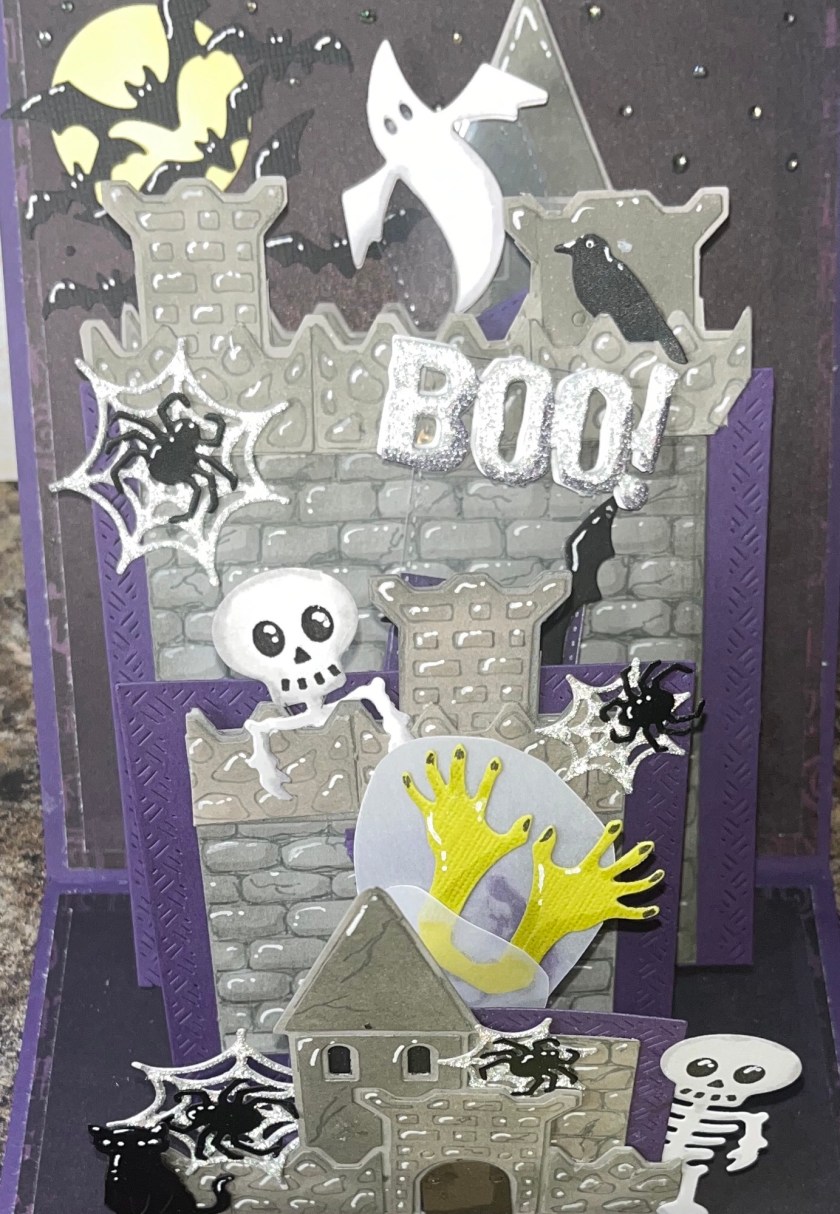
Here is my HAUNTED CASTLE card 👻

See you soon with links and instructions…..
All the fun is in the reveal, to see this card in action please check out my FACEBOOK page, feel free to join if you would like to share your own crafty creations. You can also see a video of this card on my INSTAGRAM page.
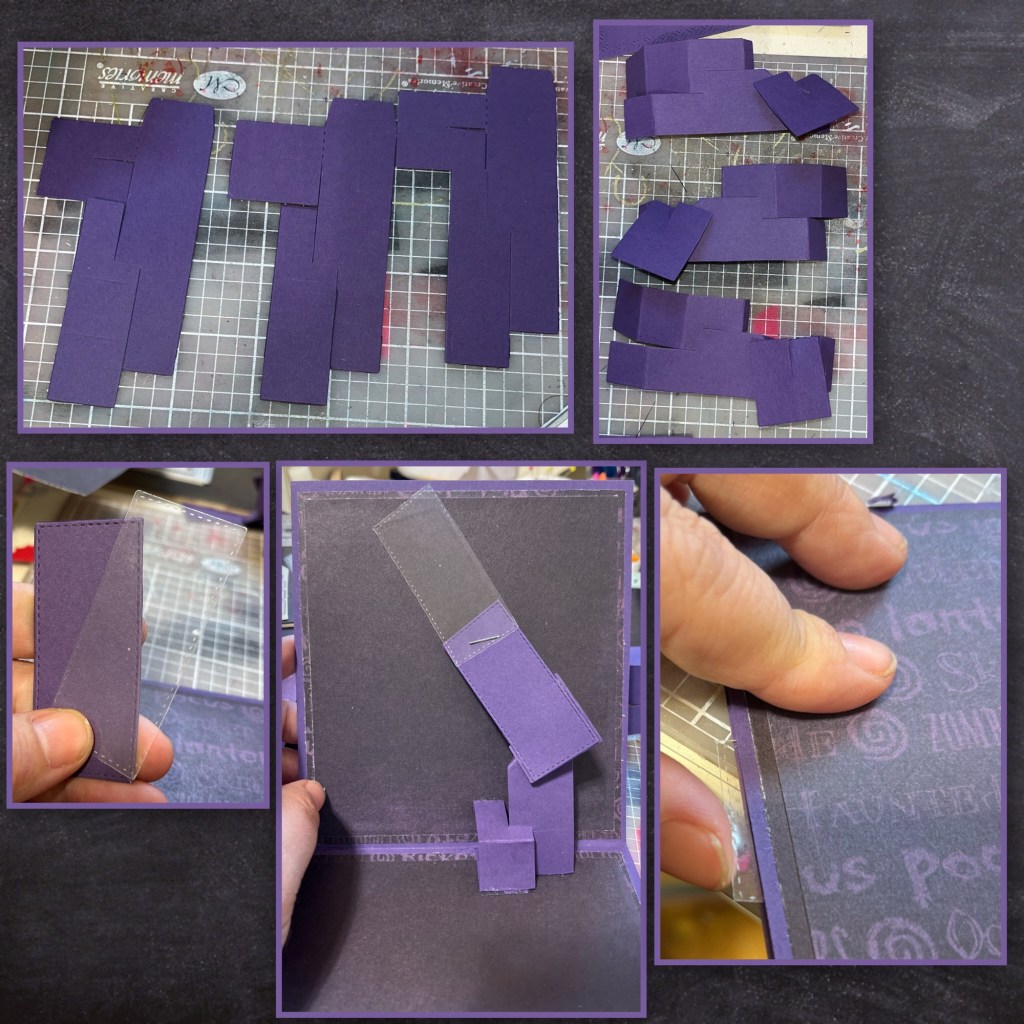
Cut the card base and panels as shown below. Assemble the card by adhering the flap on one to the other square. Layer the panels as shown.

Add the layered panels to the card base. The patterned paper on the top goes front and back, the solid paper on the top goes on the inside.
Die cut 3 Spinner Square mechanisms. Karen has an amazing Video tutorial on how to assemble this card style.
I found that adhesives don’t always hold well on acetate so I thought I would try something different. I stapled the clear section of the arm to the purple section. It was a bit too long so I had to trim it so it would stay within the limit of the card.
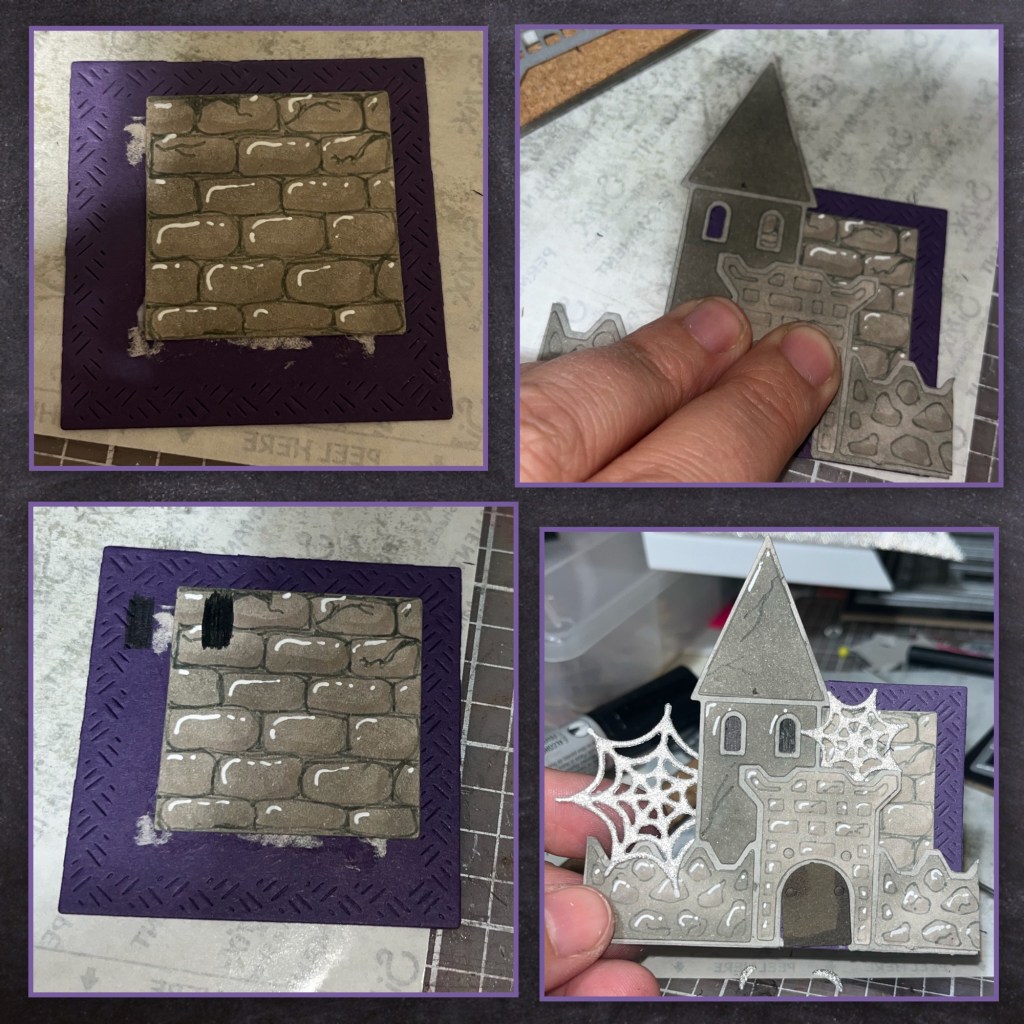
I enjoy making my own brick back ground, I cut I grey 3 1/2” square and using a ruler and my grid mat I drew the brick lines. I then shaped the bricks so they look a little rougher around the edges. Using a Versa Mark marker I drew shading on the bottom and right sides of each brick. I sponged a darker grey around the edges and randomly around the middle. Next I added white highlights to the top and left side. Last I drew cracks in the bricks to give it an old creepy look.

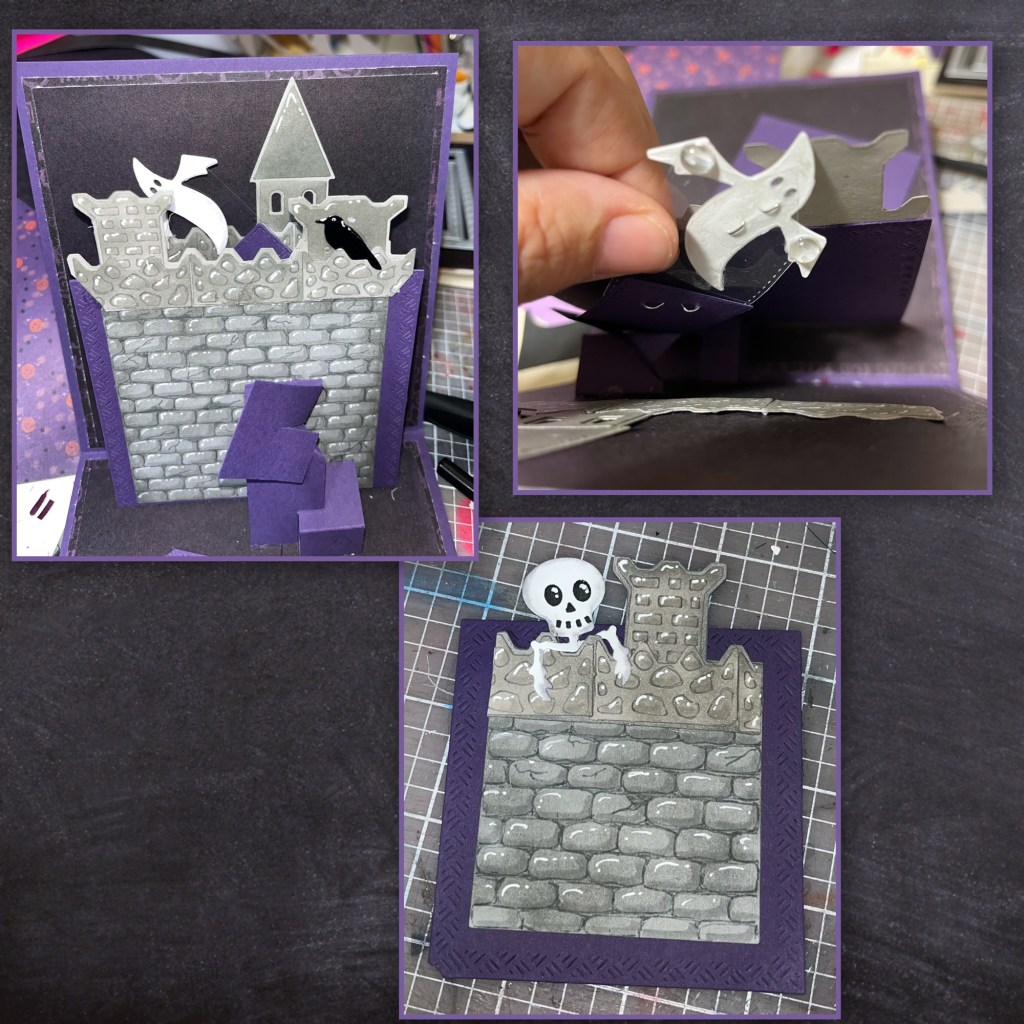
Using the largest Square Crosshatch, and pieces from the Castle Pop up I assemble the first section. With the tower it was too tall, even with the wall it was still a bit too tall so I had to trim a little bit off the bottom of the purple square.

I thought I’d try the staple trick again, so I die cut 2 ghosts from the Halloween Element, I added shading to the one that will be on the top. I stapled the second ghost to the clear arm and trimmed off the excess clear end. I then glued the first ghost over the second ghost. I added the crow to cover the little gap in the wall.

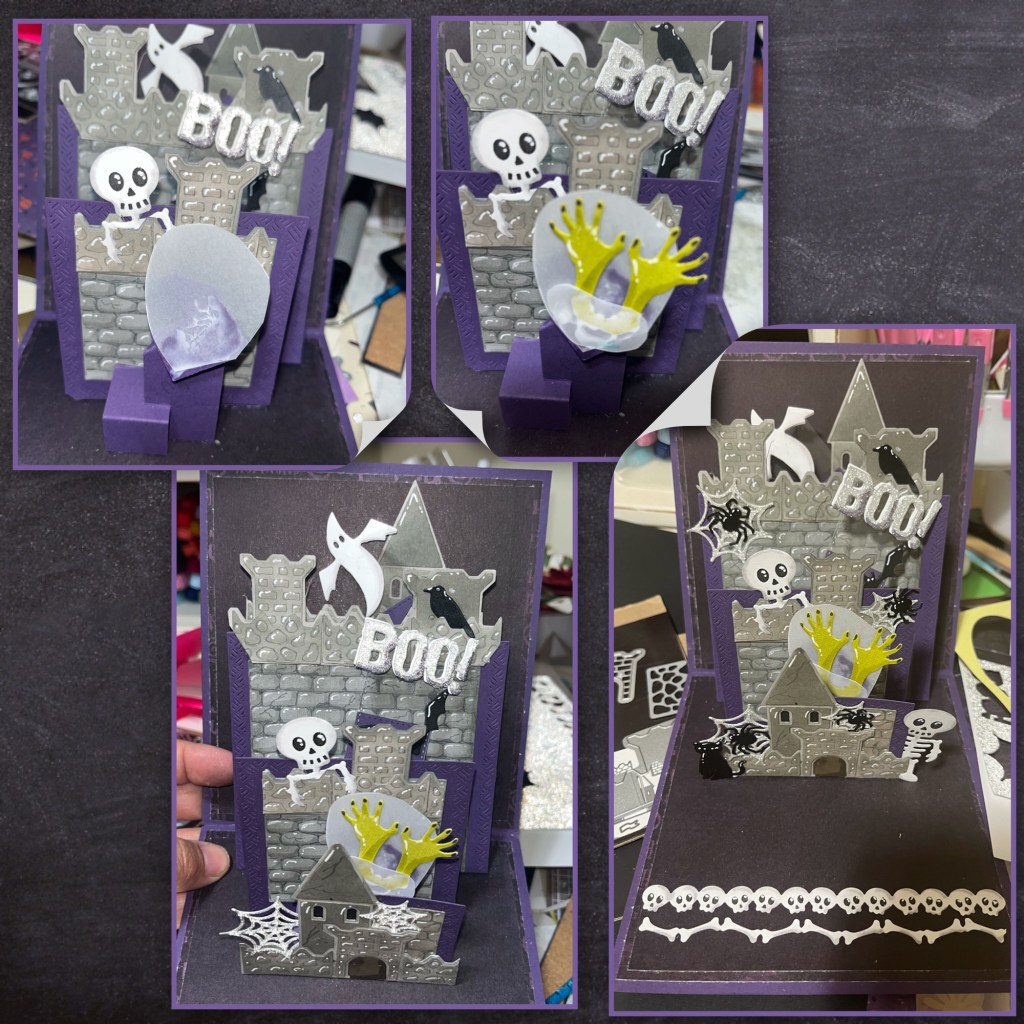
I noticed that the ghost was dragging weird so I added a couple of clear bubbles to the back so it slides better.
Added the second mechanism, it should have been a bit more to the left, but it still works. I made the second layer using the same die’s as the first, the Skeleton is from the Skeleton and Bat set
I used the same staple trick on the “BOO!” Which is also from the Halloween Elements set. The “BOO!” is cut from glitter cardstock, with grey alcohol marker shading.
I added the third mechanism.

For the last layer, added more bricks and castle pieces. I blacked out behind the windows and added some silver glitter spider webs.
I hand cut a vellum blob, and I added the green hands (also from the Halloween Elements) and added the castle piece. I added more webs and spiders, and the black cat from the Skeleton and Bat set.
I added the skulls and bones Halloween Borders
Using the Squares Crosshatch I cut a yellow and glitter square for a message block. The silver piece is missing some of edges but it was my last piece. I cut a circle moon using the same yellow and cut out a section from Slim Pattern Plates- Bats. I added highlight to the bats using a white gel pen. I added the bats and the moon to the back of the card, and used some bats and a spider to cover the missing gaps in the silver square. Lastly I added some itty bitty black gems randomly around.
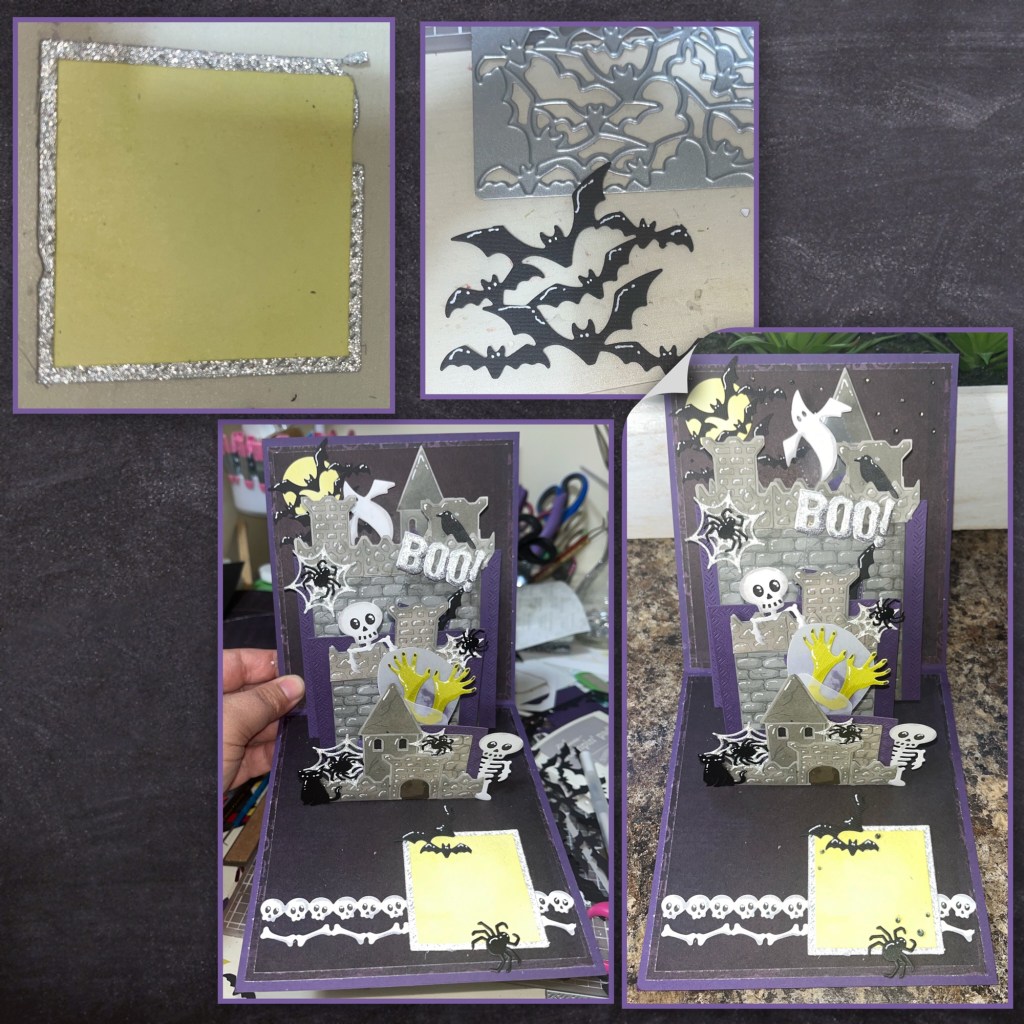
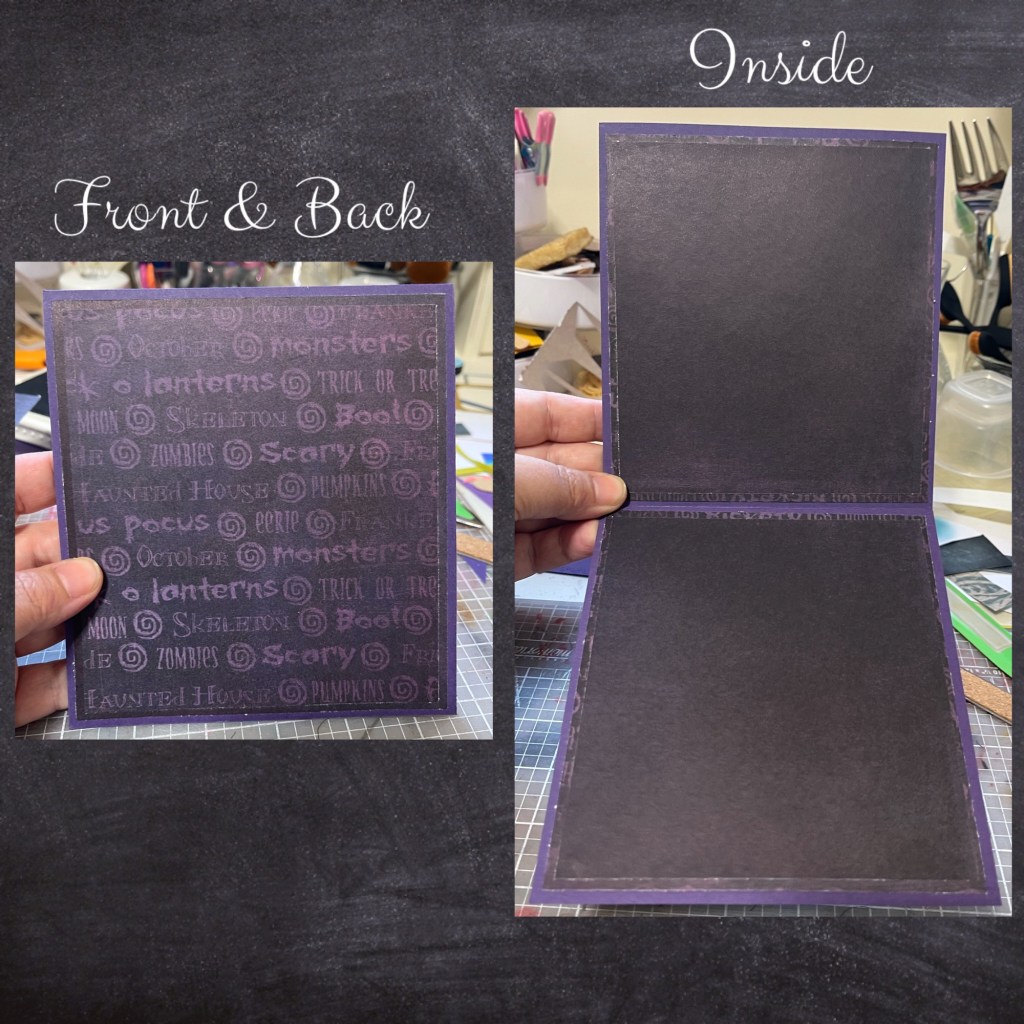
Now for the front. Cut the black and purple squares as shown. I drew another section of bricks and cut them out with shadow piece from the Happy Halloween and then the words from black. I added white highlight and more bats and of course one more spider with a silver sparkle web. I added some black gems starting at the top left to the bottom right.


Other Tools used

Wonderfully spooky! This spectacular Halloween card is a gift, not a card.
Your use of the white pen is the best I’ve ever seen.
LikeLiked by 1 person
Great halloween card!
LikeLiked by 1 person
love your card!!!
LikeLiked by 1 person
Love your card!!! Can’t wait for instructions on making this!!
Sandy S.
LikeLiked by 1 person