
Hello Crafty friends, I have a fun Design Team challenge card today. This months challenge is “Borders, Borders, Borders” and we were to make cards that highlight at least one of Karen Burnistons Borders diesets. She has quiet a few to chose from but I decided to see how creative I could get using just one. This is what I came up with…

All the fun is in the reveal, to see this card in action please check out my FACEBOOK page, feel free to join if you would like to share your own crafty creations. You can also see a video of this card on my INSTAGRAM page.
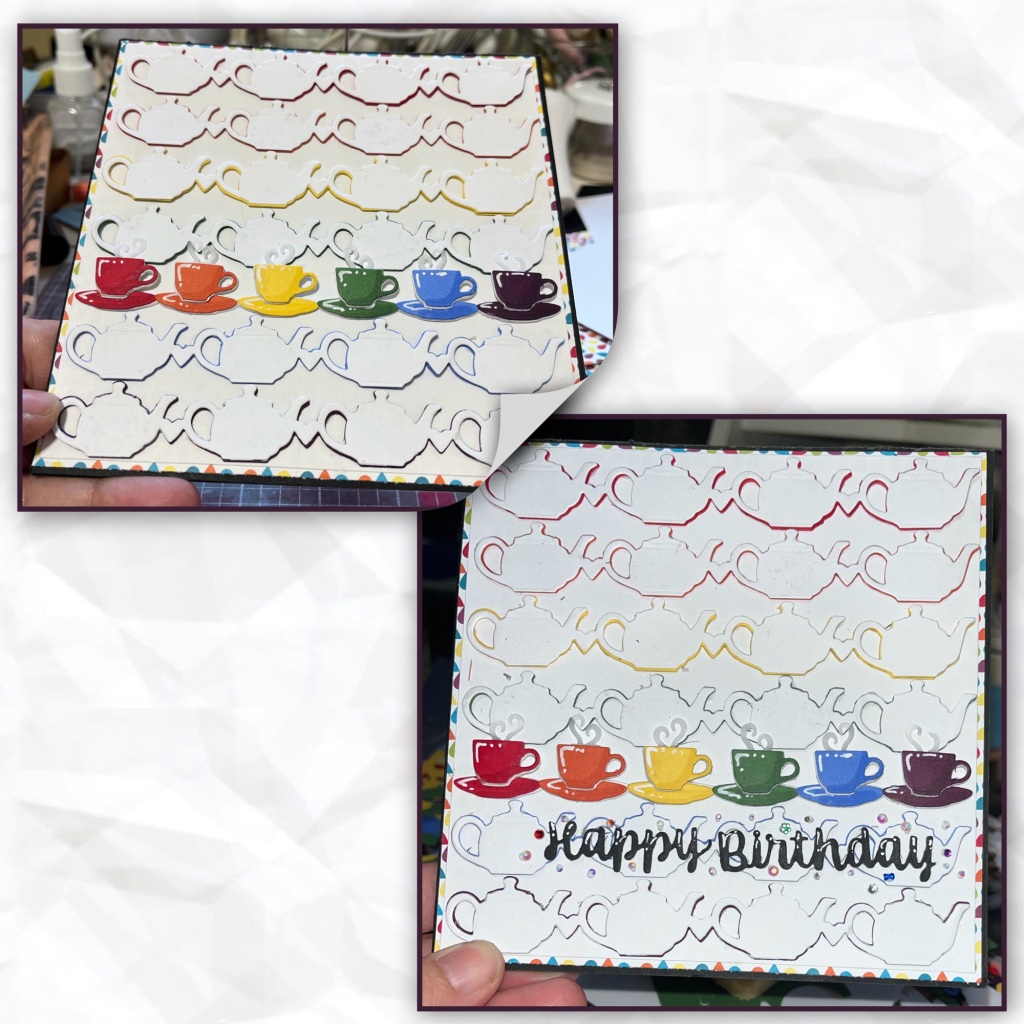
I really had no idea what size this card would be. I decided to diecut and assemble the tea pots, cups, and saucers borders, cross my fingers and see what would come out of it. In the end it is a smidge smaller than a 6”x 6”. My envelope is exactly 6” x 6” and I want to be sure it would fit in the envelope.
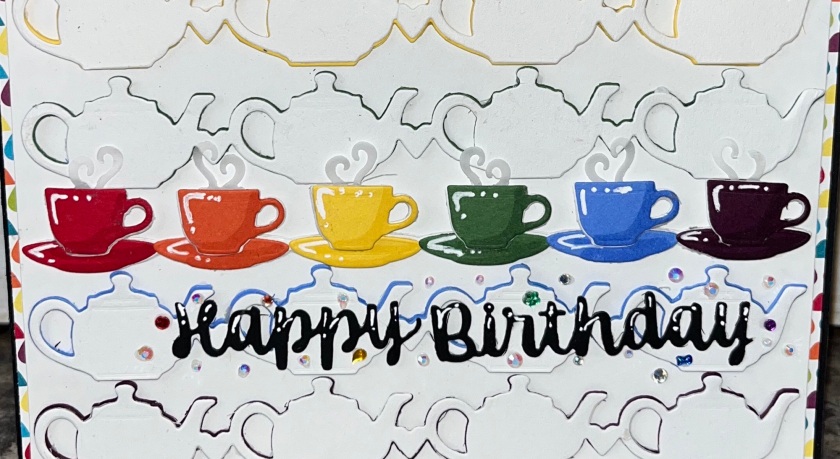
To make the borders for the front I die cut 3 each of the six colours (red, orange, yellow, green, blue, and purple) and one white of the teapots from the Tea and Coffee Borders. I carefully stacked the coloured layers then add the white on top. I did this for all 6 colours.

For the tea cups, and saucers I did the opposite. I layered 4 layers of white (my white card-stock is thinner than my coloured) and added the coloured pieces on the top, I added the steam which was cut from vellum. I did a practise lay out of how I thought I wanted them. I added shading with a Versa Mark Marker, and highlights with a white Gelly Roll pen
I kind of got lucky, I chose 6 colours, there are 6 tea cup saucers in the border, perfect for the 6 colours, and the six rows of teapots and the row up cups makes an almost perfect square that will fit inside a 6ish” x 6ish” square card.

I cut the card base pieces, and the layers as shown. I cut out the centers of the patterned paper because I knew I would need it and didn’t want to waste it. The patterned paper is retired Stampin Up.
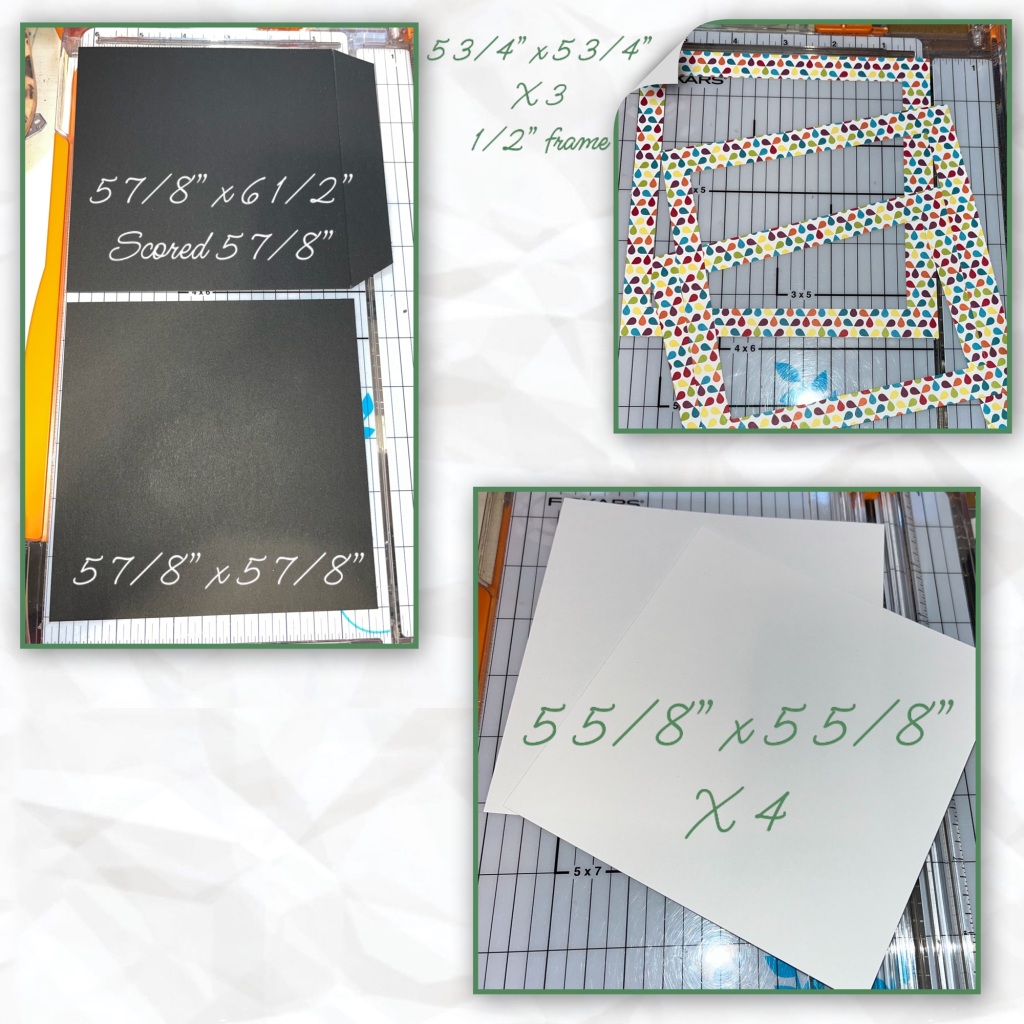
Add the layers to the front, back, and inside as shown. I know you can barely see the pattered paper layer on the front and inside but it is slightly visible and looks better than without. Also if I made any of the layers smaller than what I did then the teacups and pots won’t fit within the the white squares on the front.

To get the spacing right I added the 2 to the bottom first getting as close as I could to the edges on the bottom and the sides. Then I worked my way down from the top. I didn’t want the teapots to overlap but I was willing to have the tea cups overlap if need be. I added the teacups last and only the steam parts overlapped onto the teapot above it but I’m ok with that .
I die cut Happy Birthday from black cardstock and added it as shown. I was originally going to use the big Happy Birthday diecut but it just looked kind of weird and covered too much of the tea pots that I really wanted shown. I added a few gems, I had some coloured ones for a little bit of pop but most of them are clear.
I cut more panels for the inside as shown. I wanted to show more of the patterned paper. I haven’t used a Pivot Panel for a while so I decided to use the Gift Pivot panel for the inside mechanism. (Karen has a video tutorial on the product page at the link ⬆️ )

I cut some more pieces from the Tea and Coffee borders including the mugs (I drink my tea from a mug) and the little hearts. I had cut an extra pivot panel to practice my lay out before adhering to the card. I added some of the same gems as the front. A few colourful ones but mostly clear.

I diecut the inside greeting using the Word set 18- Connectors, Mini Alphabet and Numbers, and “day” from the “Happy Birthday” I practiced on my extra piece again before adding to the card. I cut a 2 3/4” x 1 1/2” rectangle for the inside right to sign. I added a few gems there as well.


Other Tools used

Hi Nicky. The way you used your borders on this card is so cool I am always impressed with your creative vision and how you think outside the box to create your cards.
LikeLiked by 1 person
Love the eclipse look and all the colors! And I appreciate your instructions for assembly!
LikeLiked by 1 person
This truly is a Tea-riffic card Niki, lol I reallly need to add this to my border collection. It’s super cute! How fun would it be to get away and do some crafting on the Lake. Sounds like great fun!
LikeLiked by 1 person
Great card. I Love how you layered colors. I’m a lake person, I hate sand in my swim suit bottom.
LikeLiked by 1 person
You always amaze me with your creativity and thanks for the steps xx
LikeLiked by 1 person