
Last week for the Karen Burniston design team challenge Karen posted a VIDEO on how to create a “Wiggle Card” and I thought to myself “I need to make one of these!!!” But like most of my cards I don’t actually have a complete plan when I start my card so I decided on the fly to turn it vertical and to add a second set of wiggle mechanism. This is what I came up with. All the insects (with the exception of the bottom blue butterfly) and the XOXO wiggle when the card opens and closes.
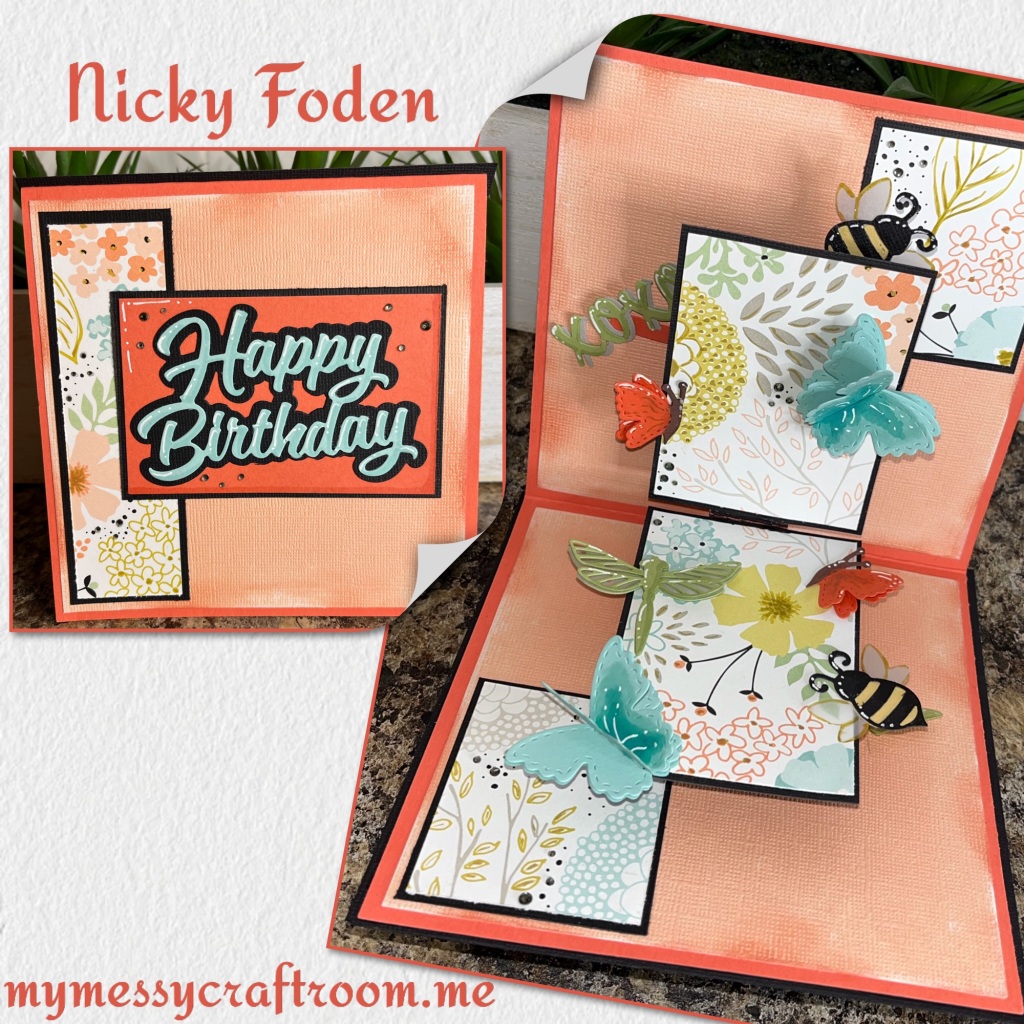
All the fun is in the reveal, to see this card in action please check out my FACEBOOK page, feel free to join if you would like to share your own crafty creations. You can also see a video of this card on my INSTAGRAM page, or TikTok 😊
I wanted a square card so I cut the base and panels as shown. The panels are actually Core Color Cardstock so I used a sanding block to scuff the edges then I sponged the edges with a coral ink. Then I added them to front and inside of the card.

I diecut the pieces from the Tea and Coffee Pop up and assembled as per Karens VIDEO TUTORIAL

This is about the time I decided I was going to turn the card so the mechanism was vertical instead of horizontal. Then I decided to created another mechanism. First I was going to try and add the mechanism into the fold of the card above the original mechanism but I didn’t think it would fit because I had centered my original mechanism. I then added the second mechanism into the fold between the top of the original mechanism and the card base as shown. I adhered the other end of the mechanism down the same way as the first. The arm that is at the very top of the mechanism was adhered pointing up as apposed to the side.

I cut 2 black rectangles as shown and patterned paper 1/8” smaller than the black cardstock. I them added to the mechanisms as shown.

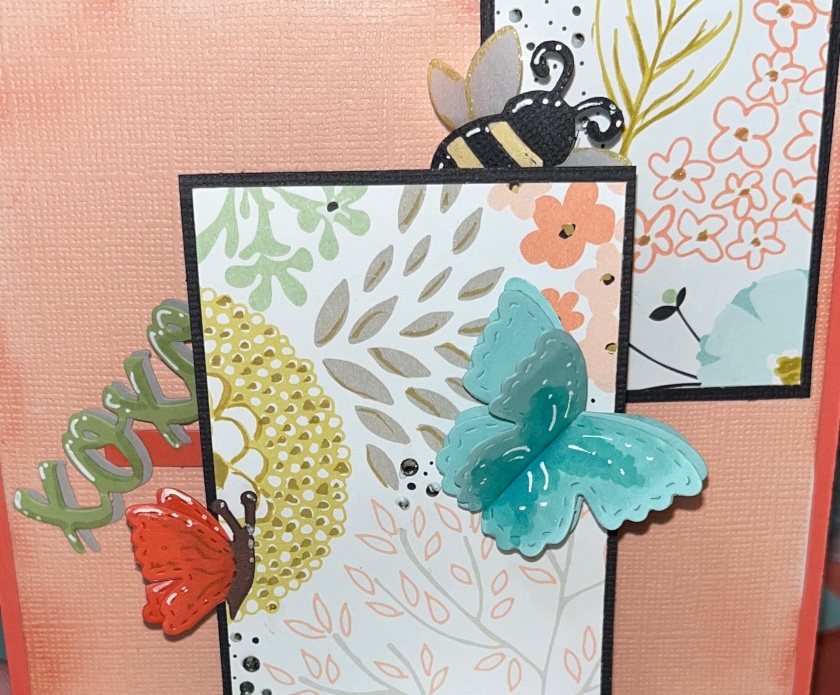
I wanted the Butterflies to have a lot of dimension so I cut one of the butterflies with the slot in the middle, and 2 of the matching butterflies. Fold as shown. I coloured the fronts of the butterflies with alcohol markers, then combined the 3 pieces by working the folded butterflies through the slot on the middle butterfly. Add a few white highlights.
To add the butterfly to the mechanism just add adhesive to the end of the arm and have the butterfly overlap the flower rectangle. Do not had glue to any other part of the butterfly.

I added the Bee and Dragon fly the same way, except the arm for the bee was a bit further back so I have him peeking out from behind.
To make the Dragon fly I diecut the green piece twice and the middle section once from vellum. I sandwiched the vellum between the two green pieces. It gives the dragon fly enough stiffness to glide a little smother.
I added a couple of Orange butterflies and another bee. The XOXO was added to the left side and it is tucked behind. I made another blue butterfly, this one is just added to the rectangle. It does not wiggle.
I added shading with a Versa Mark Marker, and highlights with a white Gelly Roll pen and highlights with a Gold Wink of Stella pen.

I added a couple of more rectangles to use up some of the space. They were scraps so I just played them in the black, then cut the black. I did not measure.

Again I grabbed a scrap rectangle that just happened to fit, added a black mat and added it to the card front.
Die cut Happy Birthday from the blue and the Happy Birthday Shadow from black. I added it to a orange 3 7/8” x 2 1/2” rectangle then to a black piece that is about 1/8” larger. I added shading with a Versa Mark Marker, and highlights with a white Gelly Roll pen

I added itty bitty black gems around the Happy Birthday and randomly around the black dots that are on the patterned paper.
I decided to add a black layer to the back of the card, it is slightly larger than the card so it adds a black border around it when closed.


Other Tools used
